|
|
|
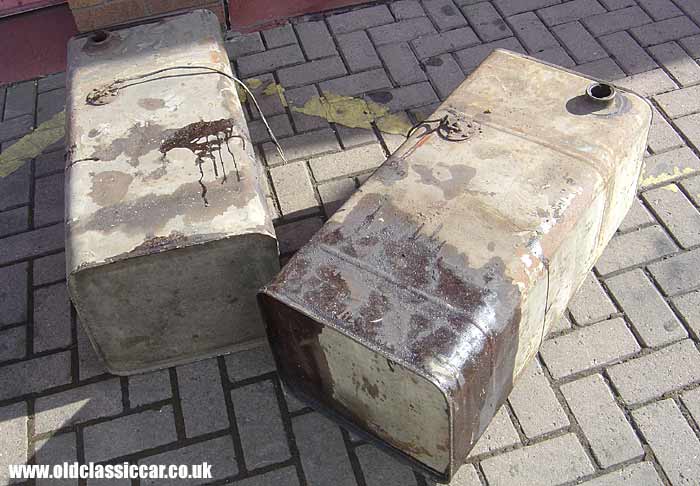
The fuel tanks are treated to the 'Renu' process, and other restoration work. |
|
|
Restoration Part 24. Click here to return to the main Dodge lorry restoration page. Part of oldclassiccar.co.uk. Contact page. |
|
|
February was a quiet-ish month on the restoration front, but things picked up again in March and most of the work described below happened during this month. Both fuel tanks were sent away and re-furbished, using the American 'Renu' process, and work began back at the workshop on both back doors. The newly-made channel section, from which the window frames will be built, also arrived in March, and further re-assembly of the engine and transmission also took place. A contact who is restoring a slightly later, 3 ton 'Burma Dodge' truck in Ohio, discovered and posted over a new-old-stock water tube, a rare part that I thought I'd never find. |
|
|
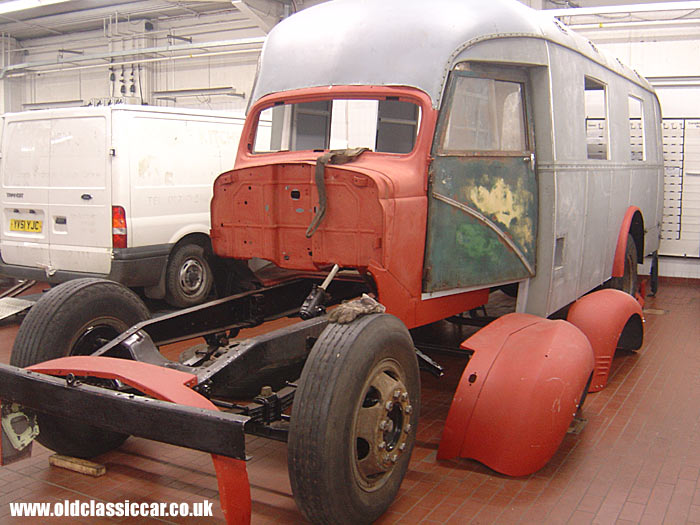
| In February, the lorry was turned around in the workshop so that work could continue on the front end. The front end of the chassis was (again) flatted back, as it's due to receive a second coat of chassis black soon. The front end panelwork was removed, and prep work to the bulkhead and dashboard began. The plan there is to seal, prime and paint these sections, after which the engine and transmission can be installed. Both front doors were also removed. | |
|
|
|
|
|
|
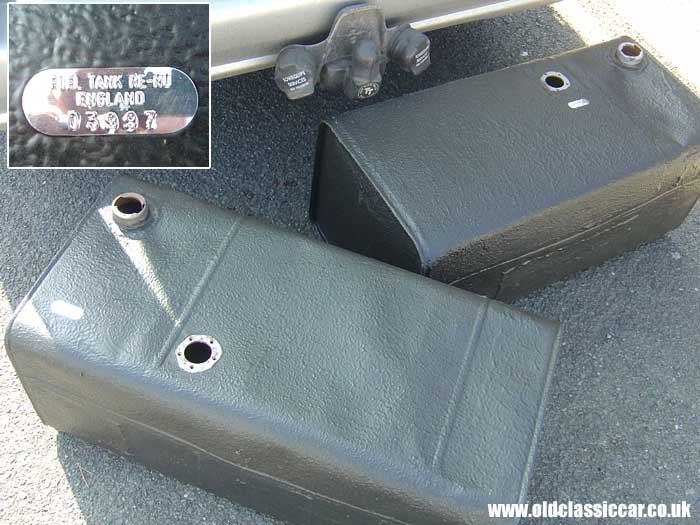
| A couple of weeks later and the tanks were ready for collection. The Renu process involves blasting the tanks inside and out, cutting the tanks open if necessary to ensure a perfectly clean surface. This is then coated with a smooth fuel-resistant coating. The exterior of the tanks are coated in a rubberised material, and a lifetime guarantee is included. As both tanks are underneath the truck, and well out of sight, this seemed like the perfect way of re-using the original tanks, with no risk of old dirt contaminating the fuel. The tank senders were shot, so they'll need to be replaced. | |
|
|
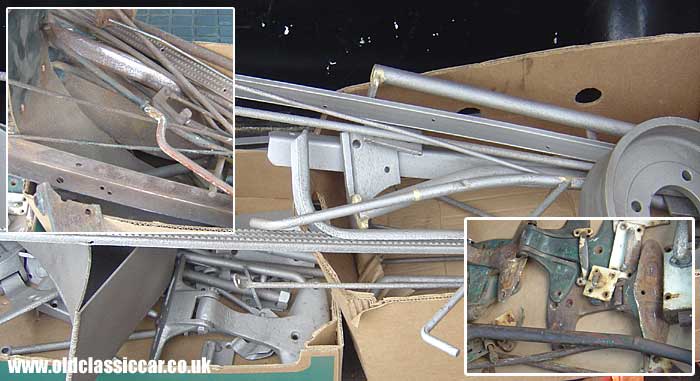
| Other progress in March included another batch of parts going away to be sandblasted, then primed on return. This included brackets, rear door hinges, brake parts and several tread strips. | |
|
|
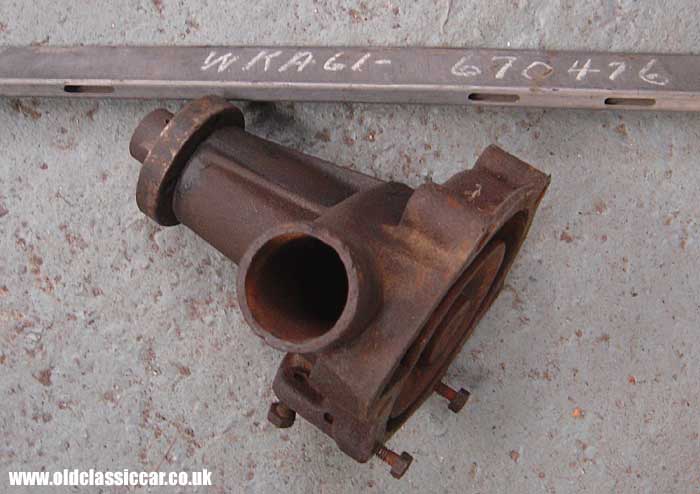
| Arnett's of Doncaster, who did the machining work on the engine in 2008, offered to take a look at the Dodge's water pump, so that was sent away to be re-furbished. Talking of the cooling system, a real stroke of luck came along in March when Charles, who lives in the US and has a later 331-engined truck, found a spare water distribution tube for the engine. My engine didn't have one in it and I wasn't happy about leaving this tube out altogether. Amazingly he had a NOS one on his shelf, and posted it over. The tube runs lengthways in the block, ensuring that adequate coolant from the pump reaches the rear cylinders. Thanks Charles! | |
|
|
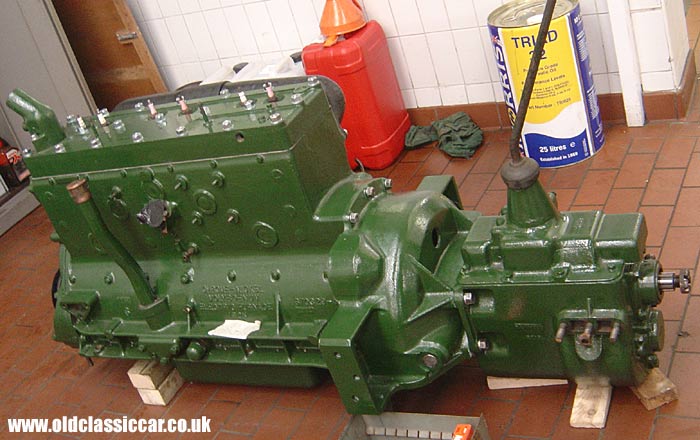
| March also saw the engine and gearbox re-united, with the re-conditioned clutch and a new spigot bearing fitted. Hopefully this assembly will be re-installed in the truck soon, once the bulkhead has been painted. A new set of Autolite spark plugs are ready to go in, replacing the mixed bag of Lodge and Champion plugs fitted at present. | |
|
|
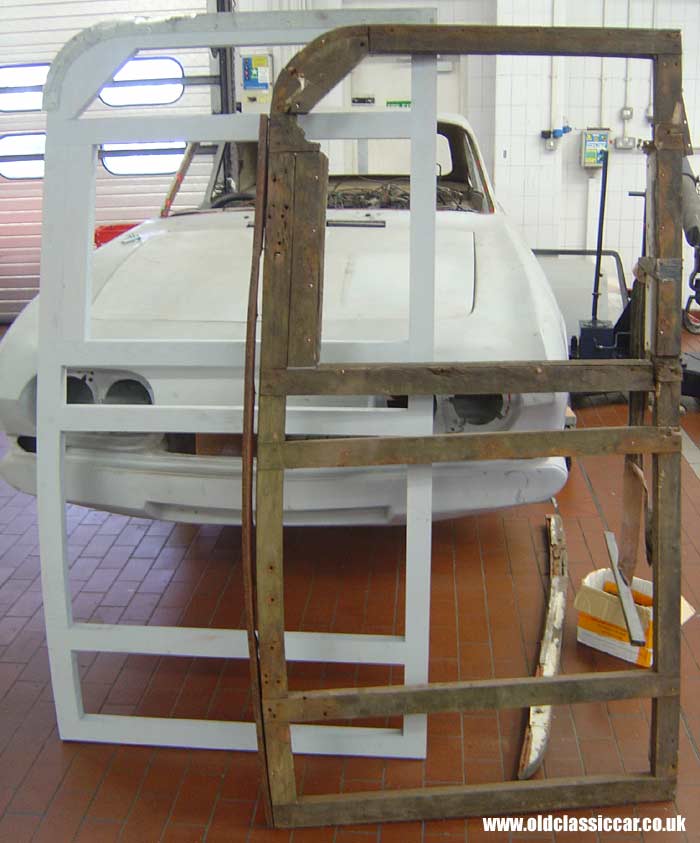
| A local joinery firm finished the new n/s/r door frame, and also repair sections to fit in the o/s/r door, so these were collected and work began on fitting them up. This photo shows the lousy condition of the n/s door, with extensive rot and splitting to the timbers. Interestingly, this door frame hadn't been treated when first put together, yet the o/s door had. | |
|
|
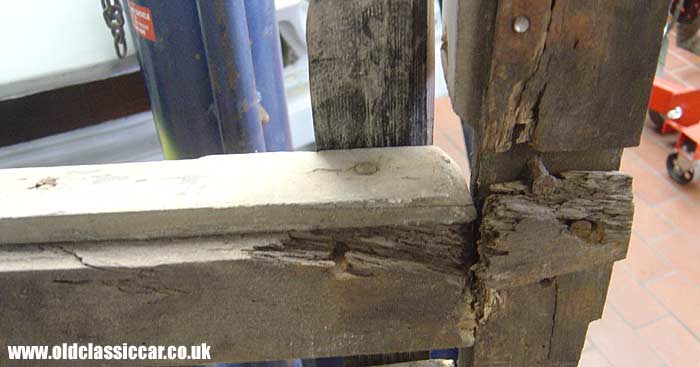
| This close-up shows just how badly deteriorated the n/s/r door frame had become. Re-using any of this wood was out of the question, hence the new frame being built. | |
|
|
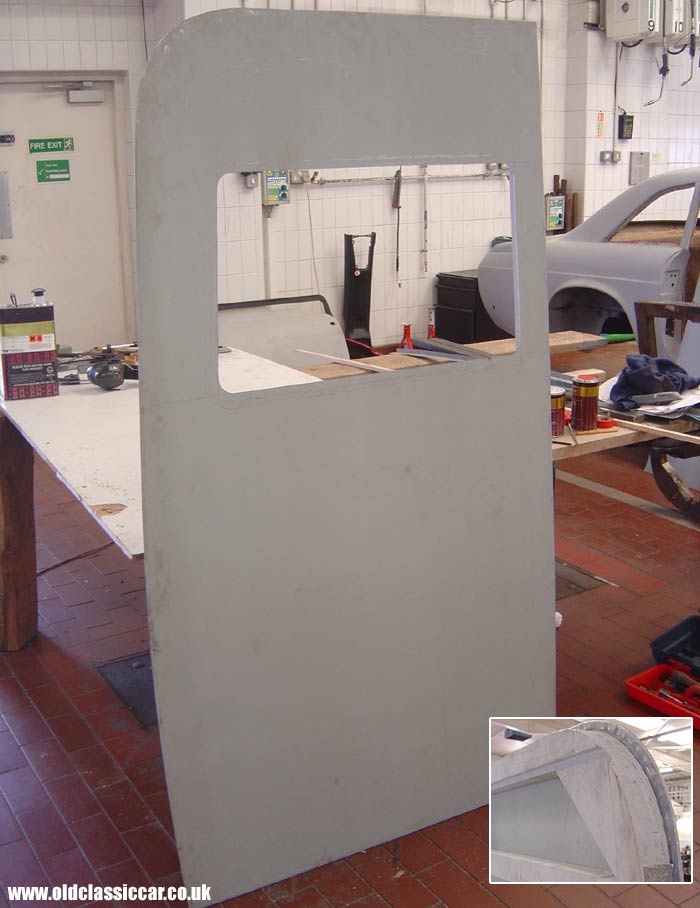
| A couple of weeks later and the new n/s door was starting to look very ship-shape, Dave had re-skinned the door frame, and let in the window aperture, maintaining the shape of the window, which differs to that in the o/s/r door. Hinges and so on still need to be fitted, but it really is beginning to take shape now. | |
|
|
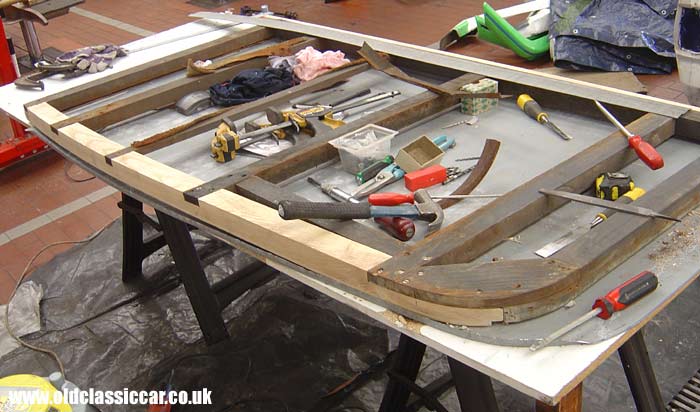
| With the new n/s door coming along nicely, work also continued on re-furbishing the original o/s door. The photograph above shows the new section of timber let into the existing door frame. Wherever possible original parts such as the o/s door are being repaired, rather than replaced, and much of the old glass from WW2 is good enough to be re-used. Door furniture will also be re-used wherever possible. Parts such as the old door skins, which are both being replaced, will be preserved off the vehicle, as will the old tyres when replacements have been sourced. | |
|
|
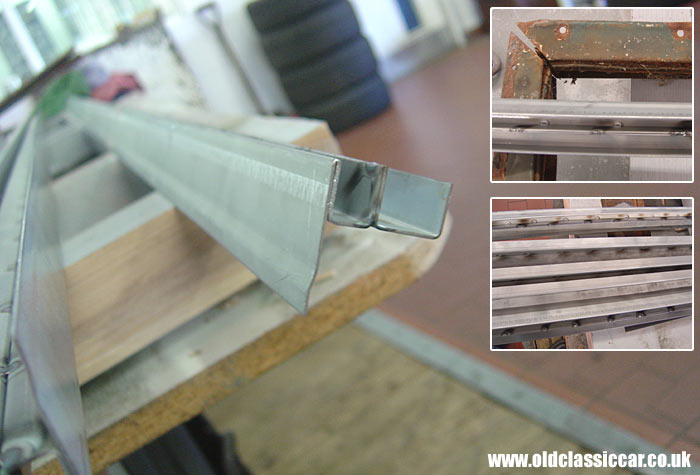
| Another outside firm made up lengths of new channelling, from which the window frames will be constructed. The originals were shot to pieces, so using some original lengths as a guide, new channel sections were created. These sections are accurate re-creations of the originals, even down to the slightly flared edge that the original outer frames had. The side windows incorporate one fixed pane, and one sliding pane of glass, hence the UU profile. | |
|
|
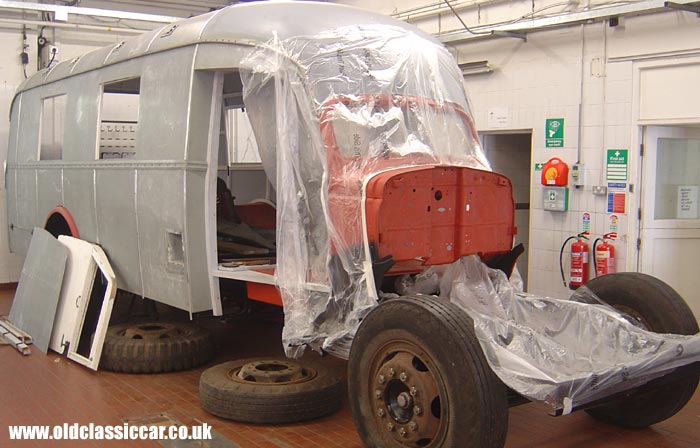
| Final job of the month was to mask up the front end of the Dodge's bodywork, in preparation for sealing and priming of the bulkhead and dash. Finally seeing some green topcoat on the vehicle itself, and the engine back in, will mark a significant stage in this vehicle's lengthy re-juvenation, some two years after it first went away to VHC's workshop. | |
|
Return to the Dodge lorry restoration page for more info on this rebuild. Previous Page: Part 23 - Progress on the engine and bodywork. Next Page: Part 25 - Re-fitting the engine and starting to paint the body. |
|
|

Custom Search
|
 |
| Old Classic Car (C) R. Jones 2026. Content not to be reproduced elsewhere. |
| Website by ableweb. |
| Privacy Policy, Cookies & Disclaimers |