
Classic cars forum & vehicle restoration.
|
|
| Author |
Message |
kevin2306
Joined: 01 Jul 2013
Posts: 1359
Location: nr Llangollen, north wales
|
 Posted: Wed Jul 09, 2014 2:38 pm Post subject: Posted: Wed Jul 09, 2014 2:38 pm Post subject: |
 |
|
coming along very nicely
I can almost sense an mot booking
Kev |
|
| Back to top |
|
 |
vitesse
Joined: 03 Jun 2013
Posts: 561
|
| Posted: Wed Jul 09, 2014 9:04 pm Post subject: |
|
|
Crumbs you have been busy. You're making me look slow.
Top tip put you knee bolsters in before you put the wiper mechanism or front loom in, as it is a pain trying to get the nuts on the end of the threads if you don't. I know from doing it in the wrong order.
Last edited by vitesse on Wed Jul 09, 2014 9:07 pm; edited 1 time in total |
|
| Back to top |
|
|
vitesse
Joined: 03 Jun 2013
Posts: 561
|
| Posted: Wed Jul 09, 2014 9:06 pm Post subject: |
|
|
| Mind you looking again at the pictures it looks like you have already. |
|
| Back to top |
|
|
colwyn500
Joined: 21 Oct 2012
Posts: 1745
Location: Nairn, Scotland
|
| Posted: Wed Jul 09, 2014 9:34 pm Post subject: |
|
|
20140709_211027 by peterthompson, on Flickr
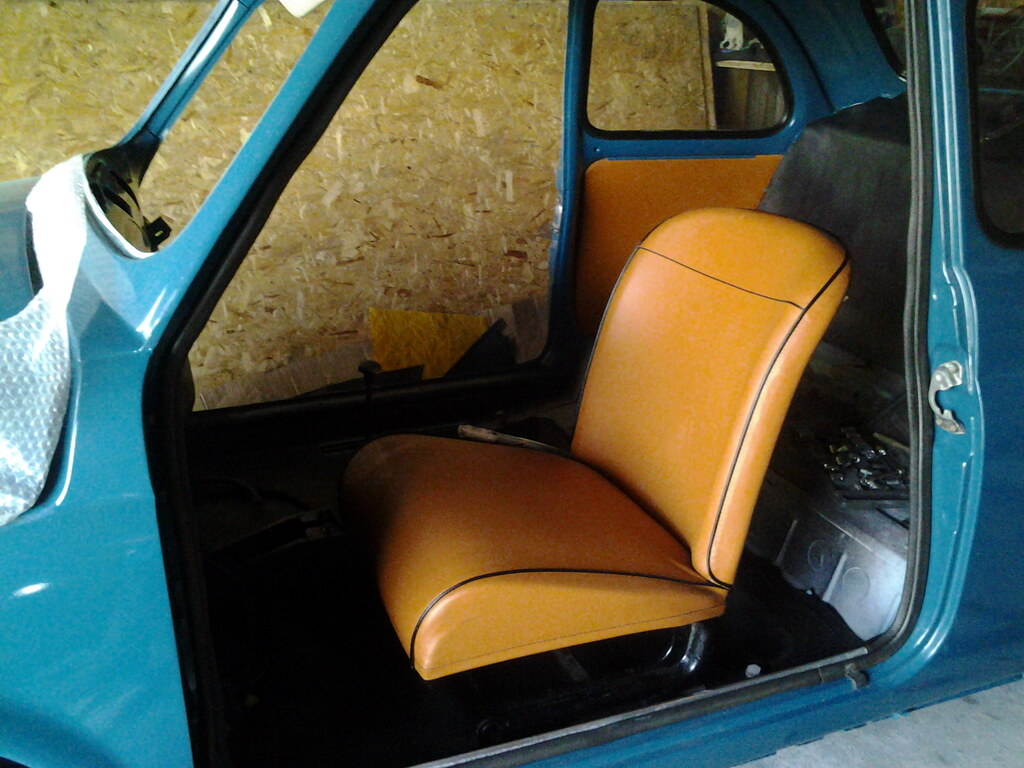
Yep.Been a bit busy but emphasis on just a bit a day adding up to looking like a lot. MOT could be a bit off since I still need my tyres and possibly two more new wheels. Also a bit of mechanical work,; mainly tightening nuts and unions and fitting rear brake shoes and cylinders. My target since January has been September and I may make it.
Thanks for the tip Tony and feel free to post more  Bolster on only by luck since they were ready and the wiper spindles need freeing. Bolster on only by luck since they were ready and the wiper spindles need freeing.
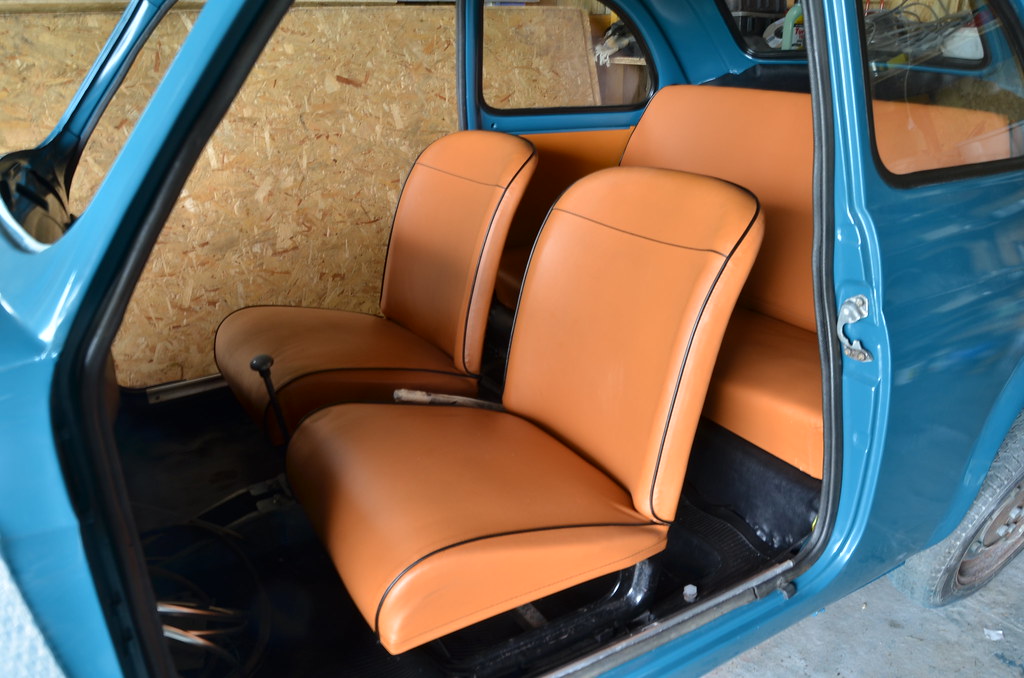
Tonight I am cleaning the rear seats. I got the passenger one fitted and put Classic Car rescuers to shame as it slipped in with no "persuasion".
I use the MUR to give him his authentic Irish-Italian name...Murphio.
I had to take a shot. not sharp (Samsung tablet).
[/img] |
|
| Back to top |
|
|
Franko500
Joined: 14 Apr 2014
Posts: 24
|
| Posted: Fri Jul 11, 2014 8:36 am Post subject: |
|
|
Its coming along really well Peter.
I am glad I found yours & Tony's threads as this will be a great help when I finally get my 500 to a refit stage. All these little tips are really going to help.
Keep up the good work!
Sean |
|
| Back to top |
|
|
colwyn500
Joined: 21 Oct 2012
Posts: 1745
Location: Nairn, Scotland
|
| Posted: Sat Jul 12, 2014 2:53 pm Post subject: |
|
|
No choice now but to keep up the good work?
Just retrieved the windscreen from the attic to find it still has the "running in" sticker attached...amazing.
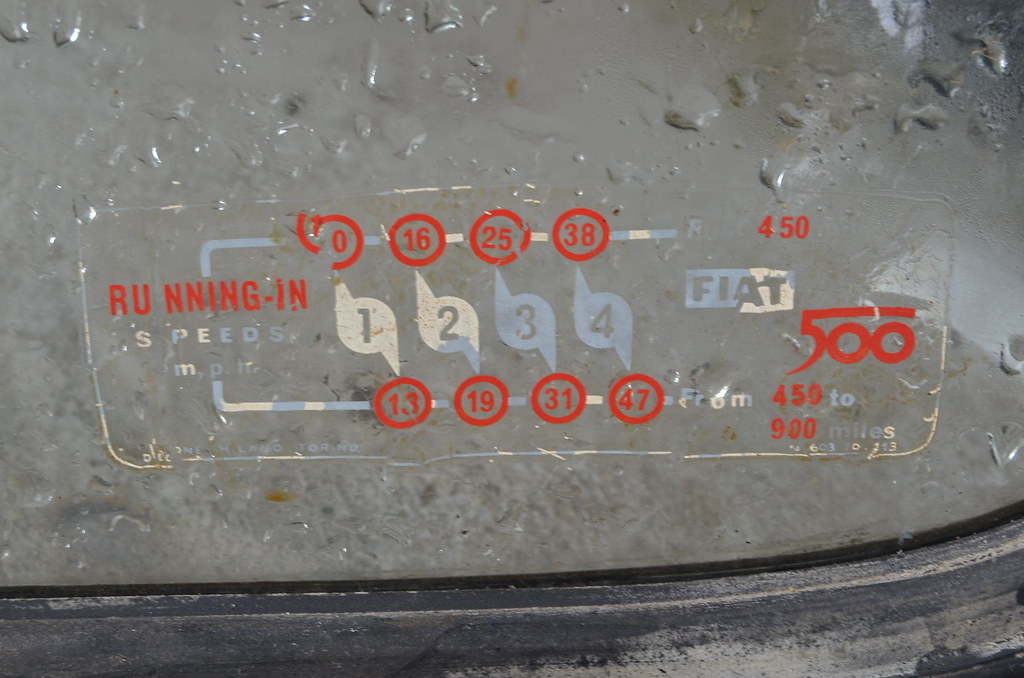 BRA_6596 by peterthompson, on Flickr BRA_6596 by peterthompson, on Flickr
The box of neatly wrapped and labelled light and handles was sitting next to it.
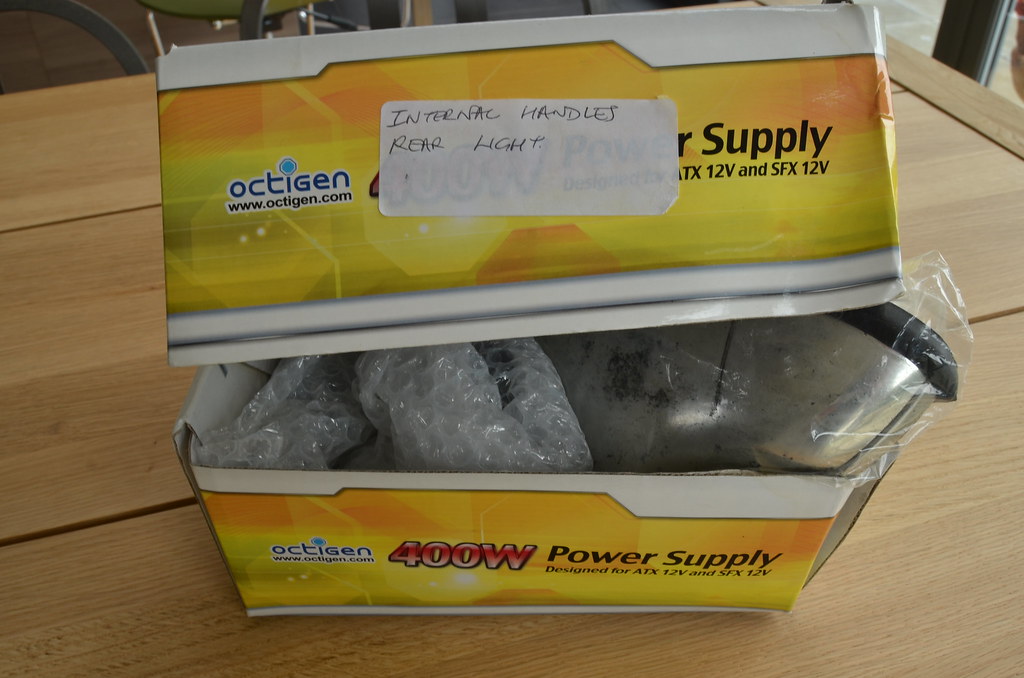 BRA_6599 by peterthompson, on Flickr BRA_6599 by peterthompson, on Flickr
I spotted a bargain camping mat in Tesco that will be cut to make a mat for under the rear seat. A bit lightweight but should do the job.
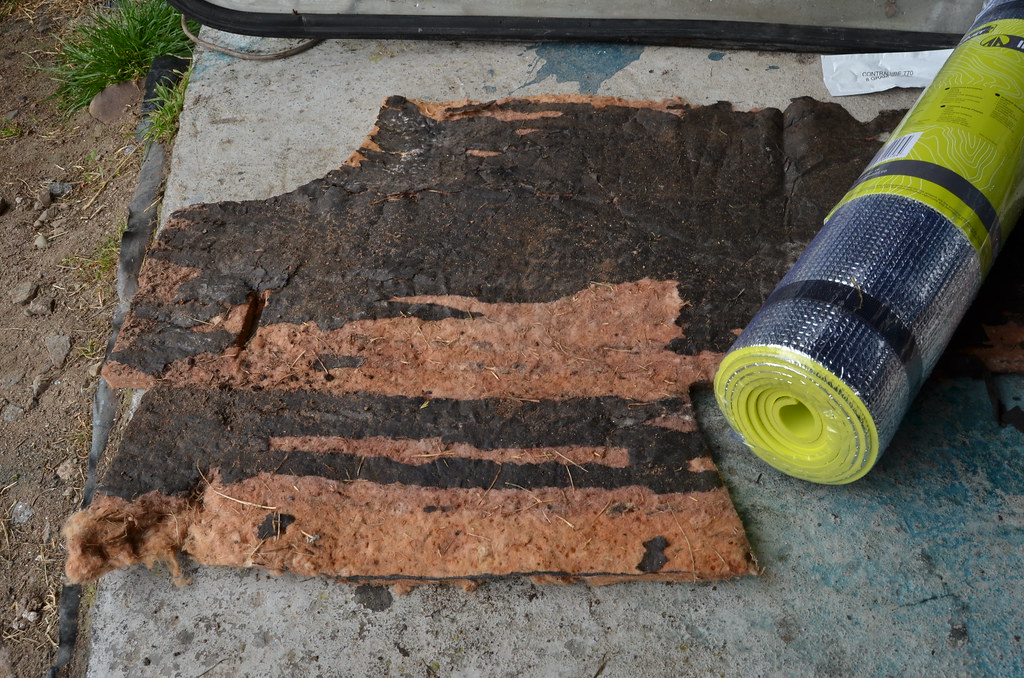 BRA_6598 by peterthompson, on Flickr BRA_6598 by peterthompson, on Flickr
Also got some Contralube, as recommended on the Forum, to improve electrical connexions. This tiny sachet.. a Fiver?.
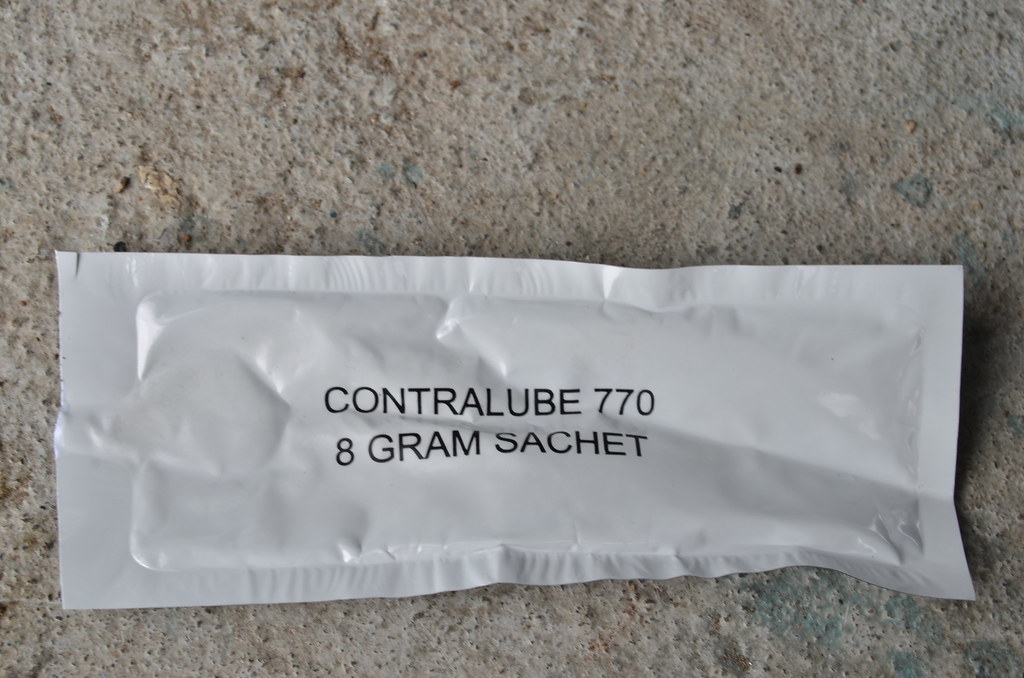 BRA_6597 by peterthompson, on Flickr BRA_6597 by peterthompson, on Flickr |
|
| Back to top |
|
|
Penman
Joined: 23 Nov 2007
Posts: 4756
Location: Swindon, Wilts.
|
| Posted: Sat Jul 12, 2014 3:25 pm Post subject: |
|
|
Hi
I love the running in sticker.
There is a gap between the highest speed for one gear and the lowest speed for the next gear.
I wonder what gear is intended to be used in those gaps. 
_________________
Bristols should always come in pairs.
Any 2 from:-
Straight 6
V8 V10 |
|
| Back to top |
|
|
colwyn500
Joined: 21 Oct 2012
Posts: 1745
Location: Nairn, Scotland
|
| Posted: Sat Jul 12, 2014 3:58 pm Post subject: |
|
|
| Penman wrote: | Hi
I love the running in sticker.
There is a gap between the highest speed for one gear and the lowest speed for the next gear.
I wonder what gear is intended to be used in those gaps. |
I thought that then looked again. They are so pedantic that it is two sets of running in speeds at each gear; one up to the first 450 miles and one between 450 and 900. I think the speeds given are the highest for each gear.
You can get a repro of this but what's the betting that it is in Km/h?  |
|
| Back to top |
|
|
vitesse
Joined: 03 Jun 2013
Posts: 561
|
| Posted: Sun Jul 13, 2014 5:07 pm Post subject: |
|
|
That mat is a piece of genius Peter. Did you just go to the local Tesco and spot it and think "that will do nicely".
I have the repro sticker and it is in km/h. I would add though that when you are driving the speedo needle is pinging around all over the place so it would be pretty difficult to see if you had reached 10 or 13 mph in first gear.
On my iPhone I have an app that has a GPS speedo on it and I did manage to get up to 47 mph slightly uphill !!!!!!!! |
|
| Back to top |
|
|
colwyn500
Joined: 21 Oct 2012
Posts: 1745
Location: Nairn, Scotland
|
| Posted: Sun Jul 13, 2014 6:45 pm Post subject: |
|
|

BRA_6608 by peterthompson, on FlickrThe interior is nearly there now .
BRA_6601 by peterthompson, on Flickrurl=https://www.flickr.com/photos/peterjthompson/14641687071/]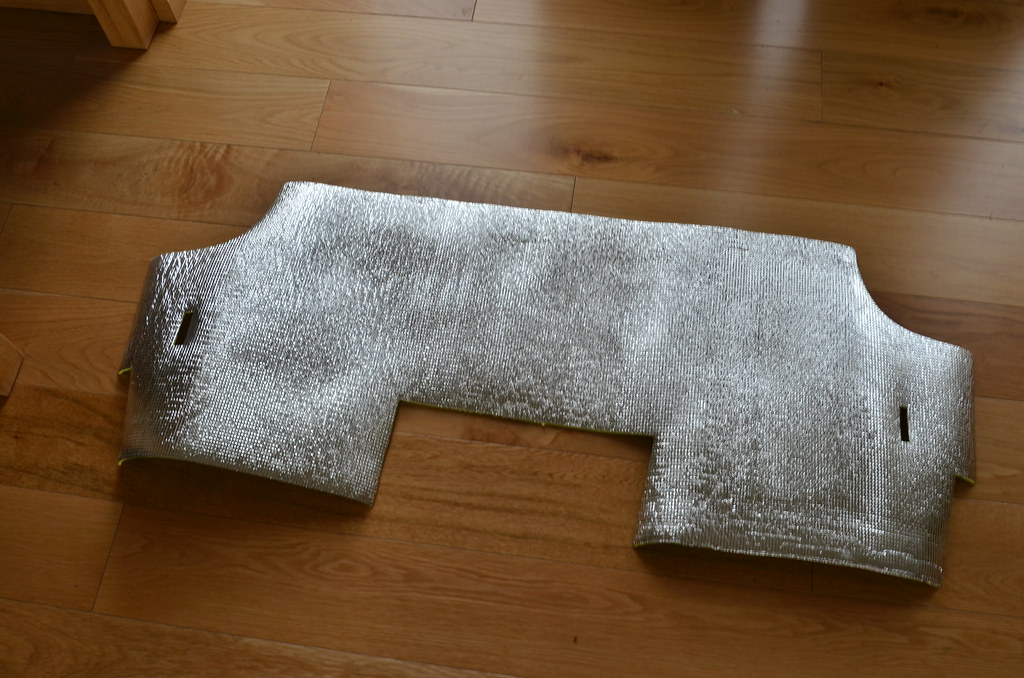 [/url] [/url]
[url=https://www.flickr.com/photos/
Yes...jumped out at me for 4.99 at the entrance door.
I only had a half of the original as a template so slightly messed up the gap for the tunnel. |
|
| Back to top |
|
|
D4B

Joined: 28 Dec 2010
Posts: 2083
Location: Hampshire UK
|
| Posted: Sun Jul 13, 2014 8:14 pm Post subject: |
|
|
Hi Peter,
Interior looks AMAZING great work  |
|
| Back to top |
|
|
colwyn500
Joined: 21 Oct 2012
Posts: 1745
Location: Nairn, Scotland
|
| Posted: Thu Jul 31, 2014 11:32 am Post subject: Steering column fitting |
|
|
I have had to take a break because of work pressures but can get a bit done today.
On The Fiat Forum we had a specific issue with one owner finding the column coming loose all the time . As I was about to refit mine I thought maybe a walk through of how I did it might help. Sorry to all those this will bore (nearly every normal person!
The first thing was to find straight ahead position in spite of the tracking being totally out with lots of loose and missing bolts and nuts. The 500 has three track rods, the central one having fixed ball-joints which connect the steering box to the idler arm on the other side. I made sure that each of these fixed ball-joints was equidistant from the centre-line of the car.
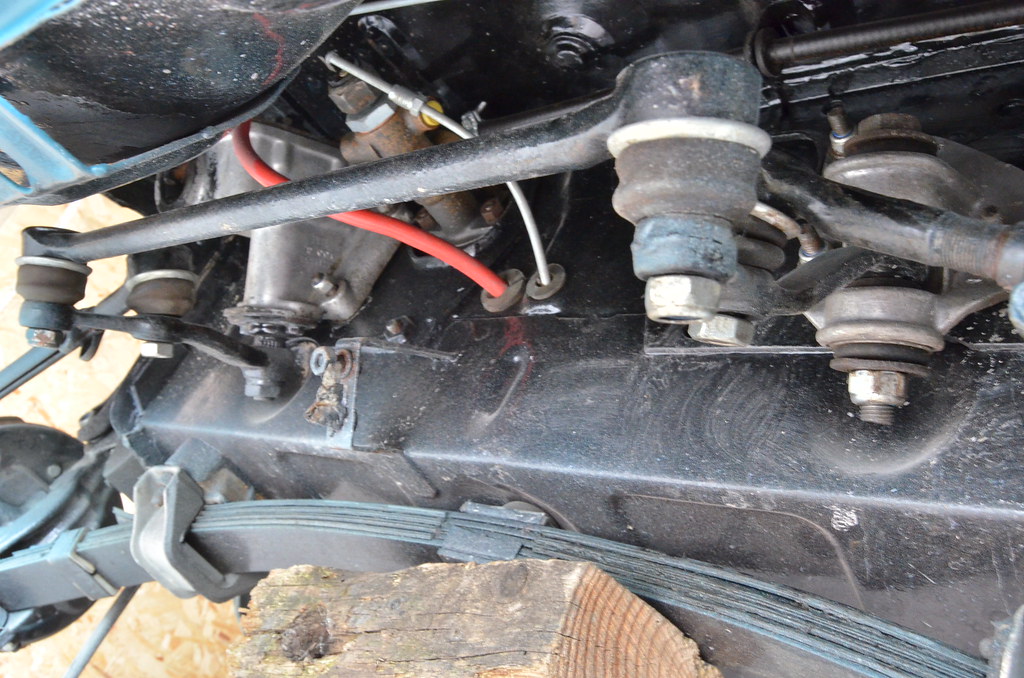 BRA_7239 by peterthompson, on Flickr BRA_7239 by peterthompson, on Flickr
The end of the column has splines and a slot which allows a clamp fit. The clamp is secured with a setscrew which threads into the column. It seems this thread is prone to being over-strained and some cars may have a nut and bolt retro fitted. It might be wise to slightly widen the slot using a big screwdriver to ease it fitting over the steering box spline.
 BRA_7234 by peterthompson, on Flickr BRA_7234 by peterthompson, on Flickr
An important thing to get right is noting that there is a groove around the shaft through which the clamping bolts slides to give a safety fit just in case it comes loose.
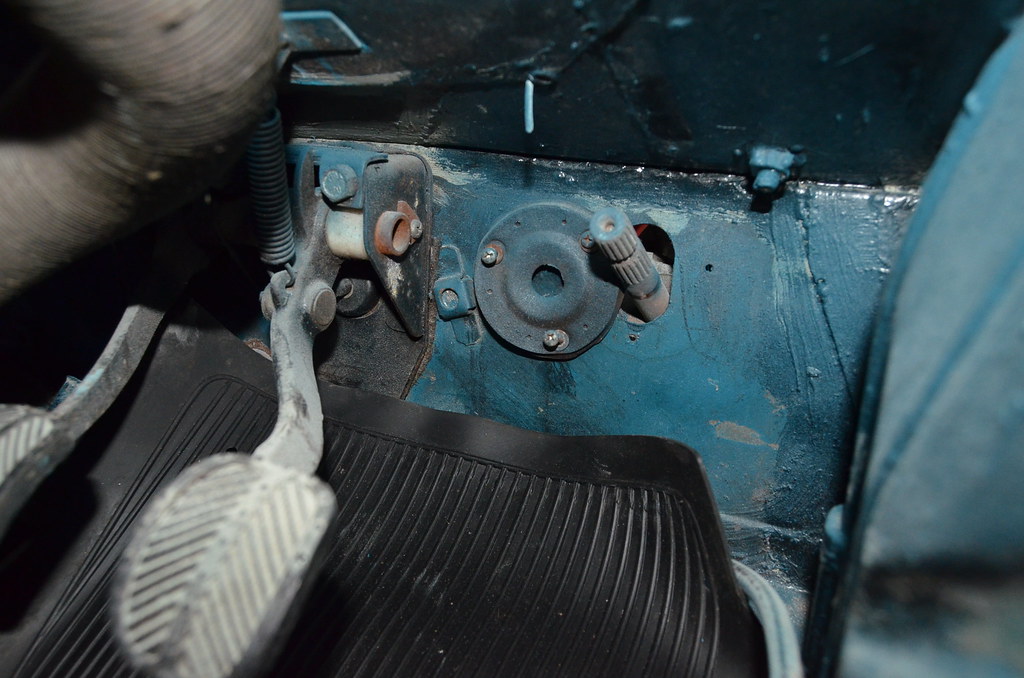 BRA_7241 by peterthompson, on Flickr BRA_7241 by peterthompson, on Flickr
The first thing to do is make sure all of the wires from the column are guided through the tiny bulkhead hole and protected with the grommet.
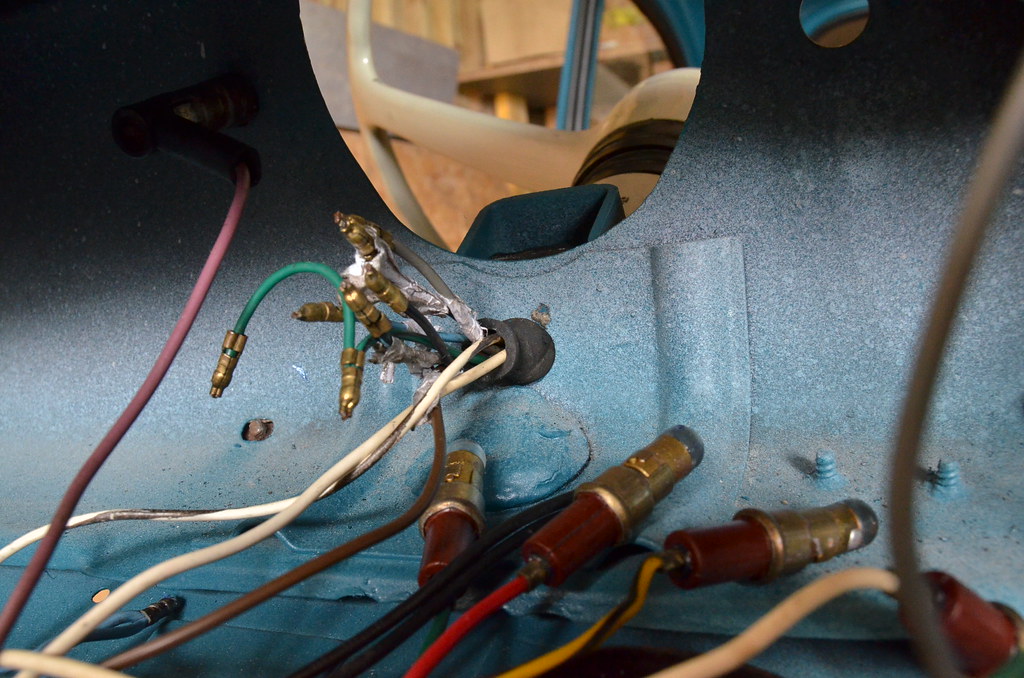 BRA_7254 by peterthompson, on Flickr BRA_7254 by peterthompson, on Flickr
I applied copper grease on the splines and all threads and lowered the column on with the wheel in the straight ahead position having first refitted the gasket at the base.
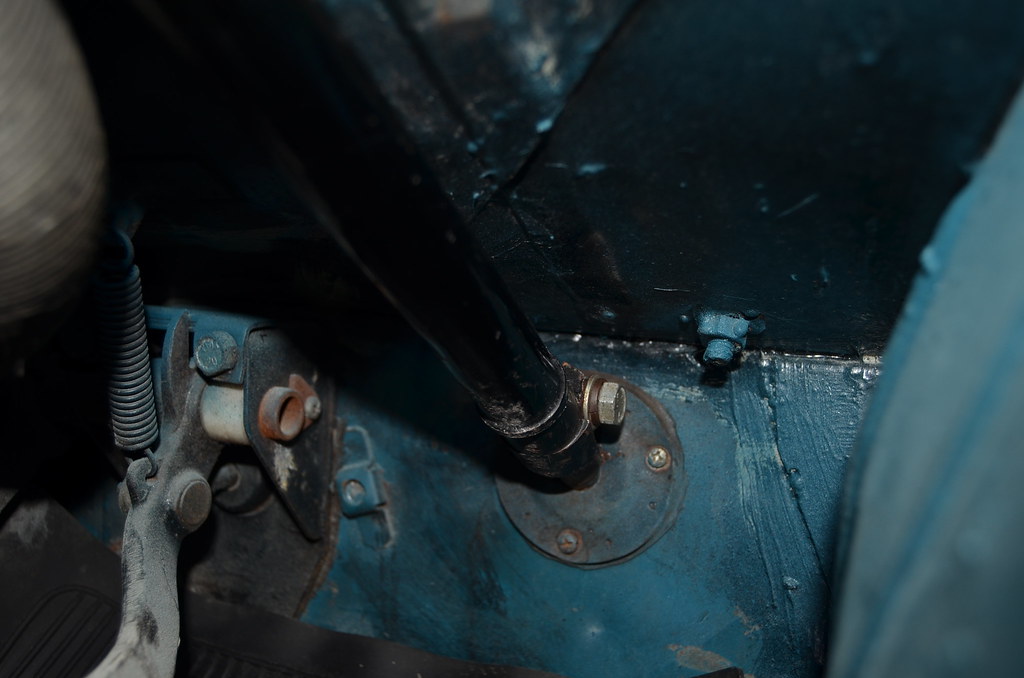 BRA_7251 by peterthompson, on Flickr BRA_7251 by peterthompson, on Flickr
This looks right to me as the head of the setscrew is at 90 degrees to vertical and easily accessible. The shaft took a little force to slide on but I used no more than fist power. Also it takes a little adjustment up and down before the screw slides into the groove easily. I wouldn't apply any force to that or the threads will get damaged.
This is the steering wheel nut. It has never been removed and you can see how it was peened for security.
 BRA_7249 by peterthompson, on Flickr BRA_7249 by peterthompson, on Flickr
The issue some people have is that they need to remove this in order to reposition the wheel. I would first check that everything is reasonably lined up centrally as in this description.
Now thw wheel and its electrics are in I can complete the wiring and get some life into the old car.  |
|
| Back to top |
|
|
colwyn500
Joined: 21 Oct 2012
Posts: 1745
Location: Nairn, Scotland
|
| Posted: Mon Aug 04, 2014 1:12 pm Post subject: |
|
|
I have stalled slightly on the electrics. Simple as they are on this car, there are several conflicting wiring diagrams and the the slight modifications that were needed to make them in right hand drive and to UK lighting regulations means that unravelling it all has been a puzzle.
I have actually removed a couple of "redundant"? wires that might never have been used.
This is the state of the front locker now as I have just about eliminated all the glitsches apart from the horn earthing.
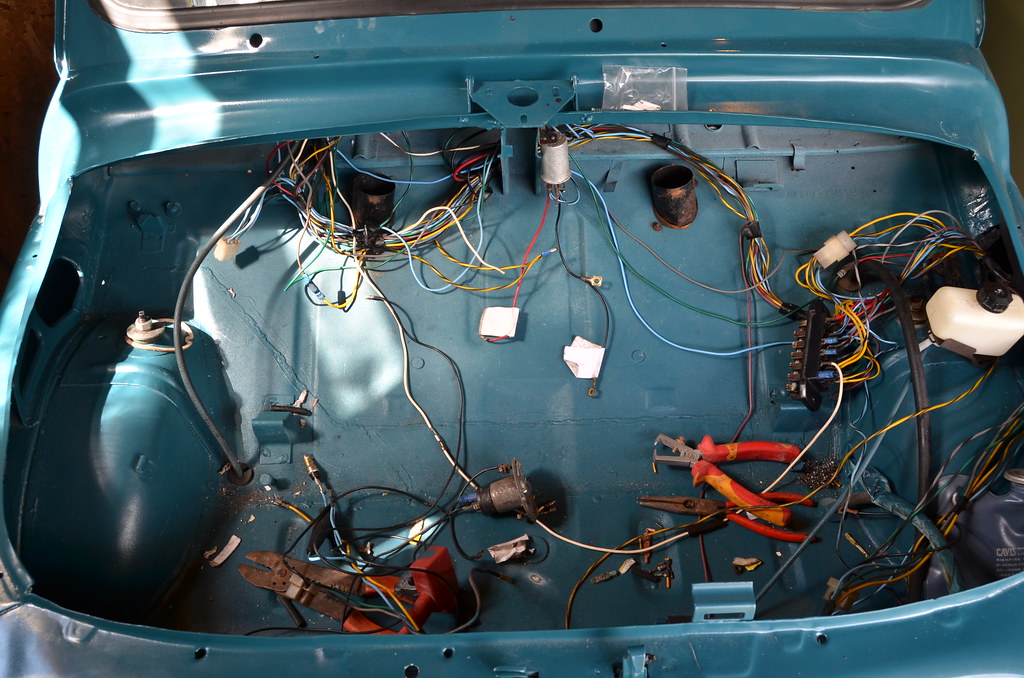 BRA_7510 by peterthompson, on Flickr BRA_7510 by peterthompson, on Flickr
Amazingly, the flasher unit, fusebox and switches all still work. Who said Italian electrics were naff?
I am still waiting for a few bits and pieces, ordered over a week ago, that should move things on quite quicky. |
|
| Back to top |
|
|
petermeachem
Joined: 23 Sep 2013
Posts: 358
Location: Chichester Sussex
|
| Posted: Mon Aug 04, 2014 5:31 pm Post subject: |
|
|
| I saw a Fiat 500 same colour as yours going towards Chichester from Goodwood. It looked absolutely beautiful and I thought wow I'd love one of those. Then I remembered the amount of rust you had to cut out! |
|
| Back to top |
|
|
colwyn500
Joined: 21 Oct 2012
Posts: 1745
Location: Nairn, Scotland
|
| Posted: Tue Aug 05, 2014 1:53 pm Post subject: |
|
|
Get one Peter!!!
Photo of repro light against the real thing (on the right). I ended up refitting the originals which had sheared studs by using the polycarbonate sealant that is being used for various trim sticking jobs. The repros, apart from not being chromed or being the right colour didn't follow the contour of the wing and had studs that needed the mounting holes on the wing to be enlarged.
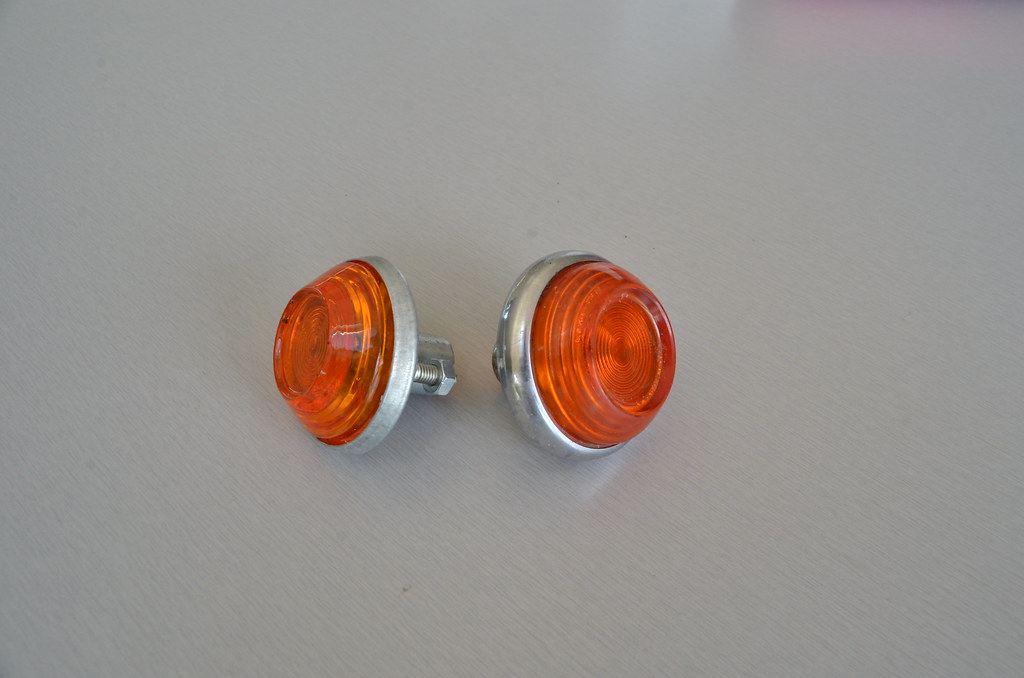 BRA_7521 by peterthompson, on Flickr BRA_7521 by peterthompson, on Flickr
Today I simply wanted to glue in the window channel prior to assembling the doors. It ended up me having to do the whole thing with quarter lights and glass. I remember Tony described it as quite a process and my way, which may be the same, was to glue in the channel apart from the first few centimetres where it reaches the quarter light. Then put in the glass from below having the channel nearest the latch side loosely fitted. then a great exercise in geometry to just squeeze in the quarter light at awkward angles and a bit of brute force. Then slide the window up and fit the channel that locates in the bottom of the quarter light.
I am just hoping that the alloy trim will fit in as the last job...Pheww!!
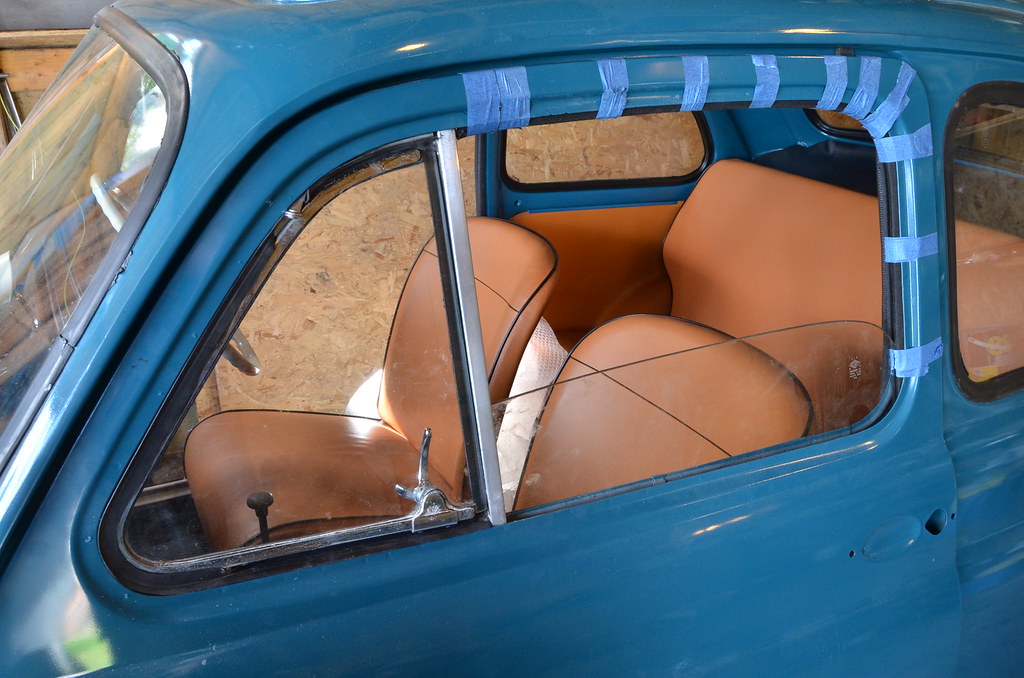 BRA_7524 by peterthompson, on Flickr BRA_7524 by peterthompson, on Flickr
Whilst on a roll, I fitted odd bits of trim including the boot seal which pegs in with rubber rivets. I backed this up using a bead of sealant which also fixed on the chrome trim on the sills. The original had plastic rivets which went through quite big holes in the sills...not very sensible.
Ps. You can see some tatty sealant around the windscreen. I just squidged it on without masking or cleaning and now it's dry it just peels off easily with a blunt scraper and no force. One last wipe with degreaser and it's like new. |
|
| Back to top |
|
|
|
|
You cannot post new topics in this forum
You cannot reply to topics in this forum
You cannot edit your posts in this forum
You cannot delete your posts in this forum
You cannot vote in polls in this forum
|
php BB powered © php BB Grp.
|


