
Classic cars forum & vehicle restoration.
|
|
| Author |
Message |
peppiB
Joined: 30 Jun 2008
Posts: 686
Location: Newcastle upon Tyne
|
 Posted: Wed Oct 08, 2014 3:14 pm Post subject: Posted: Wed Oct 08, 2014 3:14 pm Post subject: |
 |
|
| Brilliant news. This thread has been an intriguing and inspiring read from beginning to end |
|
| Back to top |
|
 |
Franko500
Joined: 14 Apr 2014
Posts: 24
|
| Posted: Wed Oct 08, 2014 4:52 pm Post subject: |
|
|
Congratulations Peter.
What an achievement, and it didn't take you too long lol.
You must be pleased as punch with that result. All you need to do now is enjoy it before your next project (don't worry there will be another one, you wont be able to help yourself)
Its been a great blog of which myself and others will be able to refer to along the way on our own projects. The great thing about your blog was retaining the originality which like all classics usually gets lost by people not knowing what they are doing.
If you ever make it down south, especially the Herne Bay or Dover area of Kent then let me know. It would be great to meet up and see you and your 500 in person.
Im sure you will be on the Fiat Forum, but once again WELL DONE. |
|
| Back to top |
|
|
colwyn500
Joined: 21 Oct 2012
Posts: 1745
Location: Nairn, Scotland
|
| Posted: Wed Oct 08, 2014 5:03 pm Post subject: |
|
|
Thanks everyone, obviously it's been a pleasure uploading all this and I benefit from having a reasonably thorough record of the work.
I will certainly make I beeline for a brew with any of you once I start getting out and about.
But as a postscript, the work continues. I couldn't have that little blot on my copybook so I peeled back the rusty rim of the old, original headlamp.
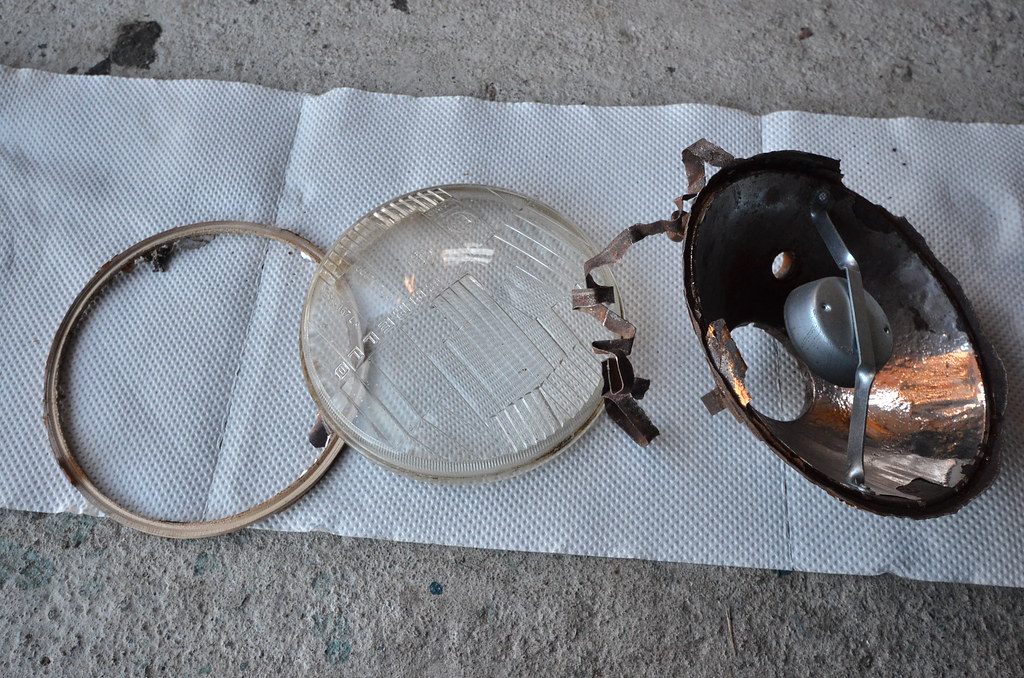 BRA_8622 by peterthompson, on Flickr BRA_8622 by peterthompson, on Flickr
Pulled out the broken glass on the new one with a good reflector and put in some PU sealant (one of the best products I have used in the latter part of the restoration).
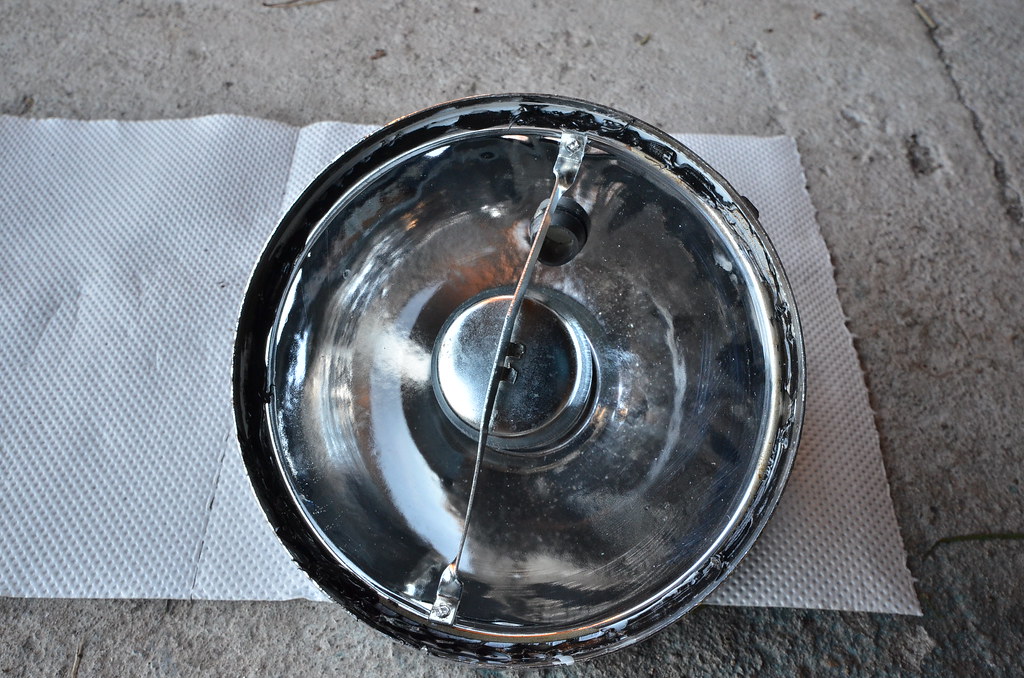 BRA_8624 by peterthompson, on Flickr BRA_8624 by peterthompson, on Flickr
Then a simple job to plop in the good glass, another layer of PU and done.
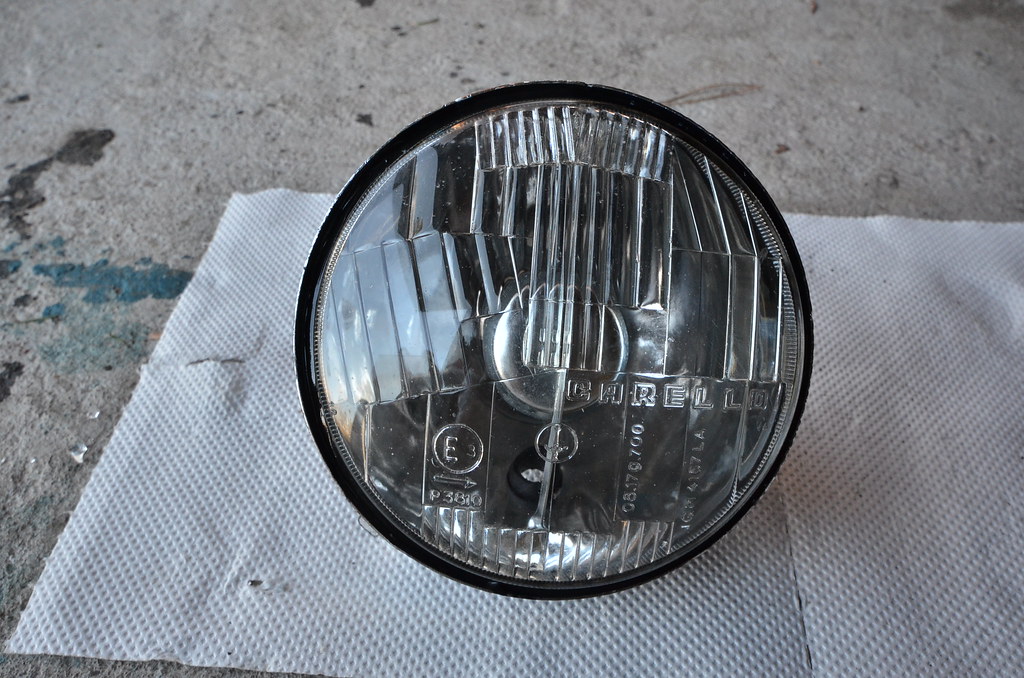 BRA_8625 by peterthompson, on Flickr BRA_8625 by peterthompson, on Flickr
Incidentally, the cracks emanated from an adjustment screw and whilst I can't see how I could have bottomed one out nor that that could even cause this, in some way it may have played apart in the damage. |
|
| Back to top |
|
|
vitesse
Joined: 03 Jun 2013
Posts: 561
|
| Posted: Wed Oct 08, 2014 7:07 pm Post subject: |
|
|
Wow well done Peter and of course Murphio. It sounds like quite an epic 2nd christening for him.
How did the engine run on the 1 3/4 hour journey? Did it miss a beat at all?
Just goes to prove how tough these little cars are, leaving the moderns in his wake. (Literally).
It's quite ironic really, that little adjustment screw on the headlight nearly caused a failure and it was exactly the same screw that nearly caused a failure on my car, except of course mine was caused by putting them on incorrectly. But well done on fixing it already.
Sod's law though that the rear wheel bearing were the only mechanicals left untouched. I changed mine years ago, I don't think it was to much of a headache just a case of finding something to drive them out I think I used a really big socket.
Again well done on both epic journeys.
Tony |
|
| Back to top |
|
|
colwyn500
Joined: 21 Oct 2012
Posts: 1745
Location: Nairn, Scotland
|
| Posted: Wed Oct 08, 2014 7:33 pm Post subject: |
|
|
Thanks Tony. The engine didn't miss a beat or overheat, flood with petrol or water! or refuse to start.
In fact, I had to start looking at the "running in" decal as it just wanted to ramp up the revs. I pulled back from 50mph at one point but it had plenty left in it.
It's better than my memory of driving one, and that's saying something!
The thing no-one can accept is right is the camber on the rear wheels. No-one believes my explanation that it's to accommodate my large Italian family.  |
|
| Back to top |
|
|
bob2
Joined: 06 Dec 2007
Posts: 1727
Location: Malta
|
| Posted: Thu Oct 09, 2014 9:44 am Post subject: |
|
|
Well done Peter, a great read from start to finish!!!!
I love these little fiats, and although I'm a mini man at heart I would never say no to one of these!!
By the way, I see you managed to split the lens from the reflector, I was trying to do the ones on my hunter in order to restore the reflectors but did not manage much, infact I found a couple of good used ones for sale and bought and fitted those instead!!
Can you explain a little bit in detail how you managed to take off the lenses without damaging them?!
When you have the time that is.
Thanks |
|
| Back to top |
|
|
colwyn500
Joined: 21 Oct 2012
Posts: 1745
Location: Nairn, Scotland
|
| Posted: Thu Oct 09, 2014 6:20 pm Post subject: |
|
|
Thanks for the thumbs up Bob. Having only recently realised from a TV quiz that Malta is smaller than the Isle of Man, I now find it has a much bigger population and high car ownership, I can see a place for the Fiat 500!
With unbonding the headlamp I think I was lucky. The original seemed to have no bonding agent and rather, a separate rubber gasket. The lense was secured by the reflector being crimped over the lense slightly. With so much corrosion I just peeled it back with pliers being careful to avoid point loading the edge of the glass.
Incidentally, the old glass is thicker than the modern copy.
I'm sure there's a variety of ways these are held on and careful use of a Dremel or similar might help.
Good luck if you try it. |
|
| Back to top |
|
|
bob2
Joined: 06 Dec 2007
Posts: 1727
Location: Malta
|
| Posted: Fri Oct 10, 2014 7:33 am Post subject: |
|
|
Hmmm, you were lucky then, I already tried doing mine but they are bonded with some sort of sealer and its pretty hard to chip off without damaging the glass bowls!!!
I'll resort to doing them on those long, frosty wintery nights!!!!
No hold on, I'm in Malta and winter here is just like scottish summer (maybe even better)!!!
 |
|
| Back to top |
|
|
JC T ONE
Joined: 30 Oct 2008
Posts: 1139
Location: Denmark
|
| Posted: Fri Oct 10, 2014 11:22 am Post subject: |
|
|
Nice to see the car "finished"  looks good . looks good .
Job well done on that headlamp .
Jens Christian
_________________
http://www.eurods.eu/wp/index.html |
|
| Back to top |
|
|
colwyn500
Joined: 21 Oct 2012
Posts: 1745
Location: Nairn, Scotland
|
| Posted: Fri Oct 10, 2014 6:55 pm Post subject: |
|
|
....and here is the headlight (on the right).
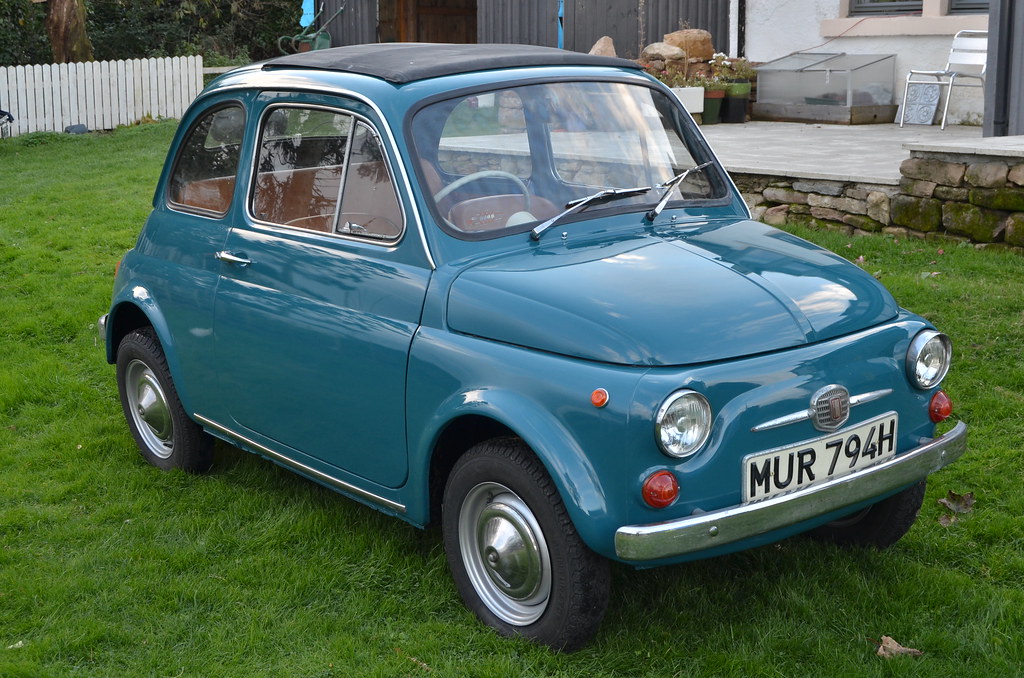 BRA_8784 by peterthompson, on Flickr BRA_8784 by peterthompson, on Flickr
..and in answer to the more observant of you, yes, I will be adjusting the N/S wiper arm resting position and I know the bezels on the lamps stick out by a different amount..more adjustments needed. These big jobs just wear me out. |
|
| Back to top |
|
|
vitesse
Joined: 03 Jun 2013
Posts: 561
|
| Posted: Fri Oct 10, 2014 7:16 pm Post subject: |
|
|
My eyes went straight to that headlight bezel before even reading the post. 
But I can't workout how it has happened unless the patent part headlight is slightly smaller than the bezel?? I did initially fit some rubber seals that fit around the back of the bezel rim but they just made it almost impossible to get the headlights in the front panel and they wouldn't adjust. Seemed like a good idea at the time.
Are they the original indicator lenses, they look darker than mine? Are they glass or plastic? |
|
| Back to top |
|
|
colwyn500
Joined: 21 Oct 2012
Posts: 1745
Location: Nairn, Scotland
|
| Posted: Fri Oct 10, 2014 8:45 pm Post subject: |
|
|
I think it might change once I get the nearside aimed properly. Failing that, it must be connected with the dimensions of the glass. The originals are a bit thicker. It's funny how tiny mods can change things so much. The old glass even makes the reflector look brighter!
I bought those rubbers that fit the headlamp inset but decided to ignore them preferring water to drain out easily and air to get in.
The main indicator lenses are original and probably are a deeper colour than new ones would be if the experience I had with the repeaters is anything to go on. They also have had the benefit of a bit of incidental rubbing compound and have been buffed with a waxy cloth.
Just about got my head round the paprwork now so getting everything together for DVLA.
PS I forgot to bid on a a pair of brand new original lenses a few weeks ago..went for a fiver! |
|
| Back to top |
|
|
vitesse
Joined: 03 Jun 2013
Posts: 561
|
| Posted: Sat Oct 11, 2014 12:07 am Post subject: |
|
|
Could you not swap the glass on the other headlight for the original?
Yeah agreed on the rubbers same thought as me they just look like they would trap water. The rubber around the sunroof aperture is one of the few after market bits I would recommend though, tidies it up a bit plus I am convinced it raises the front end a bit to lessen the potential rubbing affect that Hugh Jarce has experienced. |
|
| Back to top |
|
|
colwyn500
Joined: 21 Oct 2012
Posts: 1745
Location: Nairn, Scotland
|
| Posted: Mon Oct 27, 2014 4:22 pm Post subject: |
|
|
I'm happy with the headlights now that I have them fairly well aligned and a new bulb in one of them. I highly recommend buying good quality bulbs (Philips in this case) since one the cheapo ones off Ebay has loose terminals and a misaligned filament and is already going black!
I don't fancy the sunroof trim as the current canvas sits so well.
Now things are calmer I can get to grips with smaller matters. The rubbers of the engine mounting were staring at me looking very old and cracked so I got new ones from Middle Barton Garage who did fantastic mail order service via Ebay.
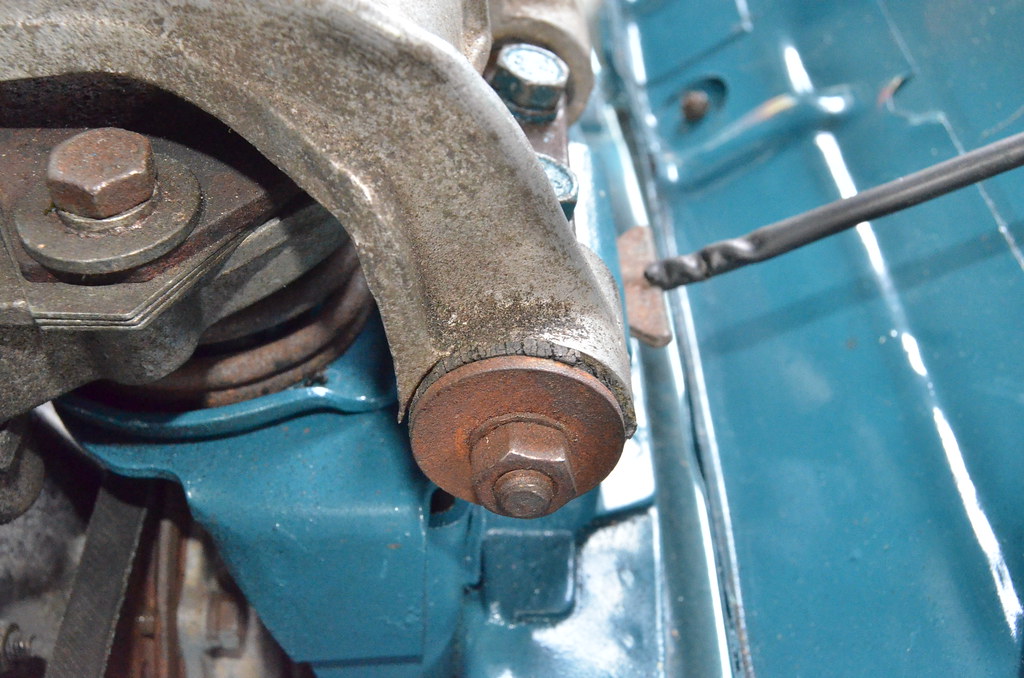 BRA_8979 by peterthompson, on Flickr BRA_8979 by peterthompson, on Flickr
Put a jack under the engine buffered with some stiff insulation.
Removed the pivoting bracket which releases a certain amount of spring tension which needs a clamp to compress when refitting.
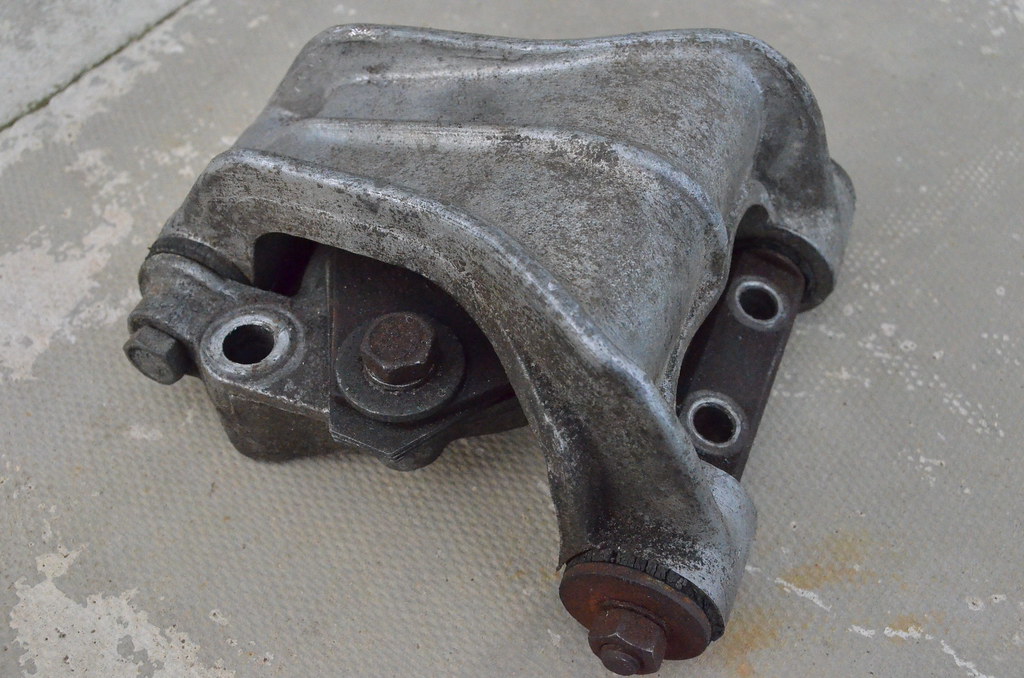 BRA_8980 by peterthompson, on Flickr BRA_8980 by peterthompson, on Flickr
Take out the pivot bolt and push out the old rubbers which was made easier by giving them a bit of blowtorch treatment.
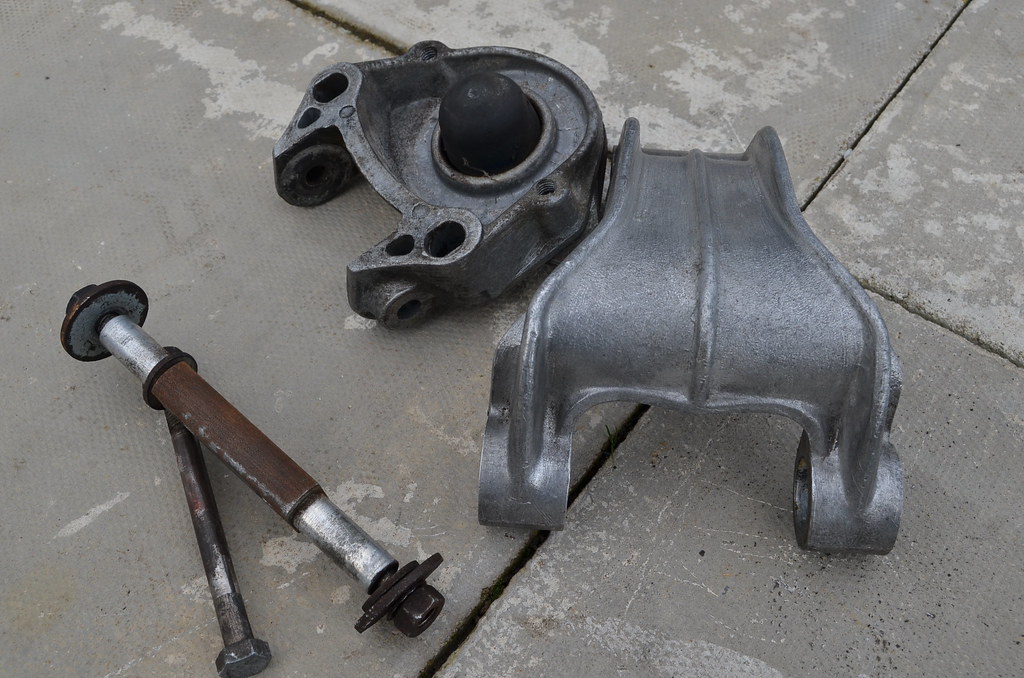 BRA_8984 by peterthompson, on Flickr BRA_8984 by peterthompson, on Flickr
Insert new bushes.
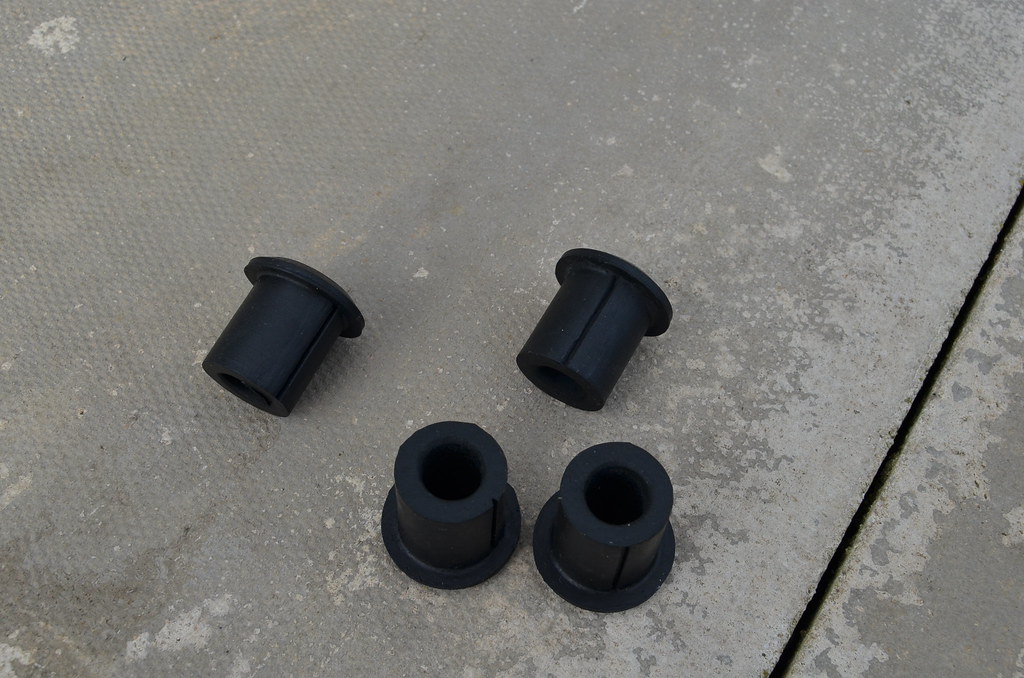 BRA_8981 by peterthompson, on Flickr BRA_8981 by peterthompson, on Flickr
These are a push-fit and then reassemble. The final tightening was done when the engine weight had been taken by the mounting.
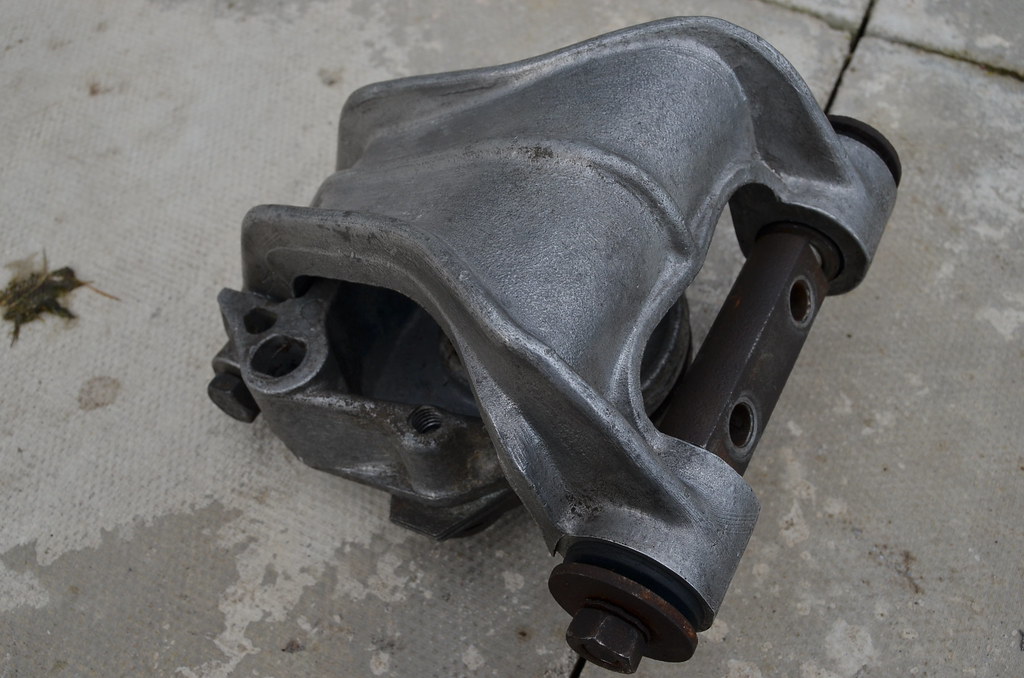 BRA_8986 by peterthompson, on Flickr BRA_8986 by peterthompson, on Flickr
These were giving no apparent problems but it seems prudent to "stitch in time" and when removed I found they were much softer than the new ones.
PS. I know the bottom part of the mounting has been loosely assembled upside down. |
|
| Back to top |
|
|
kevin2306
Joined: 01 Jul 2013
Posts: 1359
Location: nr Llangollen, north wales
|
| Posted: Mon Oct 27, 2014 4:34 pm Post subject: |
|
|
Just catching up with this after my holidays.
well done on the result, how great is the feeling of the fresh mot after all your hard work!!
murph looks fantastic and is going to be a great little motor to drive and enjoy in the forthcoming years.
once again, well done
kev |
|
| Back to top |
|
|
|
|
You cannot post new topics in this forum
You cannot reply to topics in this forum
You cannot edit your posts in this forum
You cannot delete your posts in this forum
You cannot vote in polls in this forum
|
php BB powered © php BB Grp.
|


