
Classic cars forum & vehicle restoration.
|
|
| Author |
Message |
roverdriver

Joined: 18 Oct 2008
Posts: 1210
Location: 100 miles from Melbourne, Victoria, Australia
|
 Posted: Sat Jan 27, 2018 8:52 am Post subject: Clutch Replacement, Rover P4. (Part 2) Posted: Sat Jan 27, 2018 8:52 am Post subject: Clutch Replacement, Rover P4. (Part 2) |
 |
|
Part 1 of this story can be found here-
http://www.oldclassiccar.co.uk/forum/phpbb/phpBB2/viewtopic.php?t=20086
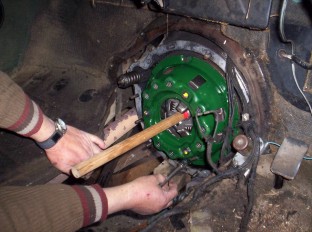
After cleaning the outside of the assembly, I turned my attention to inside the bell housing, first to clean it, then to examine the clutch thrust assembly and bearing.
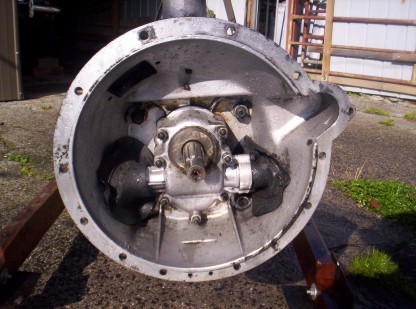
I have been familiar with vehicles of lesser breeding, but never before had I got into this part of a Rover. I was quite amazed to find that the clutch thrust assembly was in its own housing, thus minimising the risk of clutch-dust etc causing excessive wear. In fact after a very careful feel with the lever in all possible positions, I decided that the thrust bearing was in good shape and needed no other attention
This could not be said for the cross shaft that actuates the clutch. That is, of course, exposed to all of the dust, dirt and grime of the underneath of the car. The bearing was quite worn as you can see in the photograph.

The shaft itself was also quite worn where is worked within the bearing. I felt fairly sure that I could find new bronze bushes to support the shaft, but that would have been of little use unless I could build up the worn part of the shaft or alternatively locate a new one. I didn't want to spend lots of effort and waste time trying to do that, and reasoned that, like the 'Curate's egg' the shaft was good in parts, there could be another solution. A warning to purists, who should not read this next bit of the tale.
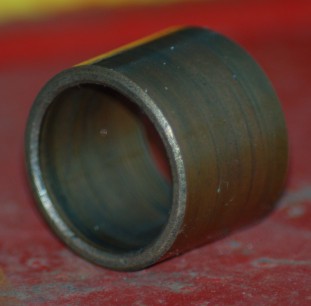
I again went to my Spare Parts Department (junk heap) to see what might be able to be adapted for use. There I found the nice chromed part of an old dress rack and cut off the end.
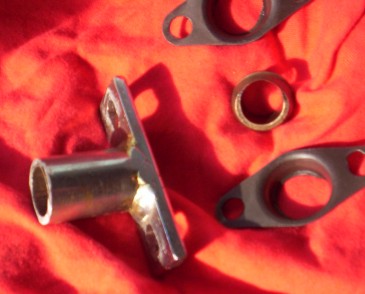
I had to file the bolt holes into slots to get the centers lined up for the gearbox housing, and I was aware that the tube part was too large in diameter, however I managed to utilise part of an old tube spanner which had the correct inside and outside diameter to 'sleeve' the tube.
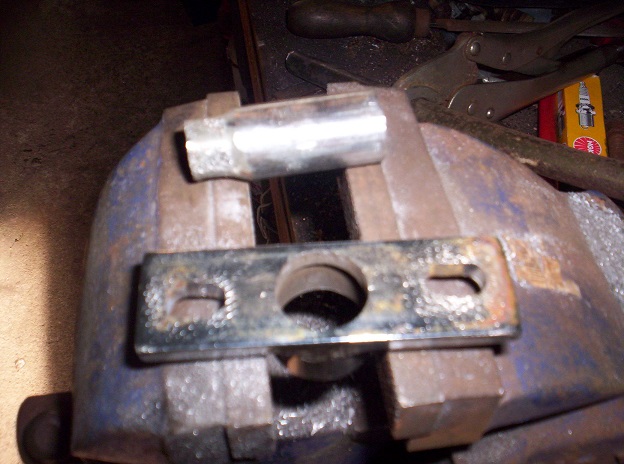
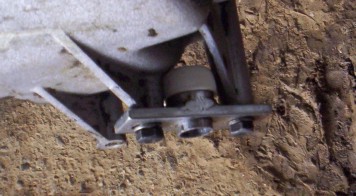
After packing the tube with grease and adding a bottle top to seal off the end, it was bolted up, ready for the reassemble operation. By using this method, the non-worn part of the shaft gets used and might last another 50 years, or alternatively an original fitment can be made as nothing on the car or gearbox was modified.
Now back to the clutch job itself.
There was evidence that the bronze spigot bearing might have been turning within the flywheel. After getting some Forum advice, I employed Loctite Shaft Fit compound to secure the bush
Through our local Repco branch, I ordered a replacement pressure plate and clutch plate on a change-over. It had duly arrived so I was able to check and compare the new with the old before send off the old.

I checked and cleaned the surface of the flywheel, then set about fitting the new clutch parts. First, found a piece of wooden dowel that was a firm fit into the spigot bearing. Next, I marked how far the dowel entered the bearing, then I built up the diameter of the dowel with successive layers of electrician's tape to make a tight fit through the internal splines on the clutch driven plate. In this way the plate could be held perfectly in place, for the pressure plate to be bolted onto the flywheel.
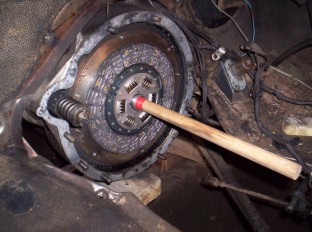
With everything bolted up, the dowel was withdrawn preparatory to the re-fit.
One other task I tackled was to make a swivel bar for my crane, to make it easier to swing the gearbox into position when the time came.
Now I was ready to re-fit the gearbox, but will tell about that in another part of this story.
The finale, Part 3 can now be found here-
http://www.oldclassiccar.co.uk/forum/phpbb/phpBB2/viewtopic.php?p=157827#157827
_________________
Dane- roverdriver but not a Viking. |
|
| Back to top |
|
 |
|
|
You cannot post new topics in this forum
You cannot reply to topics in this forum
You cannot edit your posts in this forum
You cannot delete your posts in this forum
You cannot vote in polls in this forum
|
php BB powered © php BB Grp.
|


