
Classic cars forum & vehicle restoration.
|
|
| Author |
Message |
Penguin45

Joined: 28 Jul 2014
Posts: 381
Location: Padiham
|
 Posted: Mon Oct 15, 2018 11:59 pm Post subject: Posted: Mon Oct 15, 2018 11:59 pm Post subject: |
 |
|
| Bitumen Boy wrote: | | Beware of these, I don't think the bearings are much good. I overhauled a dynamo using a kit off fleabay but it wasn't long before it was as noisy as the old one with an annoying "tick" from the front bearing. |
JCR SUPPLIES are the people to use. Decent quality parts at sensible prices. Been using them for years.
P45.
_________________
'67 Wolseley MkI 18/85, '70 Austin MkII 1800 The Landcrab Forum. |
|
| Back to top |
|
 |
BigJohn
Joined: 01 Jan 2011
Posts: 954
Location: Wem, Shropshire
|
| Posted: Wed Oct 17, 2018 5:22 pm Post subject: |
|
|
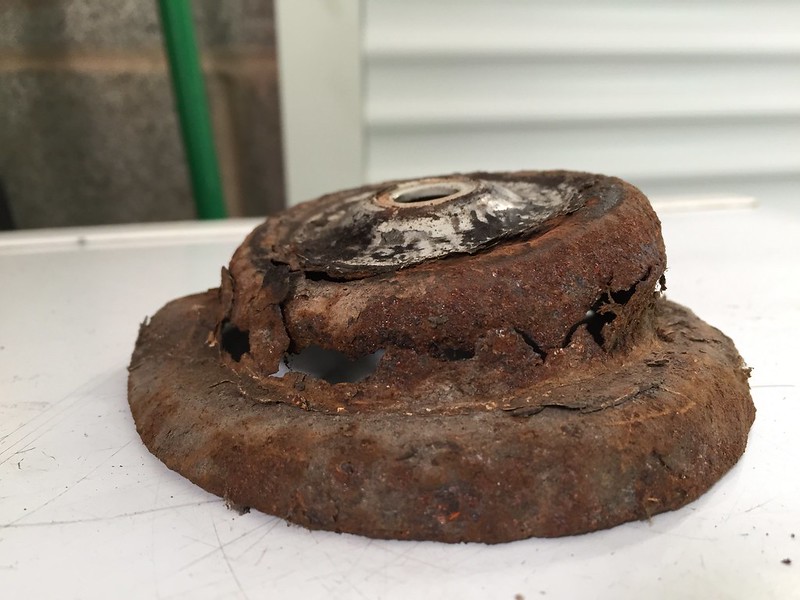
I removed the RNS top spring mount on th Mk1 Golf Cabrio as I suspect it's fubared? New one in the post.
 |
|
| Back to top |
|
|
Ray White

Joined: 02 Dec 2014
Posts: 6312
Location: Derby
|
| Posted: Sat Oct 20, 2018 8:45 pm Post subject: |
|
|
Today I took a break from preparing the Swallow wing and turned my attention to the Range Rover. The M.O.T is due on Monday so I thought I had better check it out. I will need a new wiper blade for the rear window - although I don't know off hand if it is part of the test.?
Quite by accident I discovered the coolant leak that has eluded me for the past couple of weeks. It was coming out from where two small pipes connect to the underside of the throttle housing. I took off the pipes and removed the three small screws holding the small square chamber lid. I assumed the gasket to be faulty (although there was nothing obvious) so I applied a smear of silicone gasket sealer to both sides and replaced it. The sealant needs to be left with the joint finger tight for an hour then tightened down and left for 24 hours to cure.
Not being very understanding of 'modern' cars; perhaps someone would be able to tell me what is the function of the two coolant pipes attached to the throttle housing.? There appears to be two chambers built into a block about 1 1/2" square. |
|
| Back to top |
|
|
BigJohn
Joined: 01 Jan 2011
Posts: 954
Location: Wem, Shropshire
|
| Posted: Sat Oct 20, 2018 9:10 pm Post subject: |
|
|
Fitted the new RNS spring top cup on the Mk1 Golf Cabrio and put it all back together. (and I still have all my fingers  ) ) |
|
| Back to top |
|
|
Rootes75
Joined: 30 Apr 2013
Posts: 3814
Location: The Somerset Levels
|
| Posted: Sun Oct 21, 2018 6:00 pm Post subject: |
|
|
Another couple hours re-wiring the Commer, i now have all sidelights and rear flashers wired back into the original loom and working off their respective dash switches.
_________________
Various Rootes Vehicles. |
|
| Back to top |
|
|
badhuis

Joined: 20 Aug 2008
Posts: 1390
Location: Netherlands
|
| Posted: Sun Oct 21, 2018 6:30 pm Post subject: |
|
|
Fixed the carburettor leakage, now the accelerator pump also works as it should. Painted a few under bonnet components. Aligned the bonnet. On the inner rear wheelarches noticed some rust so out with the de-rusting tools. Luckily the rust was not spread too wide, so painted it all with lead primer which I still have from a long time ago (not available now anymore). Painted all four calipers. The PO painted these silver which now showed some rust spots. I never liked Silver so they now are matt black.
_________________
a car stops being fun when it becomes an investment |
|
| Back to top |
|
|
alastairq
Joined: 14 Oct 2016
Posts: 1953
Location: East Yorkshire
|
| Posted: Sun Oct 21, 2018 8:32 pm Post subject: |
|
|
Spent today [and half of yesterday] seeing if I could raise the Mustang's rear suspension a bit. It came to me with 2 inch spacers , lowered. With my not insignificant butt in the driver's seat, often the rear tyres would rub the inner arches over the typical local wavy bumps.
The springs are 5 leafers [original would have been 4]....with normal eyes [springs can be had with mid-eyes, or underslung eyes, to lower back end by various amounts.]
Decided to sort the ride height out a bit [raise]....but being a titewad pensioner, didn't want to fork out the 80 quid-plus-8 quid postage fro a 1 inch lowering kit[complete..blocks, U bolts, nuts]....[less than 60 quid, all in incl. VAT, delivered , from USA!!]
Ordered a 20 cm length of 1 inch by 3 inch aluminum block off ebay [just over a tenner,delivered].....
Spent half an hour on friday, hacksawing the block in two.
Saturday spent dismantling right side rear spring/axle U bolts, to get spacer out. [see what I'd got, basically]...In doing so, one U bolt nut met a slightly bent bit of thread, and snapped one leg, about 2 inches up. [Booger]
Anyway...I looked at what I needed to do to the ally block [drill centre, quite large....maybe tap a thread, insert correct size bolt, to saw end off to make the stud....then chamfer off each corner to sit between the U bolts]
Booger that....measured the 2 inch spacers block, which was a semi hollow casting in ally...and sawed it in half, lengthways.....giving me a 1 inch spacer, with stud, and corresponding hole...job done.
Found one spare nut with correct thread, re-assembled the whole shebang....and just managed to get said nut to bite on the broken stud end.....[I've now got the stud end just peeping out of the nut bottom]
{Note to self, speak to Mustang maniacs to see if they'll sell me one U bolt that is just about long enough?]
Today, did the LH side. Booger me, one nut seized right at the bottom of the U bolt thread.....and took off half an inch!!
Same process as Saturday...sawing, arm dropping off, etc.
But, could I find a nut to fit the thread??? No way....eventually, espied the wheel nuts on my Ford Pop chassis...they had the same thread!!! So, for the moment, one of the U bolt studs has a pop wheel nut on it...flat side to work, a few washers [maybe 4 on each stud] to keep any nuts away from any dodgy threads that my thread file missed. The pop nut has a chamfer..but it's flush with the flats, so a socket pops on nicely. it's a lot bigger in diameter than the other nuts, 19mm, as agin 13/16ths.
All this is by way of 'suck-it-'n-see....if a 1 inch drop is better than a 2 inch drop, for avoiding the tyres rubbing on bumpy roads. The wheel/tyre combination is on the narrow side of convention in regards to this sort of motor.
I tried the car up & down the lane....seems fine...although I do wonder whether castor & camber have been altered....as the car is lowered slightly at the front [not sure whether it's springs, or a Shelby Drop, yet....] Mustangs of the classic sort do tend to sit down at the rear, from new.
Thus...one new U bolt needed [new to the car, that is]...plus nuts if possible....and once everything is settled & sorted, out with the hacksaw to cut off the surplus u bolt studs.
Gotta be better than spending 80 quid...[or 60 quid with a 4 week delivery time]...[weather could be a lot worse in 4 weeks time??]...I am an outdoors mucker-abouter with cars....no nice warm brightly lit workshop for me, thanks.
_________________
Dellow Mk2, 1951 built, reg 1952.
Fiat 126 BIS
Cannon special [1996 registered. Built in 1950's]
----------------------------------------------
Ford Pop chassis, Ashley 1172 bodyshell, in pieces. |
|
| Back to top |
|
|
Rootes75
Joined: 30 Apr 2013
Posts: 3814
Location: The Somerset Levels
|
| Posted: Sun Oct 28, 2018 2:02 pm Post subject: |
|
|
More re-wiring of the Commer, headlights all done and now working off the dash switch.
Had a go at the horn but the original after much pain of removal is in need of replacement.
_________________
Various Rootes Vehicles. |
|
| Back to top |
|
|
MikeEdwards
Joined: 25 May 2011
Posts: 2470
Location: South Cheshire
|
| Posted: Sun Oct 28, 2018 7:25 pm Post subject: |
|
|
| Swapped one of the front ball joints on the modern today, as it needs doing before the MOT. It's been on for four years, 22000 miles, which I don't think is all that much. Still, they're £14 each, so that's probably why. |
|
| Back to top |
|
|
Rootes75
Joined: 30 Apr 2013
Posts: 3814
Location: The Somerset Levels
|
| Posted: Sun Oct 28, 2018 9:54 pm Post subject: |
|
|
This afternoon we had a 40's Tea party in the village. My brother took along his WW2 GMC and stopped in at ours to pick my youngest up for the drive.
Unfortunately when he arrived at ours there was lots of smoke coming from the truck, my brother got out and said he thought there is a problem with the engine. I took a look and the source and smell was obvious, the brakes were seized on!!!
We therefore spent time loosening off the adjusters and dousing then with water. Even after a shower I still stink of the smoke!
_________________
Various Rootes Vehicles. |
|
| Back to top |
|
|
badhuis
Joined: 20 Aug 2008
Posts: 1390
Location: Netherlands
|
| Posted: Sun Oct 28, 2018 11:12 pm Post subject: |
|
|
Spend a few hours today scraping off underseal from the underside of the rear of the Interceptor. Found a bit more flaking rust than expected though I was happy to find no real rot.
I always had an old spray gun which I inherited from an old friend but had never used it, and thought it would be handy now to use it to spray lead primer (mixed with Owatrol) to the underside. That went quite well reaching hard to brush-paint areas, but in the end it all became quite a mess with paint dripping everywhere. The gun was not very good as it leaked at two points, as a result I was dripping of paint too. So that was the last use of that gun, it is now in the bin. A second layer of paint will be put on using an aerosol!
_________________
a car stops being fun when it becomes an investment |
|
| Back to top |
|
|
52classic
Joined: 02 Oct 2008
Posts: 493
Location: Cardiff.
|
| Posted: Wed Oct 31, 2018 6:12 pm Post subject: |
|
|
Time to come out of the closet and confess that lately, at least 1 day a week for the past 6, I have been moving on with my 2002 Cabriolet project!
After years of false starts it feels like I am getting somewhere at last, concentrating on the O/S sill structure to be capped off with a genuine factory panel once the layers of reinforcement have been welded in place linking A & B posts and the rear subframe mounting. I baulked at over £300 for the reinforcement section which is just a flat sheet with a rib pressed into it.
Made my own and welded in place. Neither the panel or the welding could be called 'pretty' but the result is probably stronger than the original and the structure is certainly better than it has been during the past 10 years.
If I get the outer sill and the door skin repair in primer by Christmas I will be well pleased. |
|
| Back to top |
|
|
Ashley
Joined: 02 Jan 2008
Posts: 1426
Location: Near Stroud, Glos
|
| Posted: Fri Nov 02, 2018 5:09 pm Post subject: |
|
|
I’ve got my Porsche engine out while the car is having a bare metal respray and stupidly I took the heads off to replace the pushrod seals. Although the pistons had been replaced the hone marks were deep and wrong and one barrel deeply scored.
I ordered new barrels and pistons from AA Pistons in the States and they were here in three days. Pity I had to pay £95 in VAT, duty and customs clearance.
I’ll assemble all over the weekend, hypothermia permitting. |
|
| Back to top |
|
|
Rick
Site Admin

Joined: 27 Apr 2005
Posts: 22446
Location: UK
|
| Posted: Sat Nov 03, 2018 9:00 am Post subject: |
|
|
| 52classic wrote: | Time to come out of the closet and confess that lately, at least 1 day a week for the past 6, I have been moving on with my 2002 Cabriolet project!
After years of false starts it feels like I am getting somewhere at last, concentrating on the O/S sill structure to be capped off with a genuine factory panel once the layers of reinforcement have been welded in place linking A & B posts and the rear subframe mounting. I baulked at over £300 for the reinforcement section which is just a flat sheet with a rib pressed into it.
Made my own and welded in place. Neither the panel or the welding could be called 'pretty' but the result is probably stronger than the original and the structure is certainly better than it has been during the past 10 years.
If I get the outer sill and the door skin repair in primer by Christmas I will be well pleased. |
Sounds like this deserves its own thread!
RJ
_________________
Rick - Admin
Home:https://www.oldclassiccar.co.uk
Videos:https://www.youtube.com/user/oldclassiccarRJ/videos
OCC & classic car merchandise (Austin, Ford ++):
https://www.redbubble.com/people/OldClassicCar/shop |
|
| Back to top |
|
|
Clactonguy
Joined: 20 Mar 2018
Posts: 104
Location: clacton on sea
|
| Posted: Thu Nov 08, 2018 6:01 pm Post subject: ongoing winter work |
|
|
today I removed front bumper .fog lights and number plate on my rover P6b. painted inside .refitted and checked wiring ( worked)
started cleaning suspension under off side front wing.. ( waiting new wire brush) and wiped oil leak /spray traces of bottom of auto gearbox.
this was after ( day before) removing front grill and apron . cleaning all ,draining rad. refit rad .refill, fit electric fan to front of rad ( won't fit behind) and altering wiring so it ran correct direction.
clipped wires. out of sight. repainted few bits and fitted a stainless steel slam plate I made up.
more work outstanding yet! ETA completion ..? how long is a piece of string.
every time I think I am nearly there I think of something else that can be done or needs doing. |
|
| Back to top |
|
|
|
|
You cannot post new topics in this forum
You cannot reply to topics in this forum
You cannot edit your posts in this forum
You cannot delete your posts in this forum
You cannot vote in polls in this forum
|
php BB powered © php BB Grp.
|


