
Classic cars forum & vehicle restoration.
|
|
| Author |
Message |
kevin2306
Joined: 01 Jul 2013
Posts: 1359
Location: nr Llangollen, north wales
|
 Posted: Fri Jul 04, 2014 4:18 pm Post subject: Posted: Fri Jul 04, 2014 4:18 pm Post subject: |
 |
|
spot on idea to repair the mats!
what I like about this rebuild is its retaining a whole lot of patina, lookng really lovely
Kev |
|
| Back to top |
|
 |
colwyn500
Joined: 21 Oct 2012
Posts: 1745
Location: Nairn, Scotland
|
| Posted: Fri Jul 04, 2014 6:20 pm Post subject: |
|
|
Glad someone else sees my point of view. I do think I'm going a bit far sometimes. I retained the rusty rear number plate screws and bought a pair of the plastic ones for the front just so I got a spare plastic nut and could re-use the slightly discoloured plastic bolts which match the original number plate.  |
|
| Back to top |
|
|
colwyn500
Joined: 21 Oct 2012
Posts: 1745
Location: Nairn, Scotland
|
| Posted: Fri Jul 04, 2014 9:12 pm Post subject: |
|
|
Carrying on with the cleaning I have included some details as a record which may be relevant to other restorers.
The rear wheel-arch covers came up fairly well but seem easily available new. I notice one of them has a slightly different shape to accommodate a chunk of wiring. I wonder if they are always fitted as original here, with strips of foam rubber to stop vibrations?
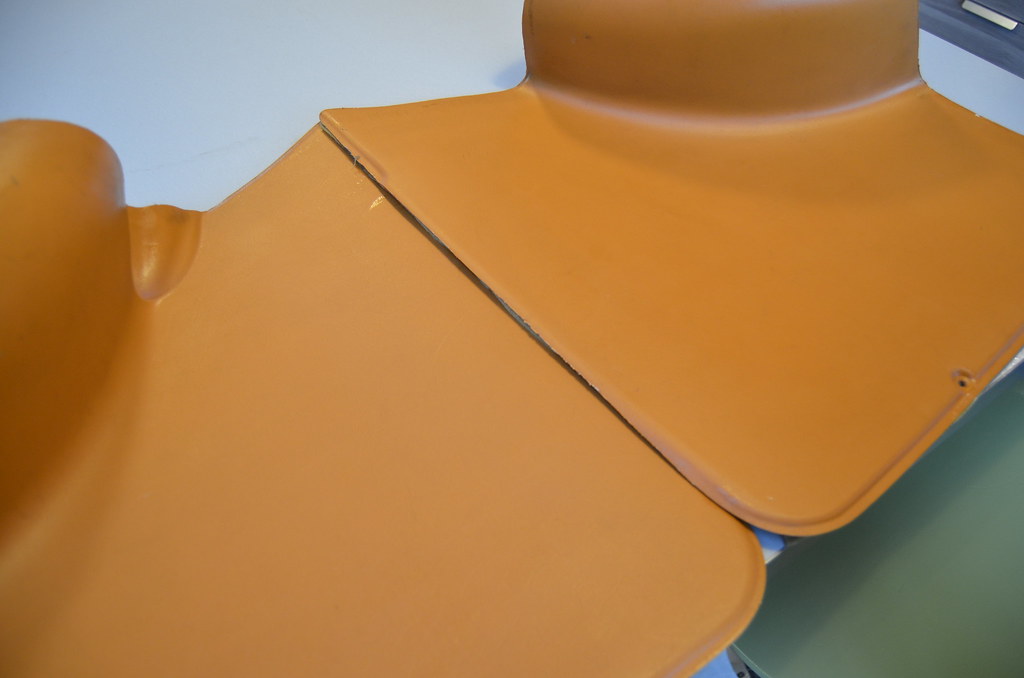 BRA_6288 by peterthompson, on Flickr BRA_6288 by peterthompson, on Flickr
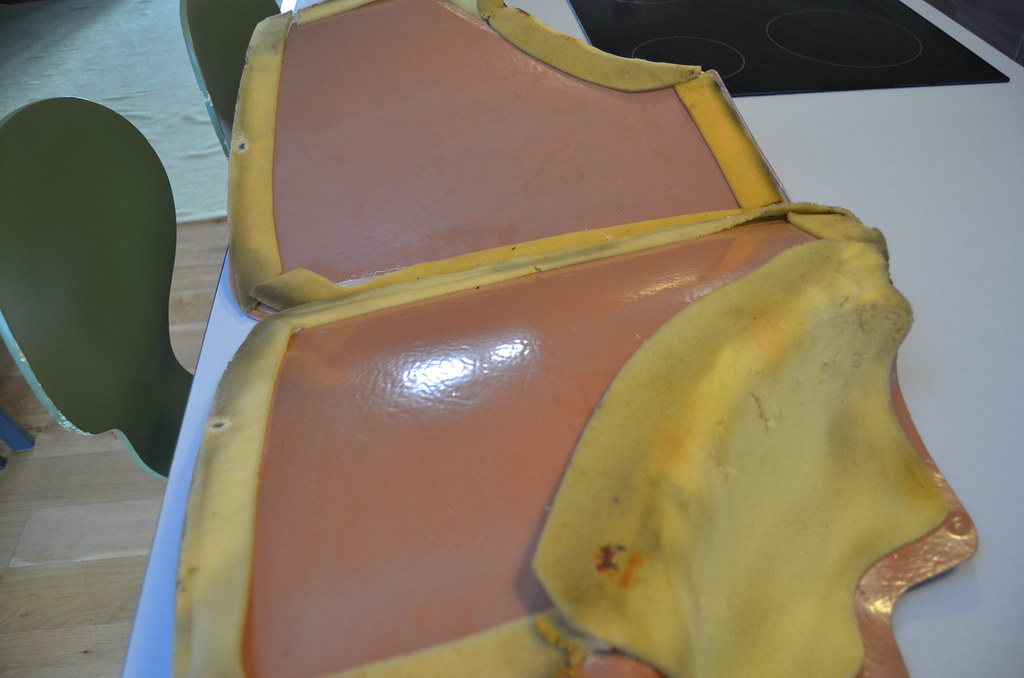 BRA_6287 by peterthompson, on Flickr BRA_6287 by peterthompson, on Flickr
The knee-pads for the dash are missing some of the fixing studs but I will glue them on with PU sealant. For the record, they are very crudely made by hand by stretching the vinyl over a shaped piece of sheet steel.
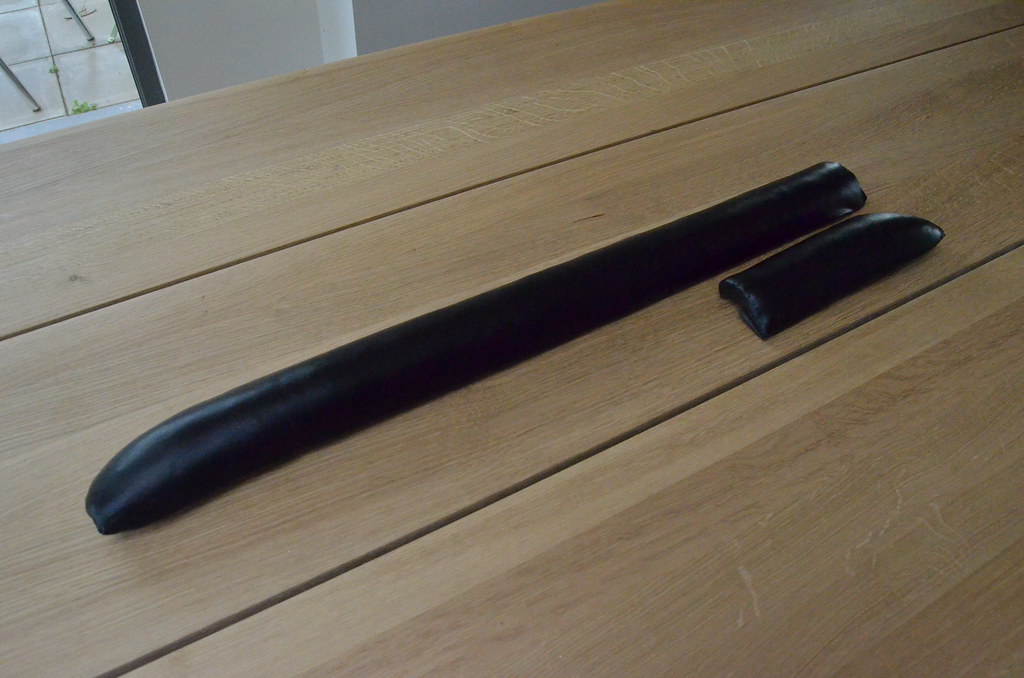 BRA_6279 by peterthompson, on Flickr BRA_6279 by peterthompson, on Flickr
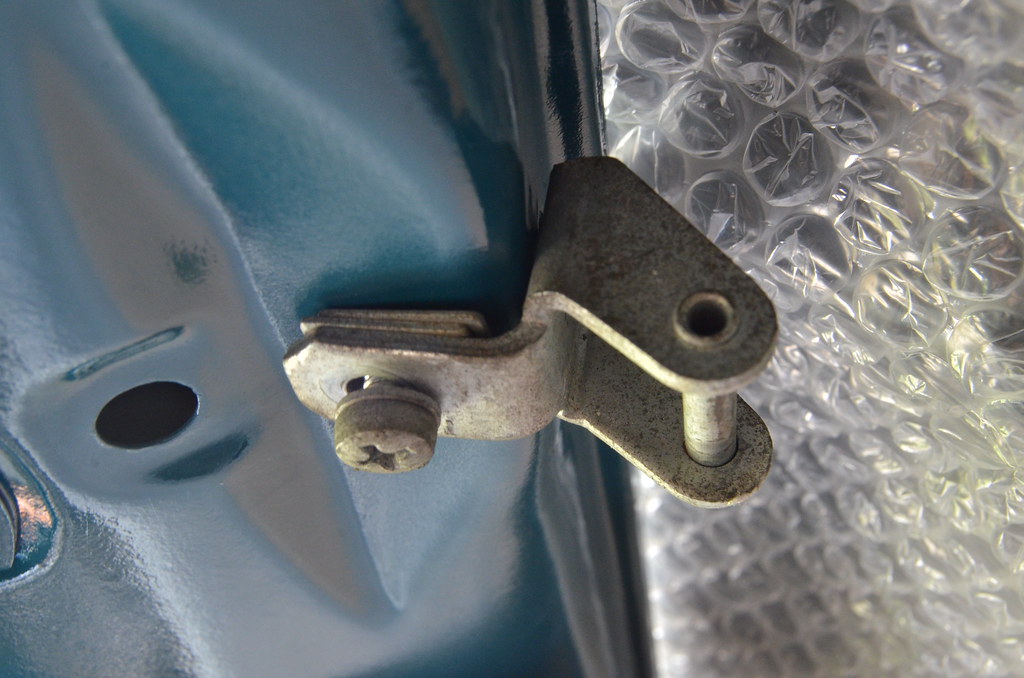
I am retaining the door striker plates and screws as there is no wear at all in them. On the reverse you can just make out a wisp of some sort of coarse fabric which must have been there to soften the tight contact between steel and paintwork.
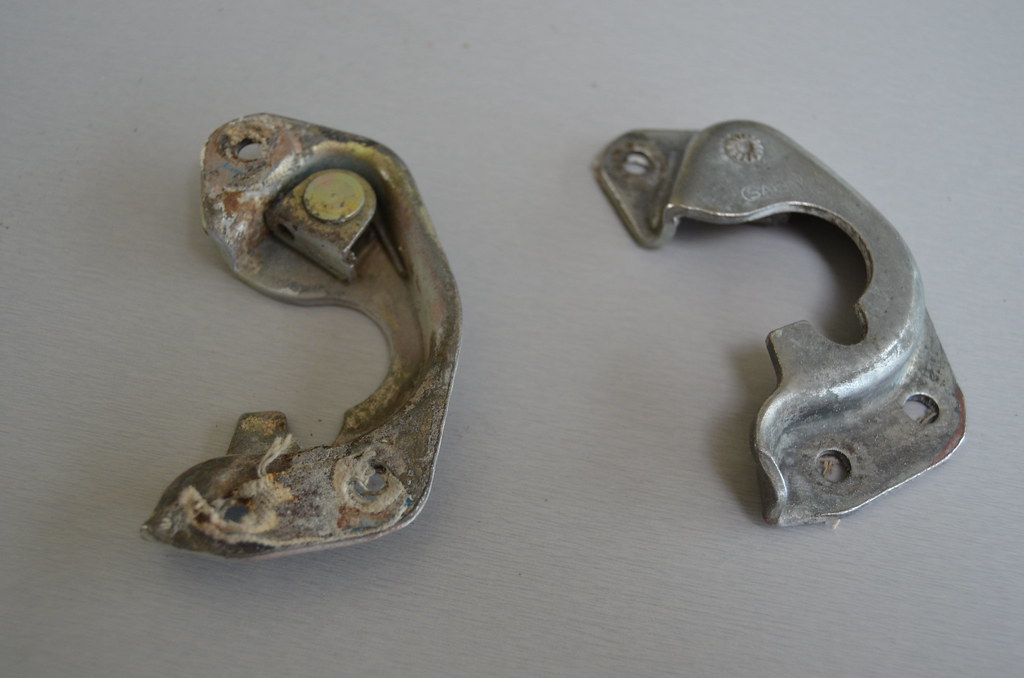 BRA_6283 by peterthompson, on Flickr BRA_6283 by peterthompson, on Flickr
Tony explained how to fit the battery retaining strap and I have hit similar problems to those that he did. I have re-inserted a couple of packing pieces of rubber that came out of the original battery box. I am not sure what they are specifically needed for.
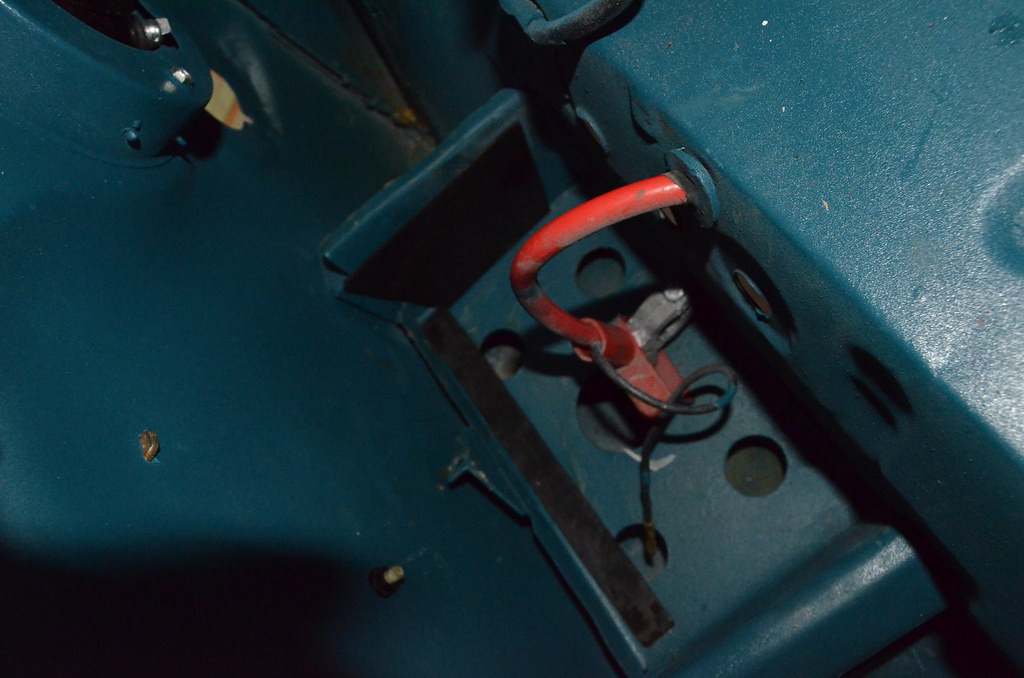 BRA_6282 by peterthompson, on Flickr BRA_6282 by peterthompson, on Flickr |
|
| Back to top |
|
|
vitesse
Joined: 03 Jun 2013
Posts: 561
|
| Posted: Fri Jul 04, 2014 10:32 pm Post subject: |
|
|
Rubber mats look good I wish I could afford a set!!!!!
My original side panels looked like they had foam on at sometime but for some unknown reason someone had pulled it off. My originals were held together with tape.
What's that extra wire for coming off the battery lead? |
|
| Back to top |
|
|
vitesse
Joined: 03 Jun 2013
Posts: 561
|
| Posted: Fri Jul 04, 2014 10:43 pm Post subject: |
|
|
Oh and least you fitted your head lights correctly unlike me first time around. When I went for an MOT myself and the tester spent ages trying to get the headlights adjusted, it was fine on the near side but we spent a good 30 minutes on the off side adjusting it. I asked if that was a fail and he said "No I am hardly going to fail an old car like this that has just been restored because one of the headlights isn't level".
It turned out that I had used the adjuster screws as mounting screws through the bodywork, so instead of mounting the headlights with the screws already screwed in. I put the headlights in and then put the screws through the holes in the bodywork. I was sitting there for ages trying to workout why I couldn't get the headlight to come down to the correct level.
My neighbour corrected the error of my ways. |
|
| Back to top |
|
|
colwyn500
Joined: 21 Oct 2012
Posts: 1745
Location: Nairn, Scotland
|
| Posted: Fri Jul 04, 2014 11:32 pm Post subject: |
|
|
In the olden days my Fiat's headlamps had corroded so badly I couldn't achieve any adjustment. That's how I knew the trick with the lights.
I have no idea why the new battery cable has a low amperage supply fitted or why it is red 
I will just make it safe as it could be handy one day. |
|
| Back to top |
|
|
colwyn500
Joined: 21 Oct 2012
Posts: 1745
Location: Nairn, Scotland
|
| Posted: Fri Jul 04, 2014 11:39 pm Post subject: |
|
|

Last edited by colwyn500 on Fri Jul 04, 2014 11:58 pm; edited 1 time in total |
|
| Back to top |
|
|
colwyn500
Joined: 21 Oct 2012
Posts: 1745
Location: Nairn, Scotland
|
|
| Back to top |
|
|
kevin2306
Joined: 01 Jul 2013
Posts: 1359
Location: nr Llangollen, north wales
|
| Posted: Sat Jul 05, 2014 9:19 pm Post subject: |
|
|
My supply of Gummi turned up today.
Remarkable stuff, certainly seems to revive tired rubber seals and trims!
Kev |
|
| Back to top |
|
|
colwyn500
Joined: 21 Oct 2012
Posts: 1745
Location: Nairn, Scotland
|
| Posted: Mon Jul 07, 2014 11:52 am Post subject: |
|
|
I will try some of that "Gummi" but the "Autoglym" stuff is doing a good job for me and doesn't go over-shiny.
I am still tinkering with odd bits of trim etc. and searching for a few bits which have gone astray despite me organising storage very carefully. I even labelled things as to which side they came off the car and that has proved useful. The aluminium door sill plate is a cheap item which I could get brand new. But in the original fit and over the years it has been slightly moulded to its position and I don't thing a new one would look as good. I avoided the temptation to straighten slight flaws and this turned out to be the right move.
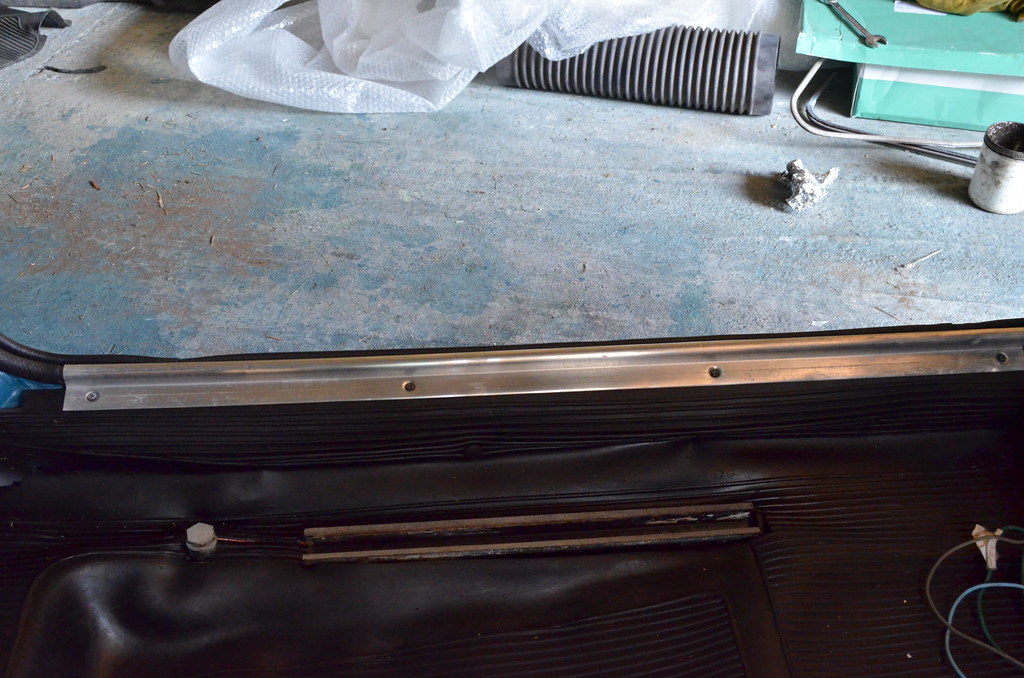 BRA_6576 by peterthompson, on Flickr BRA_6576 by peterthompson, on Flickr
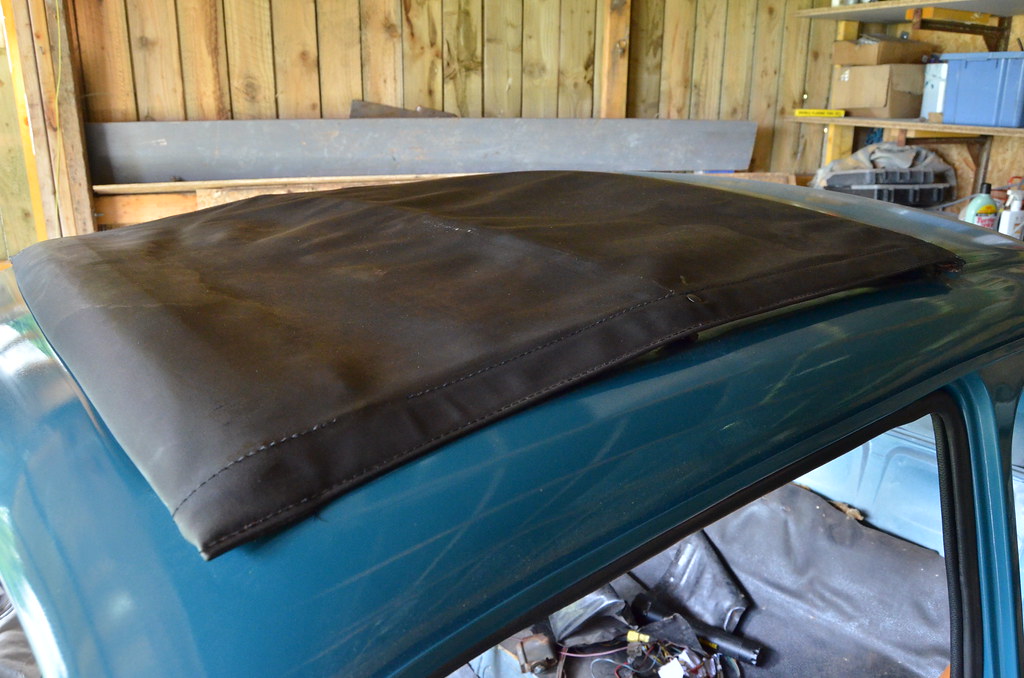
I re-fitted the sunroof having saved all the tiny nuts and washers that secure it at the rear. They are a pain to refit and even with care a couple ended up lost in the hollow of the roof. I also need to get a couple of the right sized self tappers as originally fitted for the ends. I Waxoyled the area where the fabric meets the roof and didn't replace with a strip of foam using a bead of the non-setting window mastic instead.
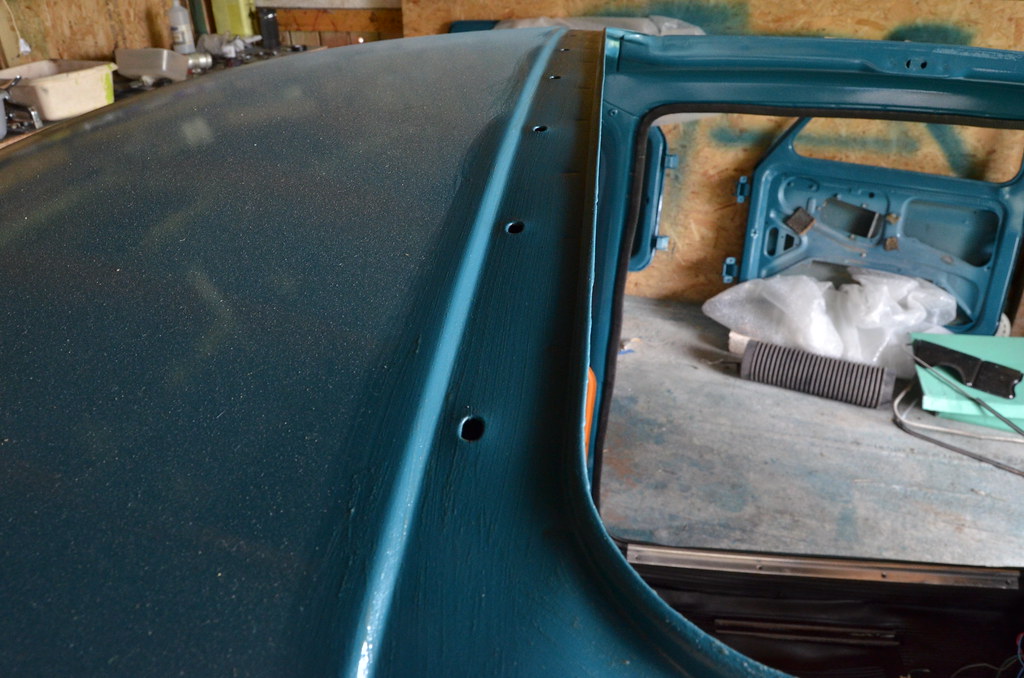 BRA_6564 by peterthompson, on Flickr BRA_6564 by peterthompson, on Flickr
 BRA_6568 by peterthompson, on Flickr BRA_6568 by peterthompson, on Flickr
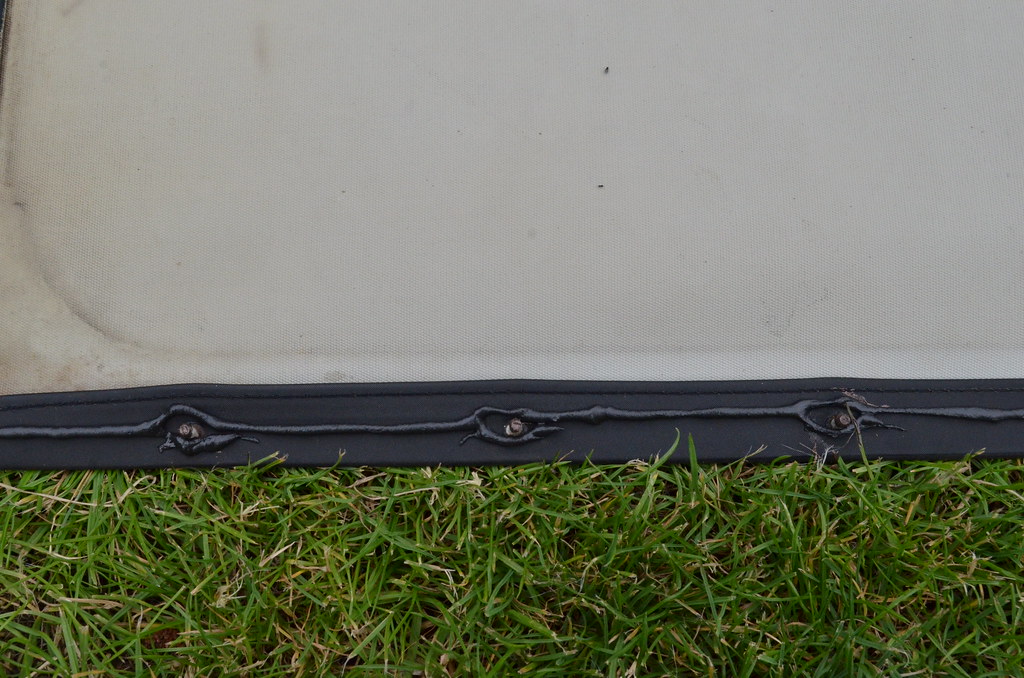
The catch at the front has two shims fitted showing how carefully this would originally have been set up.
 BRA_6569 by peterthompson, on Flickr BRA_6569 by peterthompson, on Flickr
Note that on the pivot bars the securing stud has three washers; a serrated one sandwiched between two flat ones.
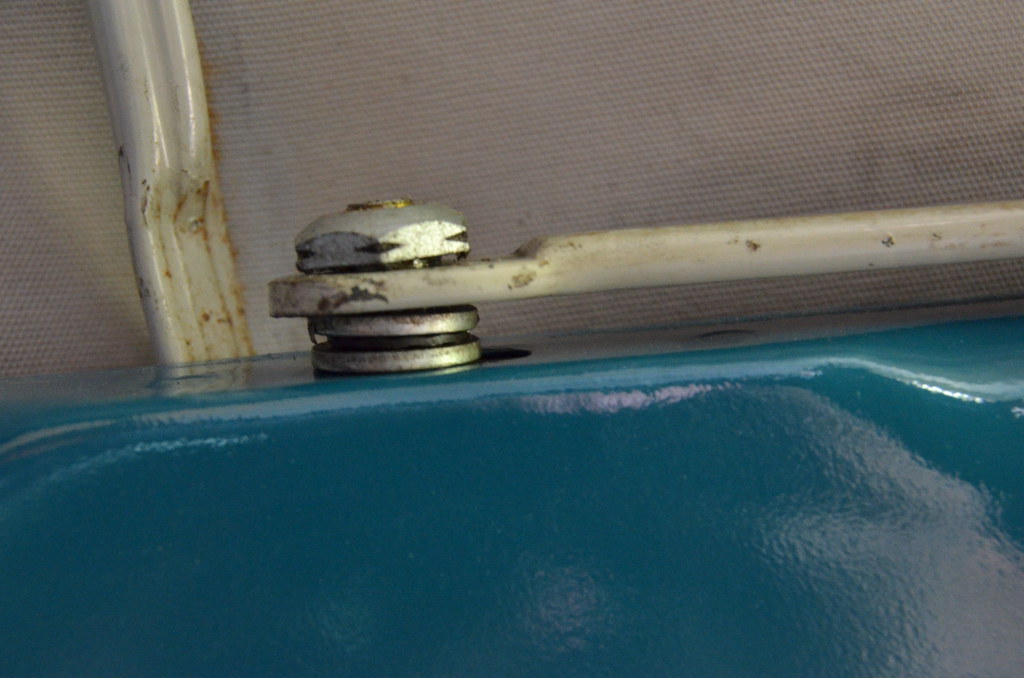 BRA_6574 by peterthompson, on Flickr BRA_6574 by peterthompson, on Flickr
I guess little details like that may have gone adrift on many cars. I can't tension properly until all the screws are in place but it feels good to have it secured.
 BRA_6575 by peterthompson, on Flickr BRA_6575 by peterthompson, on Flickr |
|
| Back to top |
|
|
peter scott

Joined: 18 Dec 2007
Posts: 7118
Location: Edinburgh
|
|
| Back to top |
|
|
colwyn500
Joined: 21 Oct 2012
Posts: 1745
Location: Nairn, Scotland
|
| Posted: Mon Jul 07, 2014 1:34 pm Post subject: |
|
|
Nearly there Peter...maybe next week 
I reached a milestone with one of the windows being back in.
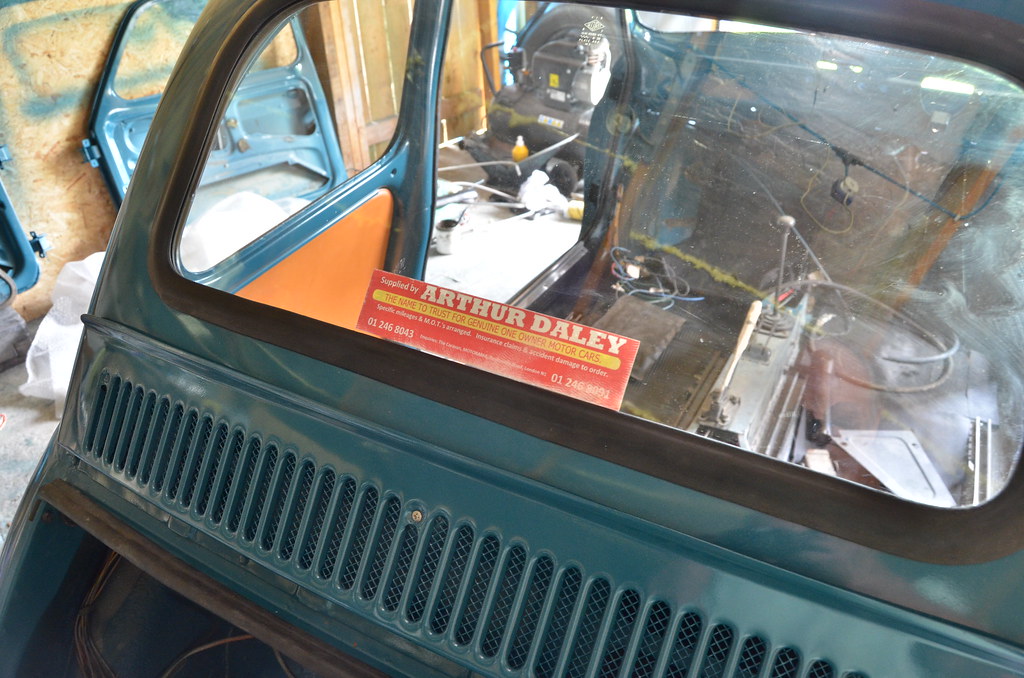 BRA_6578 by peterthompson, on Flickr BRA_6578 by peterthompson, on Flickr
There should be afoam seal under the intake grille but again, I used the non-setting mastic and plenty of Waxoyl.
Also following Tony's advice the heat shield went back easily, thanks. |
|
| Back to top |
|
|
D4B

Joined: 28 Dec 2010
Posts: 2083
Location: Hampshire UK
|
| Posted: Mon Jul 07, 2014 2:14 pm Post subject: |
|
|
| he he love the Arthur Daley sticker, just need to watch out now for the grass growing out of the front wing, where mud was used instead of filler |
|
| Back to top |
|
|
colwyn500
Joined: 21 Oct 2012
Posts: 1745
Location: Nairn, Scotland
|
| Posted: Tue Jul 08, 2014 9:21 pm Post subject: |
|
|
| D4B wrote: | | he he love the Arthur Daley sticker, just need to watch out now for the grass growing out of the front wing, where mud was used instead of filler |
"Specific mileages arranged" is the one I like. 
I have been trying to reduce the amount of clutter around me so this evening the two side windows and some big bits went back on.
The engine...
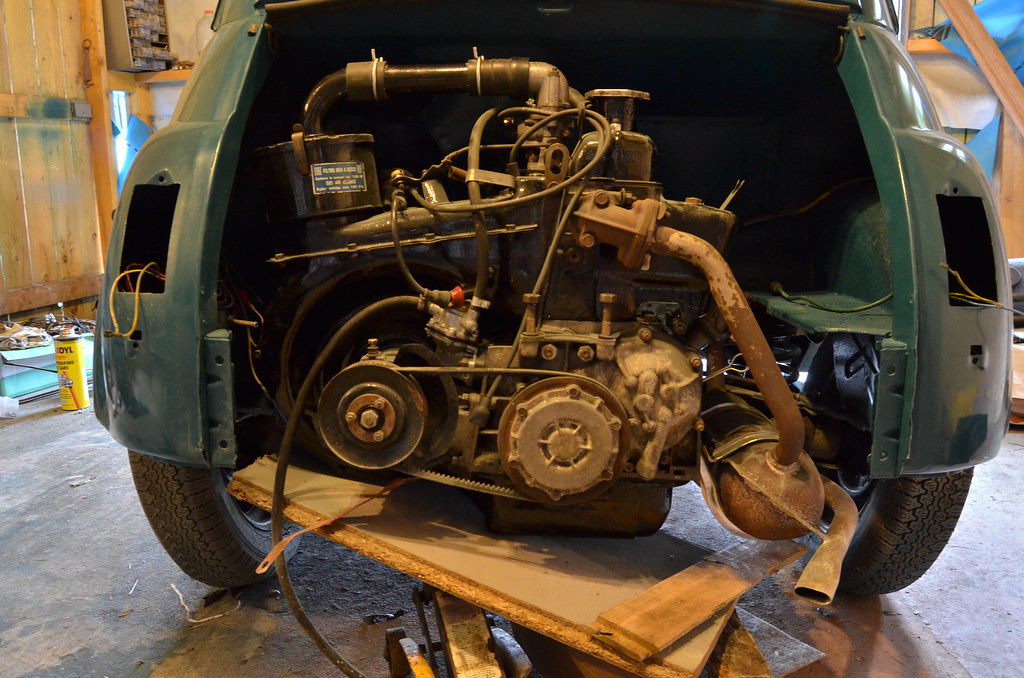 BRA_6584 by peterthompson, on Flickr BRA_6584 by peterthompson, on Flickr
No hoist or additional manpower necessary on a Fiat 500 and the actual mounting takes no more than 15 minutes if you don't count connecting pipes and cables.
I remembered to put back two insignificant pieces of plastic packing, just for originality's sake...
 BRA_6582 by peterthompson, on Flickr BRA_6582 by peterthompson, on Flickr
I was able to put the engine lid on. Much safer than hanging round the house at the mercy of SWMBO and grandkids
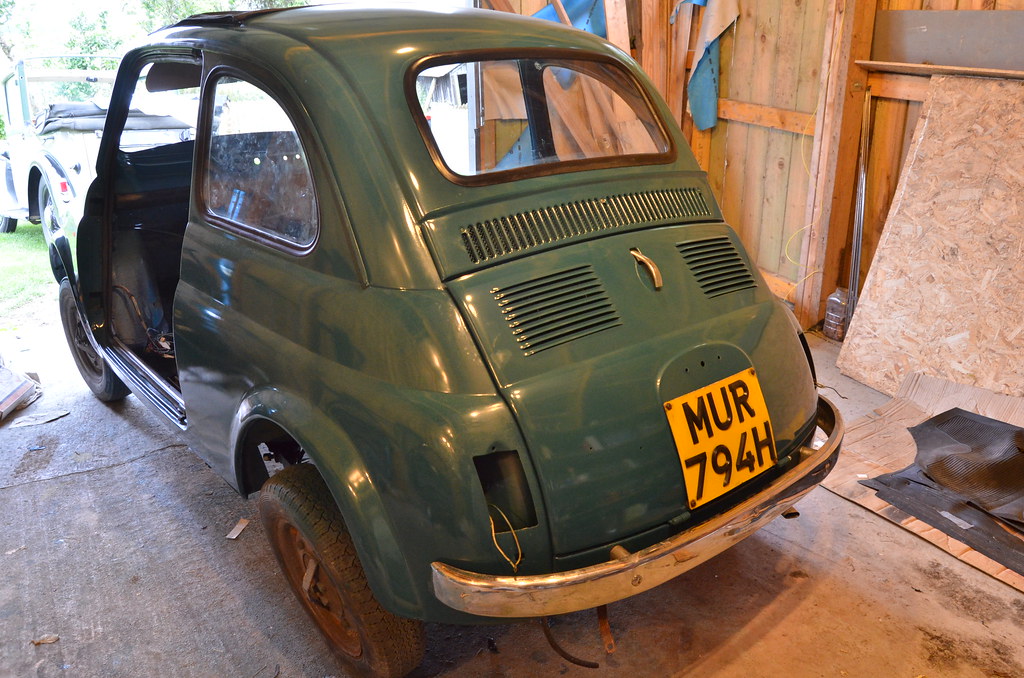 BRA_6585 by peterthompson, on Flickr BRA_6585 by peterthompson, on Flickr
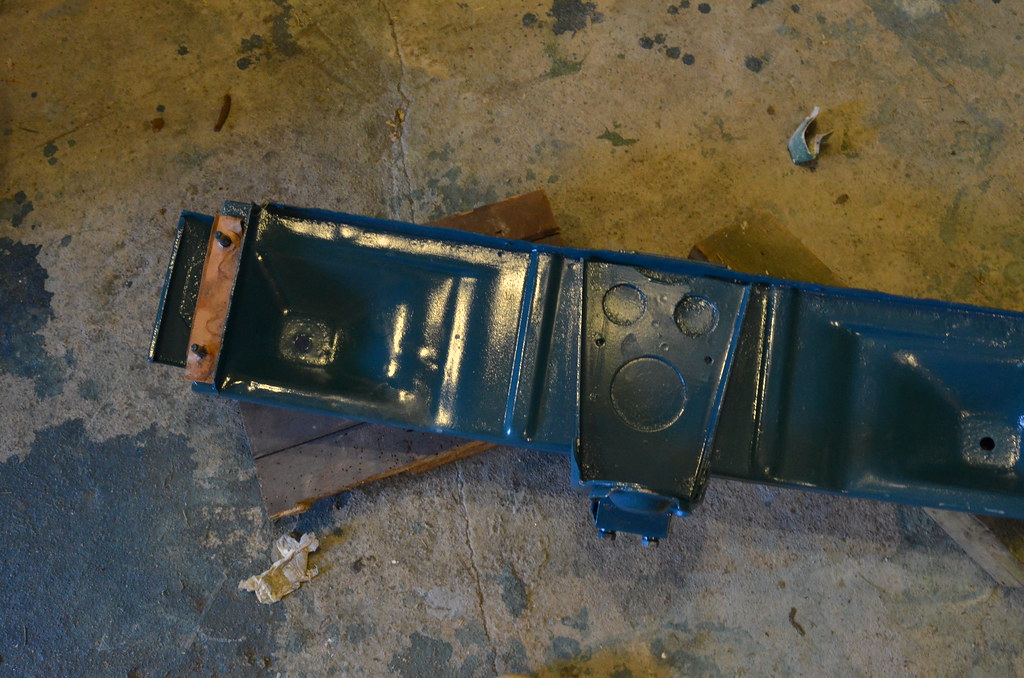
I have cleaned up the bumpers and gently tapped back a few dents. I cleaned the rust off the back and off the spacers and then wiped it all with a thin layer of Waxoyl. You can see it's starting to look good but still has a nice "lived-in" look.
 BRA_6581 by peterthompson, on Flickr BRA_6581 by peterthompson, on Flickr |
|
| Back to top |
|
|
D4B
Joined: 28 Dec 2010
Posts: 2083
Location: Hampshire UK
|
| Posted: Wed Jul 09, 2014 8:08 am Post subject: |
|
|
Hi Peter,
Wow you have been busy!! Great to see it coming along. My wife saw your number plate and said "Medicines Use Review" she is a pharmacist Strangely she was born in 1970 too.
Steve |
|
| Back to top |
|
|
|
|
You cannot post new topics in this forum
You cannot reply to topics in this forum
You cannot edit your posts in this forum
You cannot delete your posts in this forum
You cannot vote in polls in this forum
|
php BB powered © php BB Grp.
|


