
Classic cars forum & vehicle restoration.
|
|
| Author |
Message |
kevin2306
Joined: 01 Jul 2013
Posts: 1359
Location: nr Llangollen, north wales
|
 Posted: Sun Oct 20, 2013 7:38 pm Post subject: Posted: Sun Oct 20, 2013 7:38 pm Post subject: |
 |
|
have you got this car inside under cover yet?
kev |
|
| Back to top |
|
 |
Mahoney54

Joined: 23 Jul 2013
Posts: 54
Location: North West
|
| Posted: Sun Oct 20, 2013 7:43 pm Post subject: |
|
|
Sadly the garage is full of bikes.. So it can't go in there (also not sure if it would fit or not!!) it has a small cover on it at the moment, but doesn't cover all the car, mainly the roof and part of the bonnet!!
On eBay as we speak trying to locate one that will fit.. The Pops shape doesn't help!!
Charlotte!  |
|
| Back to top |
|
|
kevin2306
Joined: 01 Jul 2013
Posts: 1359
Location: nr Llangollen, north wales
|
| Posted: Sun Oct 20, 2013 8:02 pm Post subject: |
|
|
charlotte, i fear that unless you get it out of the weather it will deteriorate quicker than you can restore it!
can you not farm some of the bikes out to make space or rent a lockup?
kev |
|
| Back to top |
|
|
Mahoney54
Joined: 23 Jul 2013
Posts: 54
Location: North West
|
| Posted: Sun Oct 20, 2013 8:34 pm Post subject: |
|
|
Sadly not! They're expensive classic bikes (I've already asked my dad and got a no!) so can't store them outside!! A cover has been purchased for him now.. So he'll be covered up soon!
He has spent the last 5years outside with no cover at all, it's only since we decided to restore him, that he's had a cover!
He should be running soon, if all goes to plan!!
Charlotte |
|
| Back to top |
|
|
kevin2306
Joined: 01 Jul 2013
Posts: 1359
Location: nr Llangollen, north wales
|
| Posted: Sun Oct 20, 2013 8:42 pm Post subject: |
|
|
when i had more bikes than i could store at home i had an arrangement with a local transport museum so they displayed them safely and i got free dry and secure storage.
kev |
|
| Back to top |
|
|
Mahoney54
Joined: 23 Jul 2013
Posts: 54
Location: North West
|
| Posted: Sun Oct 27, 2013 5:47 pm Post subject: |
|
|
So today.. Only a small thing, I removed the headlining to
See if and what holes, rust or anything may be lurking below!!
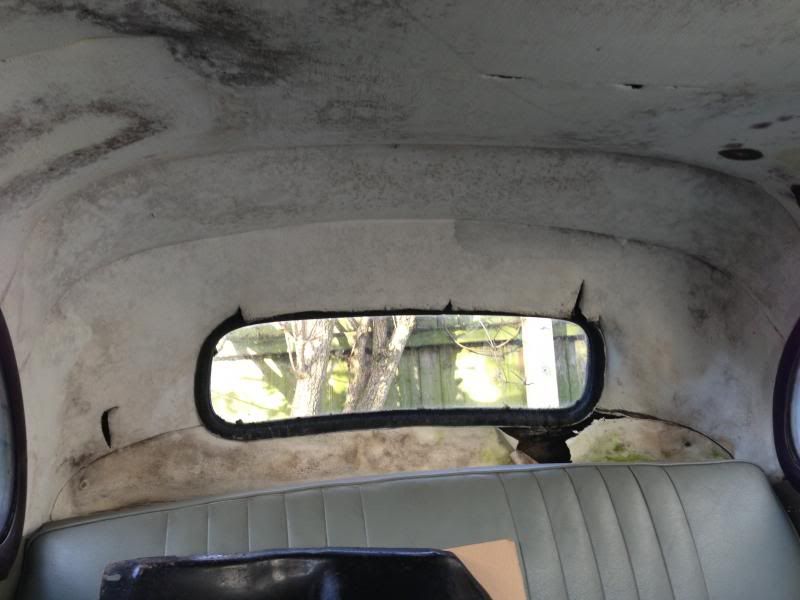
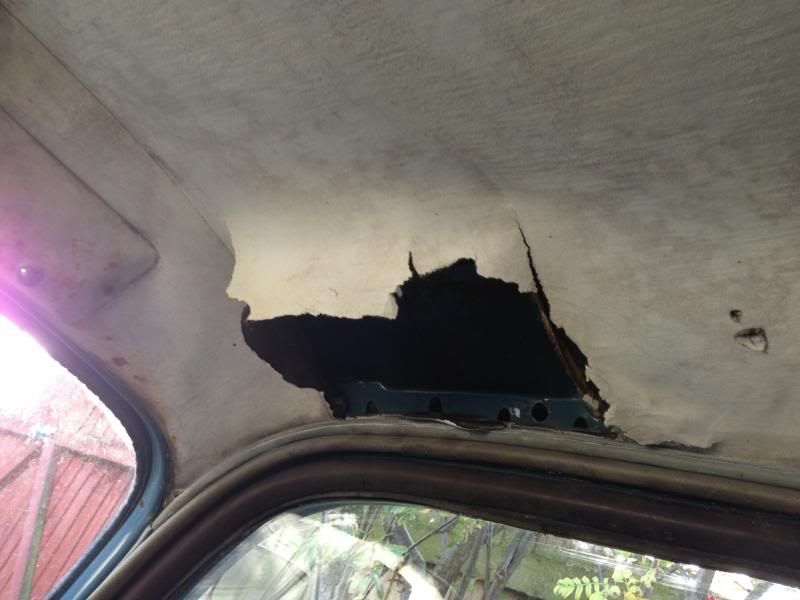
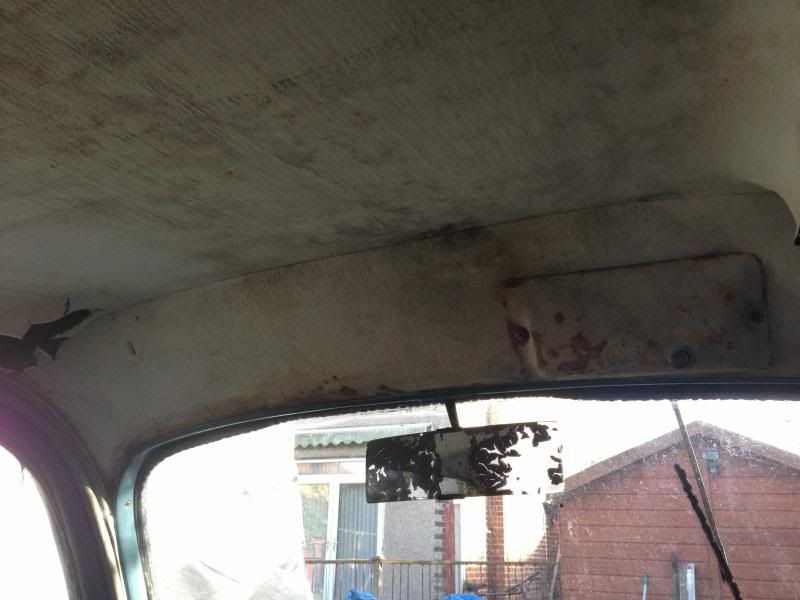
Before pictures.. And the after!
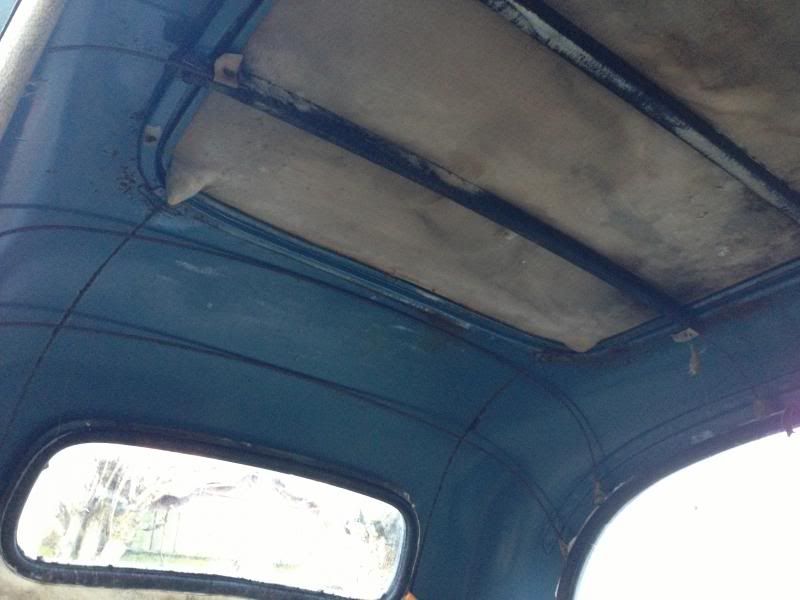
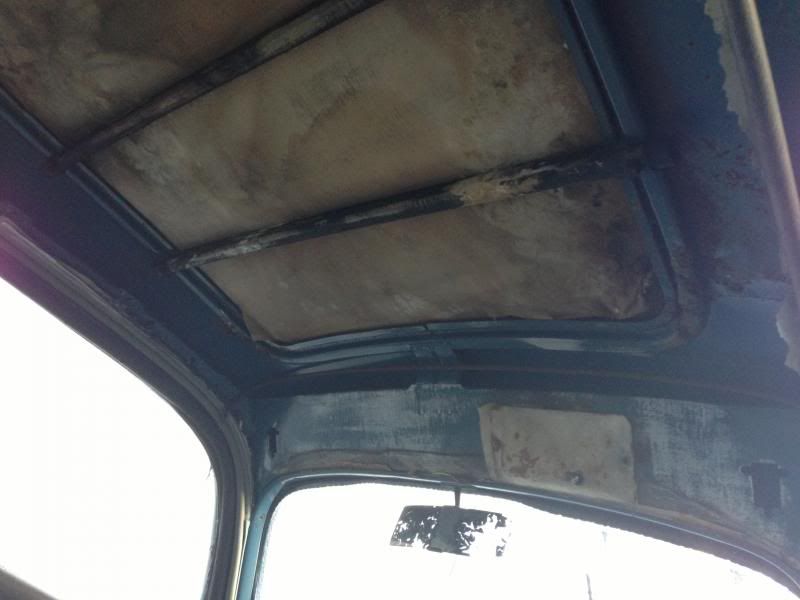
So discovered no holes, no bad rust, more cosmetical than anything!! The small leak we've discovered is because the seal on the vinyl roof has gone, so another thing to add to the to-do list!!!
Also, The Pop now has a cover too.. Just on time for winter!!
Charlotte |
|
| Back to top |
|
|
roverdriver

Joined: 18 Oct 2008
Posts: 1210
Location: 100 miles from Melbourne, Victoria, Australia
|
| Posted: Mon Oct 28, 2013 10:17 am Post subject: |
|
|
Good work, Charlotte. Glad to hear that your car is now under cover too.
If you are a bit of a seamstress as well as a mechanic, then making up a new headlining should not bee to difficult. I am sure that with the old material as a guide and template you'll find it fairly straight forward.
Many years ago, when we did our Model A Ford, my wife had to add a bit extra onto the lining, after I had fitted it almost all the way. She had to stand within the body (no floorboards at that stage), and hand-sew the extra piece in with her hands over her head- very difficult, but it worked and the job lasted.
_________________
Dane- roverdriver but not a Viking. |
|
| Back to top |
|
|
JR FLYWHEEL
Joined: 25 Mar 2008
Posts: 77
Location: Hornchurch Essex
|
| Posted: Tue Oct 29, 2013 10:55 pm Post subject: Ford Popular 103E |
|
|
Hello Charlotte,
Can i also advise you to check under the dash board of your pop.
You will find some black material along the fire wall, (where the handbrake mechanism is.) This material which is glued on can trap water, and hold that water against the steel. I found to my dismay a great deal of rust on my own pop when i checked this out a little while ago.
I've stripped out all the black insulation material , treated the rust and painted it with a good quality anti-rust black paint. It seems fine now
Please keep posting your pictures on here, it's good to see another pop.
Regards.
Flywheel |
|
| Back to top |
|
|
robo0121
Joined: 11 Nov 2013
Posts: 49
Location: Birmingham West Midlands
|
| Posted: Fri Nov 15, 2013 11:31 am Post subject: steering wheel |
|
|
| Ihave a 54 pop and my steering wheel is different although mine was 1st registered 1/1/54 so it would of been built in 53 if that makes a difference |
|
| Back to top |
|
|
Mahoney54
Joined: 23 Jul 2013
Posts: 54
Location: North West
|
| Posted: Mon May 05, 2014 4:31 pm Post subject: |
|
|
| Any help greatly appreciated got a sticky valve stops short of head by about 1mm then if pressed 'clicks' into place..have removed the spring the valve stem does not appear to have any damage there is no sign of exhaust gasses passing the guide..we have the 'mushroom tool' for removing the guide..if we remove and replace the guide how do we fit the replacement? ( engine still in car wings etc still in place) cant see how you knock it in and cant work out how you would press in given space available? if we replace the valve as well it will need lapping in to seal at top but how do you get the correct gap at tappet because the valve has to be ground (carefully I know) at the bottom but once its in you have to take the guides out all over again to remove valve to grind (oilstone.?) to the correct gap..any advice ? Thanks |
|
| Back to top |
|
|
ka

Joined: 03 Dec 2007
Posts: 600
Location: Orkney.
|
| Posted: Tue May 06, 2014 7:06 am Post subject: |
|
|
There is the correct way to do this, and the easy way.
Correct way.
I am assuming, head, manifolds and side cover removed,
bung up holes where the oil drains back into the engine with pieces of cloth to ensure items do not drop into sump,
Turn engine over (use starting handle) until sticky valve follower fully at bottom (i.e., full closed)
use spring compressor and take off valve spring retainer, remove compressor,
use a screwdriver to help remove spring,
squirt oil around valve stem,
use screwdriver to get the valve fully open,
put mushroom device over valve on to split collets,
tap gently,
try to rescue collets,
measure length of old valve,
get new valve, or if new old stock ensure it is either inlet or exhaust, to suit (if in doubt use exhaust),
remove cam follower, then again bung up hole with a piece or cloth,
if you have a seat cutter, a light cut may help, if not grind in valve using course first then fine paste, use the dummy valve locating tool now, or if you do not have one, clean up the collets with a wire brush, replace the valve, wriggle in the collets and tap into place,
tap the valve head with a hammer to seat the valve, then grind in, if the valve tool keeps slipping off, spit on it!,
clean seat between applications and when an uninterupted grey band appears on the seat and the valve you are winning,
disassemble and clean everything, remaining valve grinding paste will destroy the engine,
replace follower,
replace old valve as a guide to establish length of new valve, check gap with feeler gauge and establish how long the new valve needs to be,
shorten new valve(if needed) using grind stone, final dressing with oil stone (I use the fine end of a bench grinder, using the steady plate as a guide to ensure the valve is square)
replace check gap,
rebuild remembering to tap the valve when rebuilt with collets to ensure flat,square,
reassemble spring etc.
Easy way.
remove spring and retainer,
ensure valve fully closed with cam shaft lobe at bottom,
squirt oil liberally over valve stem,
lever valve to fully open,
squirt oil over stem guide,
tap with hammer till fully closed,
squirt oil over valve stem then lever valve up,
repeat until valve free.
Not perfect but works 99.9% of time!
_________________
KA
Better three than four. |
|
| Back to top |
|
|
roverdriver
Joined: 18 Oct 2008
Posts: 1210
Location: 100 miles from Melbourne, Victoria, Australia
|
| Posted: Tue May 06, 2014 10:44 am Post subject: |
|
|
I agree with everything that ka has said. From my rather extended experiences with Model A Fords that have the same style of valve, working a stuck valve up and down with liberal doses of oil should eventually free it quite nicely.
As to valve-grinds, again I agree with ka, however if you are lucky enough to obtain a second-hand pair of valve guides, keep them handy. A trick for easier valve grinding that I used was to take a reasonable but worn guide, that I would not use in an engine. I would grind off most of the protrusion from the bottom half. A rubber band was used to hold the two halves together and the assembly would be snapped onto the valve to be ground, but the dummy guide is upside down. The valve and modified guide would then be inserted from the top, and even though a bit worn, the modified guide would maintain the valve stem running true for the grinding process.
Grinding off some of the bottom of the guide gave sufficient room to allow the head of the valve to seat nicely. Inserting the guide upside down, meant that it was easy to pull the valve and guide from the block for checking, cleaning etc. Once all valves had been lapped in properly, and the area thoroughly cleaned of all paste residue, then the 'good' guides can be inserted in the normal way. The modified guide should then be stored away in a very safe place, ready for use in a few (many) years time.
_________________
Dane- roverdriver but not a Viking. |
|
| Back to top |
|
|
Mahoney54
Joined: 23 Jul 2013
Posts: 54
Location: North West
|
| Posted: Tue May 06, 2014 4:08 pm Post subject: 103e valve guides |
|
|
| Hi thanks for the replies on grinding the valves..when the valve guide / collars are knocked out how do we get them / or new back in ? Not much room to knock them in? Do we need a special tool to press them in ? Thanks |
|
| Back to top |
|
|
ka
Joined: 03 Dec 2007
Posts: 600
Location: Orkney.
|
| Posted: Tue May 06, 2014 5:34 pm Post subject: |
|
|
No, clean them well with a wire brush (inlet fit considerably easier than exhaust due to contamination), put some oil on the guide and in the block then,
pop the valve in,
it is a fiddle, but slide the back (cylinder side) guide up the valve stem, and push it in all the way (it is easier to do than describe).
You may need to hold rear guide in place, whilst sliding the other guide in place, push up until either fully home, or it sticks (usually the latter).
Using a screwdriver, or longish drift, tap the guide up until it is full home, the shoulder of the guide will be flush with the block, if it sticks or cockles over, pull the valve to straighten things up, but do not go mad, do not bend the valve stem.
Replace the valve spring (screwdriver again),
Compress the spring and refit the retainer.
remove compressor
ensure valve fully closed, and tap with hammer to seat it.
_________________
KA
Better three than four. |
|
| Back to top |
|
|
Mahoney54
Joined: 23 Jul 2013
Posts: 54
Location: North West
|
| Posted: Wed Jun 11, 2014 7:11 am Post subject: |
|
|
Morning everyone!
Just a little update! 6 valves out, 2 left to get out (that's my task!!) and then back in they go, once we've grinded them back in!
Also, we have a working starter motor, and dynamo! Thanks to a very useful grandad of mine, that has now said he wants to help get the pop running!
Will keep you all updated, hopefully by the end of the week, we should have it ready to put back together! Fingers crossed!
Charlotte |
|
| Back to top |
|
|
|
|
You cannot post new topics in this forum
You cannot reply to topics in this forum
You cannot edit your posts in this forum
You cannot delete your posts in this forum
You cannot vote in polls in this forum
|
php BB powered © php BB Grp.
|


