
Classic cars forum & vehicle restoration.
|
|
| Author |
Message |
CTDavies
Joined: 09 Dec 2015
Posts: 16
|
 Posted: Tue Jan 03, 2017 9:16 pm Post subject: My Jaguar Mk1 project Posted: Tue Jan 03, 2017 9:16 pm Post subject: My Jaguar Mk1 project |
 |
|
Hello all,
this is just a test as I am new to Photobucket and it's only my second post here and the first time I am adding an image to my post, so please be patient with me.
I would like to show you my Jaguar Mk1 project.
It's a 1956 2.4 Litre that I had shipped over from the States
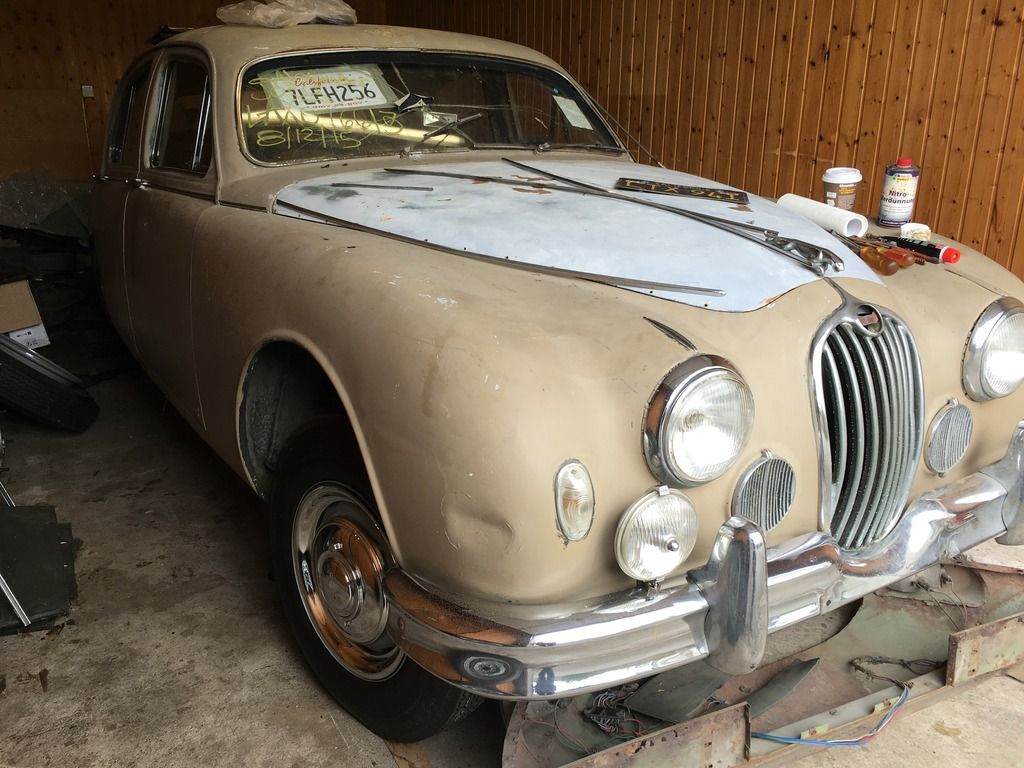
Is this image too big? I left the files in the original size before I uploaded. My it's better if I reduce the size.
In the next few days/weeks I want to tell you more about my small Jaguar collection. I hope I'm in the right place.
--Chris |
|
| Back to top |
|
 |
CTDavies
Joined: 09 Dec 2015
Posts: 16
|
| Posted: Tue Jan 03, 2017 9:52 pm Post subject: |
|
|
This car was listed on eBay a little more than a year ago and it was fairly cheap. From the images there I assumed that it was in fairly good shape (being a west coast car) but still needing a full restoration. So far I haven't been disappointed.
I already had a very early and complete 2.4 Litre Mk2 engine with gear box which was in an XK140 I had bought earlier. As this one was missing it's engine I thought it an ideal car for the one I had.
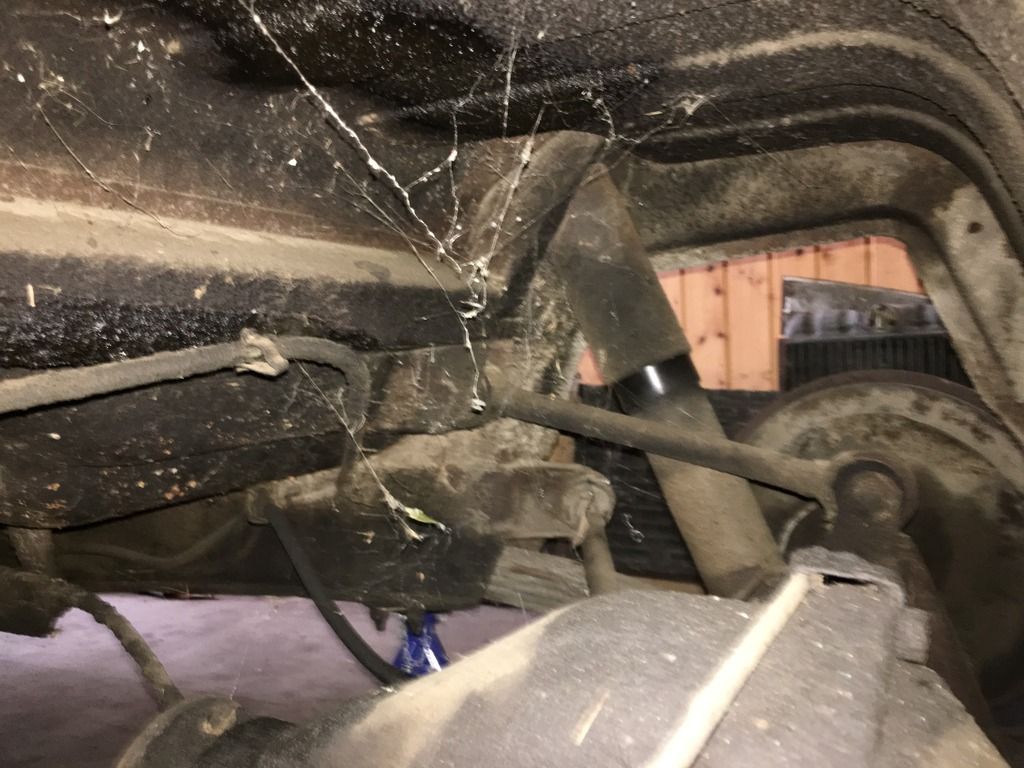
The tie rod tube was badly bent as if someone had tried to tow the car without realizing there was something in the way. While unloading it from the trailer after I had picked it up from customs I noticed that it was very hard to move her around and thought at first that that might be from the front wheels not lining up properly. So I jacked her up and took the wheels off to get at the tube. It was then that I realised that the front wheel hubs hardly moved at all. The grease in the bearings had gummed up to a consistency like epoxy resin. So I also had to remove all the front bearings, which are quite obviously replacements, and clean them in car fuel. I'm now waiting for the felt hub seals, hoping I can then get her back on her wheels again soon.
After that I will trailer her down to Cologne Wessing for dry ice blasting to see how much rust is realy there.
The so called crow's feet
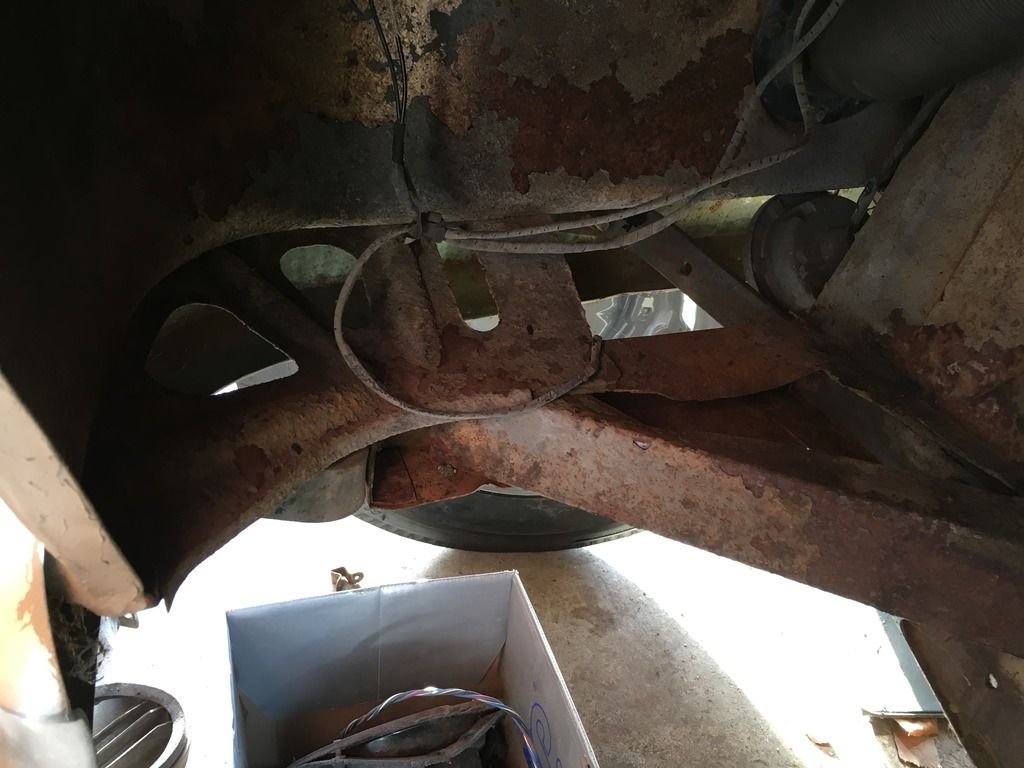
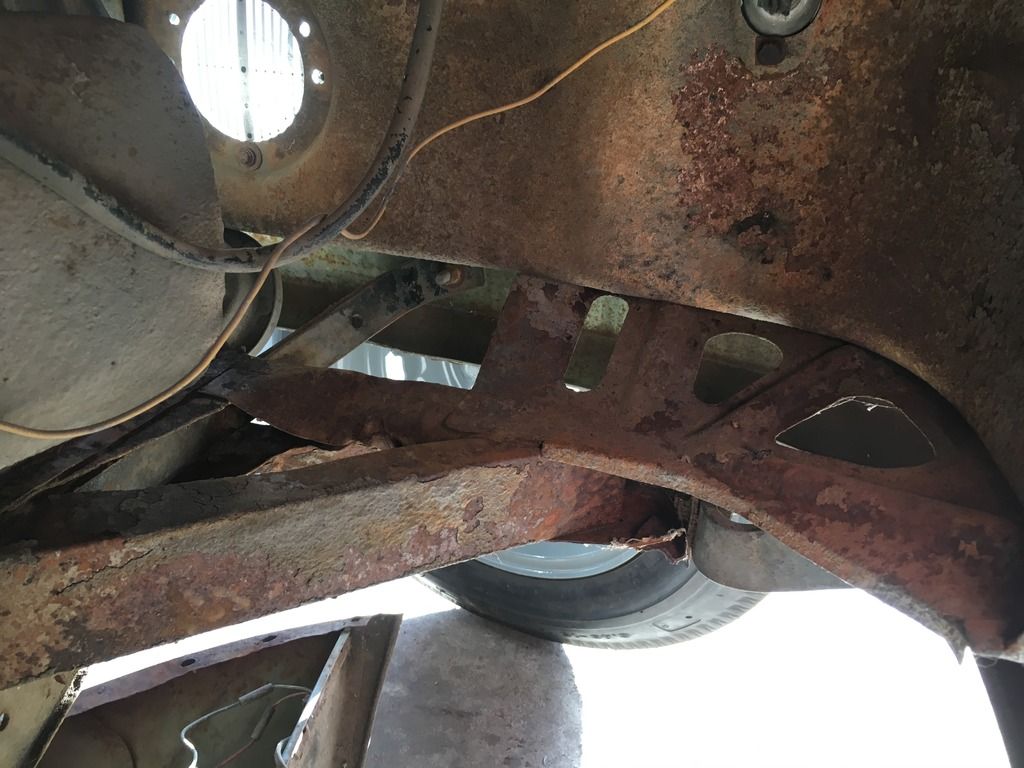
The rear axle with the torque arms.
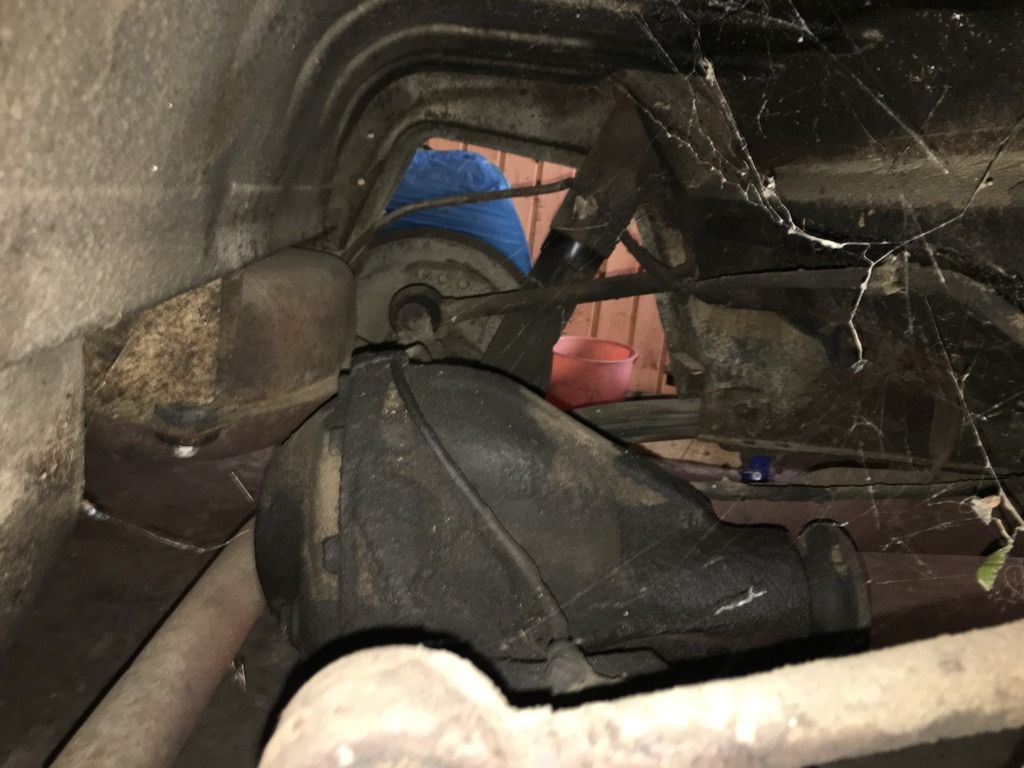
Here the other side with the panhard rod partly visible
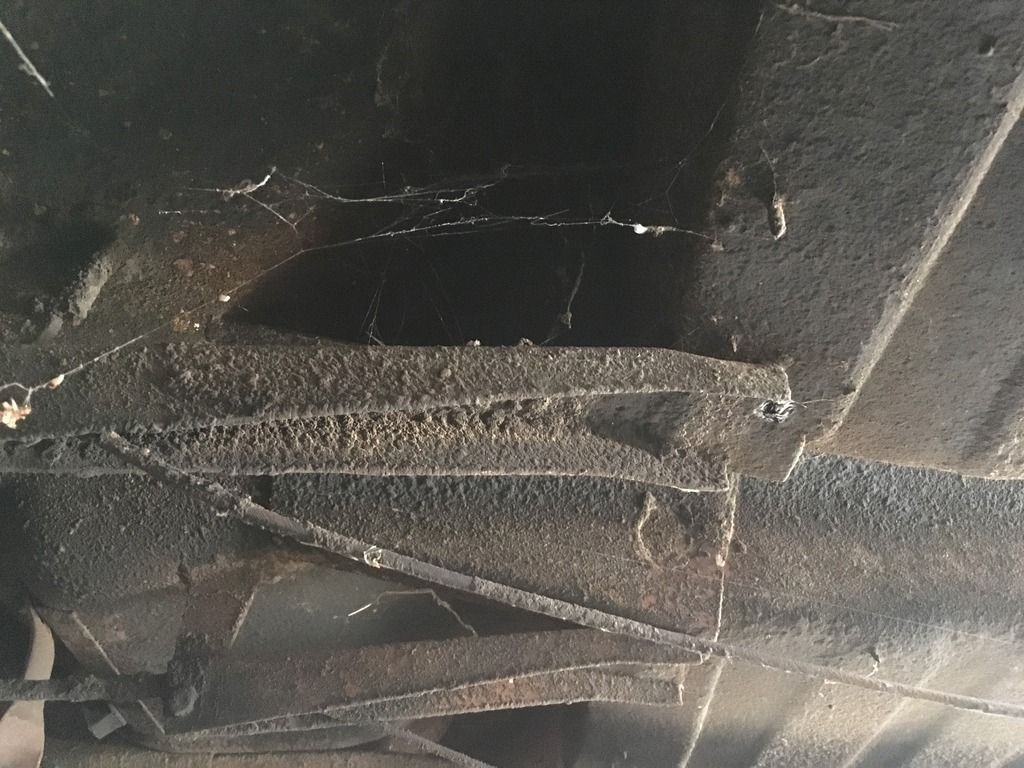
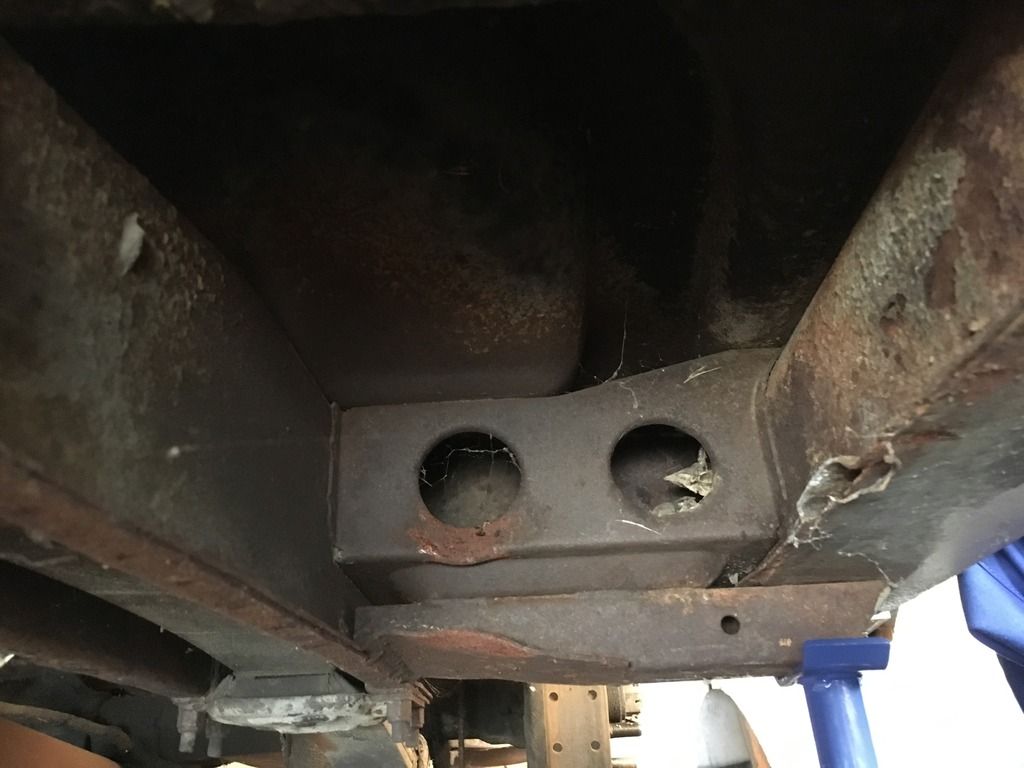
Last one for today: a close up of the floor
--Chris |
|
| Back to top |
|
|
Rick
Site Admin

Joined: 27 Apr 2005
Posts: 22442
Location: UK
|
|
| Back to top |
|
|
Ellis
Joined: 07 Mar 2011
Posts: 1382
Location: Betws y Coed, North Wales
|
| Posted: Wed Jan 04, 2017 7:52 pm Post subject: |
|
|
Very nice too! The Mark One, although it was never called that officially, has that "right" 1950s look.
If you read Nigel Thorley's major work on the Jaguar Mark One/Two you will see a photograph of a basic or fleetline Jaguar 2.4.
They were sold without a heater or overdrive and one of those must be rare now.
Good luck with the restoration, you have the basis of a fine motor car there.
_________________
Starting Handle Expert
1964 Jaguar Mark 2 3.4 litre
1962 Land Rover Series 2a 88"
2002 BMW M3 E46 Cabriolet |
|
| Back to top |
|
|
lowdrag
Joined: 10 Apr 2009
Posts: 1585
Location: Le Mans
|
| Posted: Wed Jan 04, 2017 8:25 pm Post subject: |
|
|
I regret bitterly the day I sold mine. One owner and 18000 on the clock and cannot for the life of me understand why I didn't keep it. Enjoy, but get the Solex right!
Last edited by lowdrag on Wed Feb 01, 2017 6:29 am; edited 2 times in total |
|
| Back to top |
|
|
kevin2306
Joined: 01 Jul 2013
Posts: 1359
Location: nr Llangollen, north wales
|
| Posted: Thu Jan 05, 2017 9:42 am Post subject: |
|
|
looks a lovely project and looking forward to seeing your progress.
Kev |
|
| Back to top |
|
|
CTDavies
Joined: 09 Dec 2015
Posts: 16
|
| Posted: Wed Jan 11, 2017 8:25 pm Post subject: |
|
|
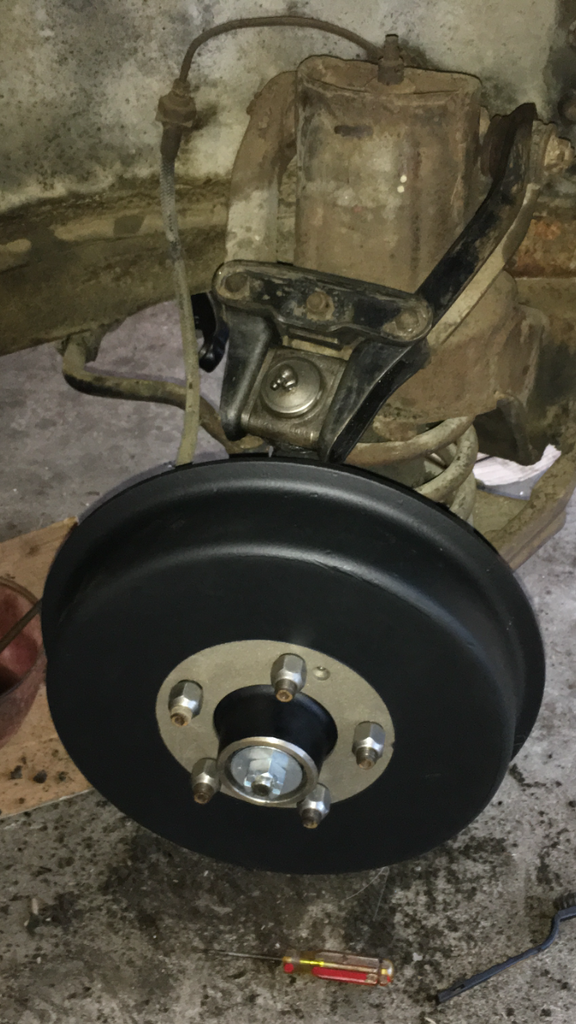
I'm waiting for the felt seals and containers to arrive so in the mean time I cleaned the hubs and gave the drums a few coats of paint
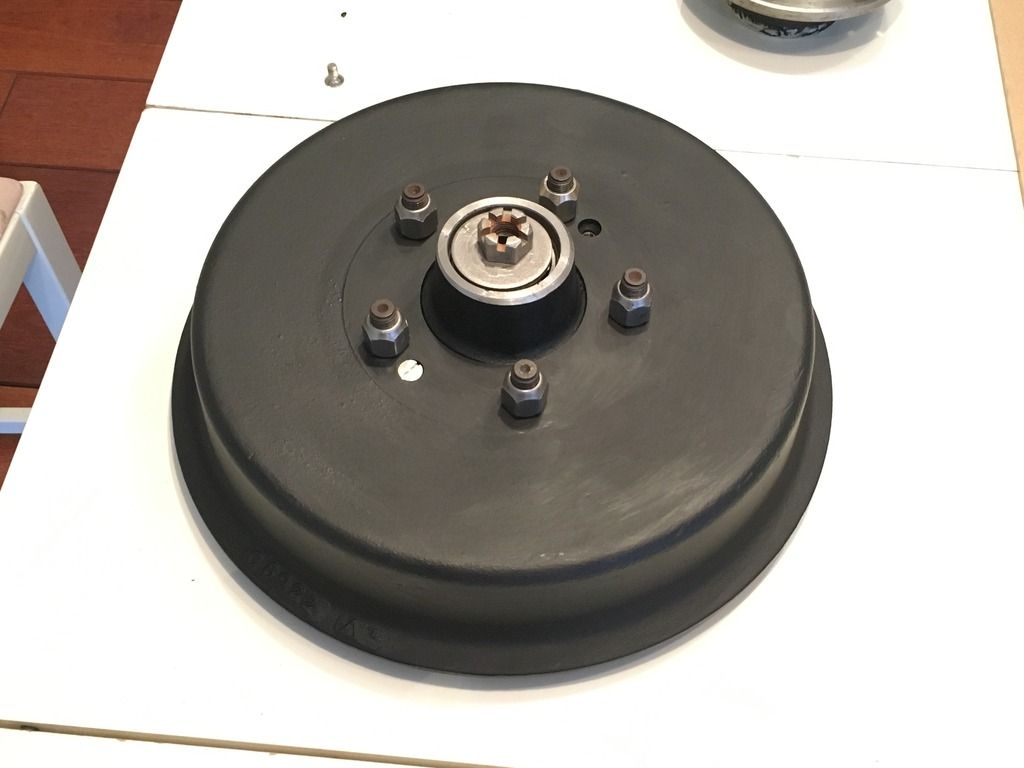
I don't really like the brush marks on the brake drum so I might give it a try with a rattle can. But, hey, it's only a brake drum (I'm saying to myself)
--Chris |
|
| Back to top |
|
|
CTDavies
Joined: 09 Dec 2015
Posts: 16
|
| Posted: Sat Jan 14, 2017 3:07 pm Post subject: |
|
|
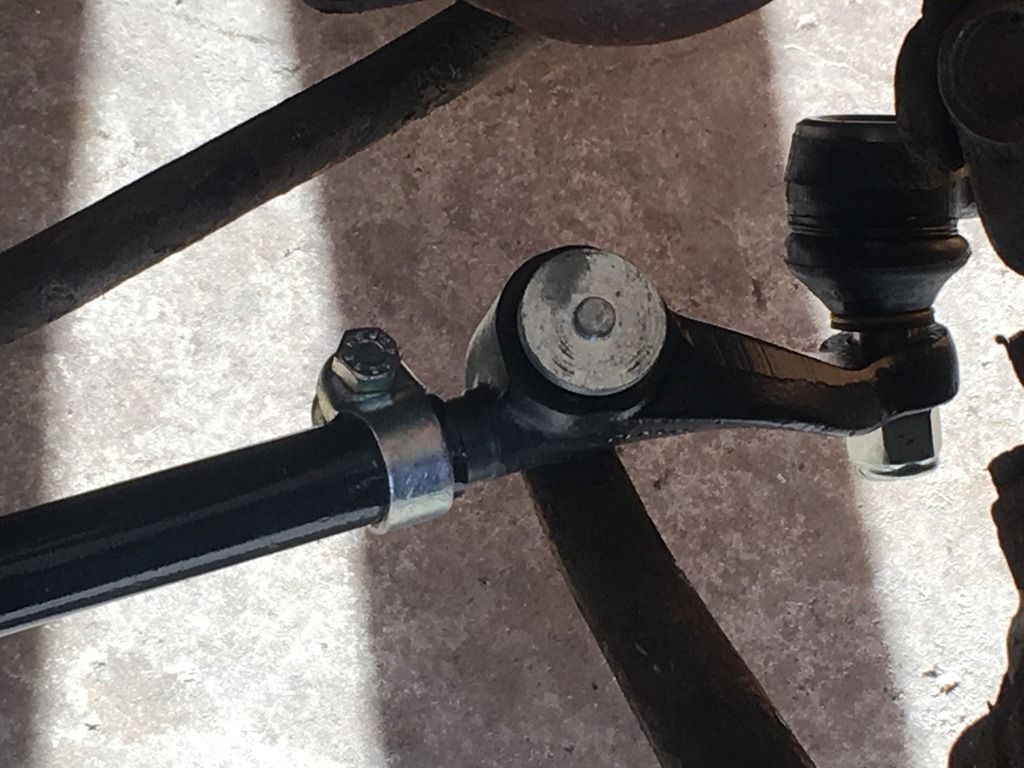
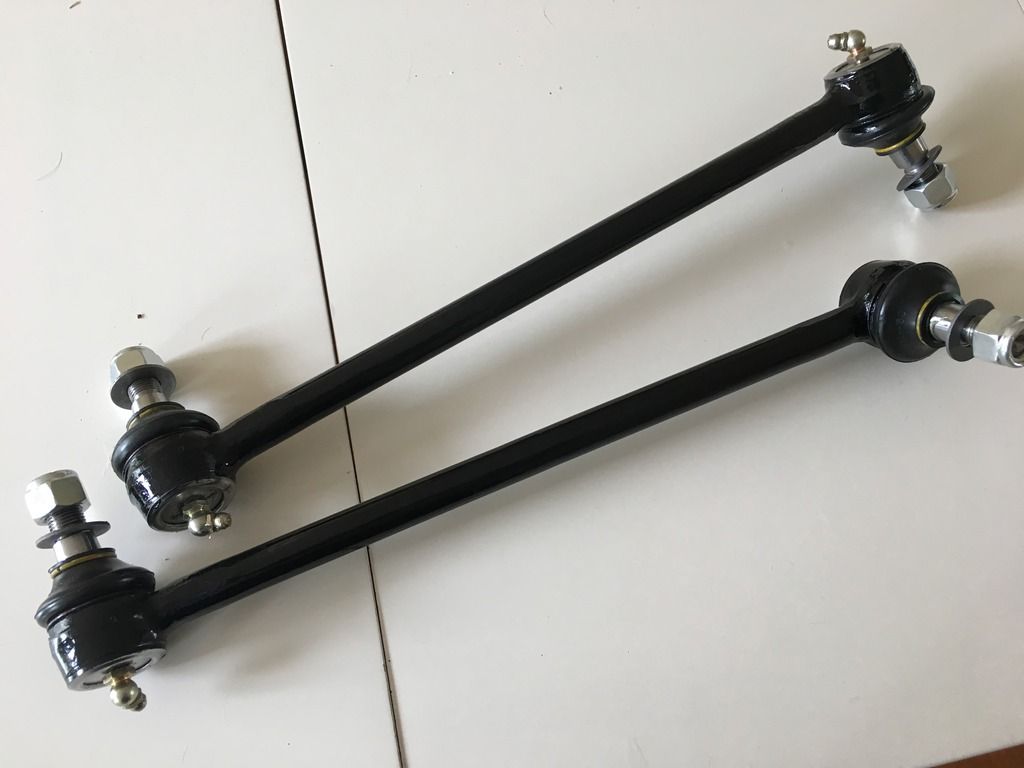
The outer tie-rods arrived today, well one did. An ebay supplier had several LH ones so I ordered two hoping I'd be able to get one changed. A day after I ordered them I found a LH and RH pair which I also bought as these are hard to get. I could have ordered the replacements for the Mk2 which also are adjustable but wanted the looks of the original ones, although this means the track can only be adjusted by the tie-rod tube and the two end assemblies, which is a huge disadvantage. So much for wanting original looks (of parts you can't see anyway).

The parts that needed to be taken out to get at the tie-rod tube were all cleaned and powder coated.
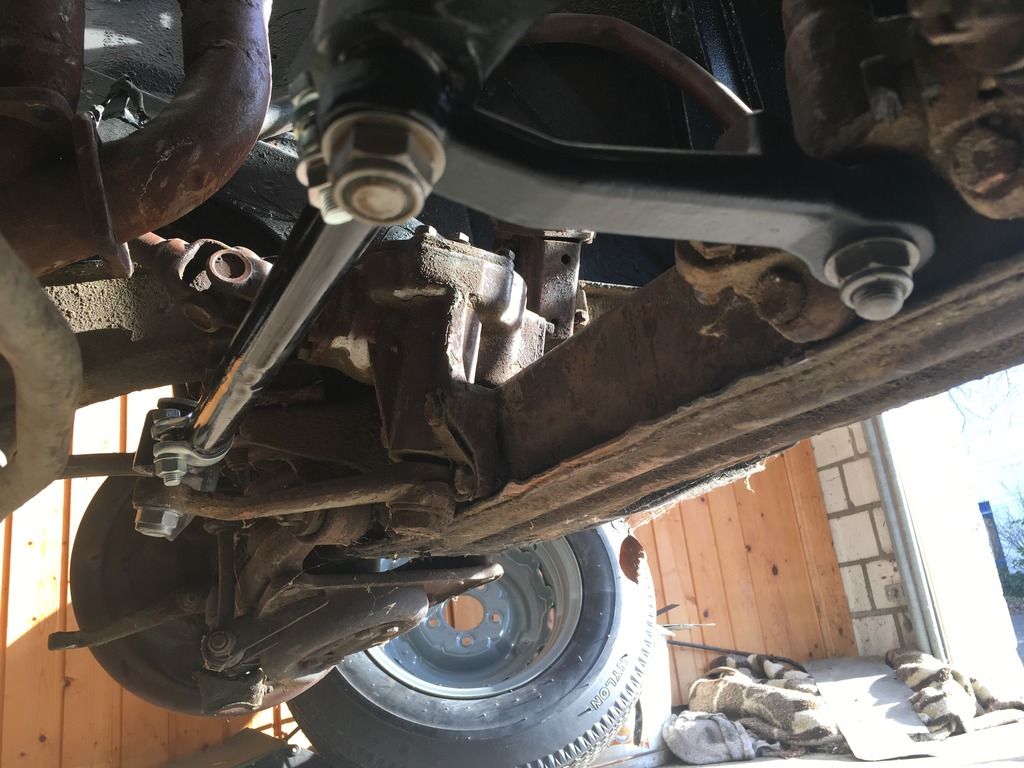
While everything was taken apart I got replacement tie-rod end bushes. I couldn't get them in place myself but needed the help of the local machine shop. They used a hydraulic press.
Some more shots from below: the rear jacking tube assemblies. I believe that these can look pretty rough on some unrestored cars.
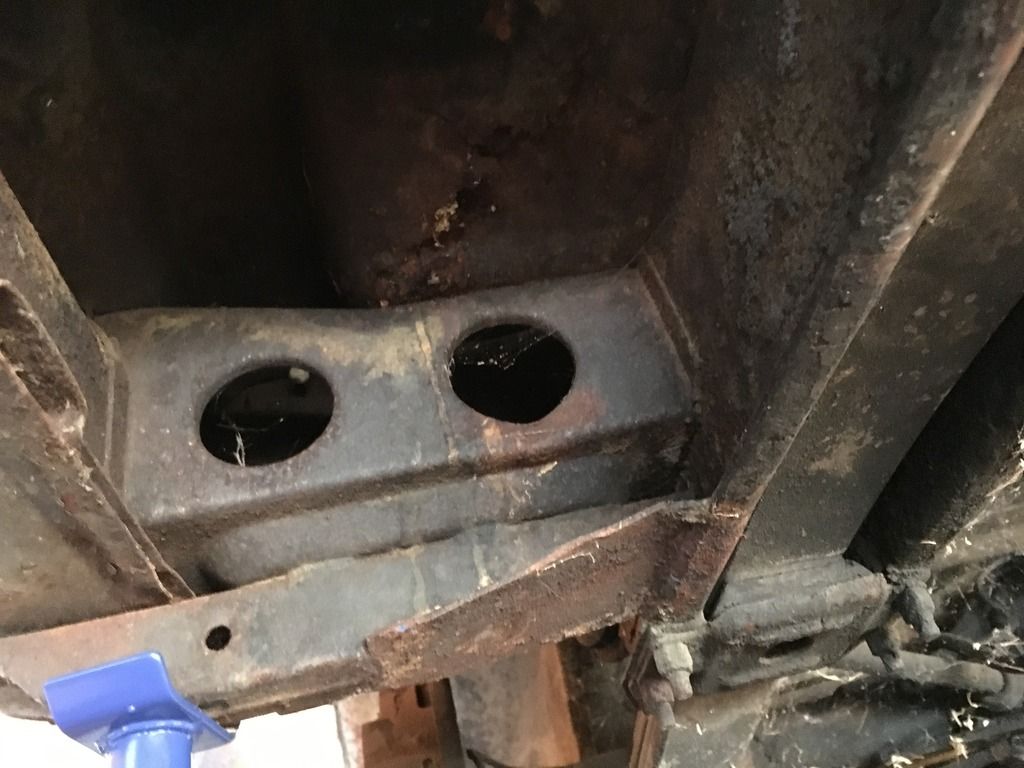
As I said earlier: the goal right now is to get the car back on its wheels so I can get it ice-blasted. Also, I want to be able to move it in and out of the garage myself as the space available right now is quite cramped so then I can move it out of the garage as soon as the weather improves, to work on it outside.
--Chris |
|
| Back to top |
|
|
Rich5ltr

Joined: 28 Mar 2008
Posts: 678
Location: Hampshire, UK
|
| Posted: Sat Jan 14, 2017 8:14 pm Post subject: |
|
|
| Excellent project Chris, I will follow your posts with interest. |
|
| Back to top |
|
|
CTDavies
Joined: 09 Dec 2015
Posts: 16
|
| Posted: Sat Jan 21, 2017 9:32 pm Post subject: |
|
|
Hi all, thank you very much to those that made their kind comments here, they are very much appreciated.
So the first hub seals order finally arrrived but things were not good - at first.
I had ordered the rubber type from xks unlimited as it was listed under Mk1 parts although I should have paid closer attention to the image that was shown close to the part with the reference number.
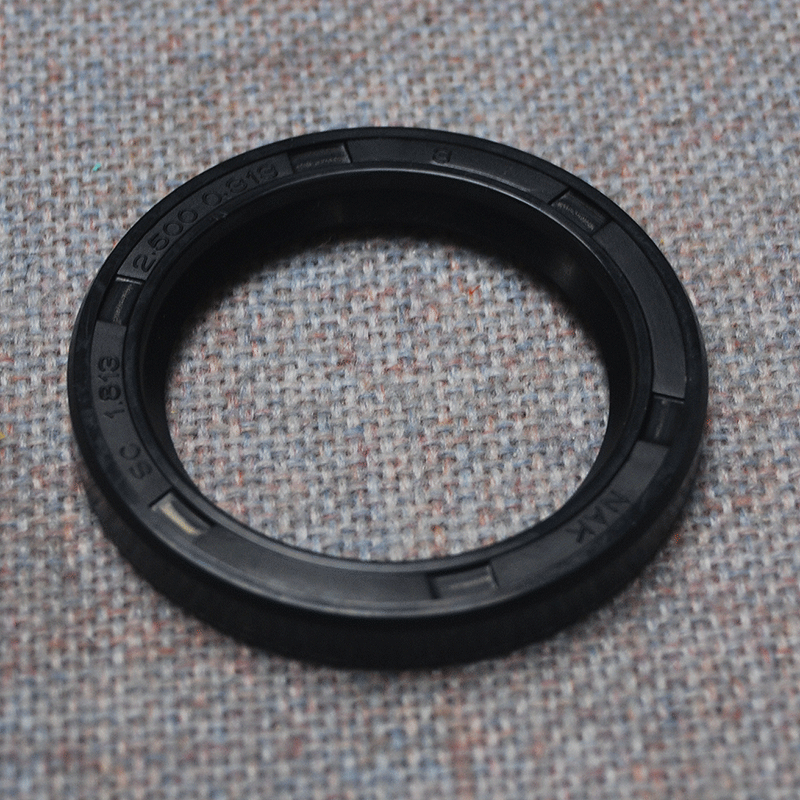
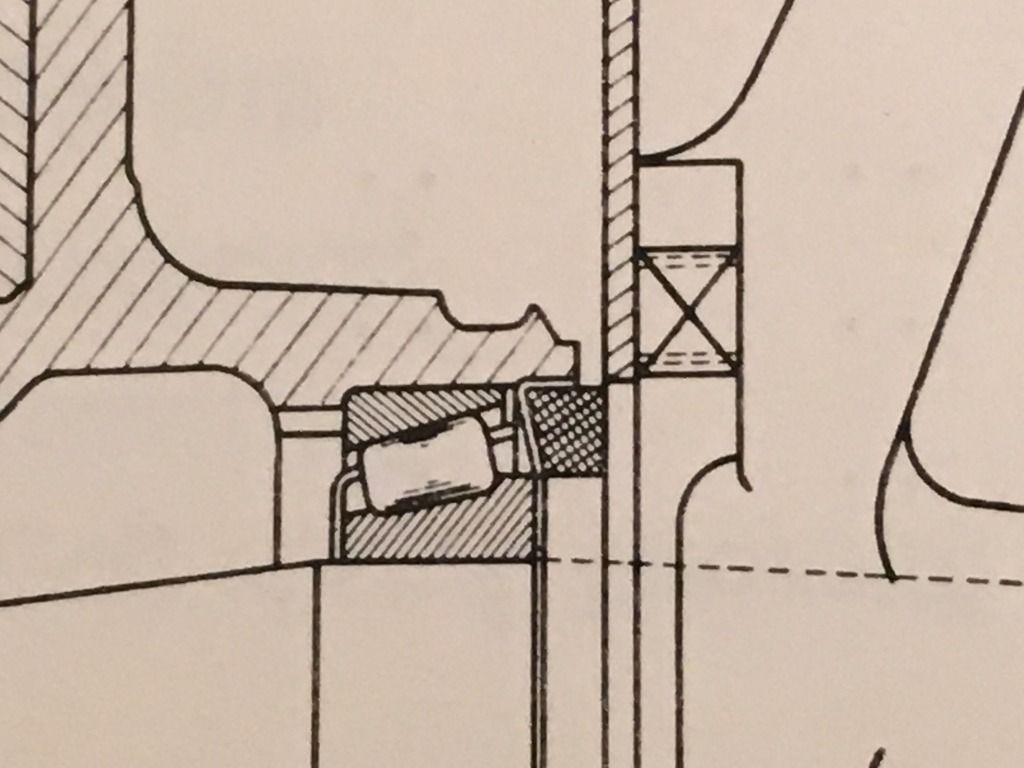
Then I would have realised that it could not be right. It is actually for a Mk2 (I assume) and designed for a totally different application (here it's number 10)
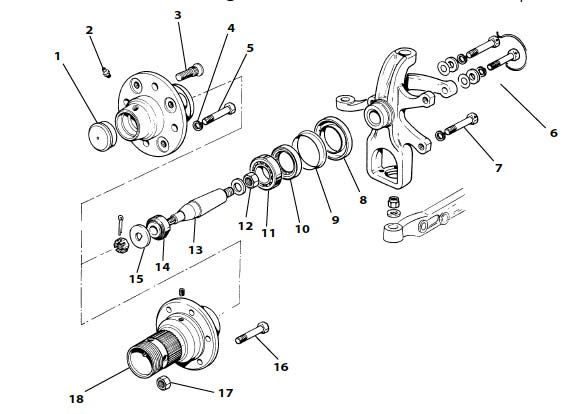
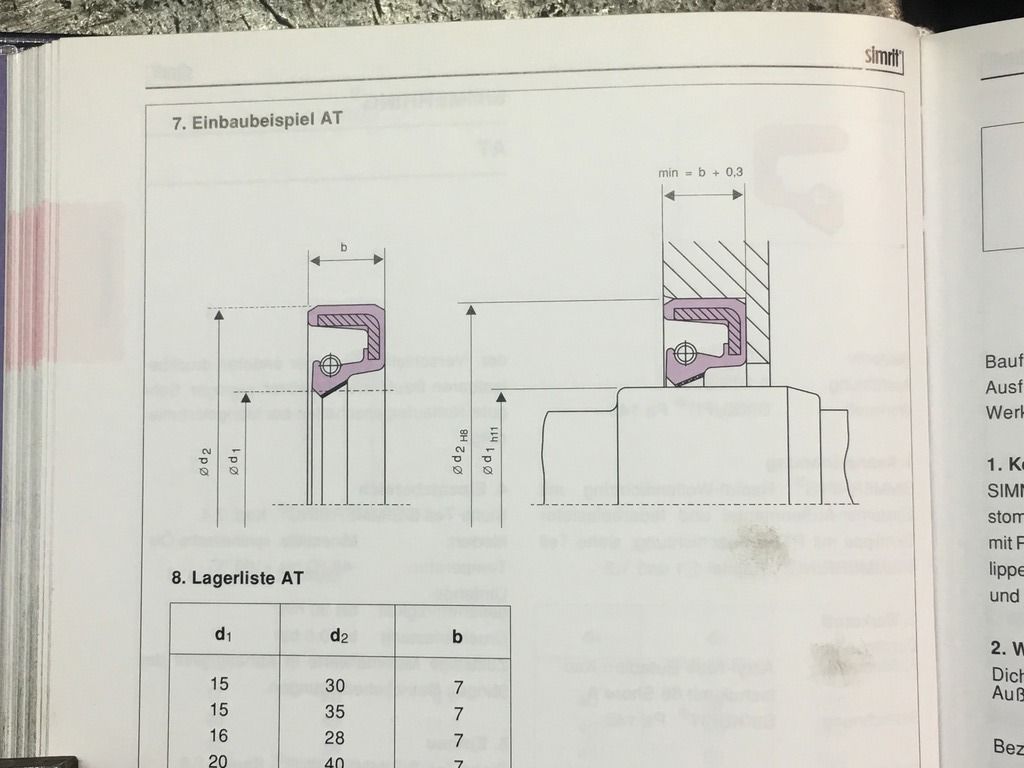
The inside face is V-shaped and it's correct application is shown here on an image out of a workshop manual that the guys at the local machine shop showed me. Anyone can tell that this won't work on a Mk1 hub.
Using the xks Unlimited seals was out of the question and I waited for the MkVII / VIII seals to arrive from SNG Barratt hoping they would work better.
Nope - they are way too big. Too bad but worth a try, anyway.
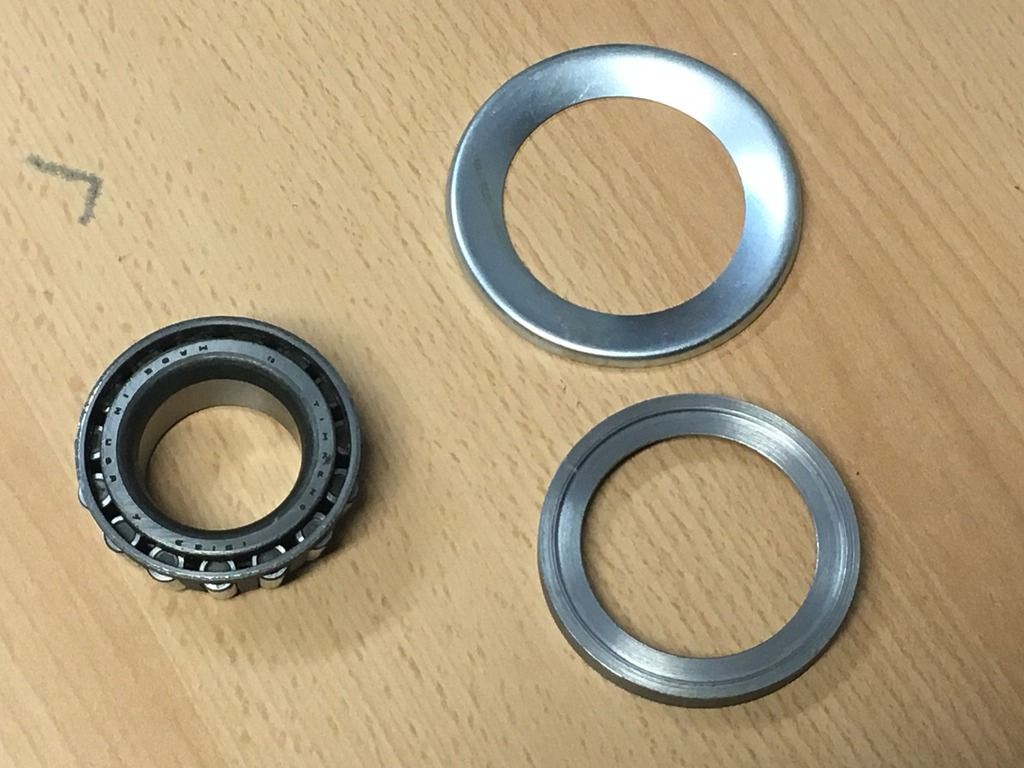
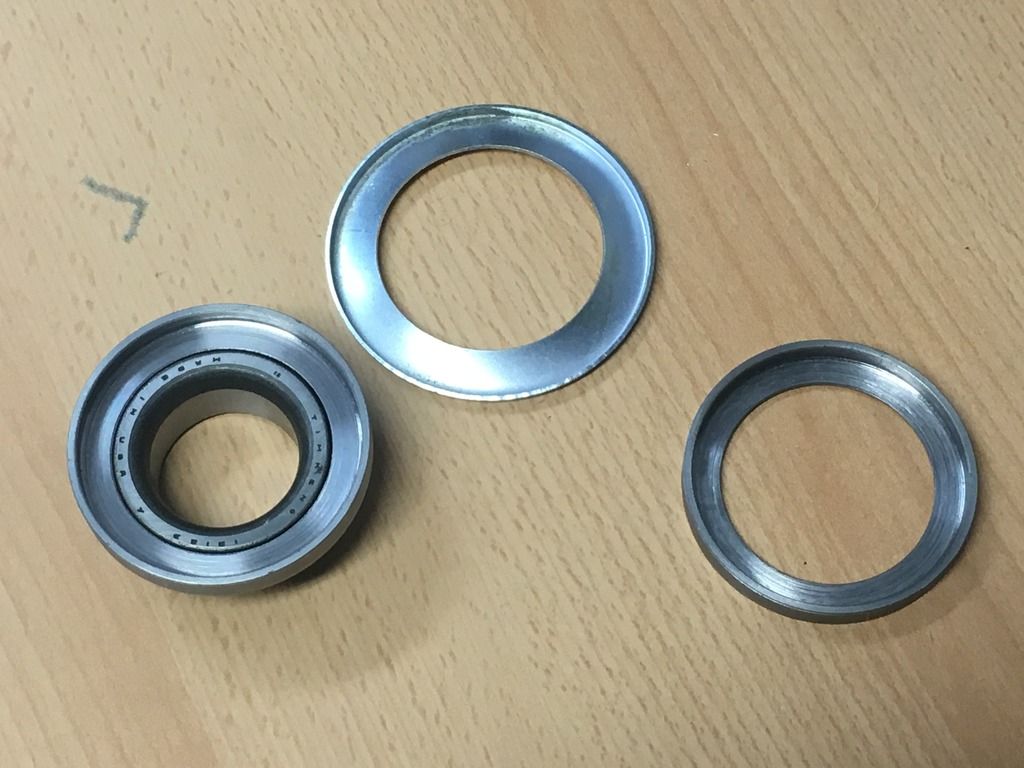
I went back to the local machine shop again and explained my problems along with the MkVII parts to show what I needed. They said they could make me a similar part in mild steel on their lathe, but it wouldn't be cheap. With this being my last resort, what else could I do?
This is what I got (the MkVII part is shown alongside to show the size difference)
This image from the workshop manual was also used as a reference.
A few dry runs seem to show that the fit is perfect but I will only know for sure when the 6mm felt I have ordered arrives (the felt seals I had ordered with the MkVII containers were also too big - of course)
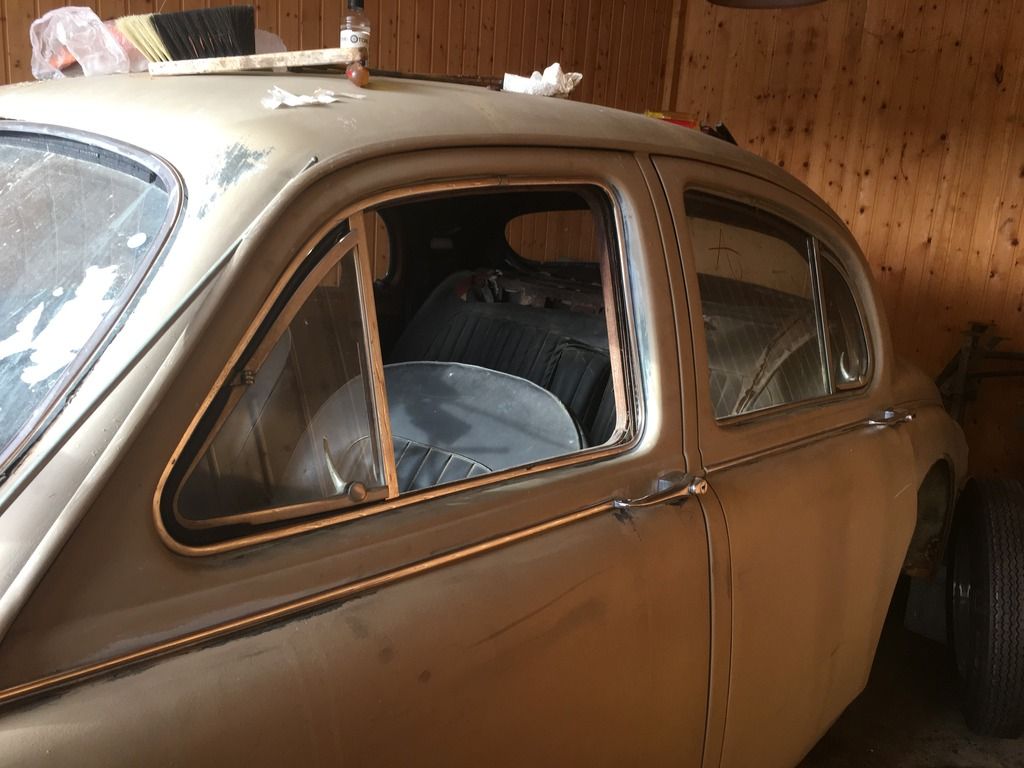
In the mean time I had cleaned the chrome trim on the door windows. These were covered in paint when the car was painted in that ghastly khaki colour, or whatever it is. How are these parts removed? I need to get them off for when the car is painted at the latest but it would be easier to clean them when they are off, but I don't want to damage anything (the marks you can see on the chrome are actually a reflection of the wooden planks on the garage wall).
This is what the dash looks like now. A bit of work still needed.
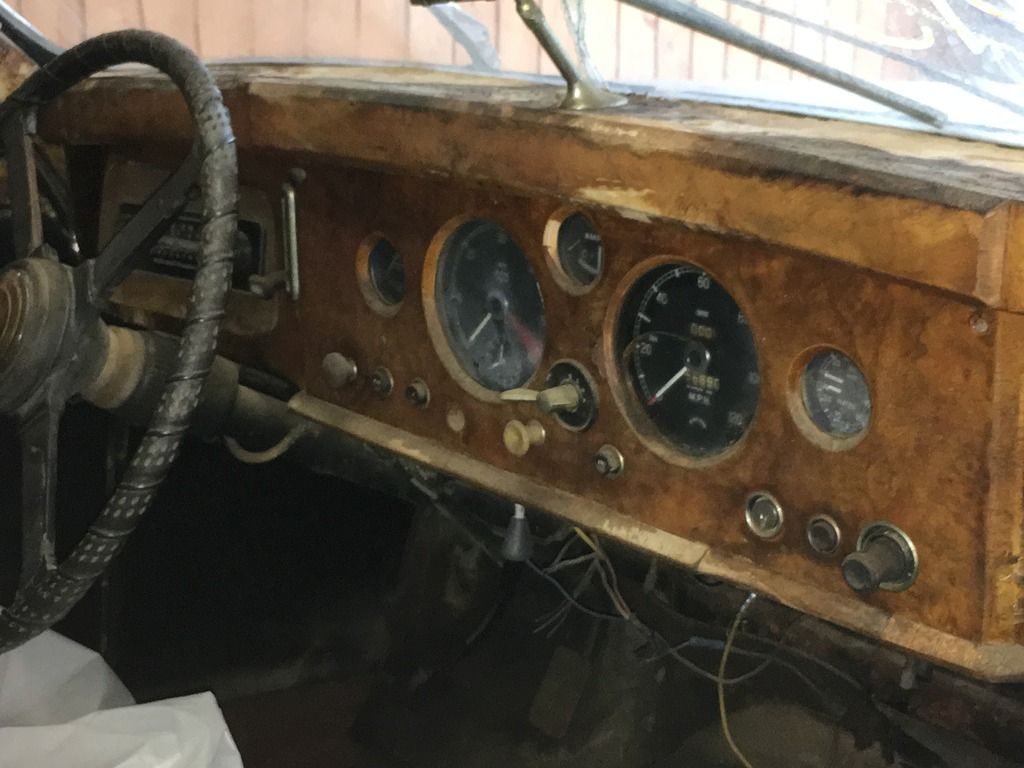
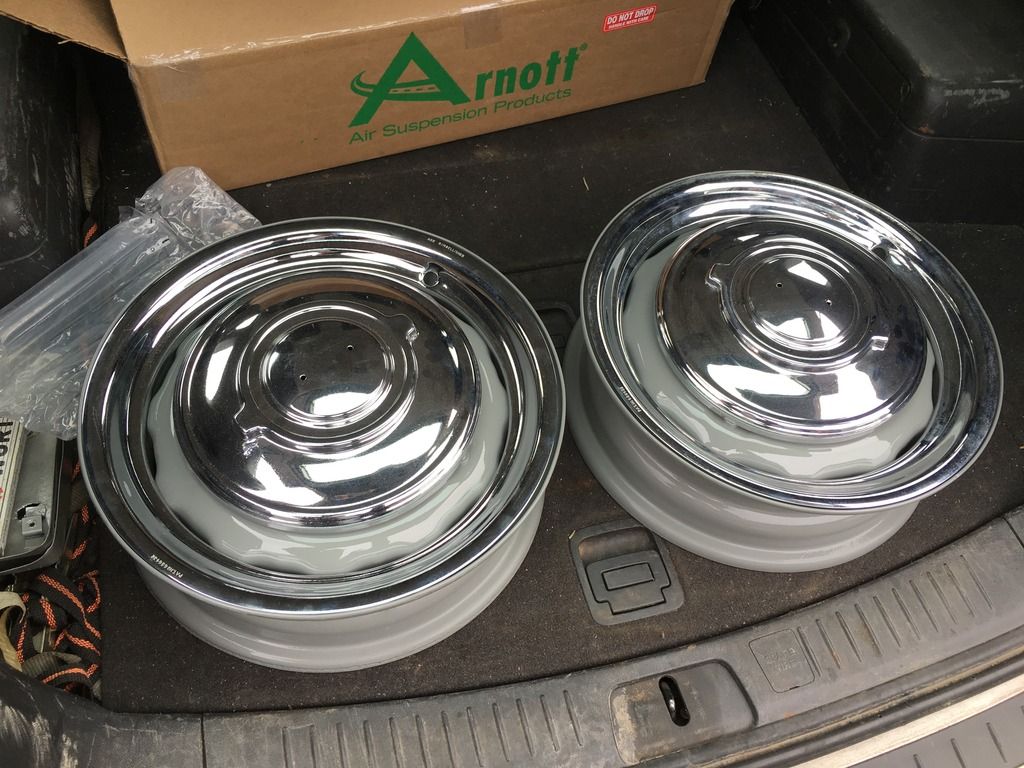
According to the heritage certificate the car was birch grey when it left the factory back in '56, a colour I like very much. The interior was red. I've had the steel wheels cleaned and painted in the correct colour. A local paint supplier has a large book with recipes and colour codes for car colours and fortunately Jaguar's birch grey was also in it.
Thanks for looking in
Chris |
|
| Back to top |
|
|
Edd
Joined: 23 Aug 2011
Posts: 15
|
| Posted: Tue Jan 24, 2017 1:34 pm Post subject: |
|
|
Hi,
Nice looking project and good work.
For the brake drums I always avoid painting the wheel mounting face. I've worked on a couple of cars where the pressure of the wheel with nuts done up was enough to effectively glue the wheel to the drum. I now always make sure there is a thin covering of grease on the drum face before putting on the wheel.
Cheers
Ed |
|
| Back to top |
|
|
CTDavies
Joined: 09 Dec 2015
Posts: 16
|
| Posted: Tue Jan 31, 2017 9:28 pm Post subject: |
|
|
Good evening everyone,
a short update tonight.
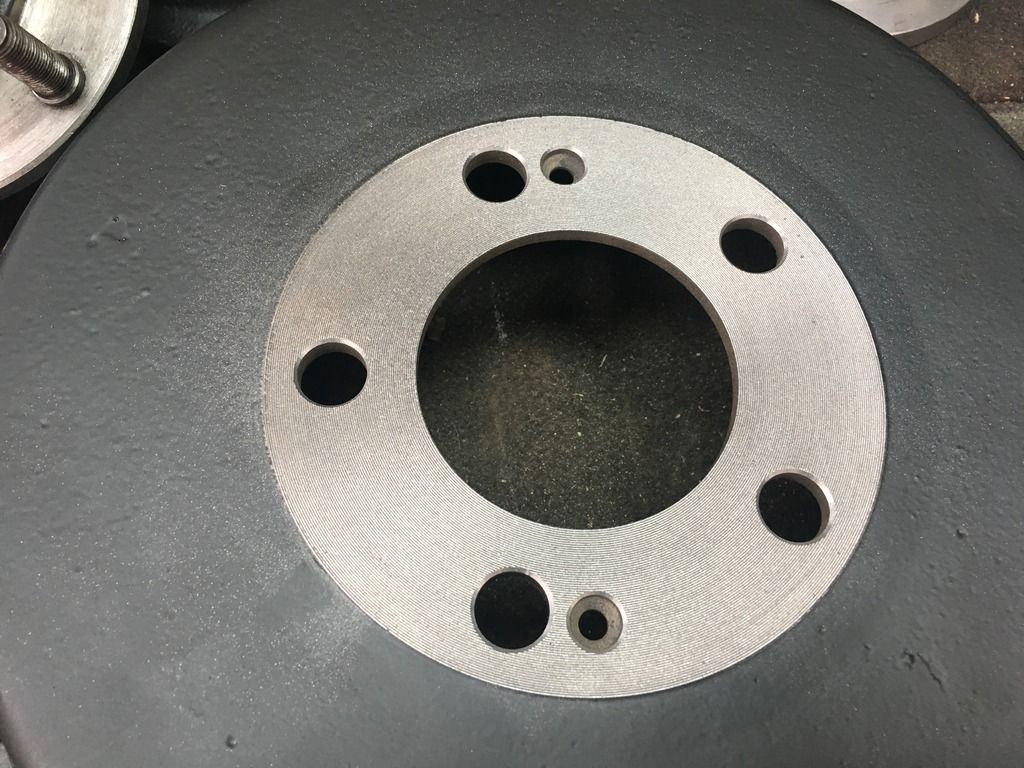
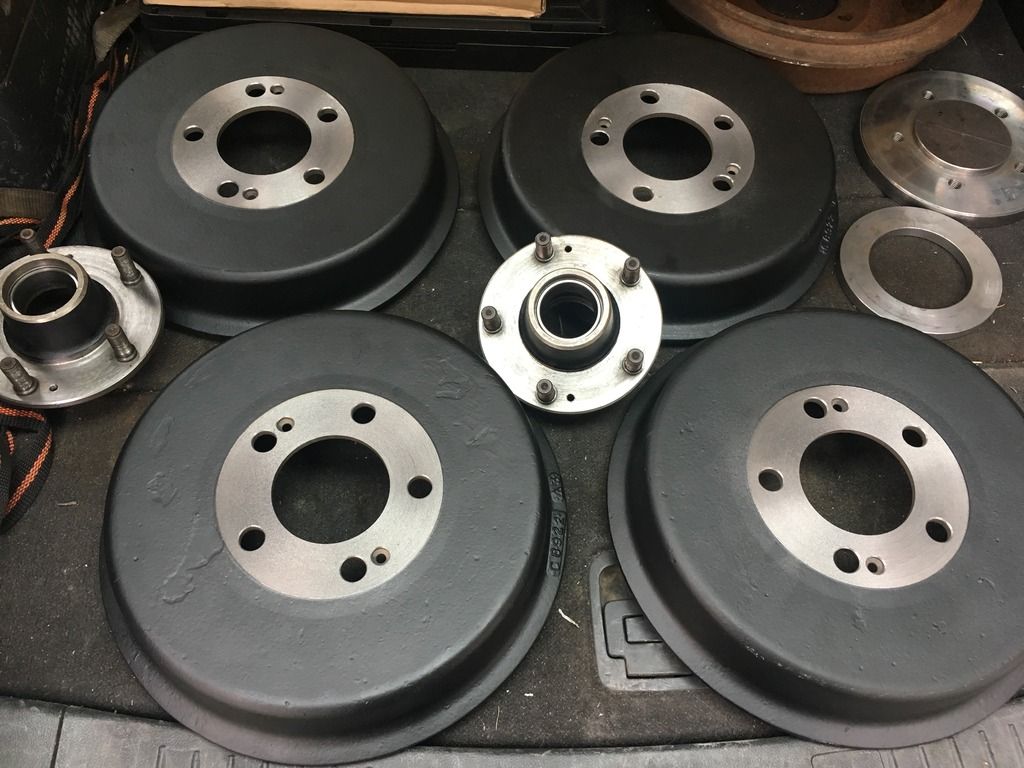
I followed ed's advise on leaving the centre areas of the brake drums unpainted. This was something I orginally thought about but after seeing pictures of Mk1s on the assembly line with the drums completey painted I decided the other way. So off to the local powder coating place to have them stripped and sand blasted again. To avoid paint brush marks this time the rest was to be powder coated matt black. Now the blasted sand blaster was so heavy handed that the fine grooves on the centre areas were completely gone and the surface that wasn't powder coated looked more like beach sand. I checked with the local machine shop if they could rectify this on their lathe and they said, they'd give it a try.
The guy in the machine shop is a bloody artist.
I tried cutting a seel from 6mm felt which turned out to be a nightmare. Cutting thick felt is murder on your fingers and it turned out to be too thick anyway, so I ordered 4mm felt which arrived today and seems to be too thin - we shall see.
The stub axles carriers were a bit stiff so I cleaned up the top wishbone a bit to get at the ball joint and grease it a bit. This helped quite a bit as I was afraid at first I might have to replace the ball joint. The gaitor of the lower one is damaged so I will have to tackle that eventually but first I want to get the car ice blasted. The steering seems ok for now. A friend let me drive his 1961 Mk2 recently and I was shocked to see how hard it is to steer the car while standing. Virtually impossible, so I'm going to make sure that on this one the steering will be in excellent shape to avoid that (if I get that far at - haha). I was pleased to see how much of the original black paint on the top wishbone survived over the years.
The correct tie rods arrived and I painted them gloss black - nice. Surprisingly these are much stiffer than the original ones, which move quite smoothly. These feel as if they are 'grinding' when moved. I'm hoping stiffer might be better here.
Playing around a bit I put one of the front hubs on, just to see what it looked like.

I'm hoping to get a lot done this weekend if the weather's not too cold.
Chris |
|
| Back to top |
|
|
CTDavies
Joined: 09 Dec 2015
Posts: 16
|
| Posted: Sun Feb 12, 2017 8:23 pm Post subject: |
|
|
After not succeeding in getting felt in the correct thickness on fleebay I finally went to the local arts and crafts store and -guess what- they had the right stuff right there. Well almost, I ended up using layers in two different thicknesses.
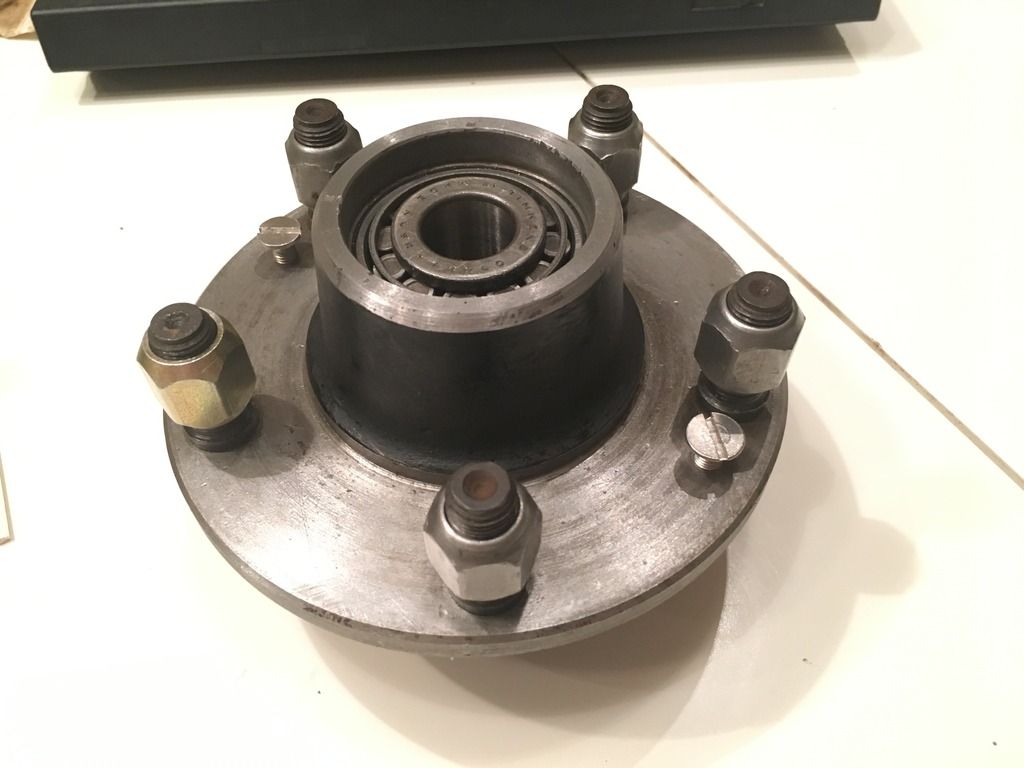
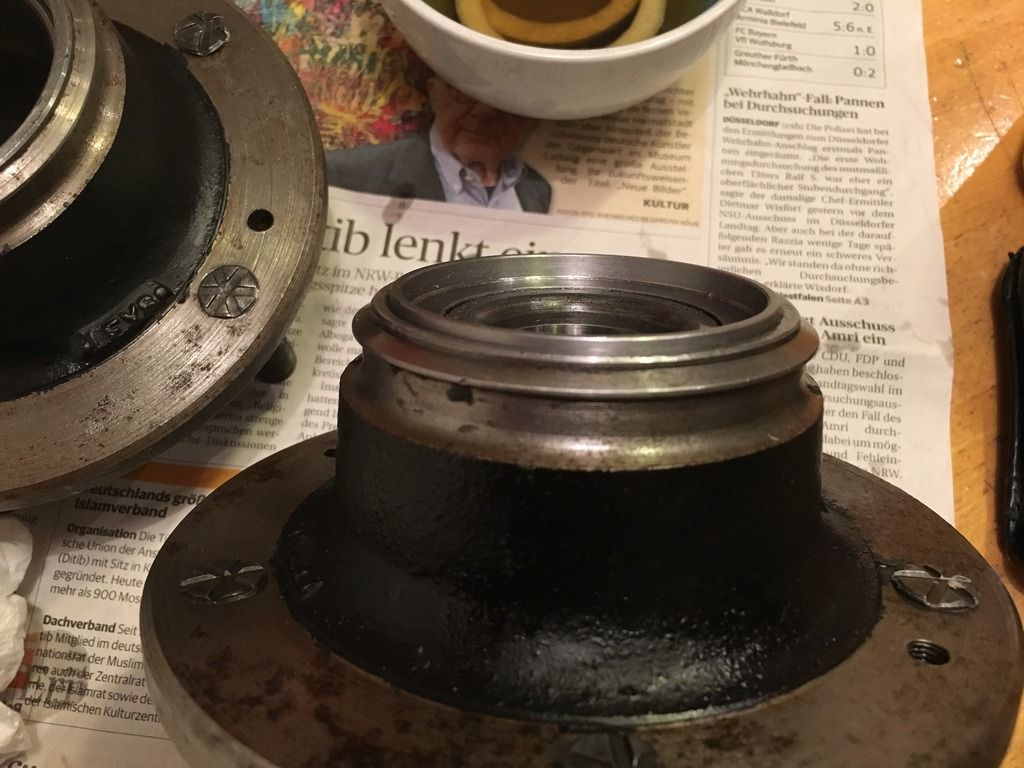
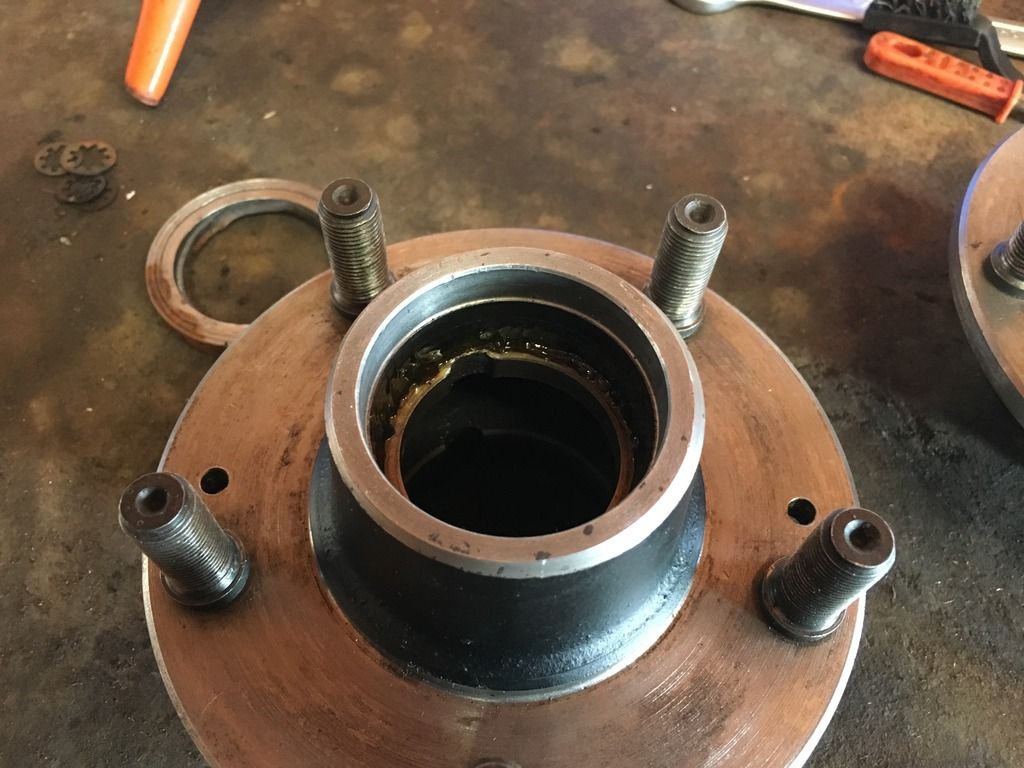
here a test to see how the felt fits...
...here the felt container in place...
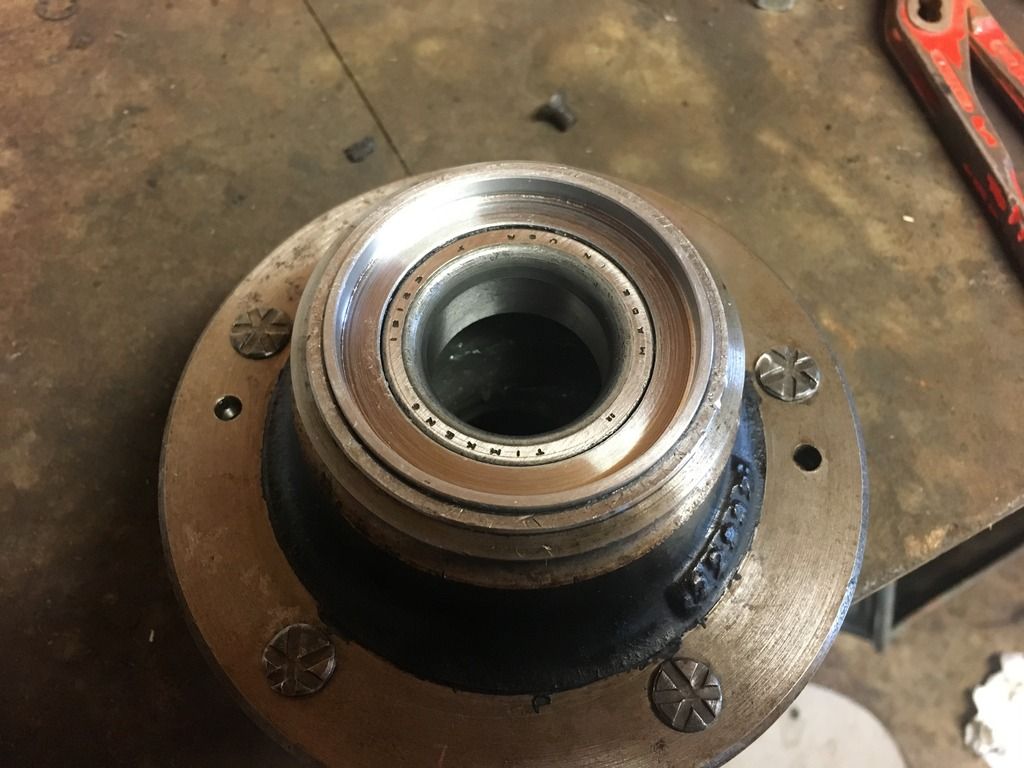
...and here the bearing in place
all looking good so far.
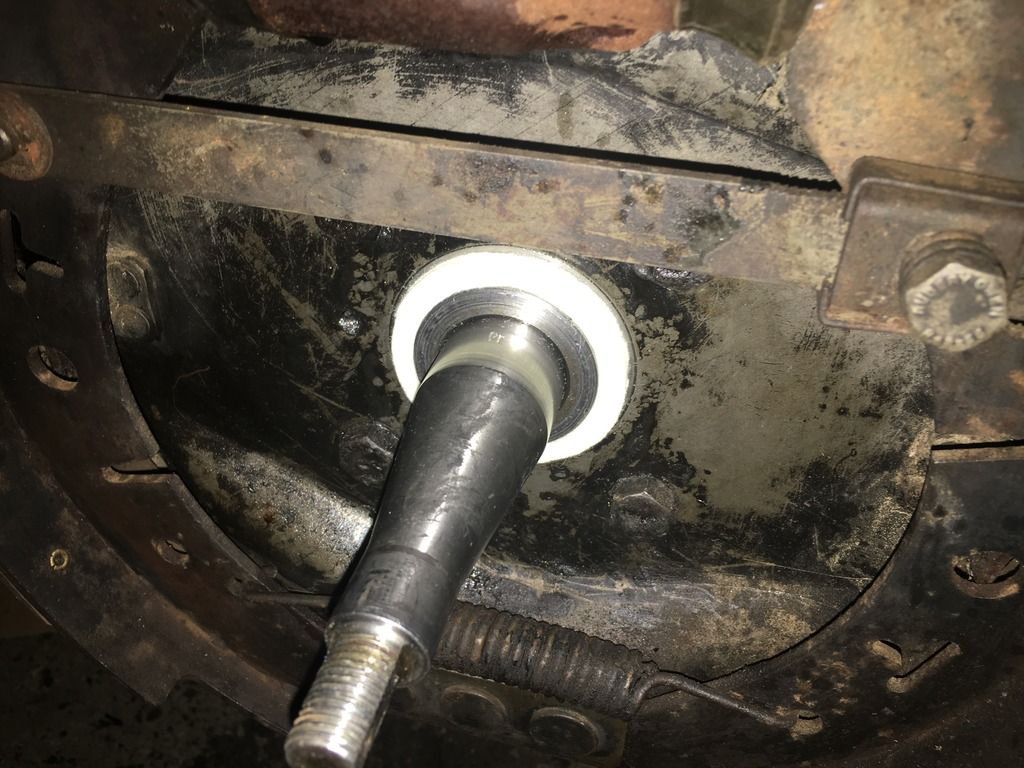
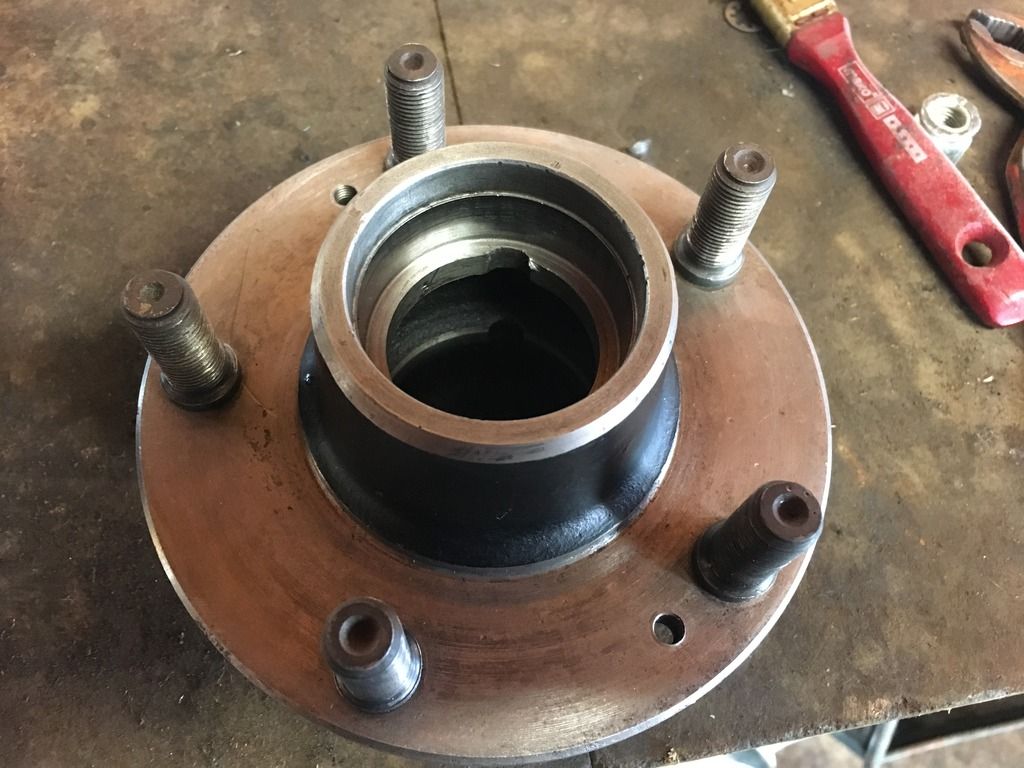
The container tapped into the hub with the bearing in place...
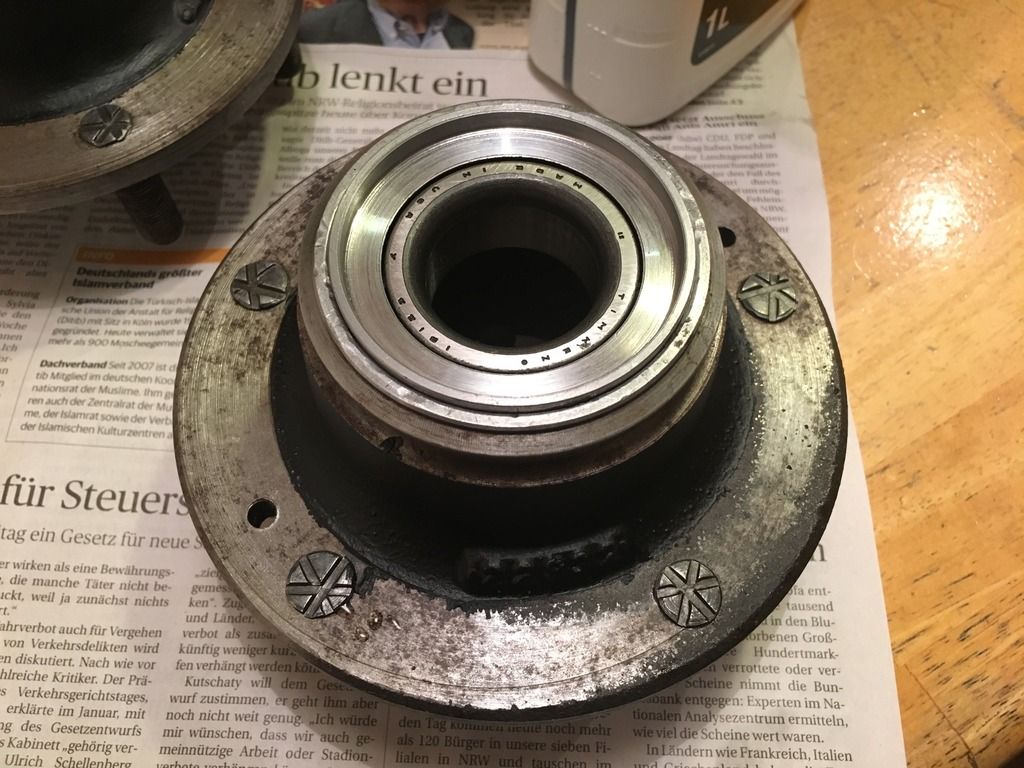
...it all lines up nicely...
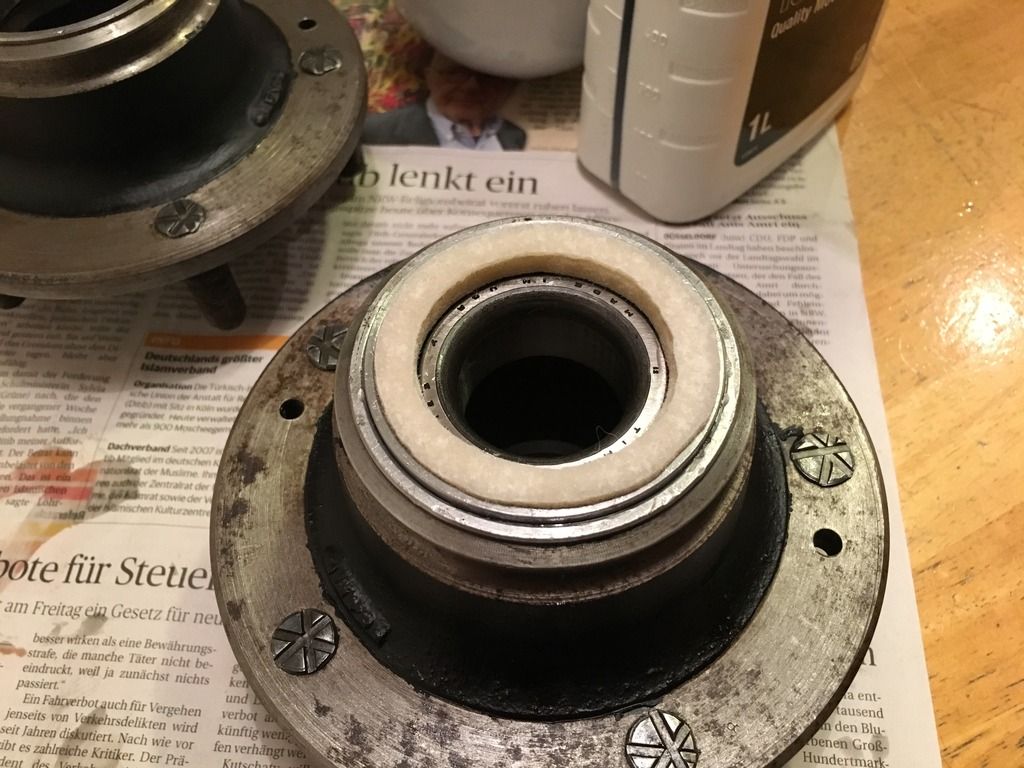
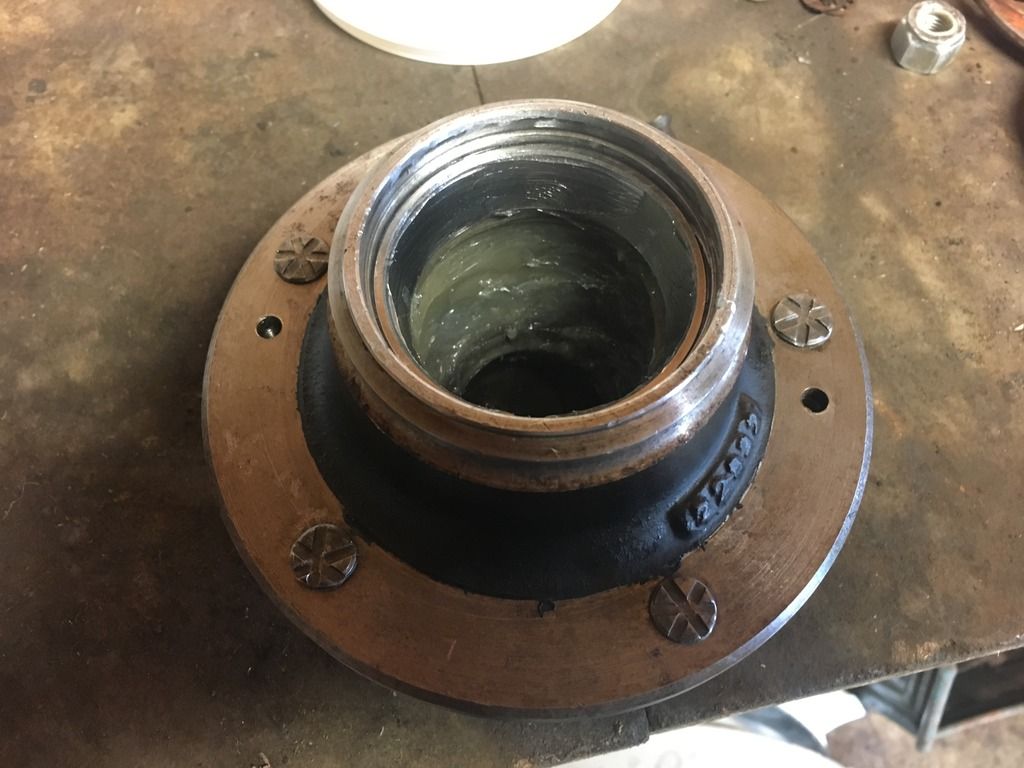
...and the oil drenched felt seals in place, just to see how it all goes together
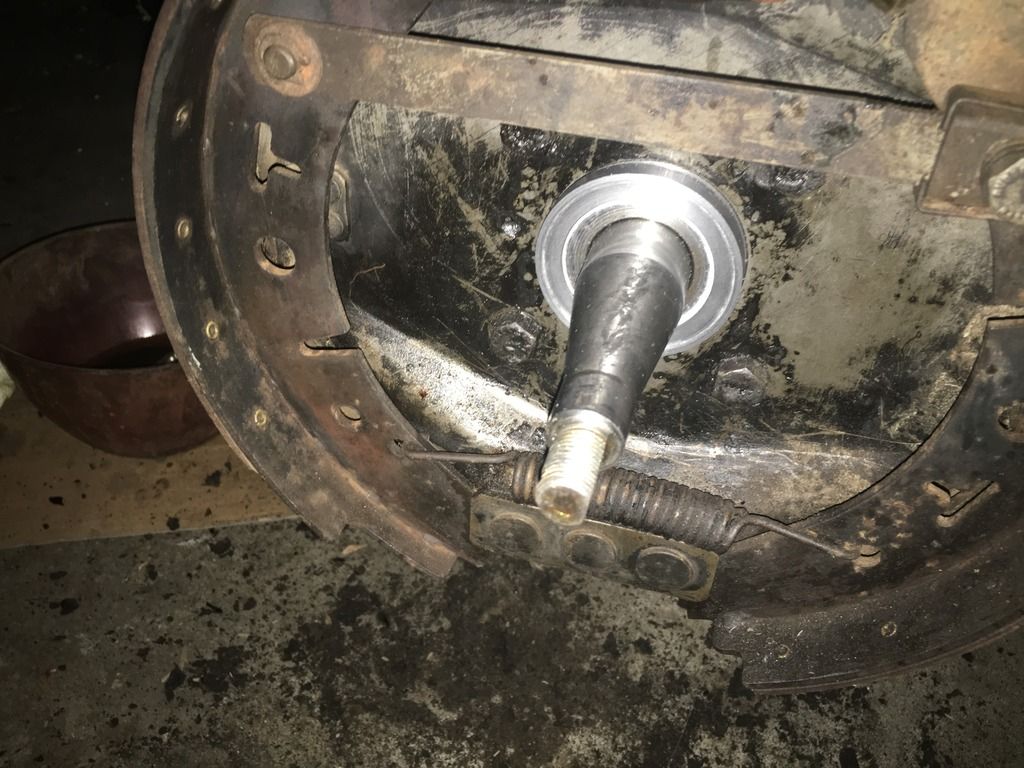
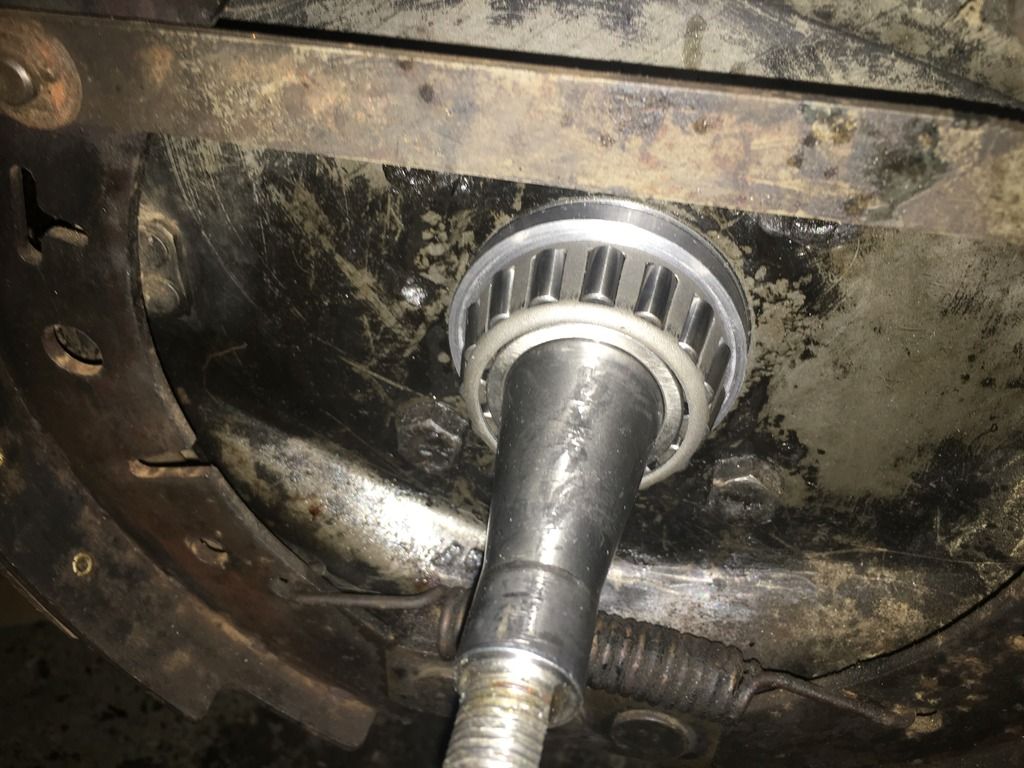
Then I realized that some of the outer races that were pressed into the hub, weren't 'driven home' completely, which, in the end could affect the position of the wheel. So they had to come out again, as I expected some of the hardened grease to have crept behind them.
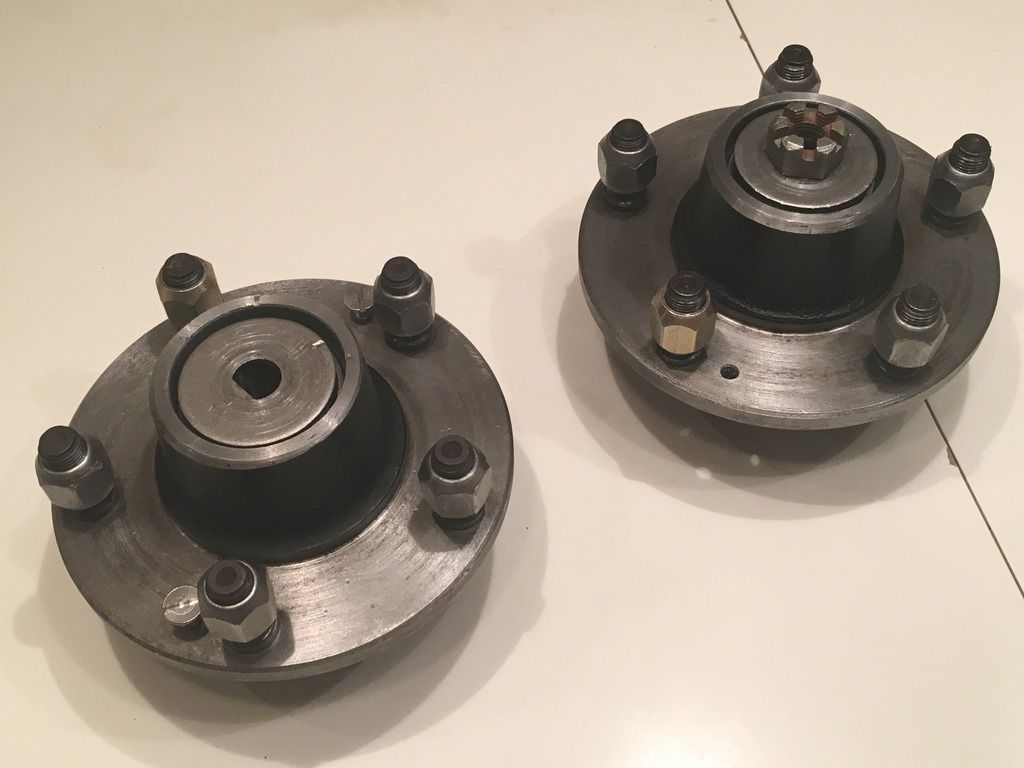
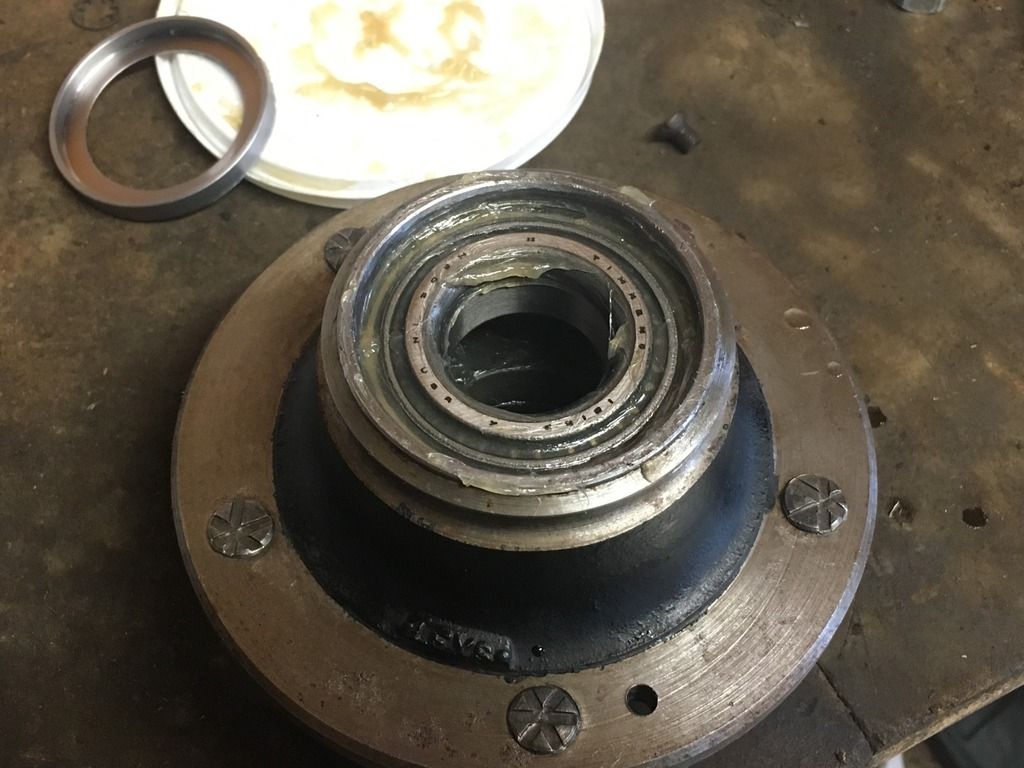
This is what it looked like after they were taken out...
...and this shows the hub cleaned again
Tomorrow I'm taking everything to the local machine shop to get the races installed again. Properly, this time.
This is taking much longer than I had expected. I was hoping to trailer the car to Cologne for ice blasting early February, now it will most likely be early March.
Chris |
|
| Back to top |
|
|
alanb
Joined: 10 Sep 2012
Posts: 516
Location: Berkshire.
|
| Posted: Sun Feb 12, 2017 8:40 pm Post subject: |
|
|
A tip for fitting wheel bearings, put the hub in the oven for a few minutes and the bearing in the freezer for half an hour, the bearing will then drop into the hub, allow hub to cool and the bearing will be a tight fit.
_________________
old tourer
Morris 8 two seater |
|
| Back to top |
|
|
CTDavies
Joined: 09 Dec 2015
Posts: 16
|
| Posted: Sun Feb 19, 2017 7:43 pm Post subject: |
|
|
Hello everyone,
a small update: I tried Alan's tip with heating up the hub and cooling the races in the freezer which worked to some extent. At least I was able to get the races in far enough for the machine shop to get them in place easily, took them less than five minutes.
The shop manual says the inside areas of the hubs need to be coated in grease. I guess that this is some sort of reservoire for heated/softened grease to flow to the inner bearing as a constant supply. It didn't say how thick the coating needs to be so I applied it appr. 3-4mm thick with the convex side of a spoon.
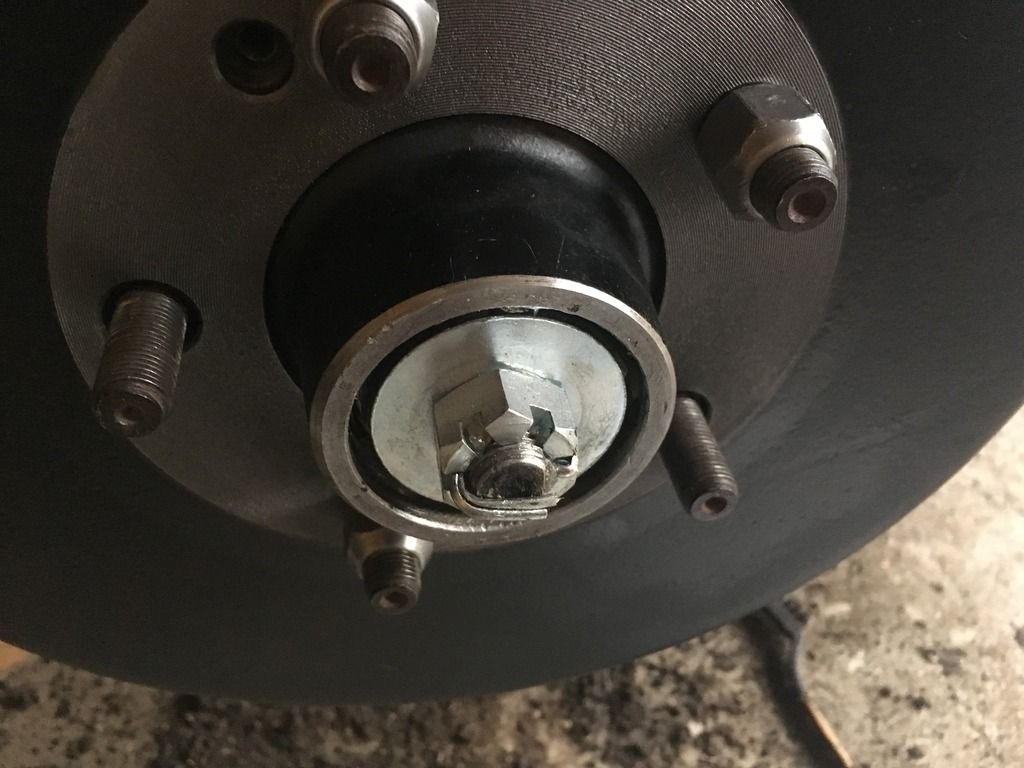
The bearing was packed with the grease in the palm of my hand method, which was a really messy job
then my home-made felt container was added with my home made seals (not pictured here)...
...and the hub could be mounted again. There is no way of telling if the felt seals went 'fully home' but I guess they did, because I used the manuals recommended way of tightening the hub and then slackening (sp?) back the hub nut one or two flats, which worked a real treat. The hub feels solid but turns as you would imagine with the bearings full of grease.
To cap it all off - the hub cap.
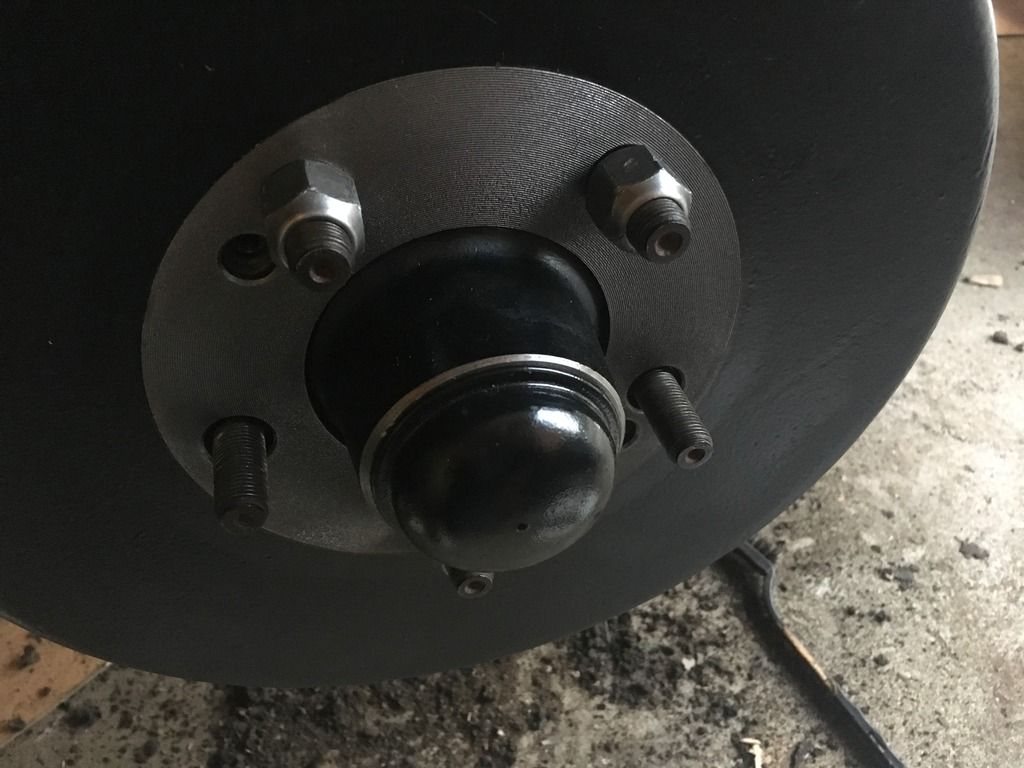
Now I still need to do the other side, but then I can put the car back on its wheels again.
Thanks for looking in,
Chris |
|
| Back to top |
|
|
|
|
You cannot post new topics in this forum
You cannot reply to topics in this forum
You cannot edit your posts in this forum
You cannot delete your posts in this forum
You cannot vote in polls in this forum
|
php BB powered © php BB Grp.
|


