
Classic cars forum & vehicle restoration.
|
|
| Author |
Message |
colwyn500
Joined: 21 Oct 2012
Posts: 1745
Location: Nairn, Scotland
|
 Posted: Tue Jan 01, 2013 9:48 pm Post subject: Posted: Tue Jan 01, 2013 9:48 pm Post subject: |
 |
|
| D4B wrote: | Thanks for sharing this
~ Fantastic ~ 
Steve |
My pleasure Steve.
Part of my motive for doing this is to force me to have a momentum once I get things re-started. The next stage is to extricate the car from its current home and get it into the garage that I have first had to make for it.
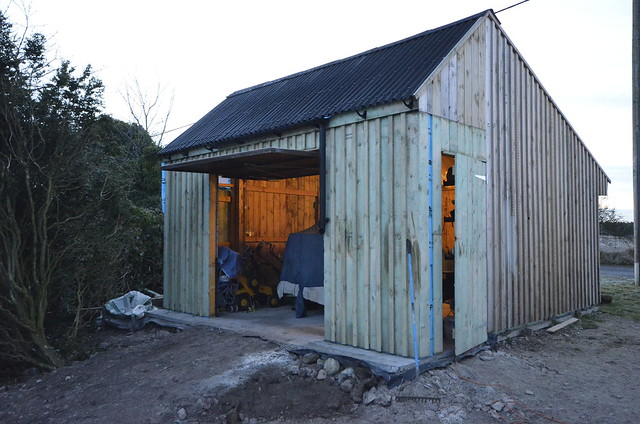
My newest garage by peterthompson, on Flickr
I have posted this shot on other threads. I will probably now have to build a lean-to to protect the old Austin when grinding away at the Fiat! |
|
| Back to top |
|
 |
colwyn500
Joined: 21 Oct 2012
Posts: 1745
Location: Nairn, Scotland
|
| Posted: Wed Jan 02, 2013 3:30 pm Post subject: |
|
|
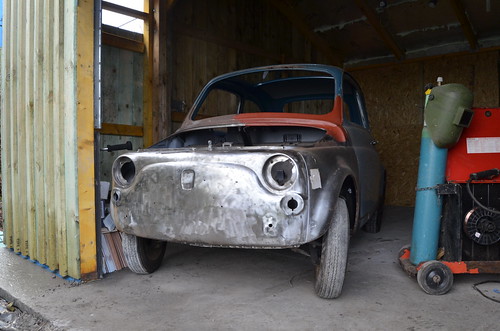
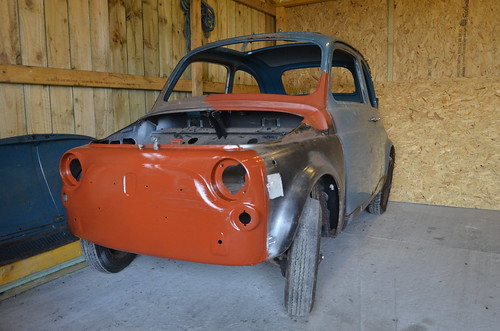
Today I got straight down to it and removed the car from its shed and pushed it the 20 metres or so across a temporary timber causeway and up the ramp to my garage.
There's a bit of surface rust where I did the welding and it is full of cobwebs and leaves but basically, no worse than it was.
I will probably get a chance to weld on the hinge for the front luggage cover before work commitments kick-in next Monday.
I will keep you posted.
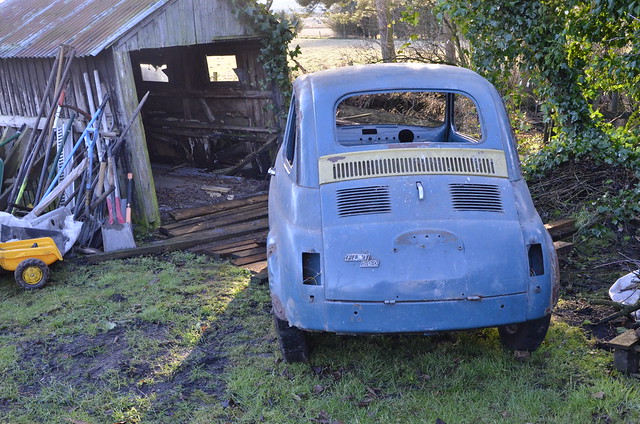
_DEC6260 by peterthompson, on Flickr
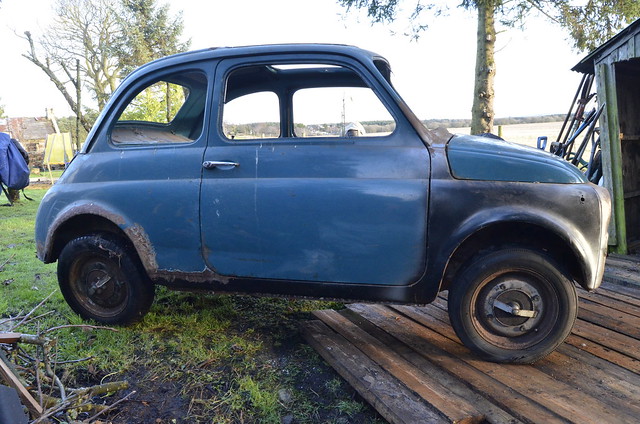
_DEC6264 by peterthompson, on Flickr |
|
| Back to top |
|
|
Greg
Joined: 03 Dec 2007
Posts: 445
Location: Dreamland Margate
|
| Posted: Wed Jan 02, 2013 10:16 pm Post subject: |
|
|
Looking great, in those first pictures the car looks very good...but then a closer look...quite a bit of metal missing  but looking a lot more solid in the later pictures. but looking a lot more solid in the later pictures.
Very interesting post,
All the best,
Greg |
|
| Back to top |
|
|
colwyn500
Joined: 21 Oct 2012
Posts: 1745
Location: Nairn, Scotland
|
| Posted: Wed Jan 02, 2013 11:50 pm Post subject: |
|
|
| Thanks Greg. I hope that I can maintain the interest. One thing for sure; posts will be a less frequent from now on as I start to get to grips with the remainder of the work. But I intend to show every stage of what I do, so be warned! |
|
| Back to top |
|
|
Richard H
Joined: 03 Apr 2009
Posts: 2148
Location: Lincolnshire, UK
|
| Posted: Thu Jan 03, 2013 10:06 am Post subject: |
|
|
Excellent progress 
_________________
Richard Hughes |
|
| Back to top |
|
|
D4B

Joined: 28 Dec 2010
Posts: 2083
Location: Hampshire UK
|
| Posted: Thu Jan 03, 2013 10:43 am Post subject: |
|
|
| colwyn500 wrote: | | But I intend to show every stage of what I do, so be warned! |
Hi Colwyn500,
Please do the more the merrier... I am always fascinated in this kind
of fabrication work.... if I wasn't so far away I would come round and
put the kettle on 4u
(or try out one of those wee drams I hear about )
Steve |
|
| Back to top |
|
|
colwyn500
Joined: 21 Oct 2012
Posts: 1745
Location: Nairn, Scotland
|
| Posted: Thu Jan 03, 2013 9:26 pm Post subject: |
|
|
Steve, thanks for the encouragement.
I had to provide the moral support for returning all of the non-fitting Christmas presents and then go for a walk in the hills today, so no work done on the car.
I have been searching for it but have mislaid the hinge for the front luggage compartment. It was very badly rusted in any case and I was expecting to have to re-make it. After a lot of trawling the internet I can get it from Holland for Euro 29.50:
http://www.fiat500vdlaan.nl/en/webshop.php?CategoryID=5
On another subject I saw a Royal Mail van that must have come a cropper before Christmas and is going to need quite a lot of bodywork repairs...

Photo0113 by peterthompson, on Flickr
If you like big bodywork projects, take a look at this...
http://www.classicfordmag.co.uk/cf-forum/showthread.php?t=365 |
|
| Back to top |
|
|
D4B
Joined: 28 Dec 2010
Posts: 2083
Location: Hampshire UK
|
| Posted: Fri Jan 04, 2013 11:38 am Post subject: |
|
|
Yes I have just been looking at that, his work (and yours) gives me
great inspiration ~ I must crack on with it !!
Cheers |
|
| Back to top |
|
|
Polypedates
Joined: 24 Sep 2012
Posts: 16
|
| Posted: Sat Jan 05, 2013 5:11 pm Post subject: |
|
|
Oh wow I love threads like this even though they make me feel totally inadequate - don't be shy, show us everything!
I love the 500 too although I've never owned one sadly.
Makes me think that I should set up a thread for my MR2 restoration as like you I have a back catalogue of pictures (about 700) to furnish it with but my 'skills' are pretty lame in comparison unfortunately  |
|
| Back to top |
|
|
colwyn500
Joined: 21 Oct 2012
Posts: 1745
Location: Nairn, Scotland
|
| Posted: Tue Jan 08, 2013 3:19 pm Post subject: |
|
|
Thanks Polypedates; I also like bodywork restoration blogs and posts so I hope this continues to interest you.
I am still waiting for a pile of bodywork bits including a bonnet hinge; most of which are coming from the Netherlands.
Wanting to make progress of some sort I have started to sand off the horrible surface rust that had attacked my previously new panels and welds over the last three and a half years. I used a poly-abrasive disc as recommended on another site. They work well and don't eat into the thin steel.
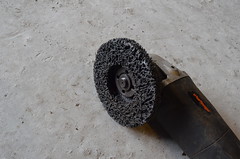
_DEC6342 by peterthompson, on Flickr
_DEC6347 by peterthompson, on Flickr
I didn't go too mad at this because I will have to do a proper job before filling and painting and that will include treating with phosphoric acid. In the meantime, all this shininess is being given a thin coat of red-oxide.
_DEC6349 by peterthompson, on Flickr |
|
| Back to top |
|
|
colwyn500
Joined: 21 Oct 2012
Posts: 1745
Location: Nairn, Scotland
|
| Posted: Tue Jan 15, 2013 4:05 pm Post subject: |
|
|
Had a morning getting used to mig-welding again after a three year break.
I did a rusty patch over the windscreen and one under the rear screen.
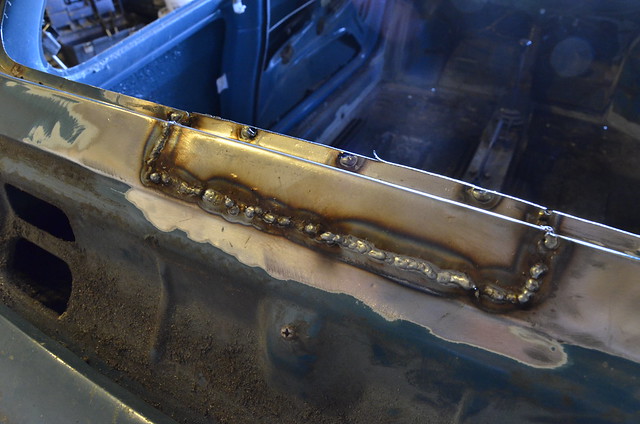
_JAN6843 by peterthompson, on Flickr
I think a long way to go yet but my excuse is that you don't get much thinner steel than a Fiat 500 and you really have got to use very short bursts. After grinding it's very acceptable given that the screen rubber covers a bit of mis-alignment.
_JAN6845 by peterthompson, on Flickr
Next stage is a door bottom |
|
| Back to top |
|
|
colwyn500
Joined: 21 Oct 2012
Posts: 1745
Location: Nairn, Scotland
|
| Posted: Wed Jan 16, 2013 5:14 pm Post subject: |
|
|
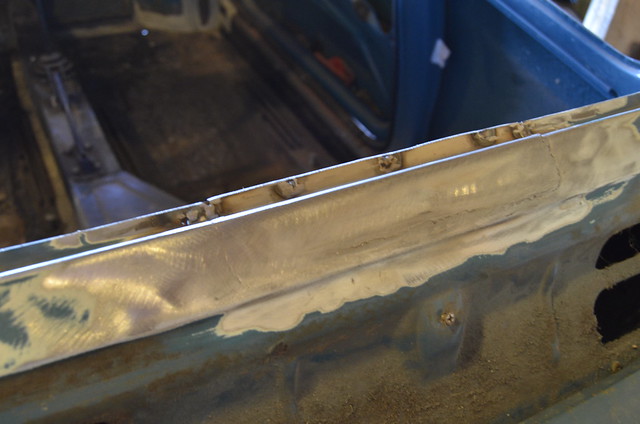
I felt confident to start a big job today...a door bottom.
The door needed a part skin and new metal in the bottom of the frame. The pattern part had a poor geometry and no curvature. Quite a lot of fiddling was needed and even when finished I had to chop and re-weld in order to get a reasonable alignment.
I used the joggle (joddle?) and plug-weld method but found I had drilled too few holes. I turned up the welder and did every other hole straight through both sheets of steel. It worked a treat as the back of the panel shows.
These door skins don't fold right over the frame so it made my repairs easier to weld through the front of the skin at the bottom to secure it.
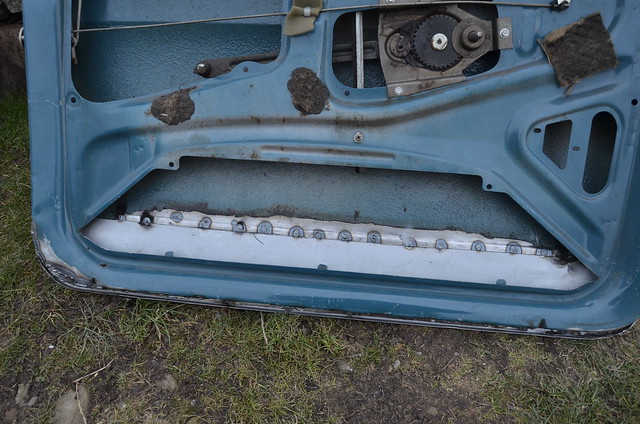
_JAN6849 by peterthompson, on Flickr
I used "weld-through" primer where the sheets overlapped; never again, it makes things quite splattery.
I am reasonably happy with the alignment, gaps and relative lack of distortion ripples.
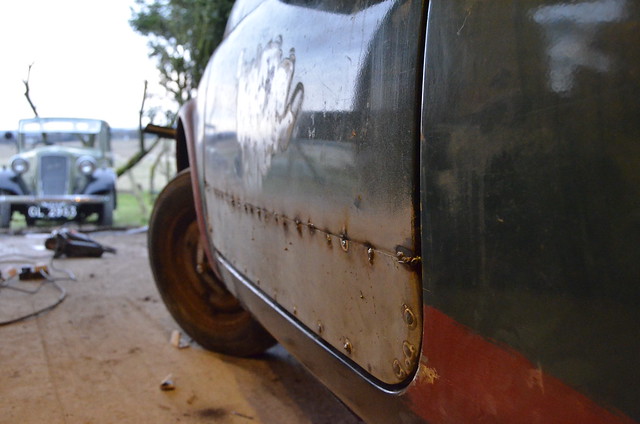
_JAN6852 by peterthompson, on Flickr
_JAN6851 by peterthompson, on Flickr
Much grinding and filling to come, but on we go to the rear wing... |
|
| Back to top |
|
|
Rick
Site Admin

Joined: 27 Apr 2005
Posts: 22442
Location: UK
|
|
| Back to top |
|
|
D4B
Joined: 28 Dec 2010
Posts: 2083
Location: Hampshire UK
|
| Posted: Wed Jan 16, 2013 6:16 pm Post subject: |
|
|
Hi Peter,
great looking job... this is one job that I have yet to brave, as the
only previous time I attempted a lower door skin repair
was 25 years ago on a 1970 VW camper sliding door, and not knowing any different I welded it straight along without stopping !!!
Needless to say, when the painter was prepping it for paint my name was
MUD
My question is, what comes next, do you grind back your plug welds and
then use filler on the outside (and perhaps seam sealer on the inside? )
Thanks Steve |
|
| Back to top |
|
|
colwyn500
Joined: 21 Oct 2012
Posts: 1745
Location: Nairn, Scotland
|
| Posted: Wed Jan 16, 2013 6:37 pm Post subject: |
|
|
| D4B wrote: | Hi Peter,
great looking job... this is one job that I have yet to brave, as the
only previous time I attempted a lower door skin repair
was 25 years ago on a 1970 VW camper sliding door, and not knowing any different I welded it straight along without stopping !!!
Needless to say, when the painter was prepping it for paint my name was
MUD
My question is, what comes next, do you grind back your plug welds and
then use filler on the outside (and perhaps seam sealer on the inside? )
Thanks Steve |
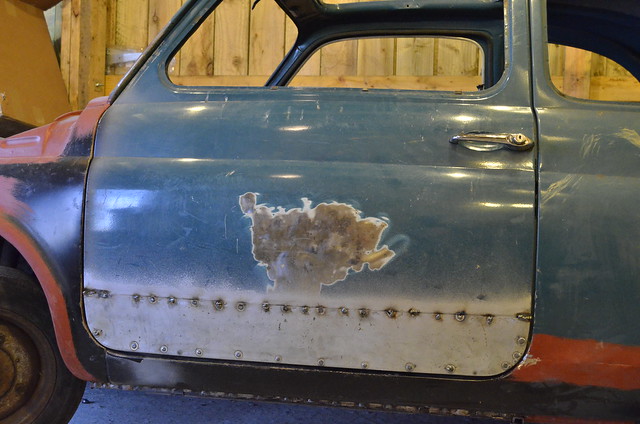
Hi Steve. I think I could have managed to seam-weld it and even butt-weld, but this way reduces distortion. I started with the middle plug and then alternated from side to side. Luckily it was a freezing day and the panel cooled quickly allowing me to make fair progress.
The original metal overlaps on the inside so this should deflect dripping water. I will use seam-sealer on the join.
The plugs will easily grind off with a flap-wheel and there should be just enough of a recess for a layer of filler. I'm not kidding myself that there won't be a need for quite a lot of final levelling with filler but it's a reasonable job.
On reflection I could easily have made a replacement panel better than this commercial one; the fit as delivered was very poor. Most people seem to get newly manufactured doors when they are as far gone as this but I prefer to keep the original so that I know it has the right weight to it and that the door gaps, however random, are more or less original.
Incidentally, here is someone else's photo of an original, Fiat 500 that had done only a few Km. it was on EBAY a few years ago. Look at the door alignment and gaps..and that's from the factory!
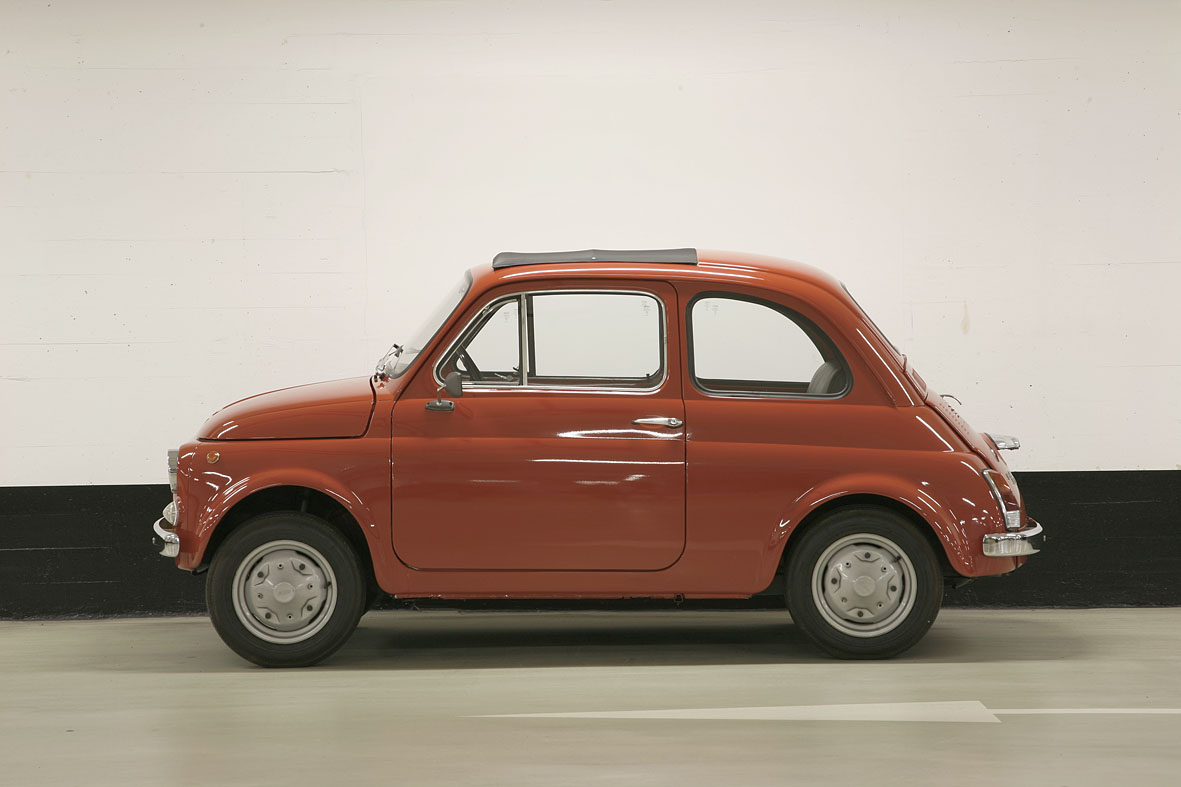
9 by peterthompson, on Flickr
I made my own door-skin for my Austin Ten way back in 1992. I used a metal-epoxy filler for the initial fill of the join. There is no cracking or rust as yet so the method is proven to me. |
|
| Back to top |
|
|
|
|
You cannot post new topics in this forum
You cannot reply to topics in this forum
You cannot edit your posts in this forum
You cannot delete your posts in this forum
You cannot vote in polls in this forum
|
php BB powered © php BB Grp.
|


