|
|
| Author |
Message |
john-saab

Joined: 06 Dec 2007
Posts: 341
Location: West Dorset
|
 Posted: Sun Dec 07, 2008 1:55 pm Post subject: Posted: Sun Dec 07, 2008 1:55 pm Post subject: |
 |
|
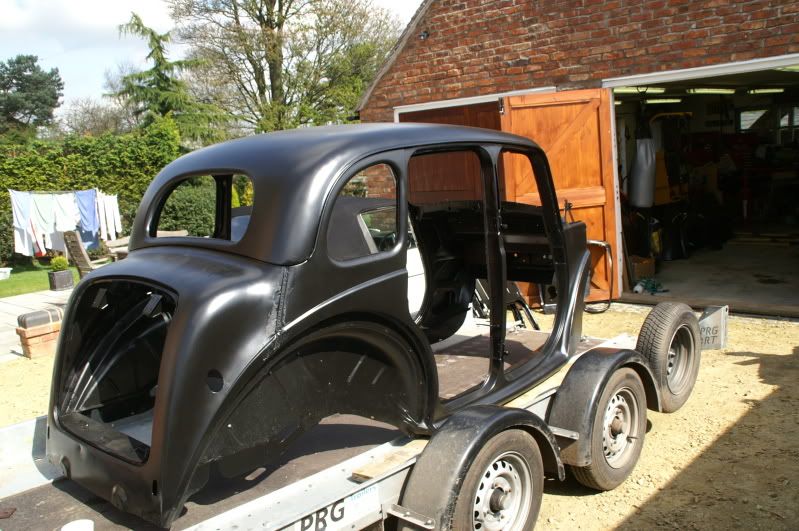
Only just found this thread ...what a bit of luck to find that body shell.
Looks like the chassis was in good condition.
Fantastic read...keep up the good work. |
|
| Back to top |
|
 |
ukdave2002
Joined: 23 Nov 2007
Posts: 4104
Location: South Cheshire
|
| Posted: Thu Mar 19, 2009 5:15 pm Post subject: |
|
|
Took the shell and all the body panels to Surface Processing Ltd http://www.surfaceprocessing.co.uk/index.html
The metal gets stripped back to bare steel any rust is dissolved only solid steel remains. It all then goes through an electro priming process in he same was as a modern car would. They drill additional holes in any box sections to ensure thorough cleaning and primer coverage. I hoping the shell will look like new! But some of the other panels like the doors will arrive back with holes in.
Picking it all up next week so I’ll post some pic’s
Dave |
|
| Back to top |
|
|
ukdave2002
Joined: 23 Nov 2007
Posts: 4104
Location: South Cheshire
|
| Posted: Mon Apr 13, 2009 11:52 am Post subject: |
|
|
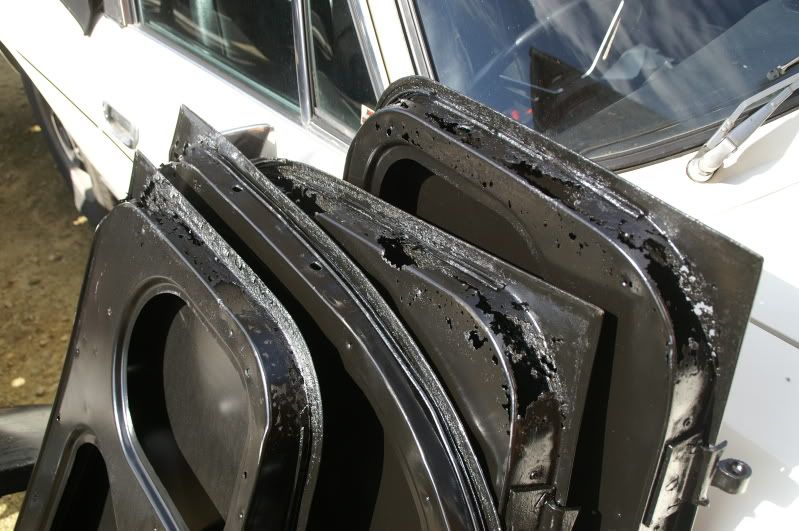
Here are the body and panel's back from SPL, they have been on a production line that firstly removes everythingthat is not solid steel, (including all the lead loading) cleans preps and then electrostaticly applies primer, which gets it in to places where no paint has gone before 
Here is the rear seam exposed for the first time in 70 years!
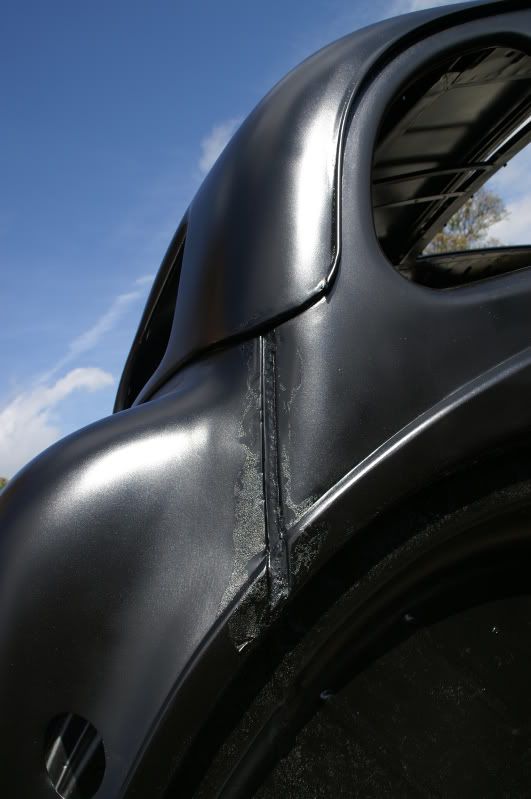
Interestingly with the lead removed its evident the front wings are made up from 4 pressings and quite roughly welded together, so I suspect these are not original Morris wings but pattern parts.
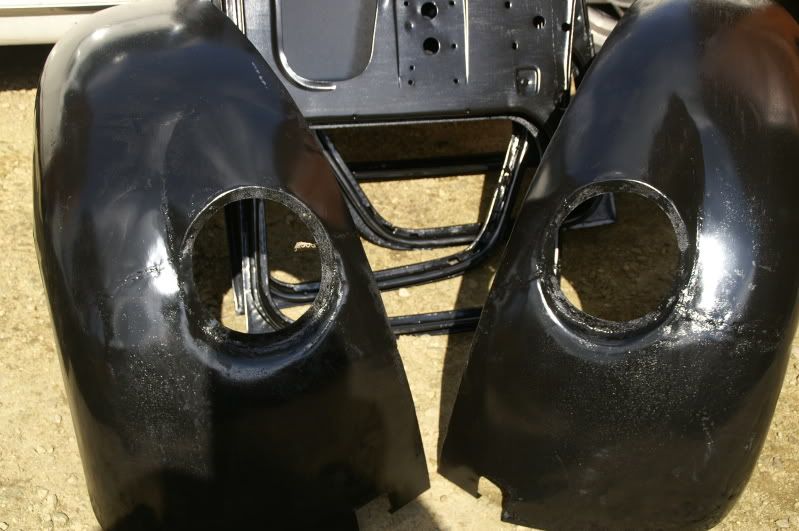
I knew the doors would all need attention, but they were not as bad as I expected, the boot lid was the only other panel that came out with holes in.
If you are interested there is a video of the process;
http://www.surfaceprocessing.co.uk/for-cars.html
Cheers Dave |
|
| Back to top |
|
|
Rick
Site Admin

Joined: 27 Apr 2005
Posts: 22446
Location: UK
|
|
| Back to top |
|
|
Nic Jarman

Joined: 05 Oct 2008
Posts: 1031
Location: Stoke by Clare, Suffolk
|
| Posted: Tue Apr 14, 2009 10:53 am Post subject: |
|
|
Silverhook sells filler in 3.5ltr drums.  |
|
| Back to top |
|
|
buzzy bee

Joined: 23 Nov 2007
Posts: 3382
Location: South Cheshire
|
| Posted: Sat May 16, 2009 9:06 pm Post subject: |
|
|
Hi
Have you got anything else done on the E recently?
Cheers
Dave |
|
| Back to top |
|
|
cobard
Joined: 13 May 2009
Posts: 1
Location: Essex, UK
|
| Posted: Fri May 22, 2009 6:27 pm Post subject: Morris 8E - 1947 |
|
|
I have been reading about your Morris. Another Ebay purchase job here!

Steve |
|
| Back to top |
|
|
ukdave2002
Joined: 23 Nov 2007
Posts: 4104
Location: South Cheshire
|
| Posted: Sun Jul 25, 2010 9:50 am Post subject: |
|
|
Its a year since my last update 
Things are progressing but very slowly !
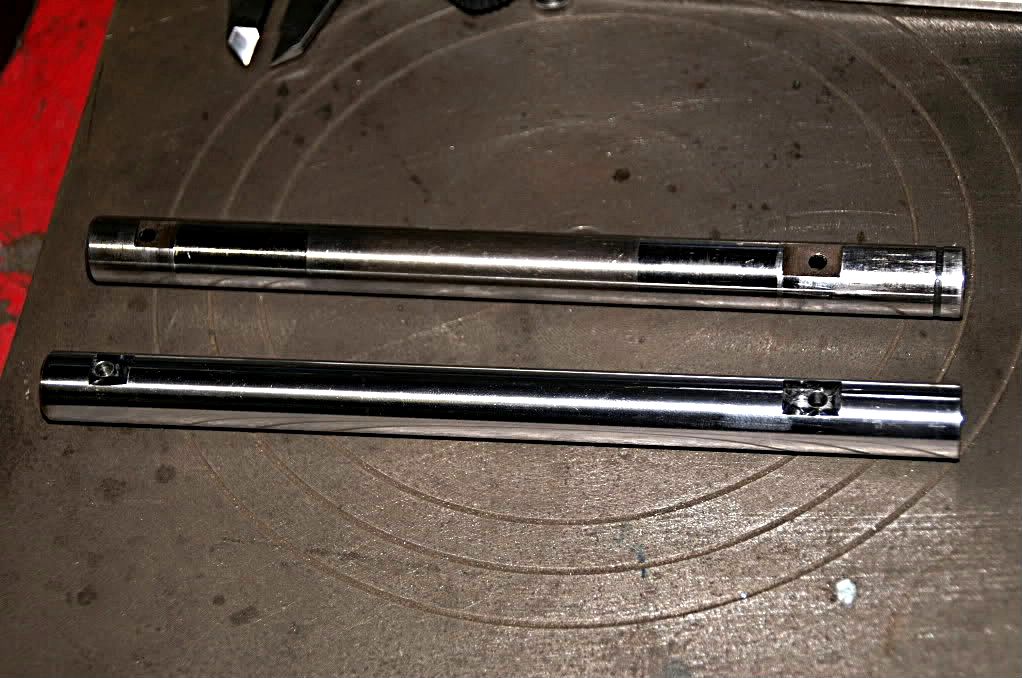
I rebuilt the gearbox, its not a difficult job apart from the fact that lots of bits are just not available, the layshaft was badly worn so I had to make one, it would have been very simple apart from needing to be ground case hardened steel, there were a couple of challenges drilling the oil-ways, and at the time I could only source 16mm ground cased hardened steel, the original was 5/8" so a couple of other mod's had to be made.
I took the opportunity to fit needle roller bearings in the lay gear rather than the original bronze bushes.
The old and new layshafts;
Because of its French roots the innards of the gearbox are a mixture of imperial and metric dimensions, some of the bearings and bushes are metric others imperial, all the ball bearings are available off the shelf.
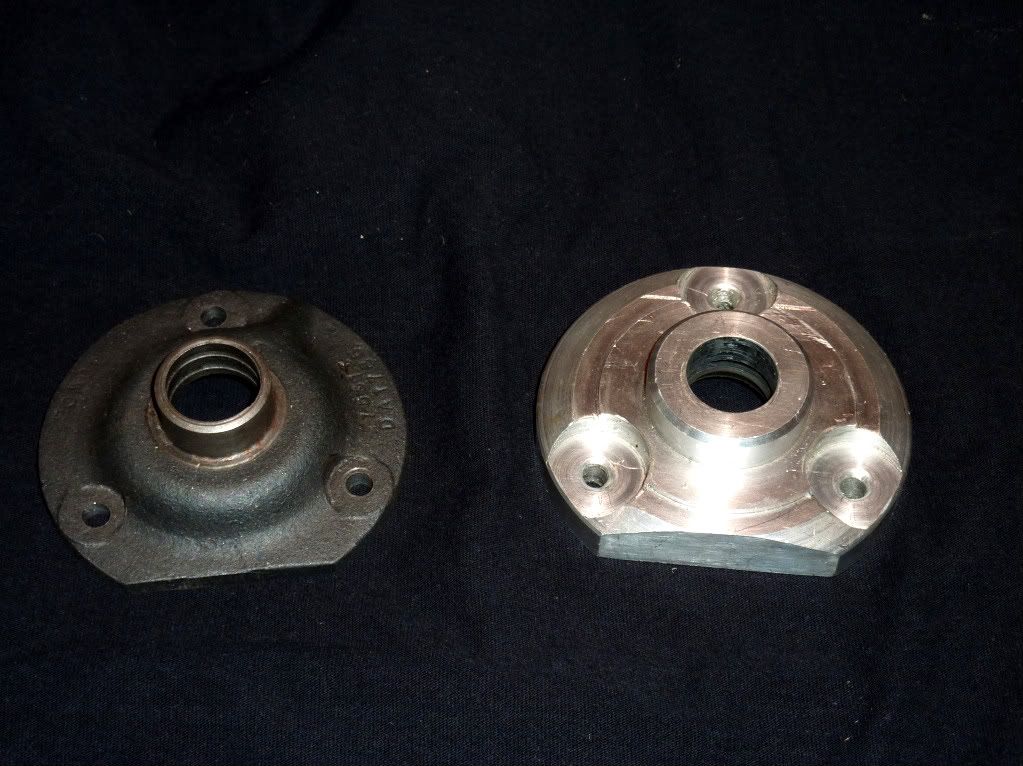
The SE box relies on machined scrolls and felt washers to keep the oil in at each end, which were never that good, so I made a new endplate for the input end that can take a modern oil seal, original on the left, my new on on the right;
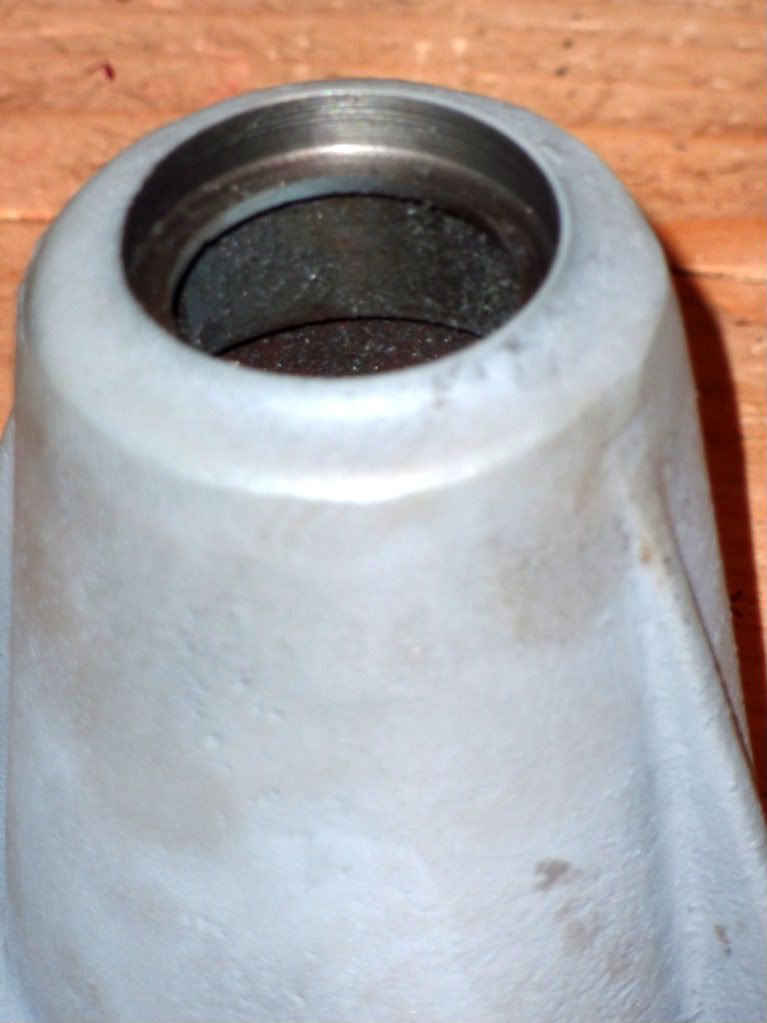
And machined the end of the output cover so that an oil seal could be fitted there;
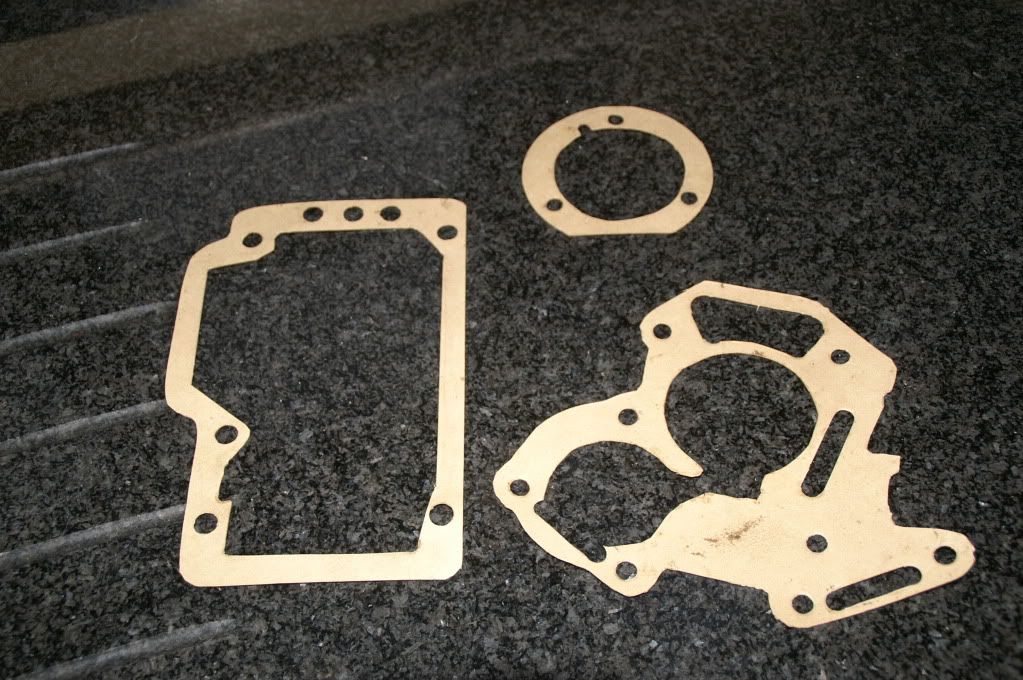
Gearbox gaskets also not available but a simple job to cut from a sheet of A4 gasket paper;
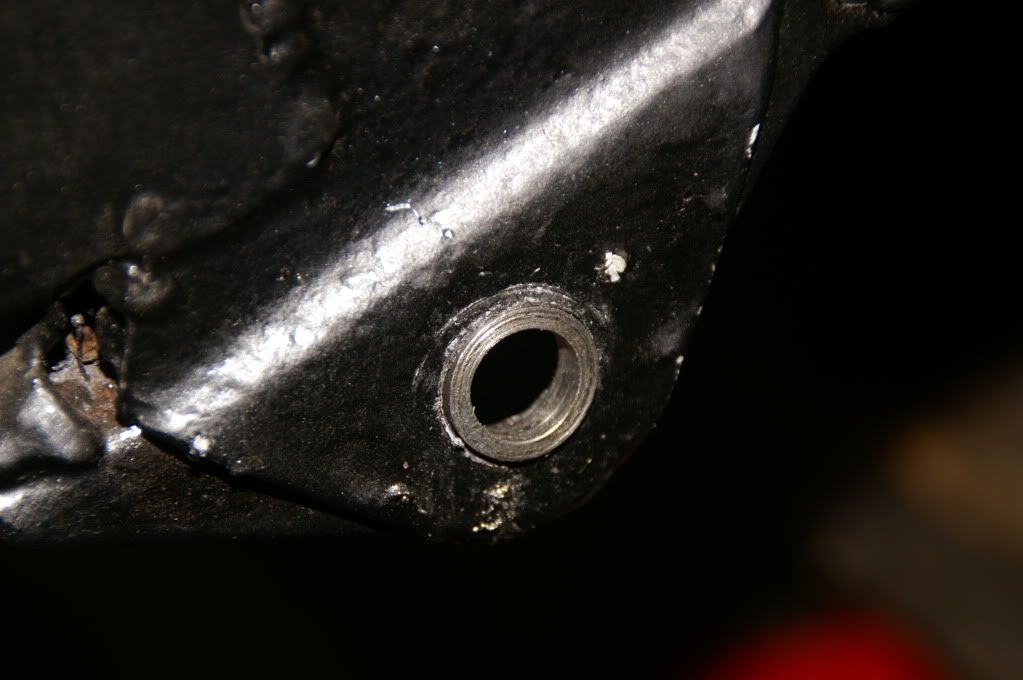
The eyes for the spring shackle pins were worn in the chassis toyed with the idea of welding them up but in the end opted to drill them out to a larger size, make some bushes and press them in, needed to do this before the engine and box were dropped in;
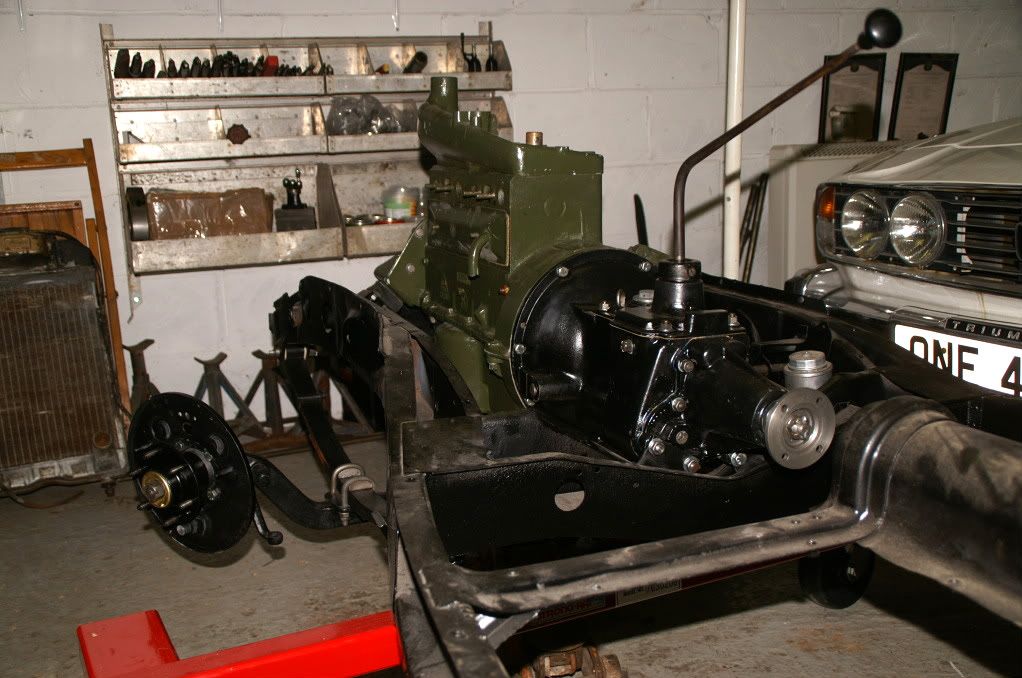
With a new clutch assembly I could finally mate the engine and gearbox up and drop into the chassis
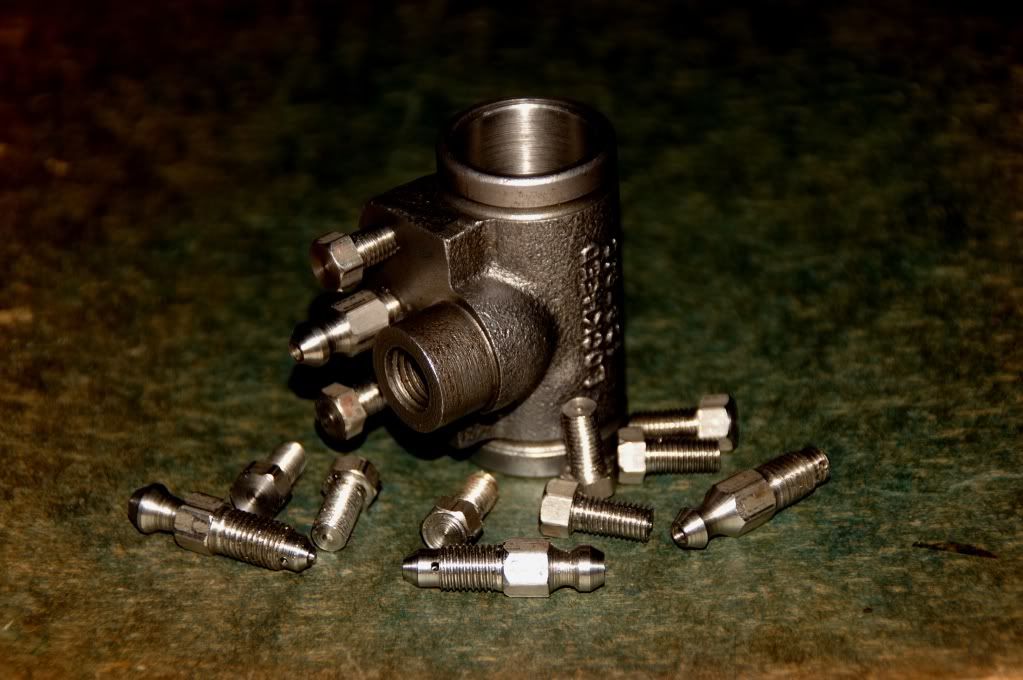
The SE has hydraulic brakes, all the slave cylinders were worn, so I bored them out, made some stainless steel liners, pressed them in and machined to the original 7/8" I know opinions are split on relining cylinders; but done properly with the right interference fit I think its fine.
Also unavailable are the slave cylinder bleed screws and cylinder screws (unavailable with the correct whitworth spanner size with BSF thread, another of the mix of threads and spanner size found on the series E)
I managed to source the correct whitworth sized hexagonal bar again in stainless steel so made the screws and bleed nipples up; below with one of my relined cylinders;
Hopefully now I am past the point where stuff has to be made so things can progress a tad quicker!
Dave |
|
| Back to top |
|
|
Richard H
Joined: 03 Apr 2009
Posts: 2148
Location: Lincolnshire, UK
|
| Posted: Wed Jul 28, 2010 11:00 am Post subject: |
|
|
Thanks for the update - some really impressive work you're doing there 
_________________
Richard Hughes |
|
| Back to top |
|
|
peter scott

Joined: 18 Dec 2007
Posts: 7118
Location: Edinburgh
|
| Posted: Wed Jul 28, 2010 3:48 pm Post subject: |
|
|
Proper engineering. Great Stuff!
Peter
_________________
http://www.nostalgiatech.co.uk
1939 SS Jaguar 2 1/2 litre saloon |
|
| Back to top |
|
|
Nic Jarman
Joined: 05 Oct 2008
Posts: 1031
Location: Stoke by Clare, Suffolk
|
| Posted: Wed Aug 11, 2010 5:59 pm Post subject: |
|
|
Looking really good Dave, you just need one of these.

_________________
1936 Morris 8 Series 1
1973 MGB roadster
1977 MG Midget 1500
Dax Rush |
|
| Back to top |
|
|
ukdave2002
Joined: 23 Nov 2007
Posts: 4104
Location: South Cheshire
|
| Posted: Fri Aug 13, 2010 10:46 am Post subject: |
|
|
| I like it |
|
| Back to top |
|
|
ukdave2002
Joined: 23 Nov 2007
Posts: 4104
Location: South Cheshire
|
| Posted: Tue Oct 19, 2010 5:12 pm Post subject: |
|
|
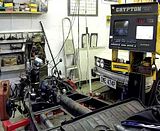
Fired the engine up for the first time a couple of weeks ago, it started after about 5 turns and just ran!...... for about 20 seconds until I my temporary fuel tank pick up poped out!
If you click on the pic below it should open up a video of the event!
 |
|
| Back to top |
|
|
Roger-hatchy

Joined: 07 Dec 2007
Posts: 2135
Location: Tiptree, Essex
|
| Posted: Tue Oct 19, 2010 7:44 pm Post subject: |
|
|
Well done Dave
Sounds great and I know the feeling of hearing it for the first time after loads of work.
Roger |
|
| Back to top |
|
|
buzzy bee
Joined: 23 Nov 2007
Posts: 3382
Location: South Cheshire
|
| Posted: Tue Oct 19, 2010 10:15 pm Post subject: |
|
|
Hi
Great stuff!
Did it all behave afterwards? Nervous moments eh!
Cheers
Dave |
|
| Back to top |
|
|
|


