|
|
|
Preparation and priming the cab and other body panels. |
|
|
Restoration Part 14. Click here to return to the main Dodge lorry restoration page. Part of oldclassiccar.co.uk. Contact page. |
|
|
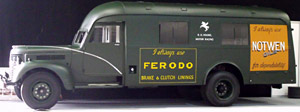
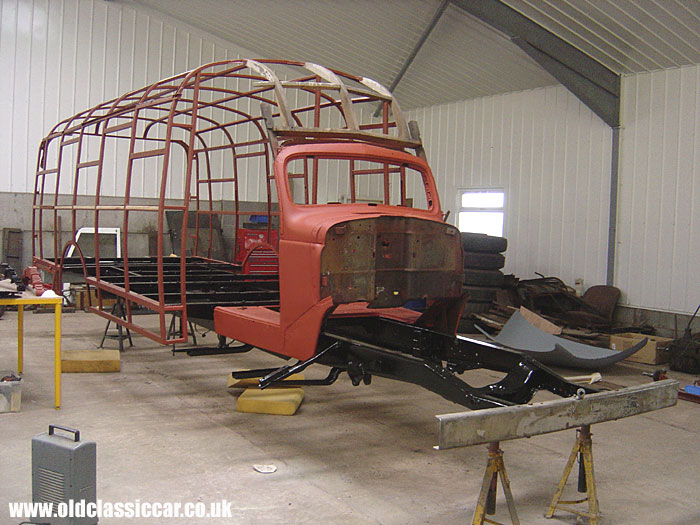
Much of the tail end of 2007 was spent renovating and repairing more of the lorry's bodywork. The work that went into it is similar to that done during a car restoration, just a fair bit more of it (especially the chassis). It was in October that the 26ft long chassis received its first coat of chassis black. The rear coach body frame and cab also received their first coat of red oxide. The cab and the front end panels will require several coats of primer, and further preparation to iron out any pitting to the metalwork, but it was great to see the old lorry looking a bit healthier again. |
|
|
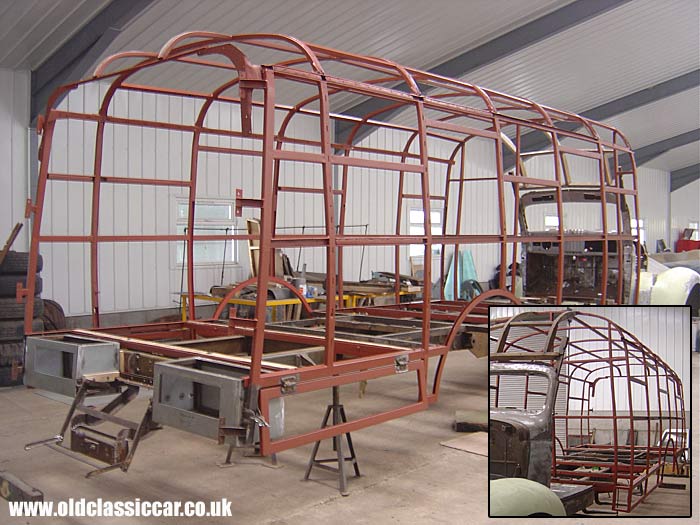
| In October the rear frame of the bodywork received its first primer coat. The majority of the wood and metalwork have been attended to, although a few small sections of ash are still required in the frame, plus the rear door pillars are made of ash and are due to be replaced, using the originals as patterns. This first coat will help prevent the metal re-rusting while other parts of the project are attended to, especially with winter on the doorstep. | |
|
|
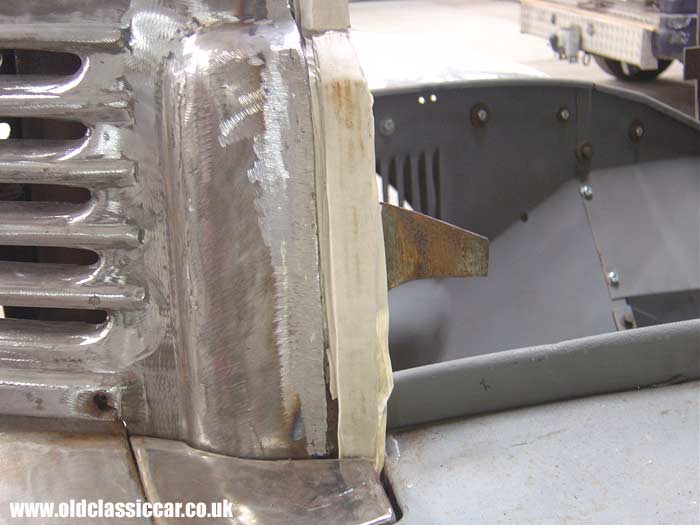
| The front end panels were re-fitted temporarily in September and left on for a few weeks. This enabled VHC to adjust panel gaps as necessary to get them acceptable. In this photograph, a thin edge of weld was added to the front grille and then ground back, in order that the panel gaps be something like right. No doubt the gaps weren't brilliant when the Dodge was first built, but they may as well look right now in retirement! | |
|
|
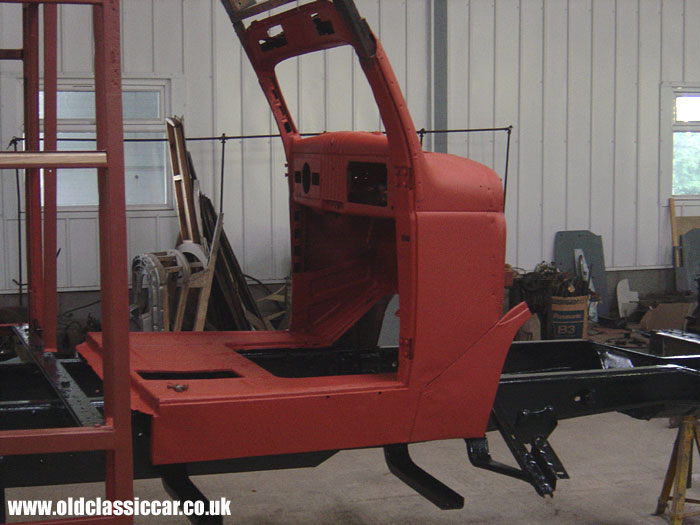
| With the adjustments made to the front body panels, they were removed again for further work. This also enabled the cab to receive its first coat of primer, again to ward off any surface rust re-appearing during the damper months. The chassis also received its first coat of paint, dulled-down slightly in subsequent coats to make it look a little less freshly painted. The large header panel that goes over the screen can be seen in the background, now also in a coat of primer. | |
|
|
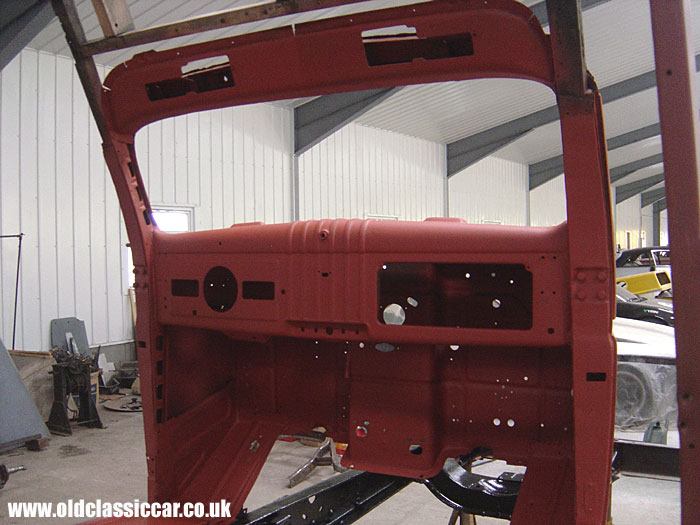
| This photo shows the stylish dashboard that was fitted in the 1939-1947 'Job Rated' era Dodge trucks, now in its first coat of primer and looking good. There are some pitting marks when you get in close under the paint, so this will be worked on to give a smooth finish prior to the green topcoat being applied sometime later on...(!) | |
|
|
| A second view showing the dashboard area. I've got a set of gauges to go in here, including a reconditioned speedometer. The condition of the metalwork in this area, bar some fatigue splits, was really excellent. All the metal visible in the cab and footwells is original Dodge from 1940. | |
|
|
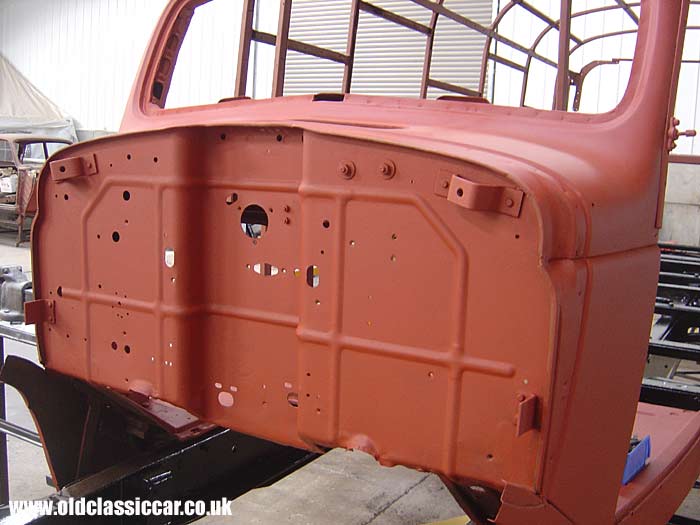
| The bulkhead was next to be cleaned up and primed. There are a few small areas that are still to be tidied in this area, but the bulk of it is aok to be used 'as is'. New rubber grommets, and seals for the screen and cowl vent, will need to be sourced, probably from the USA. | |
|
|
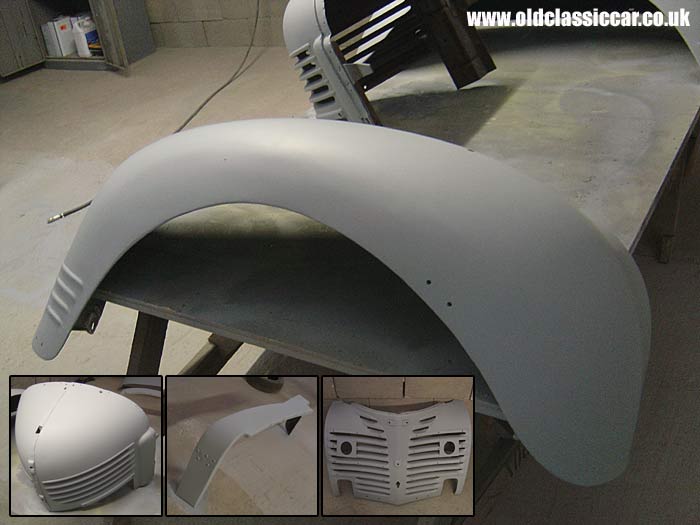
| In November, there was further work done to the front end tinwork of the Dodge. The wings had by this stage received a great deal of work to get them looking good, and fitting well. They are shown here after a coat of primer, along with smaller views of the grille panels that had also received the same time-consuming treatment. | |
|
|
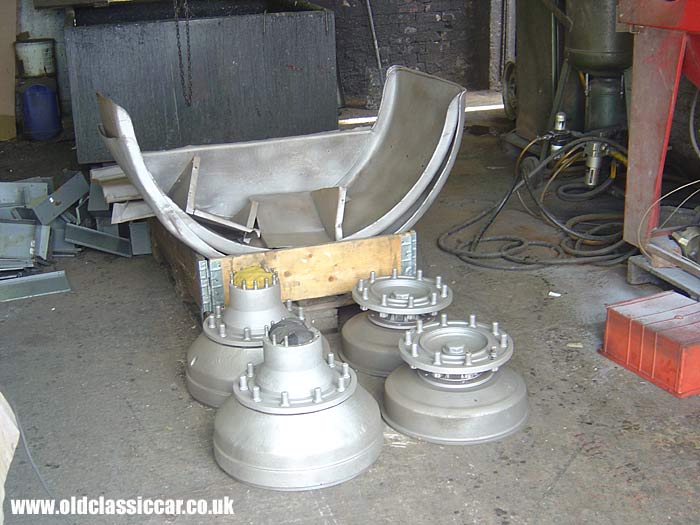
| With the bodywork receiving a lot of work in November and December, some of the smaller parts were cleaned up and painted as necessary (springs, U bolts etc). Some brackets, and the brake drums and hubs, were sent away to be sandblasted, and are seen here after a light coat of silver paint had been dusted over them to ward off corrosion. | |
|
Return to the Dodge lorry restoration page for more info on this rebuild. Previous Page: Part 13 - Other odds and ends attended to. Next Page: Part 15 - Axles back on, rear frame painted. |
|
|
|

Custom Search
|
 |
| Old Classic Car (C) R. Jones 2026. Content not to be reproduced elsewhere. |
| Website by ableweb. |
| Privacy Policy, Cookies & Disclaimers |