|
|
|
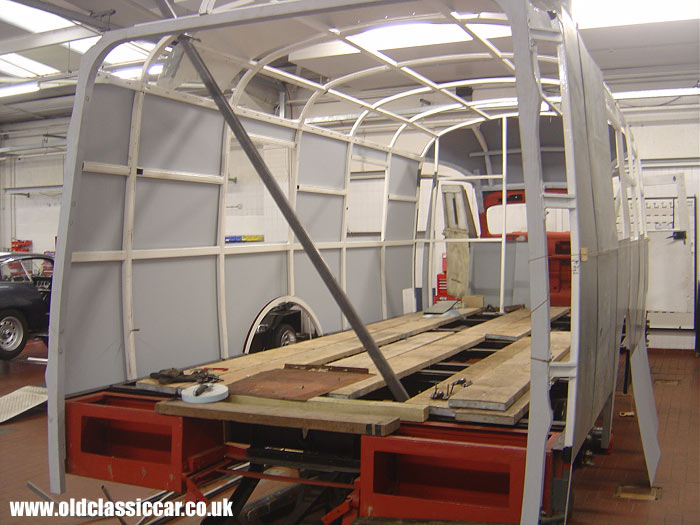
With the woodwork now in place, restoration work could continue on the outer bodywork of this classic lorry |
|
|
Restoration Part 21. Click here to return to the main Dodge lorry restoration page. Part of oldclassiccar.co.uk. Contact page. |
|
|
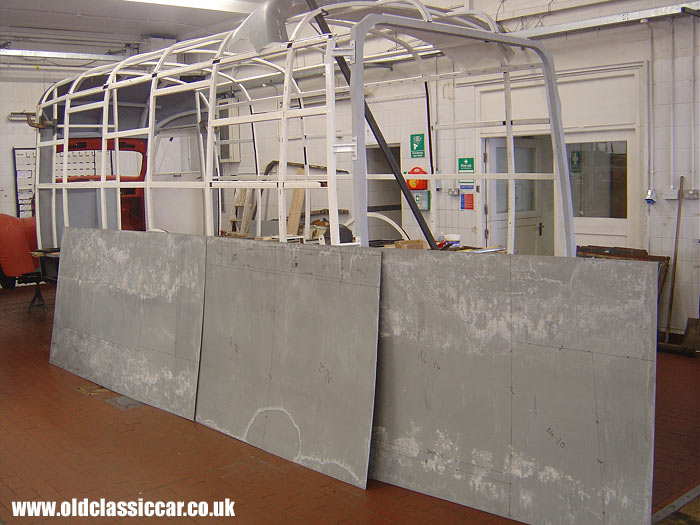
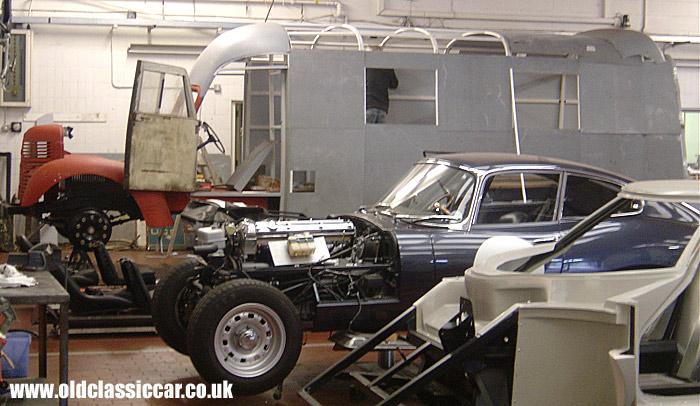
August saw the remaining pieces of ash framework installed into the Dodge truck's structure, so attentions could now turn to restoring the rear end of the body. The coachwork rear of the A pillars was built in this country in 1940/41, by well-known coachbuilders Mulliners of Birmingham. The original panelwork was steel, screwed to a composite steel and wood inner frame. The framework had already been repaired by this stage, so it was time to retrieve the Zintec sheet steel from the storeroom. Dave at VHC cracked on, marking out each of the required new pieces of steel, using the badly corroded original panels as a guide. While this was being done, some cosmetic work was done to the engine block and gearbox, and some smaller pieces were sandblasted ready for further work. |
|
|
| Seen here are several sheets of the Zintec steel, all marked up and ready to be cut to size. Rather than try cutting each piece by hand, it was decided that the cutting work would be passed over to a local engineering firm, who had a suitable guillotine large enough to handle these lorry panels. Fortunately the large curved panel over the windscreen, and that over the rear doors, were ok to be re-used! | |
|
|
| Comparing old and new - with the newly cut panels back at the workshop, they could be prepared for priming. Etch primer was applied with a roller. However before the panels could be given a coat of etch primer, the Zintec sheets needed to be given a special preparatory 'wash', in order that subsequent layers of paint would key correctly. HMG came up with both the products and advice during this process, Glen from HMG even popping over to pass on some tips prior to work commencing. The lousy condition of the original panels can be seen in this shot - they'll be preserved, but off the vehicle, not on it! | |
|
|
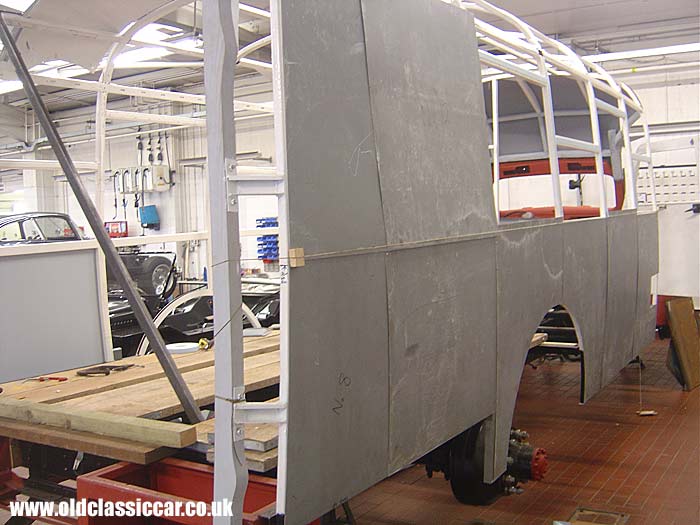
| With the insides of the panels painted, it was time to start lining them up and fitting them to the truck. Panels on the offside were first to go on, those higher up overlapping those below, and those at the front of the vehicle, overlapping the next panel to the rear, all in a bid to avoid water ever getting between the sheets. The areas of steel under the overlap(s) also received a lick of paint, prior to the final screws and beading strips going in. | |
|
|
| Offside panels, viewed from the inside. Special double-sided tape was fitted onto the framework prior to panels being fitted, this allowed panels to be temporarily positioned while they were lined up, and will also act as a buffer between the outer panel and the inner frame. | |
|
|
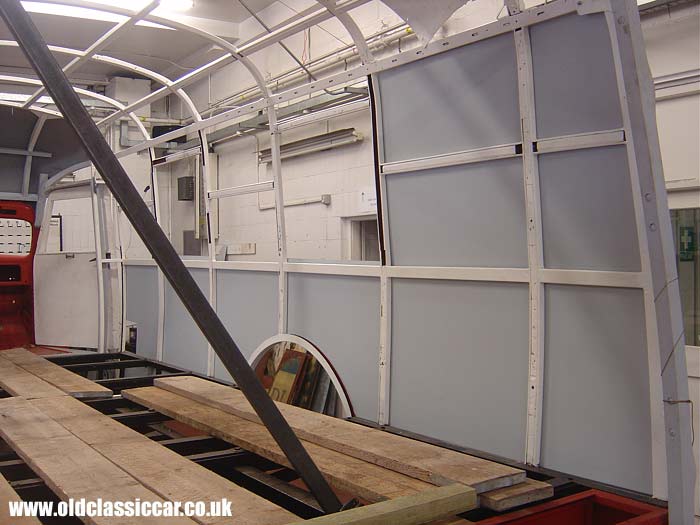
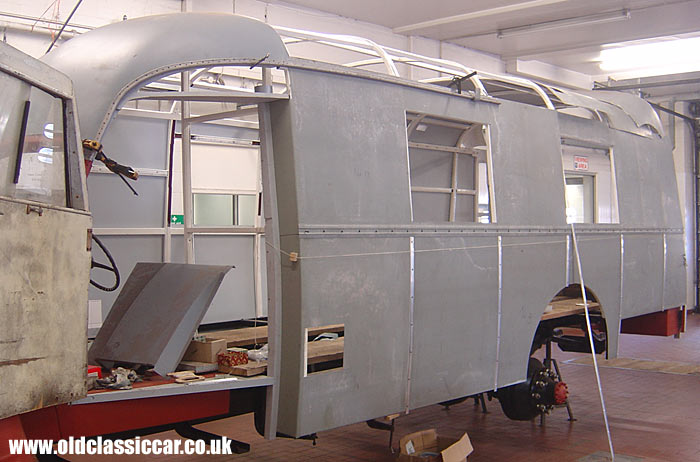
| Newly-made panels are shown here being fitted to the nearside of the lorry's bodywork. Finally the old girl is starting to look more like a classic commercial vehicle again, and less like an un-glazed greenhouse! | |
|
|
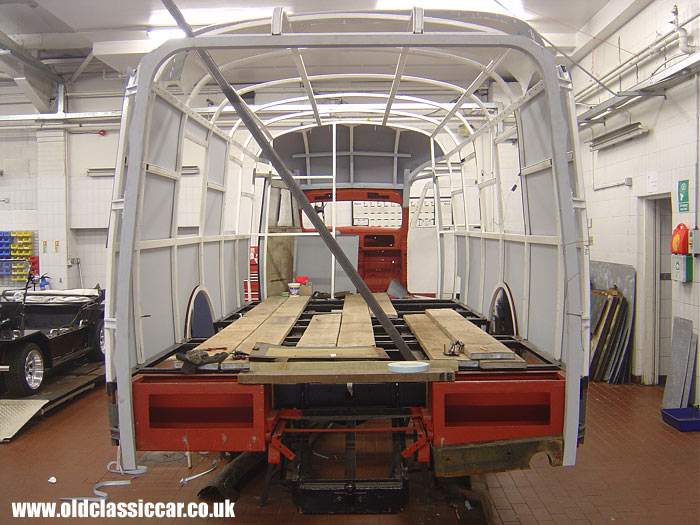
| A view from the rear now, giving a sense of what it'll look like when finally re-panelled all over. The rear vertical panels, that form the rear corners of the coachwork, have caused a fair bit of head and chin scratching. They are quite badly bashed around, and have suffered tinworm just like the rest. New ones will end up being made, one of the next jobs to look into. The hinged covers for both small rear lockers have been re-made, and will probably be fitted shortly. | |
|
|
| A couple more days had passed when I took this shot, several more panels on the nearside, approaching the back of the cab, had now been fitted. The inside of the coachwork is simply lined with sections of thin plywood, painted white, so shouldn't cause any problems when that stage is reached - but that'll be some way off yet, after electrics and so on have been installed further down the line. | |

|
|
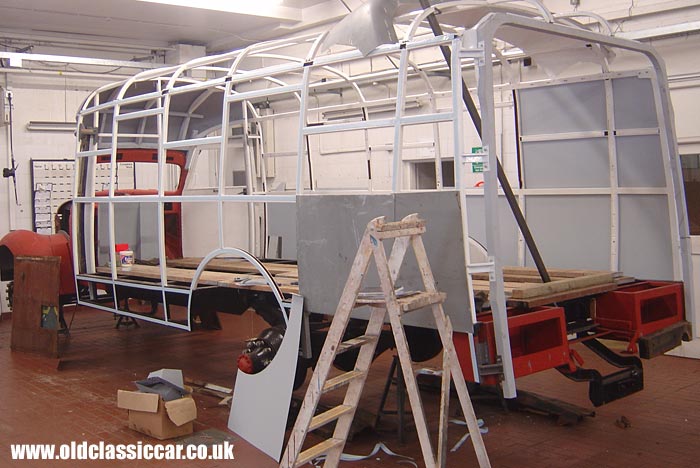
| This side-on shot of the Dodge gives a good idea of the vehicle's size - it measures 26ft long and approximately 9' tall when on it's wheels. To see it comes together like this makes it all feel very worthwhile, despite there being a mountain of work still to do obviously. | |
|
|
| Another side on shot, showing the Dodge towering over it's companions in the workshop. Note in this view, the roof panels at the rear are beginning to be fitted. The holes for the roof vents have been cut into these panels already, the vents themselves will also require work prior to fitment though. | |
|
|
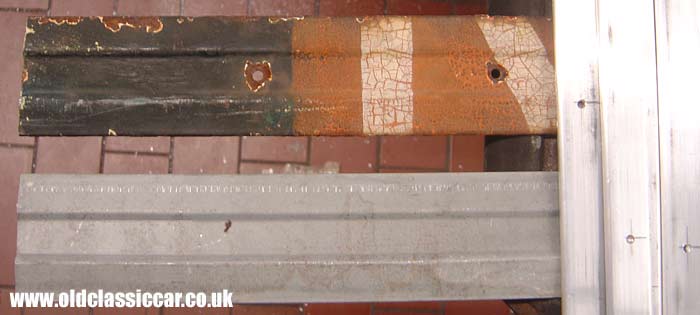
| Another week has passed, and work has begun to affix the beadings to the body frame, covering the panel joints. The thinner beading is aluminium, so needs to be fitted in such a way that no reaction (ie corrosion) can occur between the two different types of metal being used. The first piece of the original guttering has also been offered up in this view. | |
|
|
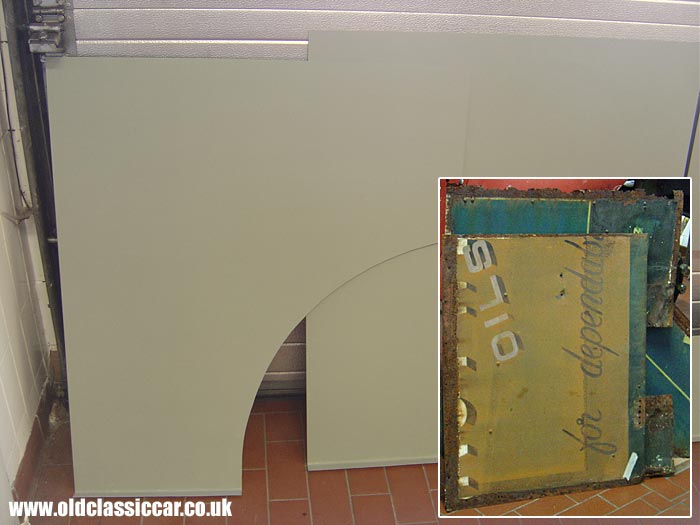
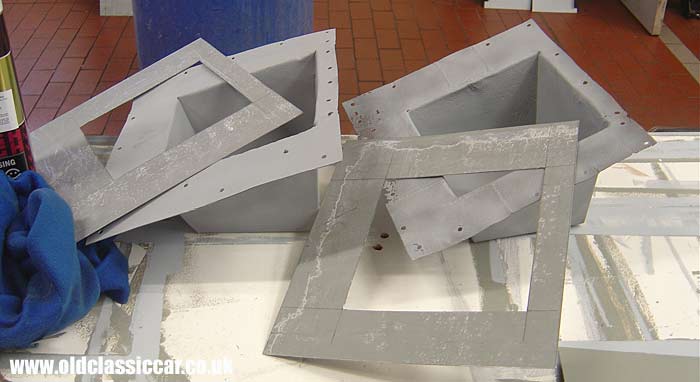
| Now for some detail photographs of parts yet to be re-fitted. The two grey panels shown here fit to the main bodywork, just to the rear of the cab, through which the petrol tank filler necks protrude - one tank per side. The surrounds to each panels were badly damaged (no surprises there), so will be re-furbished as required. This photo shows the new surrounds that have been cut to size, again made from Zintec steel. | |
|
|
| Another issue which we'd been pondering over on and off, was the replacement of the 2.5" wide beading strip, that runs fore and aft down each side of the bodywork, just below the windows. The original was badly corroded (steel again), and of a slightly unusual section. Adrian found a local engineering firm that were able to replicate the profile very successfully, and as can be seen in this photo, will look just like the original when it has been painted up and fitted to the truck. It would have been quite easy to just use any beading that was the right size, but all along we've aimed to re-use whatever was re-usable, and where something was beyond repair, replace it with as close a match as possible. To the right is the stock beading that is used on all the other body joins. | |
|
|
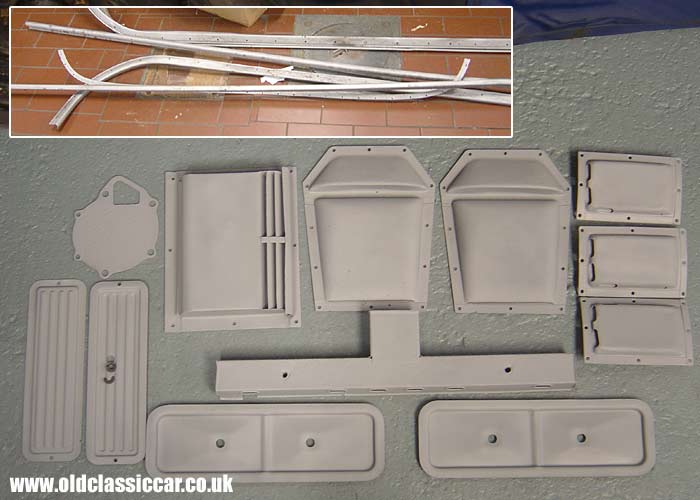
| Shown here are some of the smaller parts that were sandblasted in September (2008). The grey pieces were blasted then given a coat of primer to ward off flash-rusting. Various different roof vents are fitted to the Dodge, some stamped as 'ROEVAC' which I assume was an off-the-shelf vent that Mulliners used for the job. The larger vents are in pretty good order, some of the smaller ones though will need re-metalling in places where they've rusted through. Three of these are in good order though, and are shown on the right. The thin pressed assembly in the centre of the photo sits on top of the engine, and the HT leads are threaded through it. Also shown are the gutter assemblies after blasting, these are the originals and, with a little work, will be re-usable. | |
|
|
|
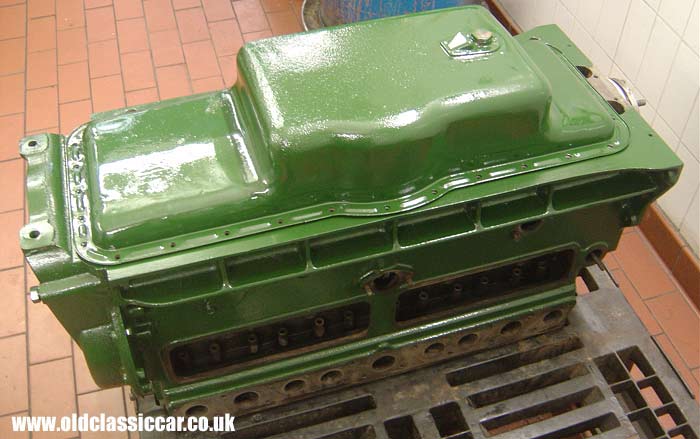
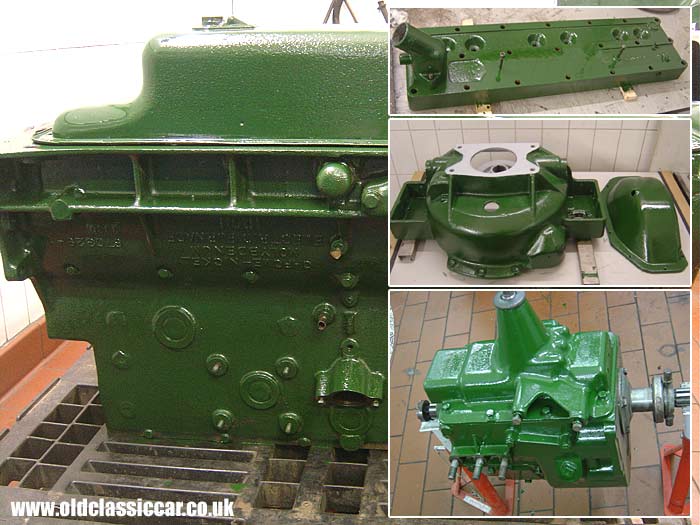
Away from the bodywork restoration. Using engine paint mixed by HMG to the correct Westminster Green shade, VHC gave the engine and gearbox their first coats of paint. Dodge engines of this era were originally finished in a silvery/grey colour. This truck's engine was painted green to match the rest of the vehicle after the war, when it became a racing car transporter, so green it had to be now. The engine valves have yet to be re-fitted - a couple of the valves were a bit thin on their seats so have been replaced with NOS parts. One of the valve springs had collapsed, so Arnett's (who did the bottom end reconditioning a few months back) came up with a replacement set. Several studs were also showing their age, so a local firm is making up new head, manifold and water pump studs from scratch. |
|
|
|
|
Return to the Dodge lorry restoration page for more info on this rebuild. Previous Page: Part 20 - Ash framing in the bodywork. Next Page: Part 22 - Roof panels, beadings and gutters are fitted. |
|
|
|

Custom Search
|
 |
| Old Classic Car (C) R. Jones 2026. Content not to be reproduced elsewhere. |
| Website by ableweb. |
| Privacy Policy, Cookies & Disclaimers |