|
|
|
Work continues in November & December to finish the re-panelling of the main vehicle coachwork |
|
|
Restoration Part 22. Click here to return to the main Dodge lorry restoration page. Part of oldclassiccar.co.uk. Contact page. |
|
|
In the previous instalment, some of the truck's new panelling had been fitted to the vehicle's structure, and finally it was starting to look like a truck once again. In fact it hadn't been this solid and rust-free since 1941, when Mulliners of Birmingham had built the crew bus body first time around. First thing to sort out would be the rear corners. They were badly bashed about, and we had a number of discussions earlier in the restoration process, about how this might be tackled. Not only were the original panels badly bent, they were also quite badly corroded in places, and it was obvious that rather than re-use them, they'd have to be replaced with new items. This was made extra difficult by the fact that they'd have to be made away from the workshop, using the tattered original panels as a guide. |

|
|
| At the beginning of November the two new rear corner panels were ready for collection. I'd only delivered them to this rural workshop a few days earlier, so to see the shiny new panels so quickly was great. Peter, whose workshop this is, is a dab hand with the English Wheel, and despite not having the Dodge close by to work alongside with, did a cracking job of making the new panels, out of aluminium. The original panels were steel, but any coachbuilder who has highly-chromed rollers in their English Wheel(s), such as those seen in this photo, won't run steel through them because of the risk of damaging the polished surfaces. Aluminium is also a lot easier to work with. Each rear corner panel was made from two separate pieces, and welded longitudinally, the final joint being worked-over and re-rolled to make it all but invisible. Possibly it isn't obvious in the photo above, but there are some interesting compound curves going on in these panels, making it extra tricky to get them right. | |
|
|
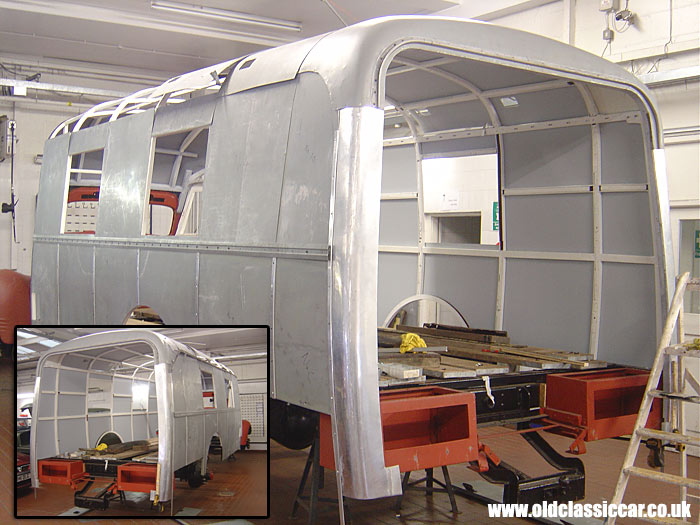
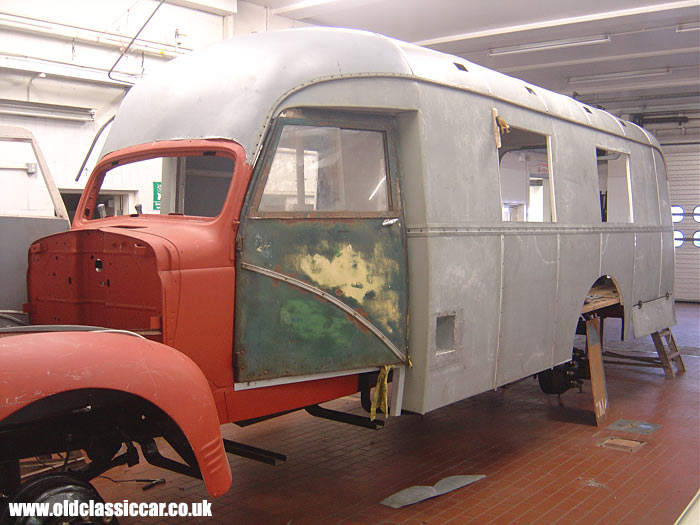
| The new panels were soon whisked over to VHC. Until these had arrived, progress on securing the roof and top rear panels couldn't start. The new corners didn't need a great deal of fettling to make them fit. Also note the tall vertical joining strip that covered the joint between the corner panel, and the flat side panels. With aluminium and steel panels joining up it is critical to ensure that they don't actually touch, otherwise corrosion will form, so everything has been well sealed prior to final fitment. The wide compound panel over the rear doors is the original panel. It was found to be in pretty good order, just needing some small pieces of new metal welding onto the edges. With the corner panels in place, the top panel could be finally installed, using many of the original screwholes as a guide to positioning. The original horizontal gutter that fits directly above the back doors, which had been sandblasted a few weeks earlier, was straightened and then re-fitted. All the woodwork around the back doors has been replaced, so there were no original holes to use as guides here! | |

|
|
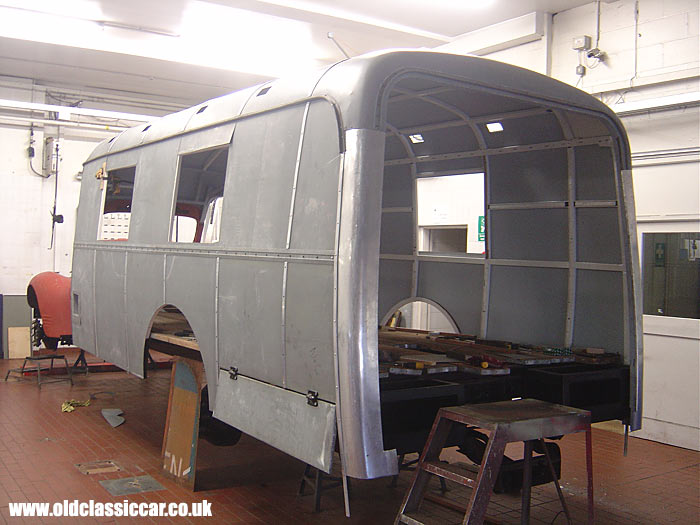
| Much of the planning that has gone into this restoration involves deciding in what order things need to be replaced in. With the rear top panel over the door aperture now screwed in, work could finally start on installing the new zintec roof sheets. This had to be done working from the rear of the vehicle forwards, in order that the overlaps went the right way, just as was done with the side panels a month or two previously. The idea is that water won't be forced into the panel gaps as the vehicle drives along in the rain. Although the gaps are covered by a sealant and beading strip, little details like this need to be done correctly. In the photo above, the five central roof panels are loosely in position. The apertures have already been cut in for the later fitment of the side roof vents. Note how they aren't all positioned in the same place on each panel, just as the original panels were designed. The re-skinned side lockers have also now been fitted, although they have yet to be fitted with the small, 'T' handle-operated, catches. | |
|
|
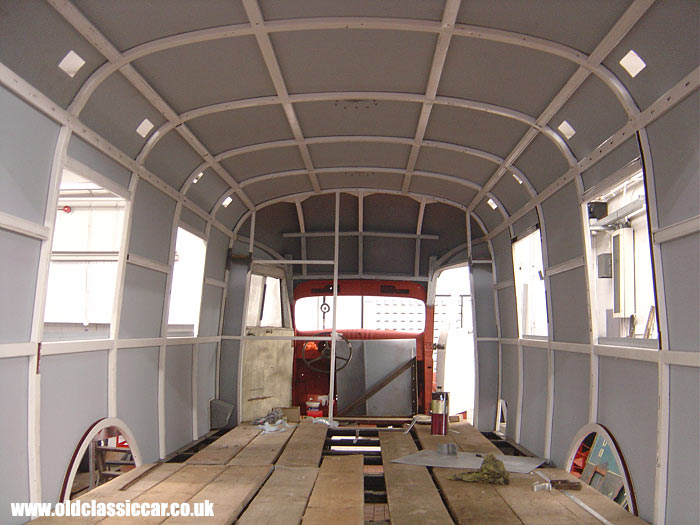
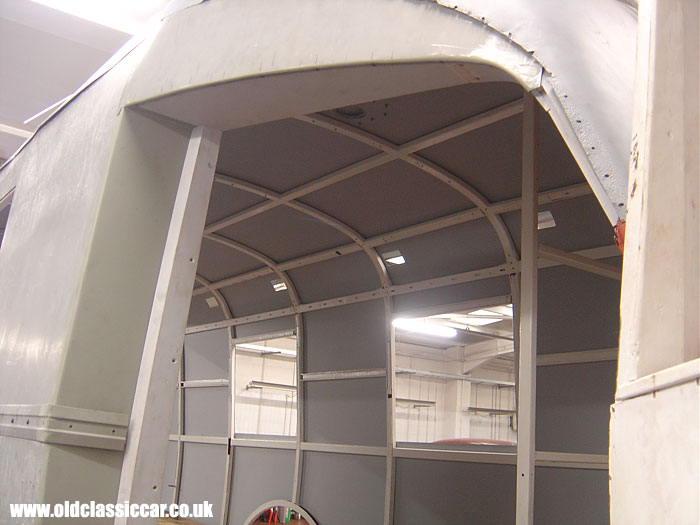
| This interior shot shows just how much better the vehicle looks, now that the panels are in position. Eagle-eyed readers will notice a few gaps within the truck's composite (metal/wood) framing - new pieces of hardwood were sourced during November, and cut to size to fill these gaps in. As the outer sheet panels are screwed through to the inner frame, it is essential that these wooden pieces are in place. | |
|
|
| A close-in look at the newly-skinned locker on the offside rear corner. The beading joining the corner to the side panels is in the process of being trimmed to fit in this photograph. | |
|
|
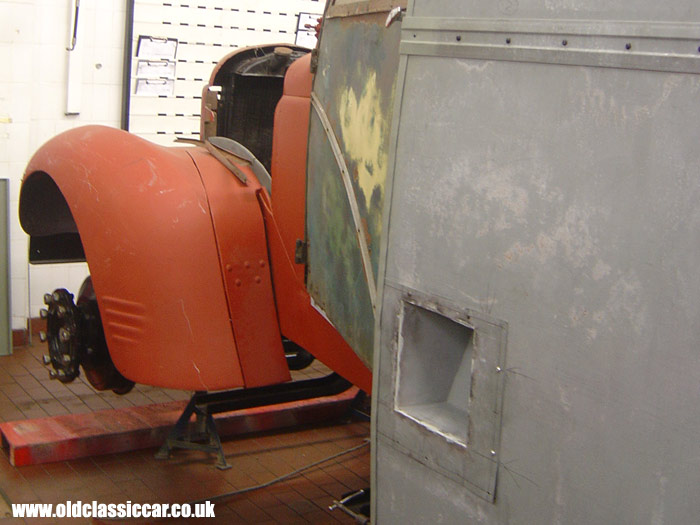
| A quick look in through the passenger door aperture. The top header panel still has a few rough edges in this view - they were welded up later in the month. The curved panels above the door have now been prepped and installed. They follow the taper of the woodwork that joins the (wide) rear body, to the (standard width) Dodge header panel and forward cab area. Lucas semaphore indicators, or 'trafficators', fit each side of the cab, just behind the doors and above the return of the side waist trim. | |
|
|
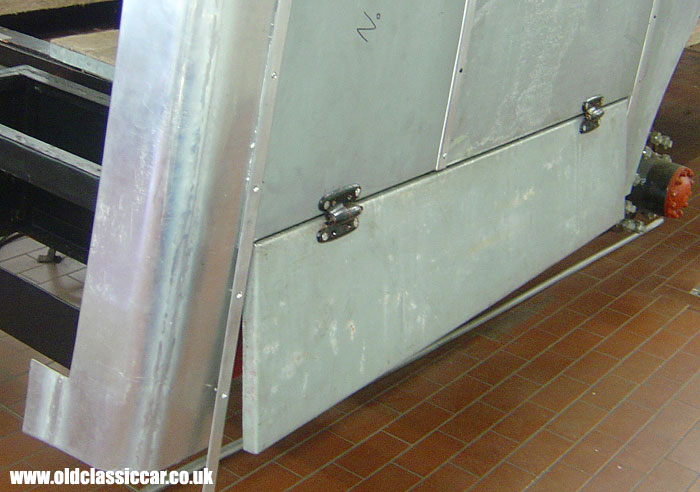
| Both petrol tank filler panels needed repairing, the nearside section is shown here part-finished and temporarily fitted to the rear body. | |
|
|
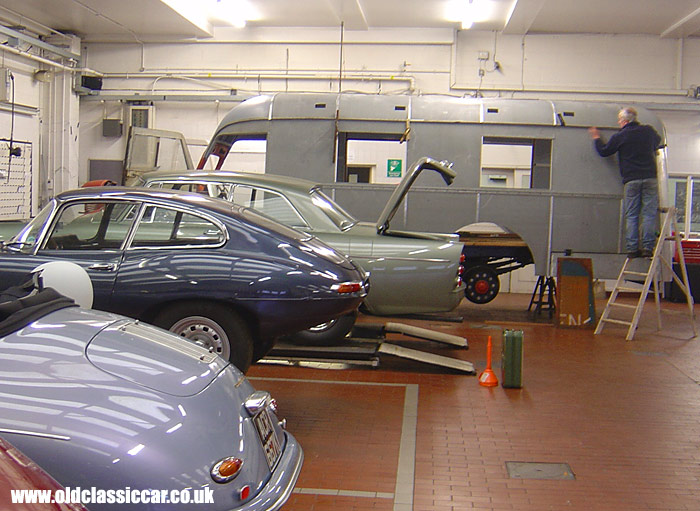
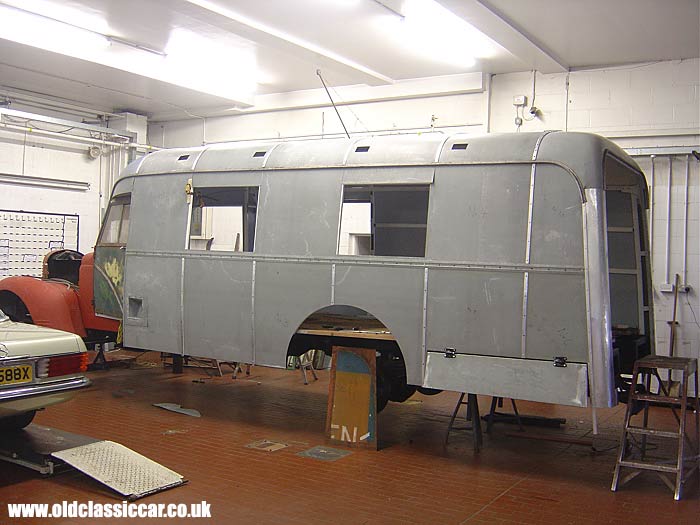
| A general view of the workshop again, showing the truck with it's roof panels in position, and work starting on fitting the full-length original guttering. These were blasted a few weeks back, and needed a few small repairs due to rust. They also needed straightening a little before they could be re-fitted. It would probably have been easier to just fit new gutters, but wherever feasible the original parts are being refurbished rather than replaced. The guttering on each side is in two pieces, with the join being above the panel between the two side window openings. It took a fair bit of work to get the 'run' of the gutter, and the join, satisfactory. Note one of the original rusty, signwritten, panels leaning against the locker door, and Dave perched on his ladder. | |
|
|
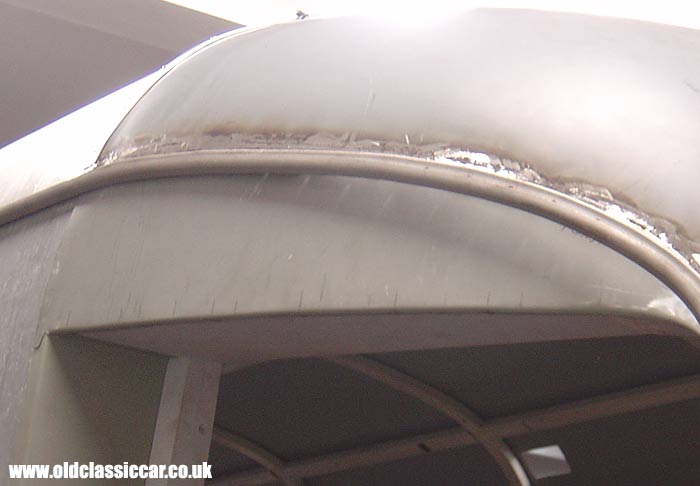
| As seen on 10th December 2008, guttering finally in place and screwed down. The beadings that run across the top of the roof could now be screwed down finally too, once the guttering was in final position. Still remaining to do, a few small sections of beading that run vertically between the gutter, and the side waist trim. Once they are in place, thoughts can turn to the window frames, one of the next jobs most likely. The small gutter that fits above the screen will also probably go on in the near future, now that the large header panel is in final position. At this stage, work was continuing on the other side of the body, fitting the side gutters. | |
|
|
| Another look at the rear corner, showing most of the beadings and screws in place. | |
|
|
| The latest state of play, again taken on 10th December. Each side window assembly features one fixed pane of glass, and another which slides. Both sit in 'U' section channels that run alongside each other. Needless to say, the original window frames disintegrated when they removed in 2007. The current idea is to get some lengths of channel made up to size, cut them down to the correct lengths, and make new frames from there, wherever possible re-using the original glass. | |
|
|
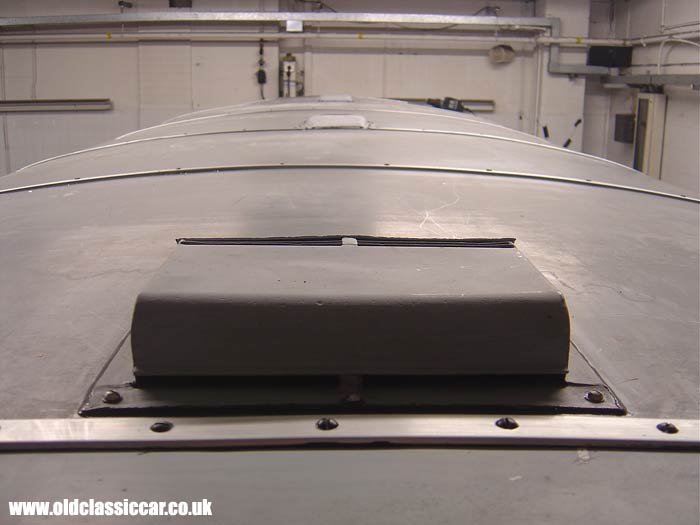
| This is the view along the top of the roof, from the rear of the vehicle. The centrally-mounted vents were pre-installed in the roof panels prior to being fitted. I found a cache of unused 2BA slotted and dome-headed screws in the garage, so they were pressed into service when the vents were fitted. No nasty-looking crossheaded screws here! | |
|
|
| Seen here, the offside edge of the screen header panel, now with new sections of steel let in. Once painted, the beadings and guttering down the offside can also be screwed into place. | |
|
|
|
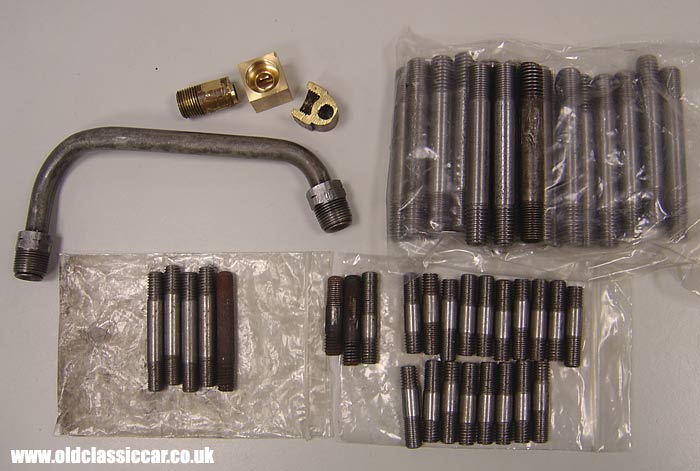
A few other odds n ends progressed. A few more little gems from a local engineering firm, this time for the Dodge's six cylinder sidevalve engine. New studs had to be made for the cylinder head, combined inlet/exhaust manifold, and also the water pump, and are shown here along with a repaired brass oil pump outlet union. The union was damaged early on (not at VHC, or by me), and attempts at finding a replacement of the correct size had drawn a blank. The engineering firm cut off the damaged part of the brass elbow and made a new section up. This will be installed when the oil pump is re-fitted to the engine, the new piece being silver soldered to the original threaded piece on the left. |
|
|
|
|
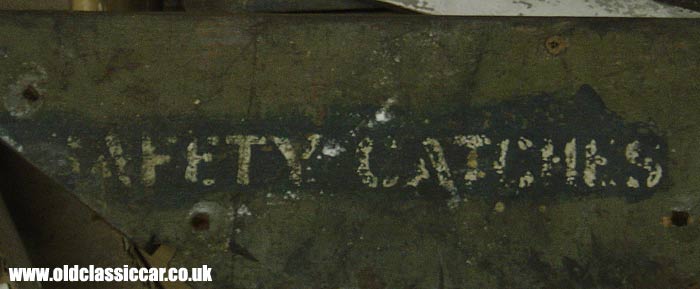
While having a look through the old wooden pieces removed from the truck, Adrian found this piece. I think it was incorporated within a corner shelf within the back body of the Dodge, so all being well it'll be returned there later on in the build. Stamped with the words SAFETY CATCHES, it harks back to the Dodge's first incarnation as a wartime bus used by the RAF. I think the remaining work to be done this month will see the gutters fitted to the offside of the body, and perhaps the roof vents installed down each side. |
|
|
|
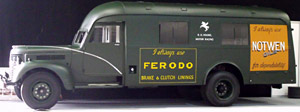
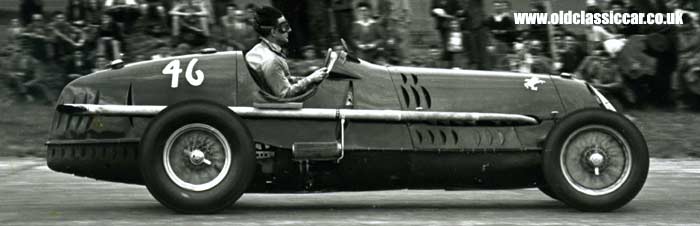
| During November I was lucky enough to buy this old photo, showing the twin-supercharged 3.8 litre Alfa that the Dodge once carried. The photo was taken around 1949 or 1950 - note the lack of crash hat. More details about this Alfa Romeo, an 8C-35, can be found here. Needless to say, if anyone can help me find other photos of the car, and even better the Dodge photographed with the car, that would be great! | |
|
Return to the Dodge lorry restoration page for more info on this classic truck restoration. Previous Page: Part 21 - Making a start on re-panelling the bodywork. Next Page: Part 23 - Further engine re-assembly, and work on the back doors |
|
|
|

Custom Search
|
 |
| Old Classic Car (C) R. Jones 2026. Content not to be reproduced elsewhere. |
| Website by ableweb. |
| Privacy Policy, Cookies & Disclaimers |