|
|
|
The lorry's bodywork receives several layers of primer and undercoat. |
|
|
Restoration Part 31. Click here to return to the main Dodge lorry restoration page. Part of oldclassiccar.co.uk. Contact page. |
|
|
The month began with further work being undertaken in the rear end bodywork, principally in the cab division and above the side windows in the back. March saw the majority of this done, with just small pieces still to do as the month drew to a close. The biggest efforts though went into the lorry's paintwork. All along we knew this would end up being a labour- and time-intensive operation. To help things along - a little - I spent six days mucking in with prepping various panels, in between wielding a brush on various parts of the truck. The final prep and finishing coats I think I'll leave to the experts, but I'm sure there'll be other things to help out with as and when I get time to go over. Apologies if this page is slow to load - there are quite a few images. |
|
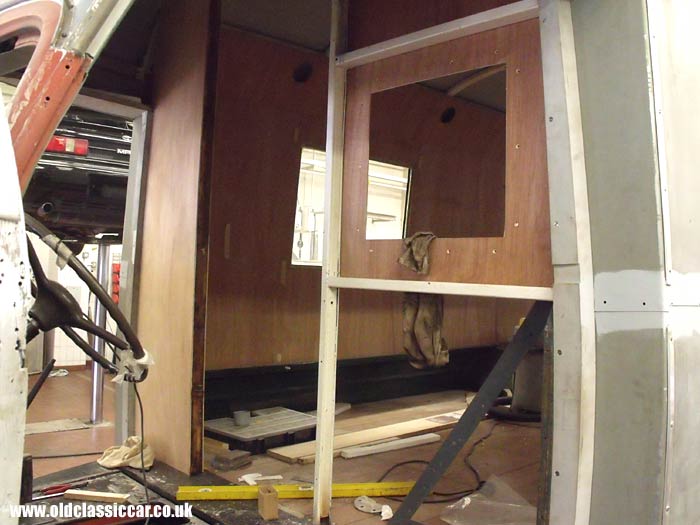
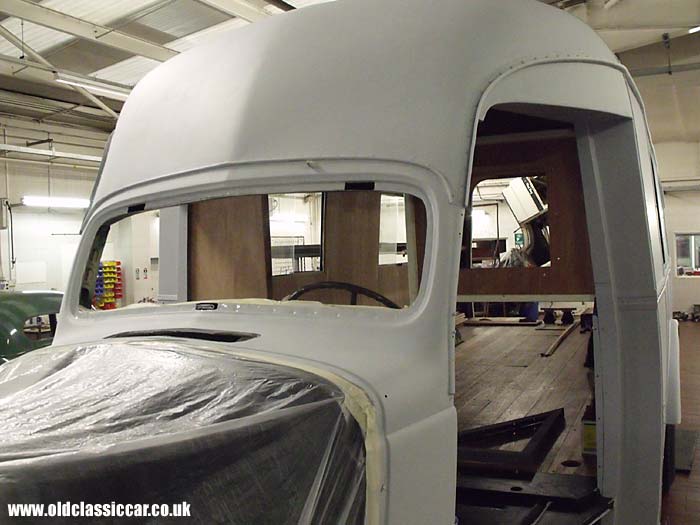
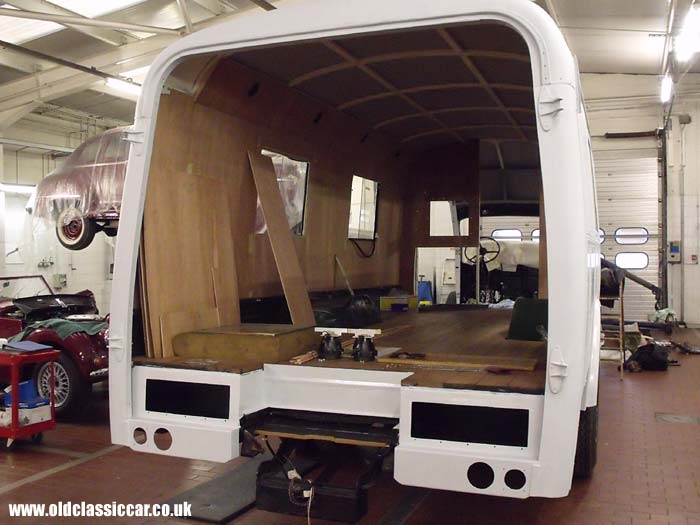
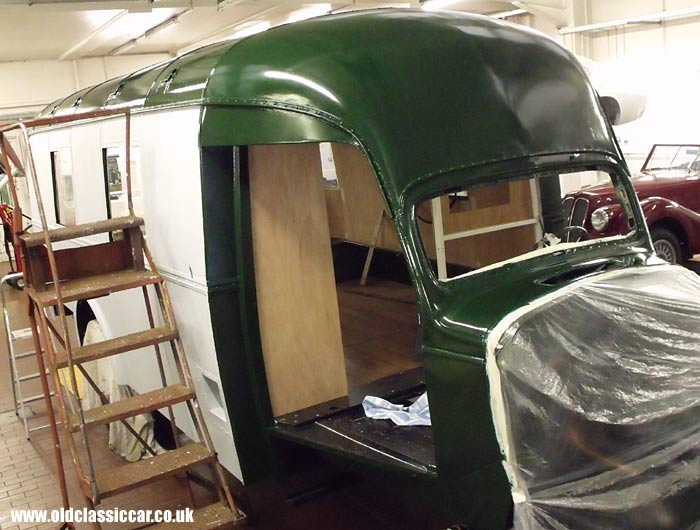
| This view shows work underway in the cab area, where it goes through to the rear. Part of this panelling was suitable for re-use, the remainder had to be built from scratch. |
|
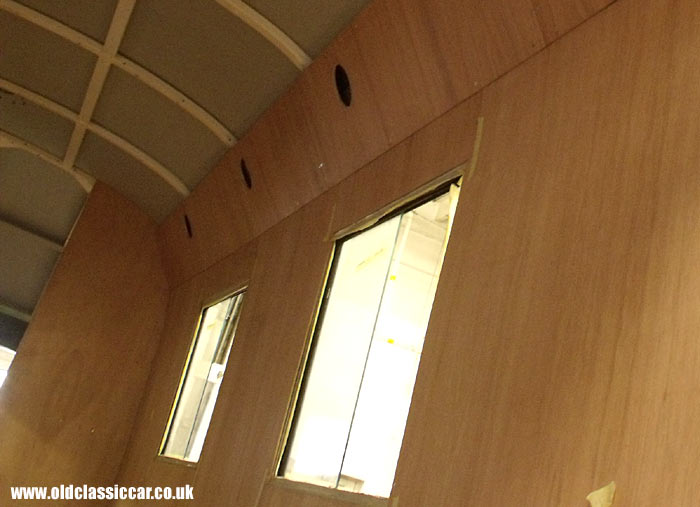
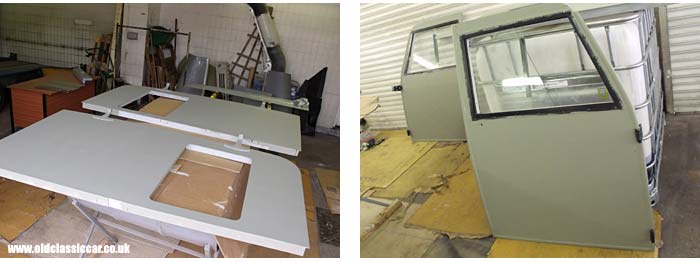
| This is as far up as the interior ply lining extends. The circular apertures will shortly be fitted with the original brass air vents that were retained from the old panels. All of the interior visible here will be painted white, as per original. |
|
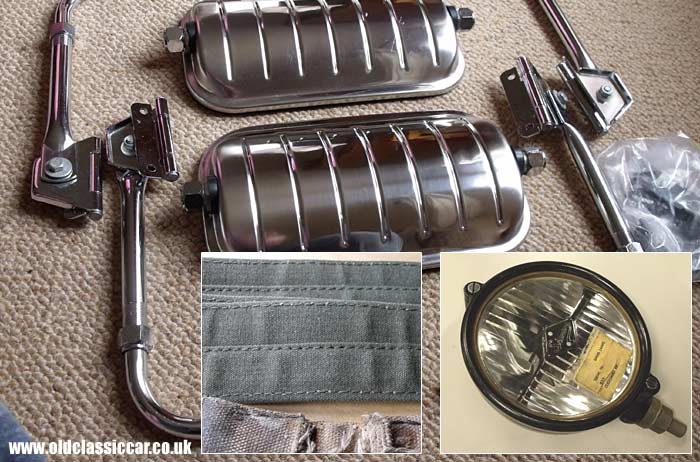
| During the month I was able to source some more new parts to use on the truck. The original door mirrors were tiny, I'll keep them "on the shelf" but I decided to find something that would give a better rear view of the road. It would have been easier - and cheaper - to buy some lorry or horsebox mirrors in the UK, but as they all seemed to be black plastic affairs, that would look awful on an old lorry, I had a look around in the US for something more suitable. These "West Coast" style mirrors were found on ebay USA, and while they're a little shinier than I'd like, will offer a much better view of the road while still being in-keeping with the vehicle. New checkstraps were ordered from a supplier in Shropshire, and a new-old-stock Simms lorry lamp that I bought years ago was dug out and taken over to the 'shop. Originally the Dodge had a single vintage Bentley lamp mounted on the front, in addition to the headlamps, but this will be a suitable alternative until a correct Bentley lamp is found. |
|
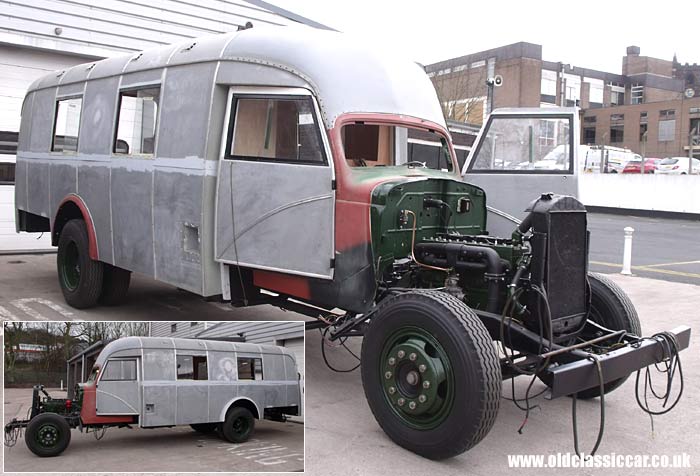
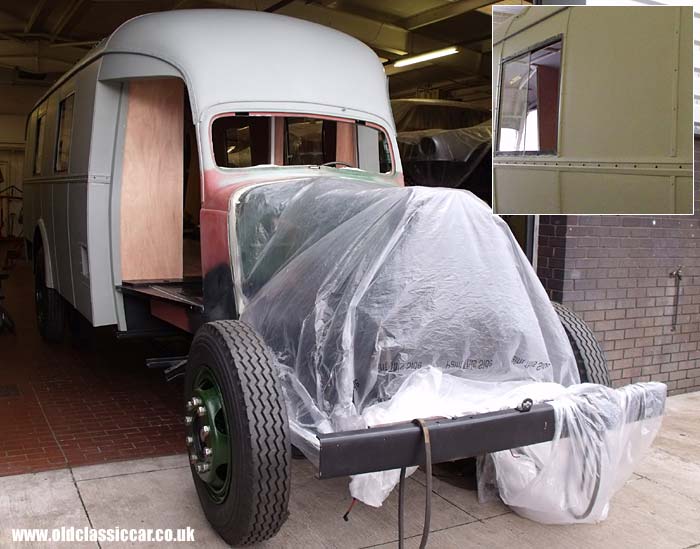
| Now to the main job for March, making a start on painting the main body. Firstly, the old girl was pushed outside, where all the dust could be blown from both inside and outside the coachwork. It had been a while since I'd seen it outside, so it was a good opportunity for a photo or two. Note the new copper feed pipe to the brake booster valve on the bulkhead. |

|
| The front end panels were prepared alongside the main vehicle, and will only be re-fitted once the engine is running, and the panels painted. This shot shows the lower section of the front grille, by this stage in light undercoat. At first glance it looks like any other 1939 - 1947 "Job Rated" Dodge truck grille, but these military 3-tonners featured a brush guard fitted to the front bumper, requiring stays which sprouted through the front grille assembly. Hence the two circular apertures visible here. |
|
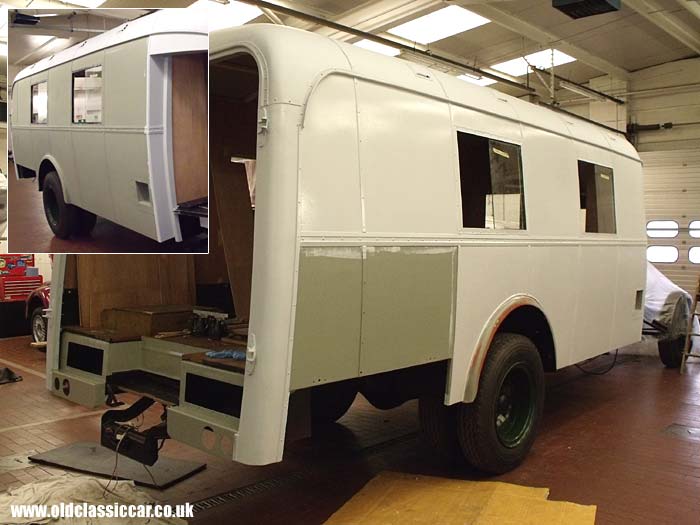
| The following photos show some of the stages of paintwork that took place during March. The entire vehicle, once dusted down and thoroughly cleaned with panel wipe, was then ready for its first coat of paint, etch primer in this instance. Beadings between the panels, and the rear vertical corners, are in aluminium so it was especially important for them to be etch primed, in order for top coats to key successfully. The photo above shows most of the main body in etch, with the side trims yet to be replaced. Each coat of the main lorry, including the four doors, requires ~ 5 litres of paint. |
|
| The doors are shown above, also at the etch stage. The bonnet still requires some work before it can be painted, and is just visible in the first photo. |
|
| The side strips were primed away from the vehicle, and then fitted. Time was spent ensuring that all the screwheads lined up correctly, just as Mulliners of B'ham would have done when originally building the main body in 1940/1941. The scuttle was the only item remaining un-primed at this point. All seams were sealed, to help prevent water getting where it isn't welcome. |
|
| The second coat to be applied, with brushes and rollers, was the white/grey undercoat seen above. It was still wet in this shot, and dried to a matt finish. |
|
| In all two coats of this white/grey undercoat were applied on top of the etch, this view shows the paintwork once it had dried completely. |
|
| This shot of the rear was taken after the second undercoat layer had dried. While drying, various loose panels went through the same process, including the rear locker doors that fit either side of the step. |
|
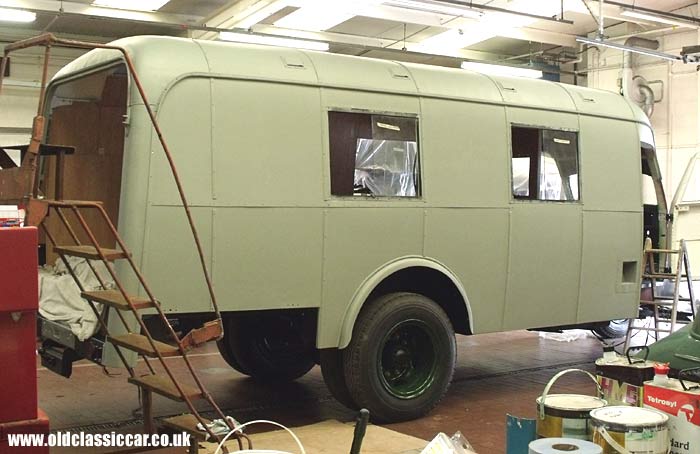
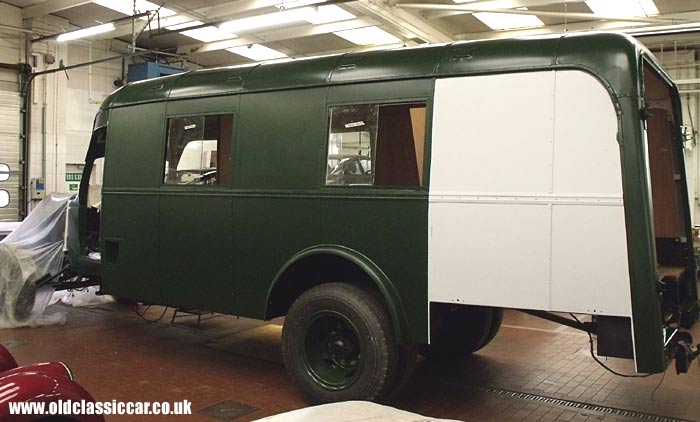
| Towards the end of March it was time to apply paint layer number 4, a green undercoat. This photo was taken after one day of work between two of us, again this layer was applied with brushes and rollers and was still drying at this point. Curiously this coat ended up drying with a slight sheen to it, whereas the sides, painted a couple of days later, dried to more of a matt finish. The photo below of the nearside seems to exaggerate this difference though. Once fully dried, it will be flatted off and readied for a second application of the same undercoat. |
|
| Adrian, at VHC, came in over the Easter Bank Holiday and painted both sides of the lorry in green undercoat. The rear sections have not been painted green - large colour blocks, one yellow block advertising Dunlop Tyres and the other in orange for Notwen Oils, will feature, one either side of the rear bodywork. These two areas need a grey rather than a green base colour. These square areas will be marked out on the panels still in grey undercoat. Once this is done, the remainder of the surrounding green undercoat will be touched in. The two coloured panels will then be painted. |

|
| A look now at the offside. Although this green undercoat won't be a match for the final Westminster Green topcoats, it gives an indication of how the finished vehicle should look. Once the final coats of paint, and the signwriting, have been applied, it'll then be time for a final clear coat over the lot. This will have a matting agent mixed in, to tone down the final shine somewhat. Many old lorries are finished in modern paints to give them a shine akin to a boiled sweet, but the intention with this one is to finish it to a shine that would be representative of a 10+ year old vehicle, in use during the early 1950s. The finish must be good, but not overly shiny, and that's what we're all striving for. |
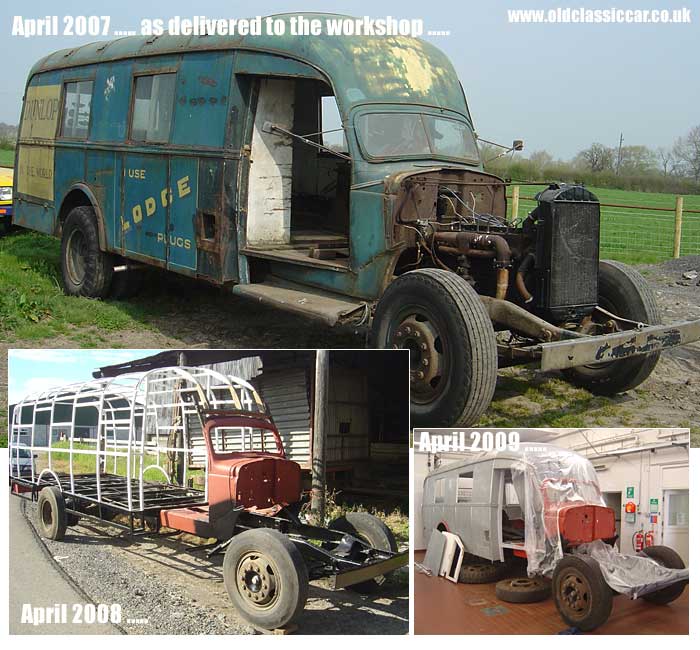
Flashback over the last three years.2010 is a notable year in this classic truck's life. It'll celebrate its 70th birthday this year, and in April it will be the third year away from home being restored. Nearly fifteen years of planning, tracking down spare parts, and research are finally beginning to bear fruit. Back in 2007, this old transporter was in a very decrepit state, and the extent of the corrosion in the rear bodywork, and shocking state of the engine, had yet to be fully appreciated. By 2008 the extent of the truck's woes had made itself all-too evident, but by 2009 it had turned a corner, and the extensive job of re-furbishing and re-fitting all the parts removed in earlier years was well underway. April 2010 sees the truck wearing a green coat of paint for the first time in 50 years, and all being well this old race car transporter will be back to Westminster Green before too long. |
|
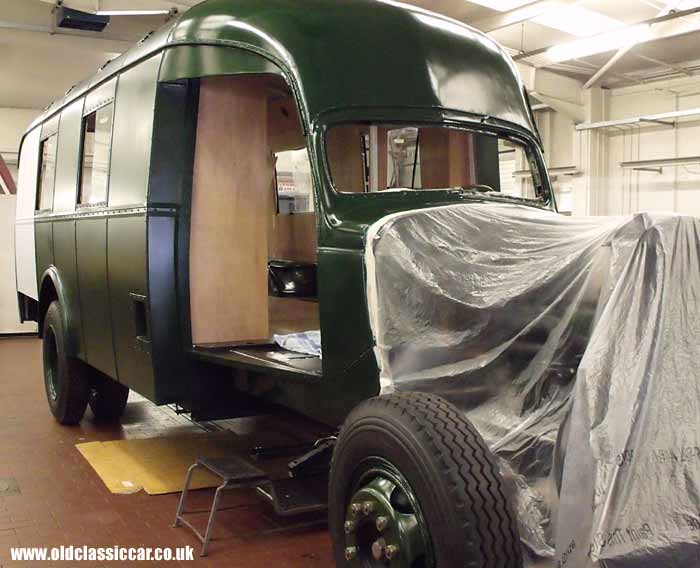
| And a final view for now of the lorry, as at the beginning of April 2010, some three years down the line. This coat of paint will now be flatted, and a second layer of the same undercoat applied. Following that, it will be time for the top coat(s). |
|
|
Return to the Dodge lorry restoration page for more info on this rebuild. Previous Page: Part 30 - Re-lining the inside of the rear bodywork. Next Page: Part 32 - More paintwork and bodywork restoration. |
|
|

Custom Search
|
 |
| Old Classic Car (C) R. Jones 2026. Content not to be reproduced elsewhere. |
| Website by ableweb. |
| Privacy Policy, Cookies & Disclaimers |