|
|
|
Progress continues on this 1940's Dodge truck rebuild. |
|
|
Restoration Part 33. Click here to return to the main Dodge lorry restoration page. Part of oldclassiccar.co.uk. Contact page. |
|
|
June started off as May ended, with preparations well underway for the second coat of green undercoat. Given that each coat of the body uses in the region of 6 litres of paint, this isn't a quick job, especially as there are still other jobs that need doing. A fair chunk of progress was also achieved in the area of the cab, with the piping underneath completed for the brake servo and fuel systems, as well as in the area of the dashboard and bulkhead. Various new parts were sourced during this time, including a new-old-stock mascot to fit on the Dodge's grille panel up front. By the end of July, the first coat of semi-shiny topcoat had been applied. The finished truck will be duller than this, in keeping with how it was in the late 1940's, so there'll be more flatting-down required before the second topcoat can go on. |
|
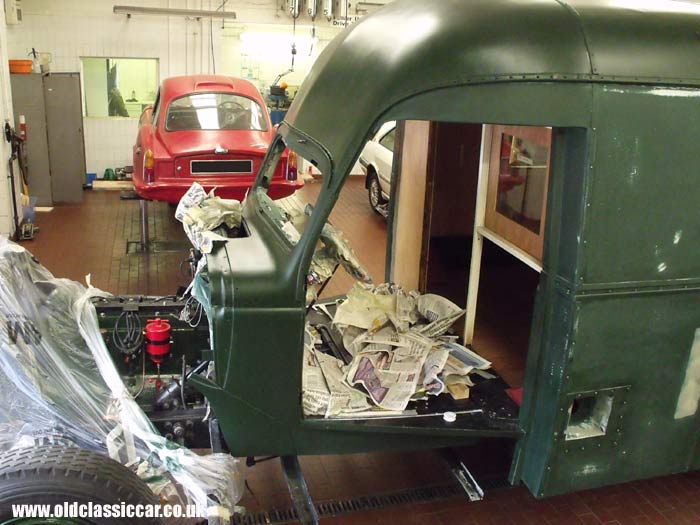
| Early in June saw the second coat of undercoat begin to go on to this "Job Rated" truck, in this photo the roof and scuttle had been done. The scuttle vent has yet to be re-fitted and will be painted off the truck, along with the other front end panelwork. |
|
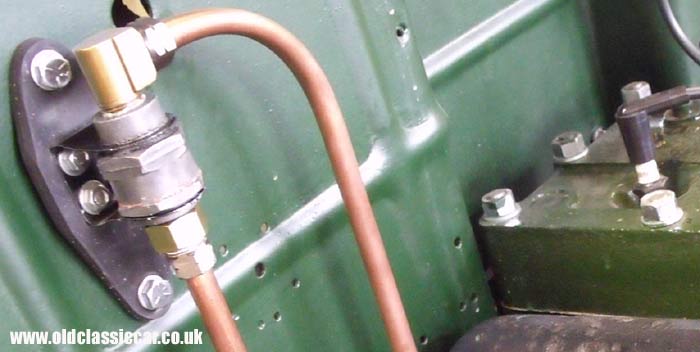
| Inbetween coats of paint drying, progress was made in the area of the braking system. Shown here is a bulkhead-mounted valve incorporated within the vacuum system. This had to be stripped and cleaned. New pipework was made up, and a new rubber mounting was required where the valve unit bolts to the bulkhead. |
|
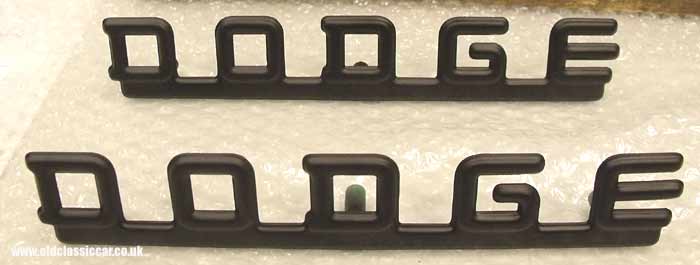
| Previously I'd managed to source a pair of pressed steel (painted) Dodge hood emblems, suitable for a 1939 - 1947 Dodge truck (although most models had chrome/mazak badges). They were however quite scruffy, so they were sanded back by hand and then powder coated in satin black. Strictly speaking the military VK-series lorries didn't have badges at all in service, the mounting holes in the bonnet were left empty. However this would have looked unfinished, so this pair should do the trick perfectly. |

|
| At this stage the front panels had received their second coat of undercoat, and were left to dry thoroughly. |
|
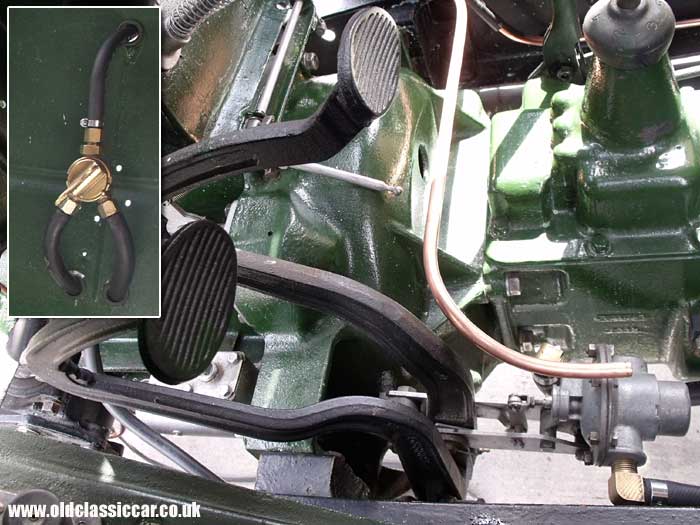
| This shot shows the pipework beneath the driver's side floor panels, and some of the plumbing incorporated within the servo arrangement. New brass fittings were sourced as required. Inset is a view of the original petrol tap, mounted on the inside of the bulkhead on the passenger's side. New lines were fed from the re-furbished tanks and clipped along the chassis, before heading upwards to the tap, the final few inches finished off with rubber hose. |
|
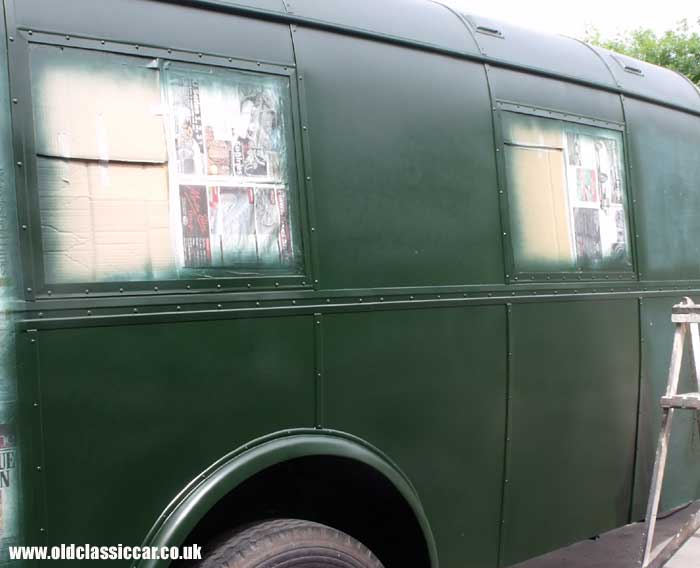
| This shot shows the offside panels after they'd received their second coat of green undercoat. |
|
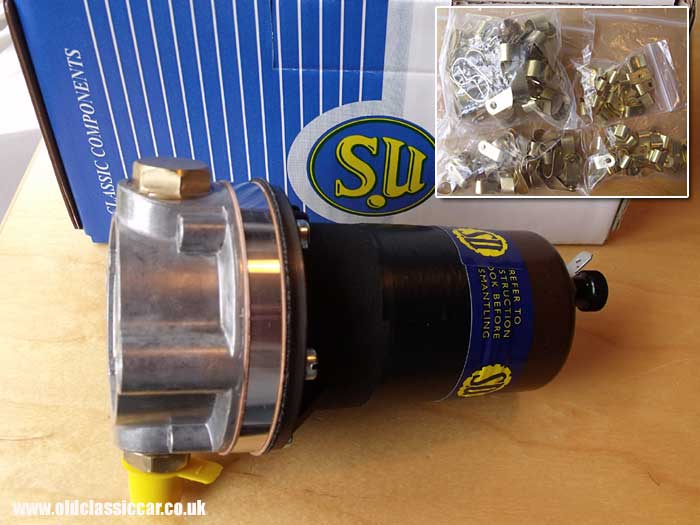
| Originally the Dodge only came with a mechanical AC fuel pump. The original RAF specification for this vehicle in 1940/41 called for twin tanks, whereas I believe civilian 3-ton VKs had just the one. After the war, in its new role as a race car truck, an additional 6-volt SU electric pump was incorporated within the fuel line, mounted to the bulkhead close to the switch-over tap. As the lorry is being restored to its late-1940's specification, a new pump was purchased and plumbed in as required. During the course of the build, a large number of brass 'P' clips were required for fuel, air and brake lines, so several bags were purchased in July and dropped off at the 'shop. |

|
| By early July the truck was entirely covered in its second layer of undercoat, and looking a world apart from the sad-looking vehicle of three years before. |
|
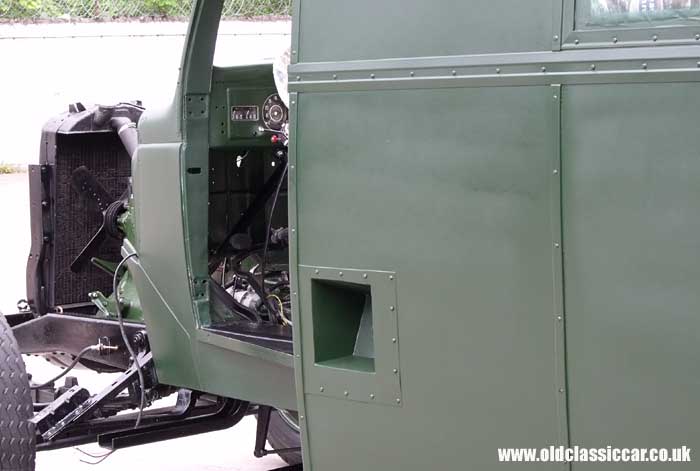
| A closer look at the nearside coachwork. The fuel filler panels are the originals, although the surrounds through which they screw to the body were re-made to match the originals. |
|
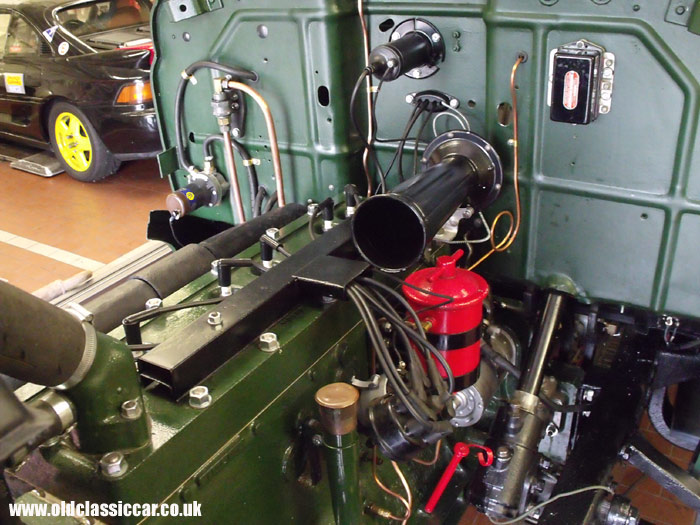
| July saw a number of ancillaries re-fitted to the Dodge's engine bay. The 6-volt horn has been re-installed, and the new electric fuel pump can be seen over to the left of shot. Several of the control cables, such as those for the choke and hand throttle, pass through a rubber and steel assembly in the centre of the bulkhead. Surprisingly the original rubber was ok and could be re-used, it's shown here in place, just beneath the correct-spec base-mounted coil. The new pipework for the oil pressure gauge, and the temperature gauge, is also shown. |
|
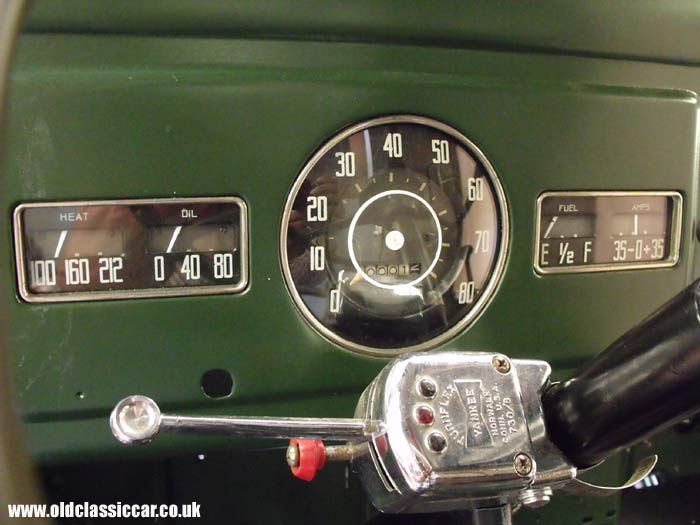
| The Dodge's dash is looking a little more complete by this stage. The speedometer is a refurbished unit, the ancillary gauges have been checked over and, where necessary, new-old-stock parts were sourced and used. New lenses were fitted to both rectangular units, and the original bezels tidied up as required. Originally there were no flashing turn signals, just pop-up semaphores. The plan is to fit both to the restored truck, hence the requirement for a turn signal switch on the column. The switch is an American "Yankee Turnflex", typical of the type fitted to American trucks in the 1930s and 1940s. |
|
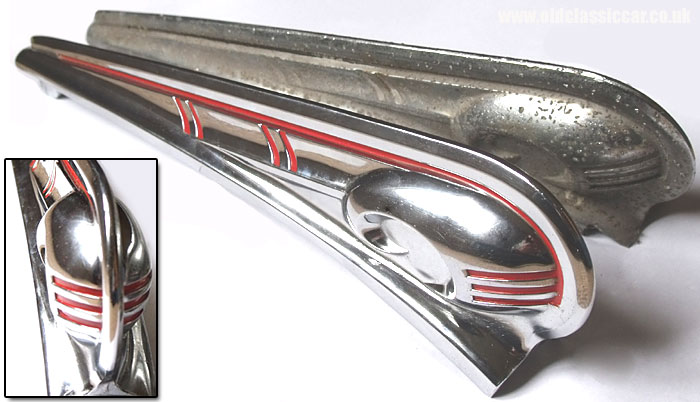
| Ebay came up trumps again, with this new-old-stock (NOS) Dodge mascot, a fitting suitable for trucks built in 1941 through to 1947. The late-1940 VK series featured a 41-style radiator grille. The original mascot was in a terrible shape, as the photo above shows. I'd already found a good used mascot, but when this NOS item appeared I didn't waste too long in hitting the Buy-It-Now button. It came from the same Dodge specialist as the re-polished "DODGE" trim pieces that will be fitted to the front end shortly. It wasn't exactly cheap, especially after postage charges, and the cheerful people at HM Revenue & Customs had ferreted around in my wallet for their share, but new items like this are hard to find. For some reason the mounting is slightly different to that on the original mascot, but it shouldn't need much tweaking to make it fit. |
|
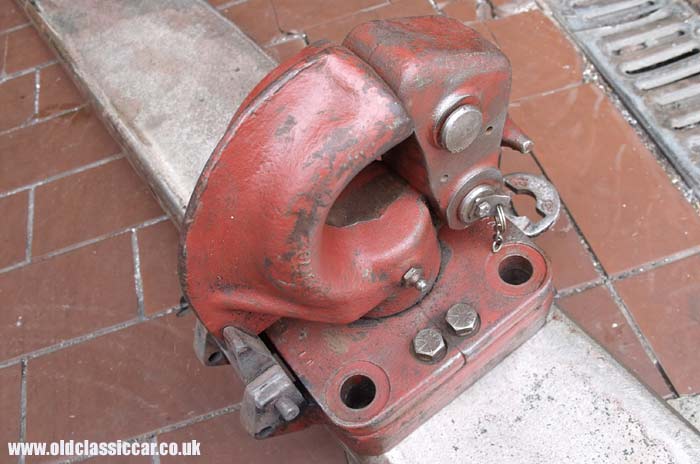
| The above towing eye was sourced at a local commercial vehicle breakers yard. The idea is that if, horror of horrors, the Dodge were ever to expire at the side of the road, and require a tow home, this towing eye could be pressed into service. The front bumper has been drilled with four suitable holes, and some substantial bracing will be fitted behind the scenes. The front numberplate, an unused Bluemels item that was donated to the project recently, covers the four holes just perfectly. Should I hit a problem and need a tow, the numberplate can be removed, exposing the four mounting holes, and the eye swiftly bolted on. A standard towing pole could then be used by the recovery truck. Although the bumper had been re-painted only a year or two back, it was decided to strip it back again. I think it'll end up being powdercoated prior to being fitted for the final time. |
|
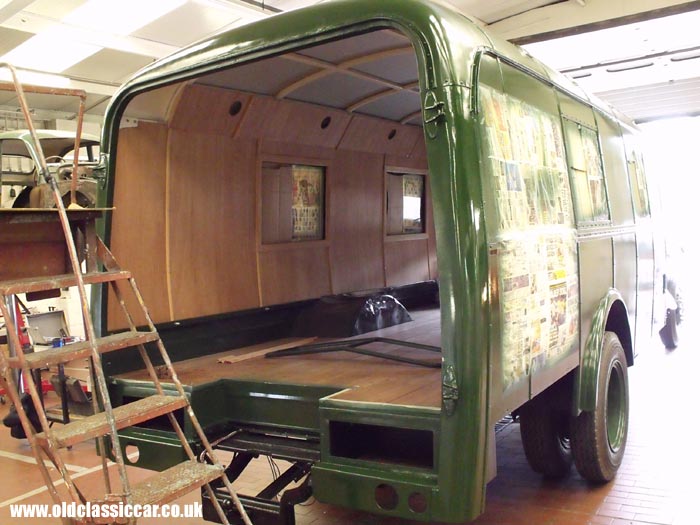
| By the end of July, the first coat of semi-shiny topcoat had been applied. This is still too shiny for the look we're after, but as a first coat it'll do the job fine. It will then be flatted off, in readiness for a duller second coat that will be more in keeping with the finish that the car and the truck both sported when Poore was racing in the late 1940s and early 1950s. It was interesting to get an indication of how Westminster Green will end up looking on the finished truck, given that the undercoats were a generic shade of green rather than WG specifically. The interior is virtually ready for several coats of white paint, I'm just waiting for some new window pulls to be made, and then they can be fully re-assembled. |
|
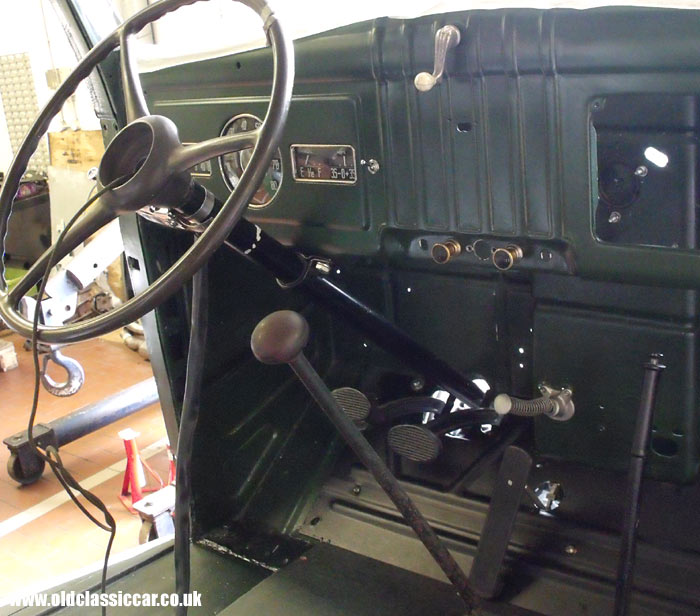
| My final visit of the month saw some further re-assembly in the dashboard area. The original Dodge switch knobs had been cleaned up, and new switches used as required. A couple more ancillary switches were needed, so we spent an hour or so rooting through a box of switches I've got, picking out a few that would be suitable for the age of truck. The gearknob was another Ebay find, purchased with the remains of an old military lamp for the princely sum of 99p. The new accelerator pedal is also fitted in this shot, although it required some modification to make it fit properly. This is probably due to the fact that the carb and linkages on the 3-ton were different to those found on most other models of this age. A NOS turn switch to operate the semaphores will be installed in the centre of the dash, as per late-1940's original. |
|
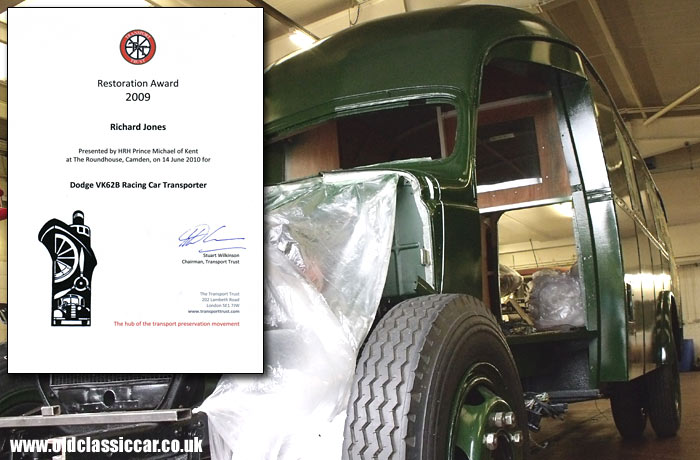
| This final shot was taken on the 28th July, shortly before the next round of paint flatting was due to commence. Inset is the certificate I received from the Transport Trust, something that was an honour to receive given the other projects that have received similar awards in recent years. |
|
Return to the Dodge lorry restoration page for more info on this rebuild. Previous Page: Part 32 - More paintwork and preparation. Next Page: Part 34 - Paintwork continues, inside and out. |
|
|

Custom Search
|
 |
| Old Classic Car (C) R. Jones 2026. Content not to be reproduced elsewhere. |
| Website by ableweb. |
| Privacy Policy, Cookies & Disclaimers |