|
|
| Author |
Message |
vitesse
Joined: 03 Jun 2013
Posts: 561
|
 Posted: Tue Apr 15, 2014 7:14 pm Post subject: Posted: Tue Apr 15, 2014 7:14 pm Post subject: |
 |
|
| New workshop looks good Peter. I had to use a broomstick to line up my clutch plate but it seemed to work?????? |
|
| Back to top |
|
 |
colwyn500
Joined: 21 Oct 2012
Posts: 1745
Location: Nairn, Scotland
|
| Posted: Tue Apr 15, 2014 9:54 pm Post subject: |
|
|
| vitesse wrote: | | New workshop looks good Peter. I had to use a broomstick to line up my clutch plate but it seemed to work?????? |
Couldn't find one that small. I can usually guesstimate it well, but not this time. I was convinced I had the wrong clutch. |
|
| Back to top |
|
|
vitesse
Joined: 03 Jun 2013
Posts: 561
|
| Posted: Tue Apr 15, 2014 10:05 pm Post subject: |
|
|
| colwyn500 wrote: | | vitesse wrote: | | New workshop looks good Peter. I had to use a broomstick to line up my clutch plate but it seemed to work?????? |
Couldn't find one that small. I can usually guesstimate it well, but not this time. I was convinced I had the wrong clutch. |
I had to ditch the new release bearing and put the old one back on, as the new one seemed to foul when it moved on the lever. |
|
| Back to top |
|
|
colwyn500
Joined: 21 Oct 2012
Posts: 1745
Location: Nairn, Scotland
|
| Posted: Wed Apr 16, 2014 11:23 am Post subject: |
|
|
I encountered the release bearing issue this morning. There IS a big difference in what I was supplied with from the original on the right.
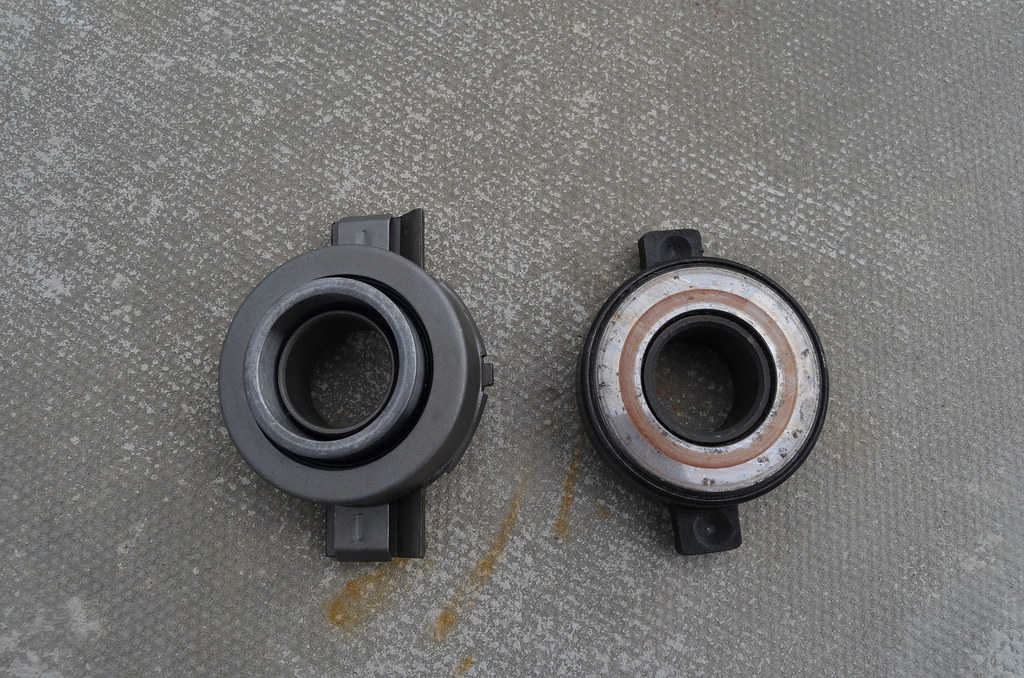 KNO_3004 by peterthompson, on Flickr KNO_3004 by peterthompson, on Flickr
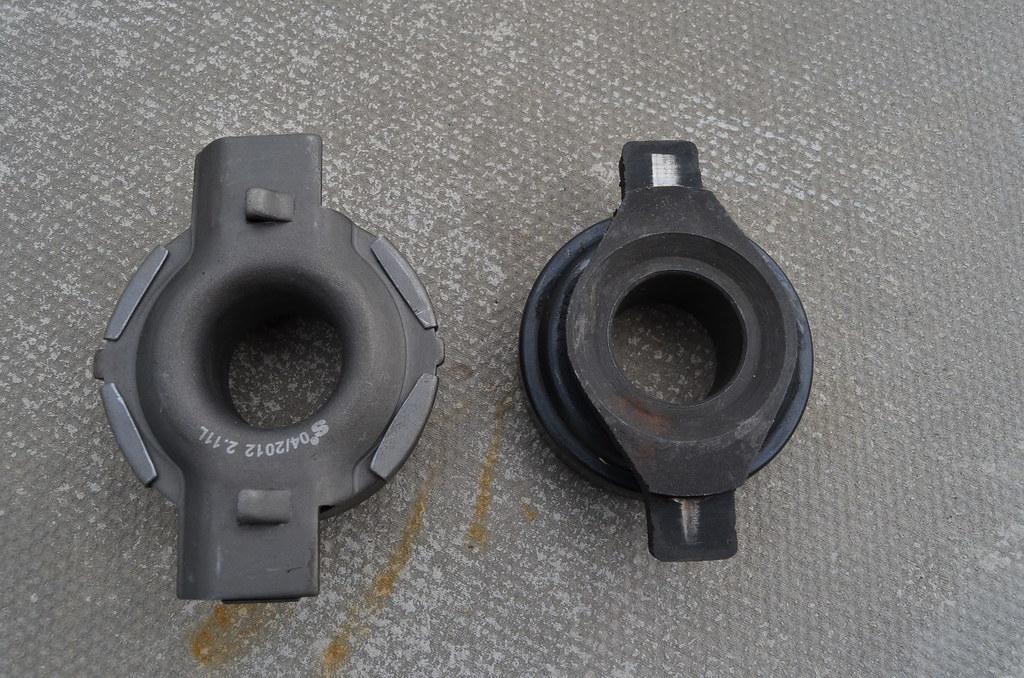 KNO_3003 by peterthompson, on Flickr KNO_3003 by peterthompson, on Flickr
I don't think it could be made to fit so I also used the original part which seems in good condition. I imagine this is generic item made for later 126's. I just hope the geometry is OK because the new part has a longer nosing so in resting position would give the operating lever a greater mechanical advantage. It seems to work OK from what I can make out operating by hand.
The engine/gearbox is now reassembled. The lack of cosmetic restoration will appall many people since I have had all winter and the bits available on the bench for renovation. All i can say is that i have thoroughly cleaned everything that matters and put a lot of care into replacing anything suspect and thought about long-term reliability above all else.
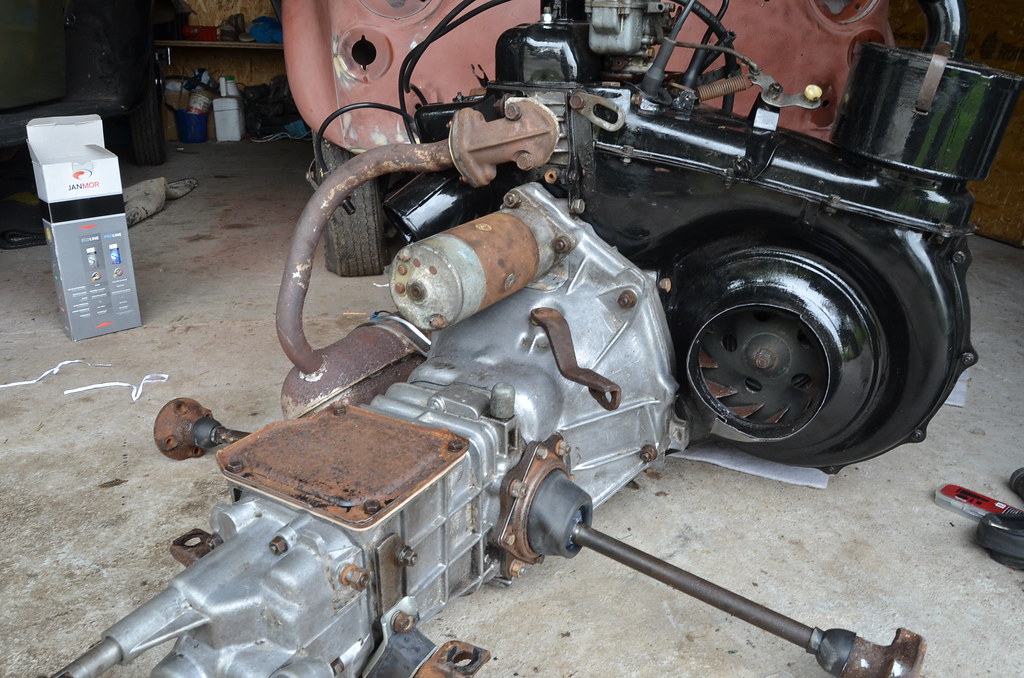 KNO_3005 by peterthompson, on Flickr KNO_3005 by peterthompson, on Flickr |
|
| Back to top |
|
|
colwyn500
Joined: 21 Oct 2012
Posts: 1745
Location: Nairn, Scotland
|
| Posted: Wed Apr 16, 2014 1:10 pm Post subject: |
|
|
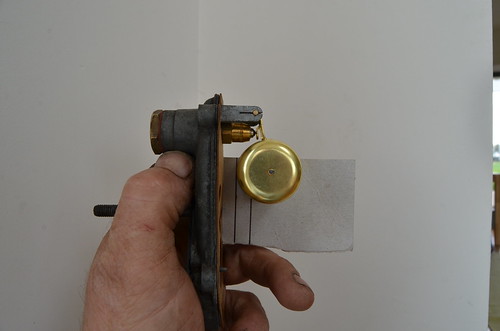
It's a busy day today as i decided to re-examine the carburettor which didn't seem 100% right when I did my test run a few months ago.
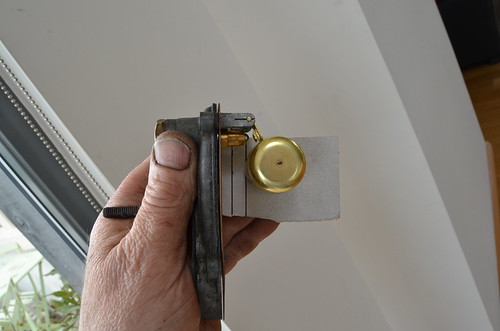 KNO_3008 by peterthompson, on Flickr KNO_3008 by peterthompson, on Flickr
I had set the float level but suspected it to be wrong. I measured the two extremes of movement for the float arm onto apiece of card, put on my specs and spent a frustrating few minutes tweaking the tabs on the arm to get near to the marks. I am still not certain it's spot-on but it's definitely better. This is a 26IMB6 and the manual gives measurements for the IMB4; I just hope they're the same.
 KNO_3006 by peterthompson, on Flickr KNO_3006 by peterthompson, on Flickr
Time will tell. |
|
| Back to top |
|
|
vitesse
Joined: 03 Jun 2013
Posts: 561
|
| Posted: Wed Apr 16, 2014 4:13 pm Post subject: |
|
|
| Peter the bible says from the cover gasket the shortest distance is .2756" and the longest is .5906", so that is in imperial. I hope your ruler is accurate! So 7mm and 15mm. |
|
| Back to top |
|
|
colwyn500
Joined: 21 Oct 2012
Posts: 1745
Location: Nairn, Scotland
|
| Posted: Wed Apr 16, 2014 4:32 pm Post subject: |
|
|
| vitesse wrote: | | Peter the bible says from the cover gasket the shortest distance is .2756" and the longest is .5906", so that is in imperial. I hope your ruler is accurate! So 7mm and 15mm. |
Hooray for Metric measurements; 7 and 15 are what I went for. Ruler is accurate; my eyes less so 
Last job of the day and the hardest by far was to fit new brushes to the dynamo. I had removed the old ones in situ put putting them back was going to be nigh on impossible. For those who don't know the car, the dynamo is a wonder of ingenuity as it takes a fair dynamic load having an impellor fan fastened to the rear end. it is new territory for me and a challenge I wasn't looking forward to nor did I enjoy. Haynes is only partly helpful and gave bad advice about how to lock the pulley to remove the nut resulting in a bent stud of the three that adjust the width of the fan belt pulley; I used Stilsons to hold it tight 
I would hate to do that job with the engine in the car and I still can't be sure that it will charge once installed having never run the thing.  |
|
| Back to top |
|
|
vitesse
Joined: 03 Jun 2013
Posts: 561
|
| Posted: Wed Apr 16, 2014 7:05 pm Post subject: |
|
|
| Funny you should say that about the dynamo, odd that there were two people at either end of the country playing with their dynamo's. I had decided that the nut on the end of the shaft between the 3 studs looked a bit rusty, so went to swap it for a new one. It was then that I discovered that I hadn't tightened the one on the other end of the shaft by the fan. I tried the screwdriver wedged in the stud to undo the one by the pulley and I thought that is going to ruin that stud if I am not careful. So I did the simple thing and gave up!!!!! It can stay rusty. |
|
| Back to top |
|
|
colwyn500
Joined: 21 Oct 2012
Posts: 1745
Location: Nairn, Scotland
|
| Posted: Wed May 07, 2014 6:19 pm Post subject: |
|
|
 peterjthompson/13944590709/] peterjthompson/13944590709/]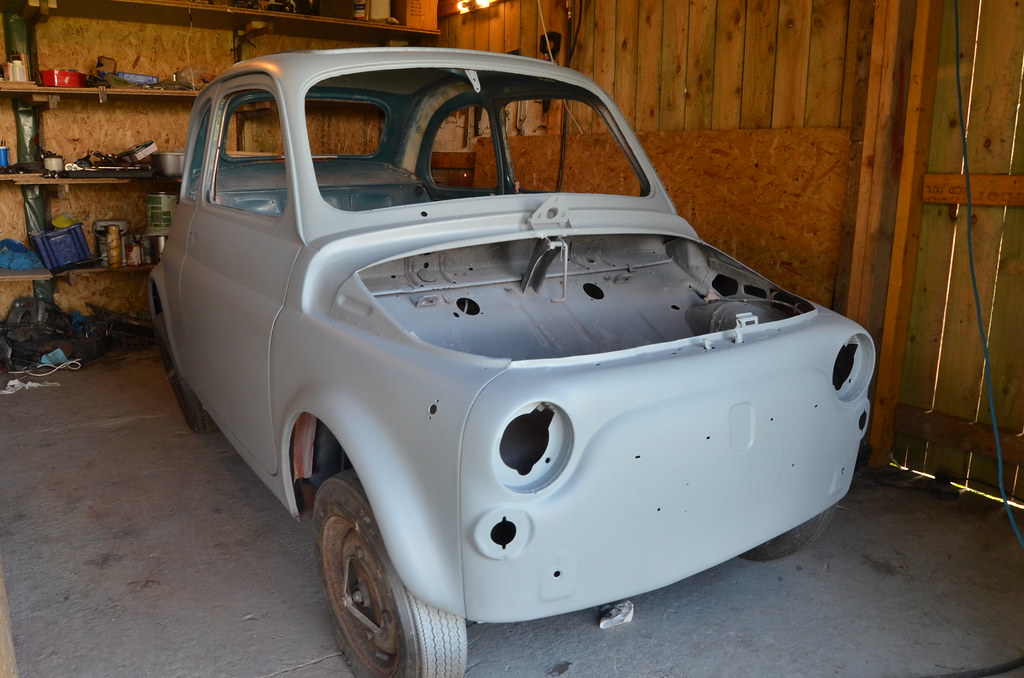 [/url] [/url]
KNO_3536 by peterthompson, on Flickr
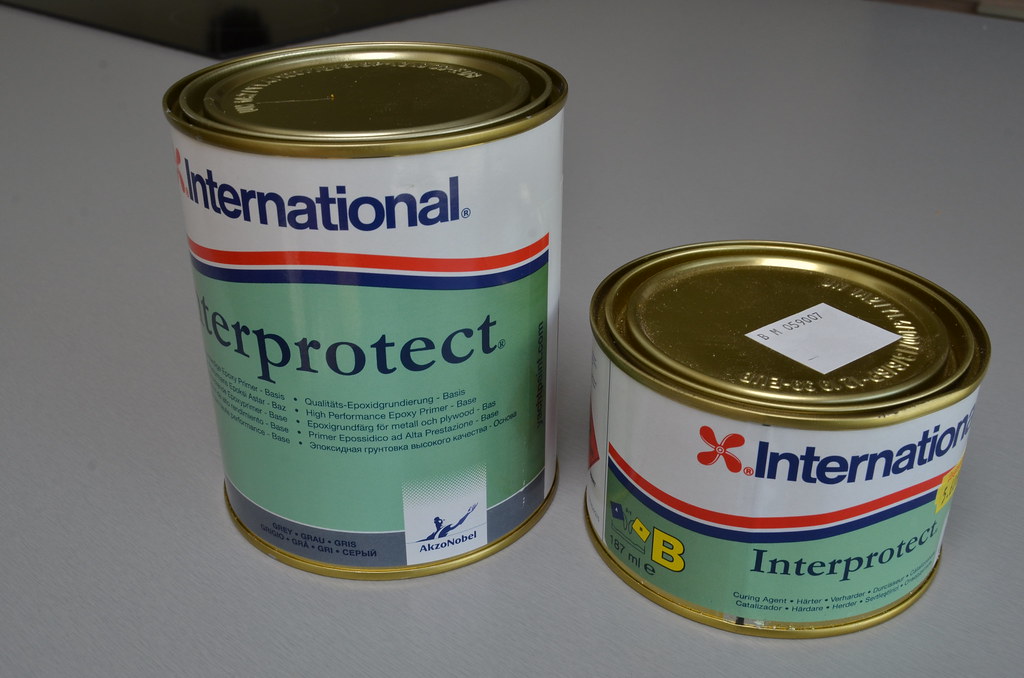
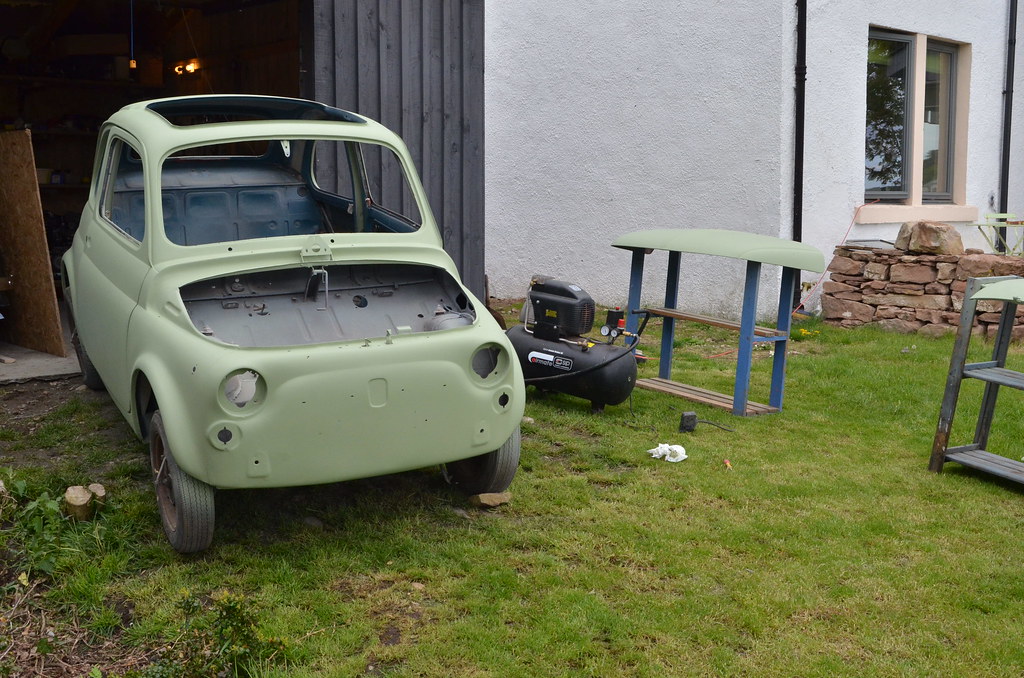
Today I knew, without the need for a thermometer that the temperature was finally OK for spraying. The car has been sitting in epoxy primer but there were lots of small areas where the paint had been sanded off when rubbing down after filling.
First I had to vacuum out all the dust acquired through the winter degrease the surface and sand the whole car with 320 grit Abranet paperwork. I paid particular attention to the bare areas which had acquired surface rust and then wiped with a thin application of phosphoric jelly. Then a wipe with a de-salting solution to take away the residues and a final wipe with degreaser. Phew!!!u
It is actually a boat paint but I see no reason not to use it.
As long as I get cracking quickly I can recoat with high-build primer without sanding or degreasing.
For now it's great to see a more or less smooth car body in a uniform colour. |
|
| Back to top |
|
|
vitesse
Joined: 03 Jun 2013
Posts: 561
|
| Posted: Wed May 07, 2014 8:46 pm Post subject: |
|
|
Looks good Peter as you said nice to see it all one colour and solid.
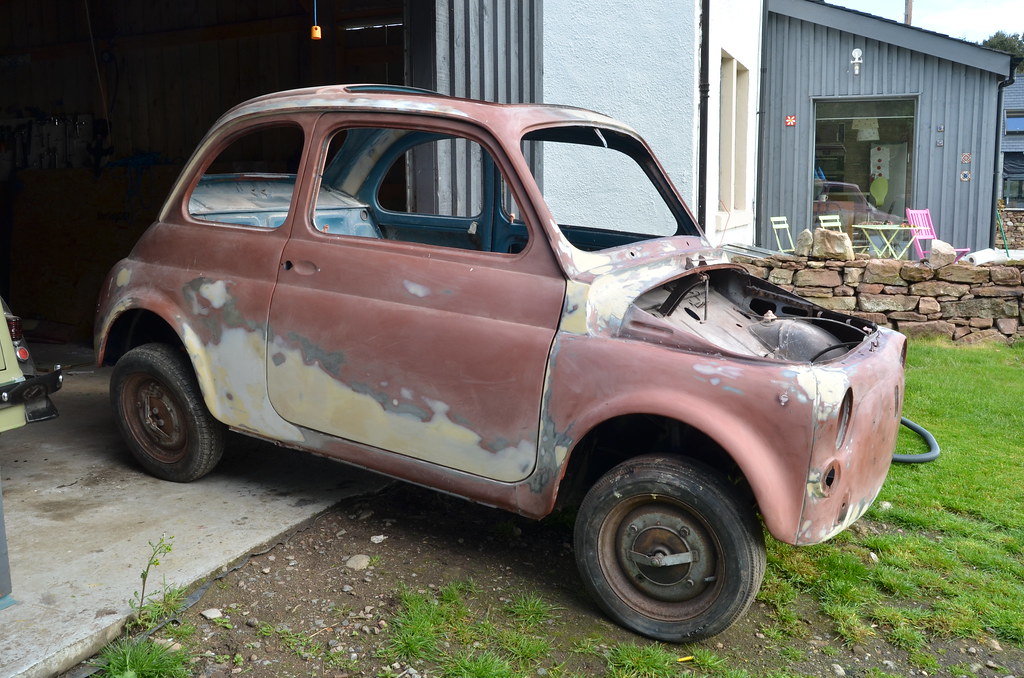
I was trying to work out what the two extra holes were for below the badge holes. Then it occurred to me that it must have been where the number plate was mounted.
Mine was stuck on in the same place with double sided tape but the new front bumper came with holes for brackets, so I went for that option this time. |
|
| Back to top |
|
|
D4B

Joined: 28 Dec 2010
Posts: 2083
Location: Hampshire UK
|
| Posted: Wed May 07, 2014 9:01 pm Post subject: |
|
|
Excellent days work Peter  |
|
| Back to top |
|
|
colwyn500
Joined: 21 Oct 2012
Posts: 1745
Location: Nairn, Scotland
|
| Posted: Thu May 08, 2014 2:10 pm Post subject: |
|
|
That was indeed a good day's work.
I ended up preparing the epoxy paint with a light scuffing with 320 paper and a Scotchbrite pad as recommended by the majority of web contributors who know about these things.
I was just about to mix my high-build cellulose primer when the electricity went out. Then I remembered a planned power cut to allow a new line to be connected. Damn, the weather was fairly good and I was ready and the swallow were diving around trying to get to their old nest at the back of the garage. Luckily the power came back early and by then it was really warm and the air was unusually still.
 KNO_3547 by peterthompson, on Flickr KNO_3547 by peterthompson, on Flickr
So out came the car to the open air where I can see better. It had two coats of primer before I ran out as I only had a one litre tin from last year. I tinted the paint with some spare green topcoat so I will know when I rub through to the grey epoxy.
I will leave it for a couple of weeks to let it settle and then give it a gentle rub down with 400 grit paper before giving it at least three more coats of primer.
When painting it I had a look at those holes in the front. There are two holes for the numberplate and four tiny starter holes for an Italian plate. |
|
| Back to top |
|
|
vitesse
Joined: 03 Jun 2013
Posts: 561
|
| Posted: Thu May 08, 2014 8:07 pm Post subject: |
|
|
The other four holes are more than likely for the mustache badge Peter. I can't really see in the picture but if the two outside ones are more slot shaped than round holes then that's what they are for.
There again, are there four holes just inside the two I was referring to, for the an Italian plate?
Tony |
|
| Back to top |
|
|
colwyn500
Joined: 21 Oct 2012
Posts: 1745
Location: Nairn, Scotland
|
| Posted: Thu May 08, 2014 9:53 pm Post subject: |
|
|
"There again, are there four holes just inside the two I was referring to, for the an Italian plate"
That's the ones and they look just the dimensions for plates I have seen on Italian cars..they're pilot holes for self-tappers I think.
Now I am sitting here ordering paint, 419 Blu turchese if I remember correctly. I think 4 litres should do it. Last minute dithering over Positano Yellow which was the colour of my favourite previous 500 but it would look rubbish with brown seats and I want to keep them as they are in remarkably good condition. |
|
| Back to top |
|
|
vitesse
Joined: 03 Jun 2013
Posts: 561
|
| Posted: Thu May 08, 2014 10:10 pm Post subject: |
|
|
| Yes 419 is correct. |
|
| Back to top |
|
|
|


