|
|
| Author |
Message |
Bellisin
Joined: 19 Dec 2010
Posts: 16
|
 Posted: Fri Dec 24, 2010 12:02 am Post subject: My ongoing Bristol 409 Restoration Posted: Fri Dec 24, 2010 12:02 am Post subject: My ongoing Bristol 409 Restoration |
 |
|
I should start by explaining that this has been a project in the planning for some years. I have wanted a Bristol 409-11 all my 20 years behind the wheel and love getting my hands dirty on all sorts of DIY adventures so a restoration was always the route for me.
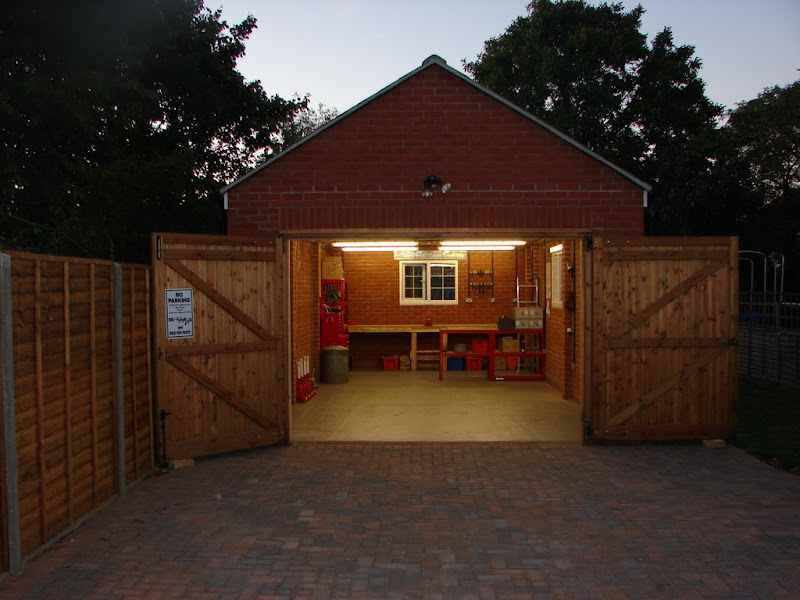
I started by building a workshop for the job, saving some money by managing the project myself and bringing in some excellent tradesmen. I am in love with the result which is wired with enough sockets and lighting to rival Tesco’s.
I bought my car after a year of searching (and researching). The seller was well known to the Owners Club and a perfect gentleman. I knew I was buying a challenging project and was not disappointed! Bye the way the damage on the rear was from a previous owners bonfire. The car sat in a garden for 10 years.
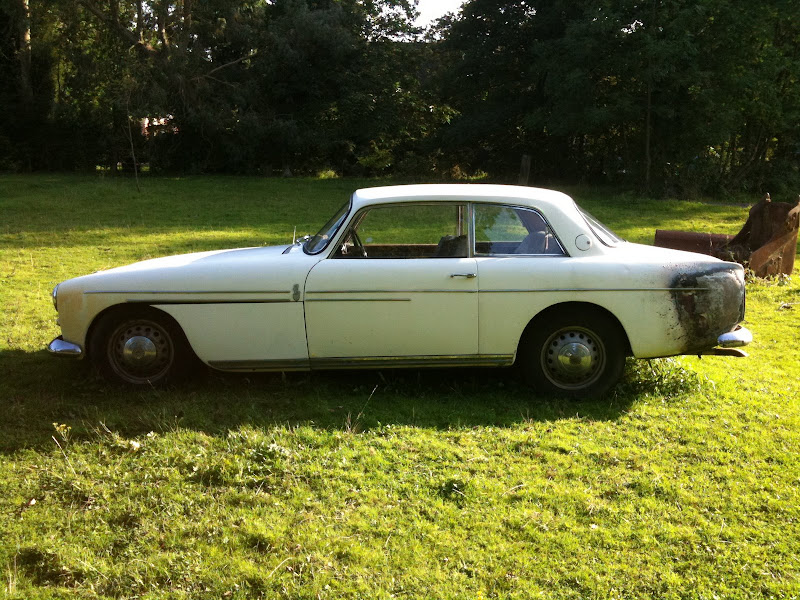
The car was pretty much complete and a days tinkering got the engine running (albeit not very smoothly) hand feeding the carb some petrol. On the initial inspection I found a great deal of rot in the arches etc but have now found a whole world of hurt under the car in the chassis, inner wing cubbies and floor as well. The saving grace is that the body of these cars are aluminium and need little attention except where steel and alloy connects, causing an electro chemical reaction to occur.
Unfortunately I did not discover this community until recently and this is a real shame as I would like to have posted progress from the beginning.
Since I have done some work already I will post the various jobs completed bit by bit until I catch up with myself. It might be good to remind myself that I have actually done some as it does not always feel like it! |
|
| Back to top |
|
 |
Bellisin
Joined: 19 Dec 2010
Posts: 16
|
| Posted: Fri Dec 24, 2010 12:21 am Post subject: |
|
|
I designed the workshop with a boarded and lit loft so that I would have plenty of room for storing parts. This turned out to be real foresight. Lord knows how you guys manage in single garages but you have my respect.
I started by stripping out the interior of the car including the head lining and walnut dash/ trim. The fuel tank was also removed; this sitting behind the rear seats.
I then removed the glass and began stripping the body of paint. I started doing this was a paint removal disk and a grinder but found this a little too harsh for aluminium. I then learnt about using standard paint stripper. This worked a treat given patience and time.
This is the result of these labours:
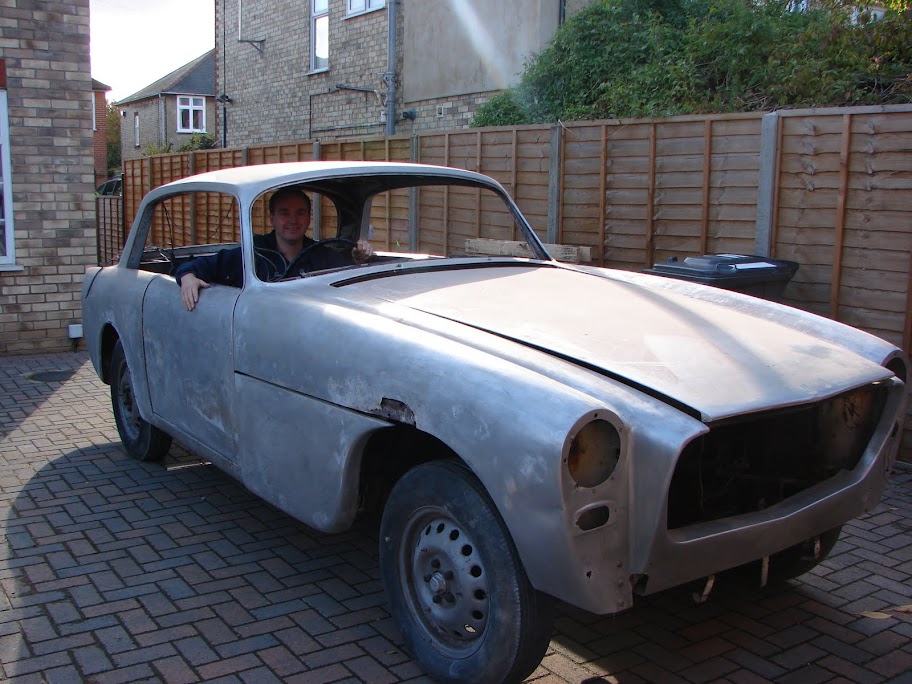
Note there are cubbies or lockers behind each front wheel which house the electrics and battery one side and spare wheel the other. I think that's quite cool!
Last edited by Bellisin on Sat Dec 25, 2010 8:22 pm; edited 1 time in total |
|
| Back to top |
|
|
Bellisin
Joined: 19 Dec 2010
Posts: 16
|
| Posted: Fri Dec 24, 2010 12:53 am Post subject: |
|
|
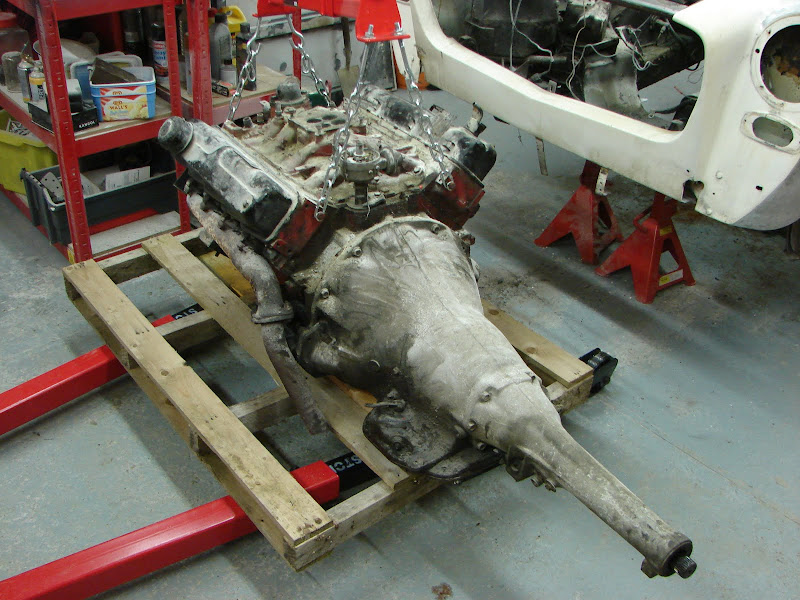
Now it was time to remove the engine and gearbox.
I found removing the radiator, alternator and power steering quite straight forward. I also removed all the pipes, cables, carb and electrics. The exhausts were wasted and so cut free.
Next I bought myself an engine crane (I admit it, I was very excited to own a crane) and set about separating the engine from the gearbox. However, the starter motor bolts refused to budge and access to them was insanely difficult. In the end I gave up and removed the engine/ gearbox as one.

In case you are wondering, the engine is a 5200cc Chrysler 318 mated to a Torqflight 3 speed auto. It’s all steel and quite a lump.
Last edited by Bellisin on Sat Dec 25, 2010 8:27 pm; edited 1 time in total |
|
| Back to top |
|
|
Roger-hatchy

Joined: 07 Dec 2007
Posts: 2135
Location: Tiptree, Essex
|
| Posted: Fri Dec 24, 2010 11:49 am Post subject: |
|
|
Looking forward to this project.
I see you also found striping an ally body time consuming.
You were lucky I tried a few paint strippers nothing touched the paint on the DLM, ended up with scrapers and a long slow job of careful persuasion.
Looking at your engine and gearbox I reckon my engine could sit between the cylinder blocks on yours 
Just love ALL Bristols
Roger |
|
| Back to top |
|
|
imfinlay
Joined: 26 Aug 2008
Posts: 48
|
| Posted: Fri Dec 24, 2010 11:54 am Post subject: |
|
|
| Looks like the same Chrysler A block as in my '57 Plymouth. If you need engine parts these are very easily available, as the engine was made well into the '70s with many interchangeable parts. |
|
| Back to top |
|
|
Rick
Site Admin

Joined: 27 Apr 2005
Posts: 22447
Location: UK
|
| Posted: Fri Dec 24, 2010 2:12 pm Post subject: |
|
|
Should be a fascinating build, look forward to the updates
The car reminds me of a 406 I happened upon in a guy's shed years ago, complete with holed piston (6 cyl rather than V8 obviously) and a lorry-load of pigeon calling cards on top of it
I'll dig out a pic of the 401 I photographed yesterday and pop it on here. On the surface that looks ok too with its alloy body, but the steelwork beneath looks like a different story.
Rick
_________________
Rick - Admin
Home:https://www.oldclassiccar.co.uk
Videos:https://www.youtube.com/user/oldclassiccarRJ/videos
OCC & classic car merchandise (Austin, Ford ++):
https://www.redbubble.com/people/OldClassicCar/shop |
|
| Back to top |
|
|
62rebel
Joined: 03 Dec 2007
Posts: 343
Location: Charleston, South Carolina
|
| Posted: Fri Dec 24, 2010 5:55 pm Post subject: |
|
|
| it might not make much of a difference, but there are ally intakes available for that polyspheric MoPar engine. not sure if it is an option if you're going for concours, however. interesting car. good job saving it. |
|
| Back to top |
|
|
Penman
Joined: 23 Nov 2007
Posts: 4759
Location: Swindon, Wilts.
|
| Posted: Fri Dec 24, 2010 11:41 pm Post subject: |
|
|
Hi Bellisin
Now I recognise the car and driver, Hampton.
_________________
Bristols should always come in pairs.
Any 2 from:-
Straight 6
V8 V10 |
|
| Back to top |
|
|
Bellisin
Joined: 19 Dec 2010
Posts: 16
|
| Posted: Sat Dec 25, 2010 8:38 pm Post subject: |
|
|
Thanks for the kind words. The engine is shared with the Plymouth, being a Poly A.
I believe there are all sorts of engine upgrades and the Bristol Owners Club are quite flexible in this respect as Brsitols are bespoke and regularly factory upgraded . Indeed it is possible to bore out from a 318 to a 400 and turn it into quite a beast.
My current plan is to remain stock. The reason for the total car rebuild is that I want a reliable weekend driver and summer tourer. The lazy eight will be perfect for this and as powerful as most high end soloons today.
I am also on a restrained budget and therefore looking for an acceptable finish rather than concours perfection.
Oh and Penmans; I would love to complete my pair of Bristols with a 400 one day. Who knows! |
|
| Back to top |
|
|
62rebel
Joined: 03 Dec 2007
Posts: 343
Location: Charleston, South Carolina
|
| Posted: Sun Dec 26, 2010 3:00 am Post subject: |
|
|
poly's had been a relatively overlooked engine until the dreaded "Rat" rod movement sprang up, when OLD engines of any kind drew a premium over the ubiquitous SBC... while Hemis were the cherished MoPar, polys were the workhorse v8 until the b series and rb came along. LA 318's are relative newcomers.
excellent engine for longevity and simplicity. |
|
| Back to top |
|
|
Bellisin
Joined: 19 Dec 2010
Posts: 16
|
| Posted: Tue Dec 28, 2010 2:22 pm Post subject: Engine teardown started |
|
|
I have started to strip down the V8 over the christmas break.
No complications which was a first for me! However, I need to get a valve spring compressor to finish the heads.
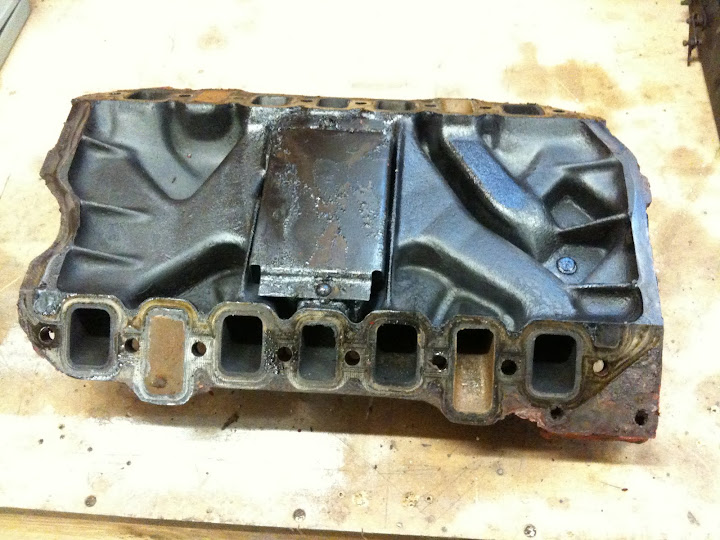
The intake manifold is cast iron and HUGE. It weighs an incredible amount.
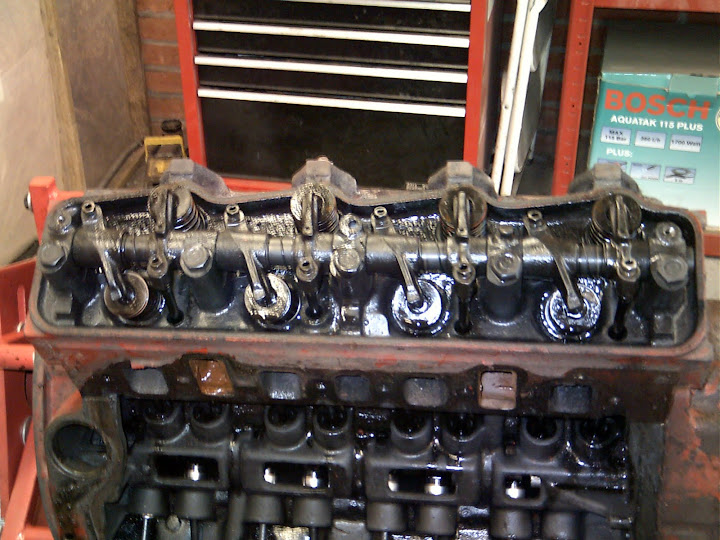
Rocker cover removed. Not much to see. Pretty black though with real dirty oil.
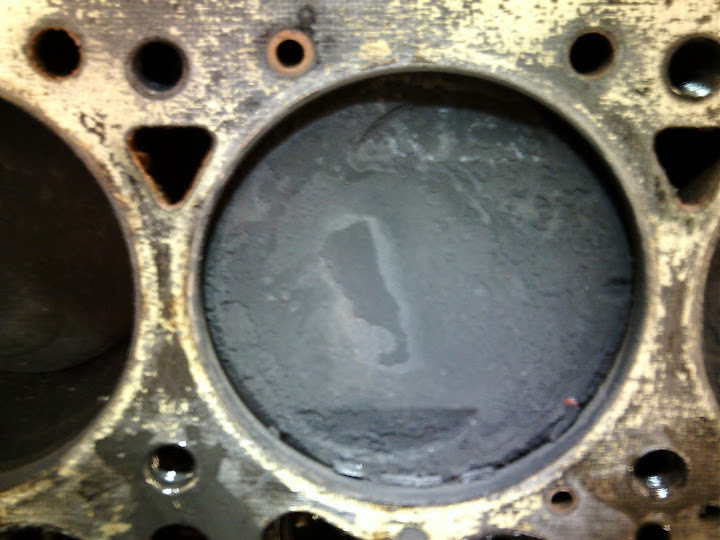
Head off. You can see that the pistons are badly coked up. Indeed there were lumps of carbon debris rustling around on top. A sign of oil getting onto the combustion chamber?
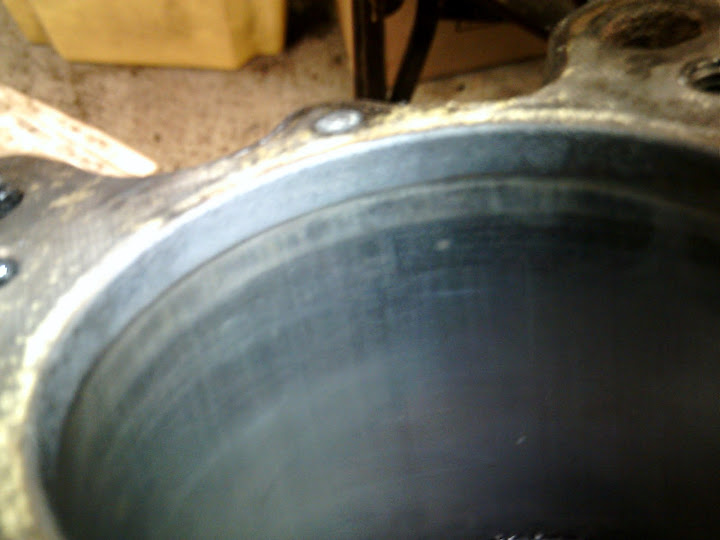
There is a clear lip in the bore where the piston stroke stops. there are also scratches in the bore caused by the piston stroke. A rebore will therefore be needed but that suits me as the machine shop will also be able to skim the beds and add hardened valve seat inserts.
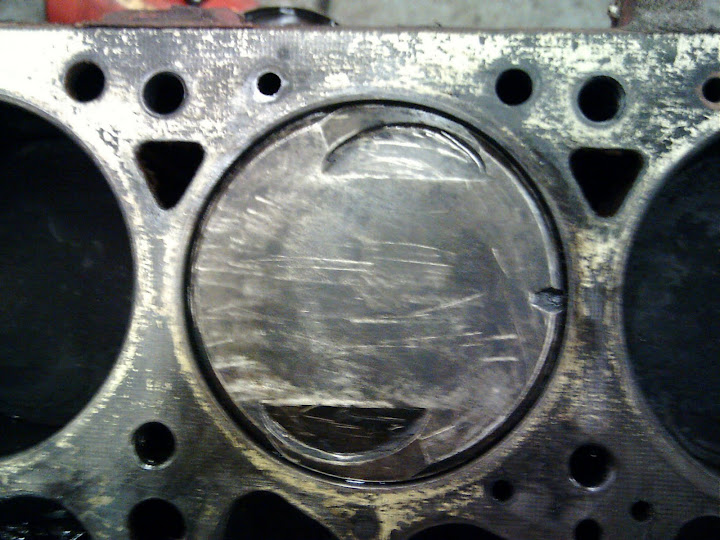
Piston head cleaned up. No markings.
Questions:
1. Am I right in believing that as the tops of the pistons do not appear to be marked that I am still on the factory bore?
2. Can anyone recommend a machine shop that could handle this work. I live in Ipswich so somewhere in east anglia would be good.
Last edited by Bellisin on Tue Dec 28, 2010 2:59 pm; edited 1 time in total |
|
| Back to top |
|
|
Bellisin
Joined: 19 Dec 2010
Posts: 16
|
| Posted: Tue Dec 28, 2010 2:51 pm Post subject: Rust in peace |
|
|
I think that "Hamton" (yes my car has a name; sorry) was close to rusting in peace when I got him.
Here are some pictures. Not for the faint hearted ameteur like me although I know some of you seasoned veterans of the classic car world will see this as a mild repair.
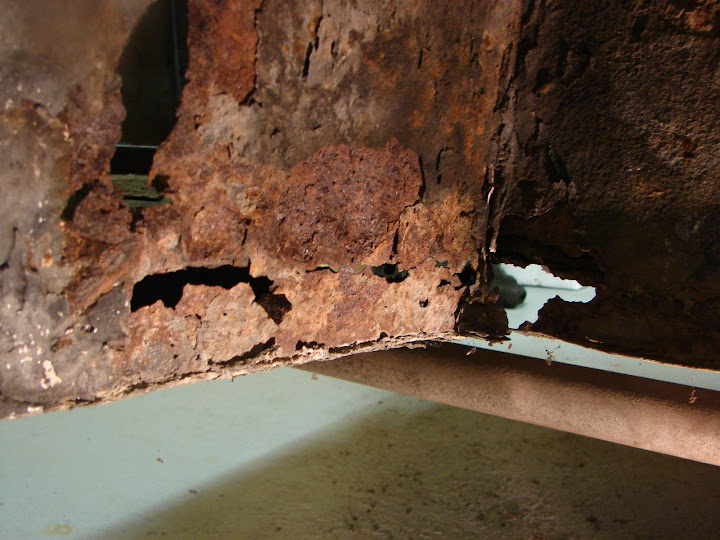
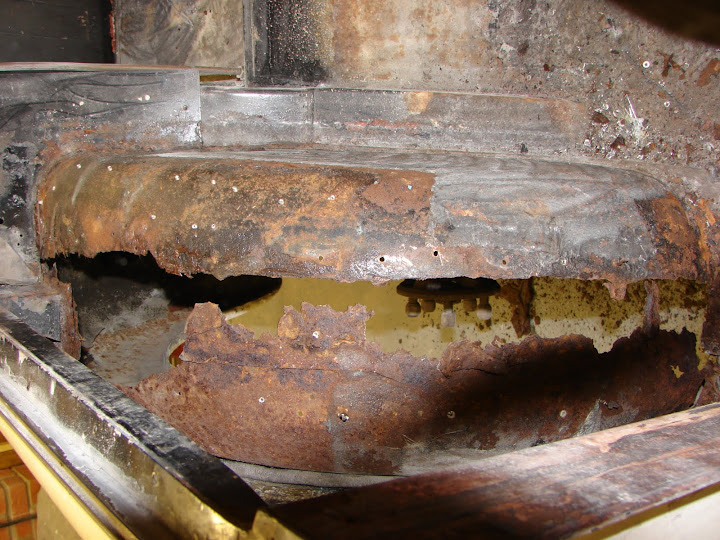
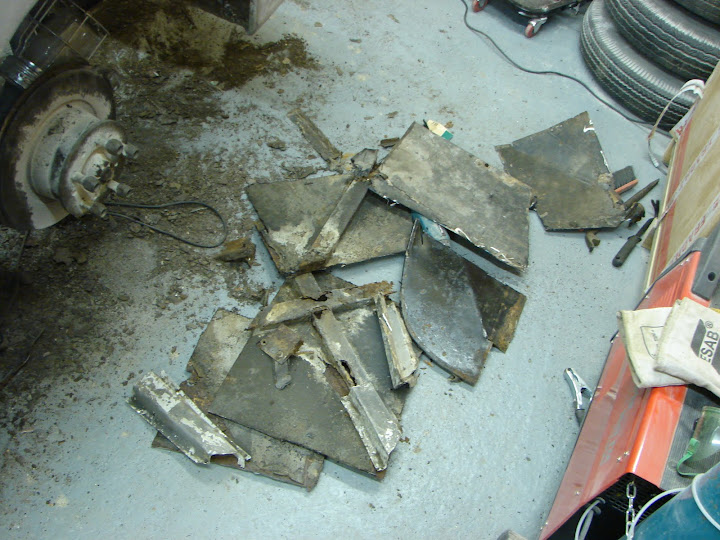
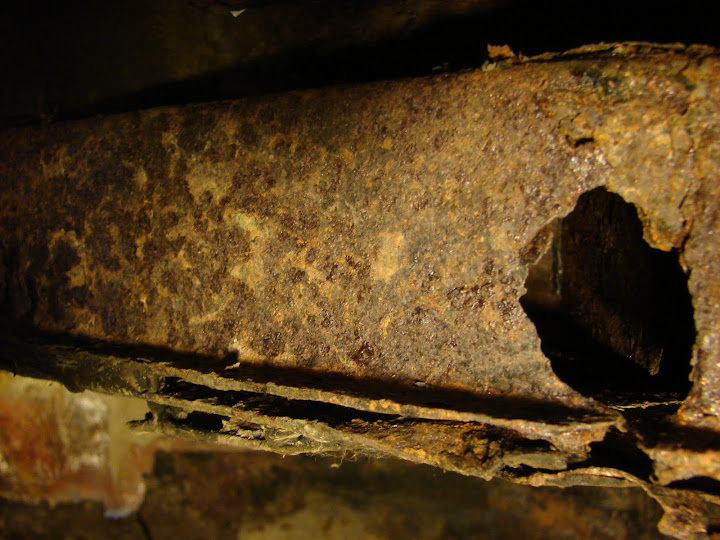 [/img] [/img]
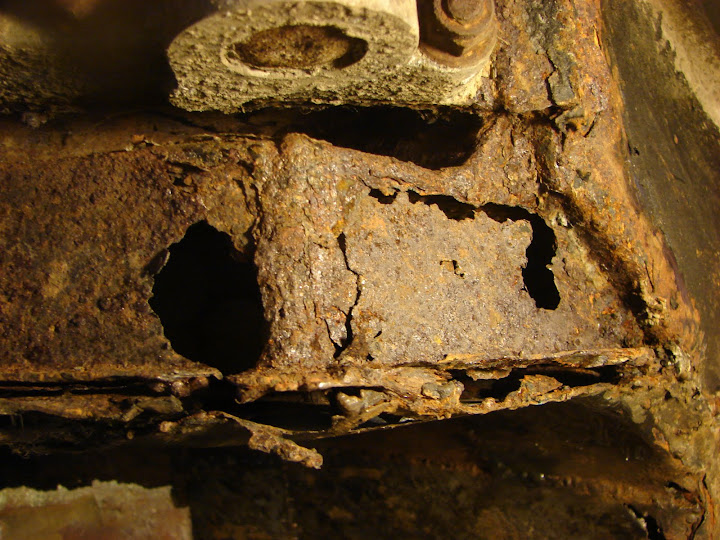
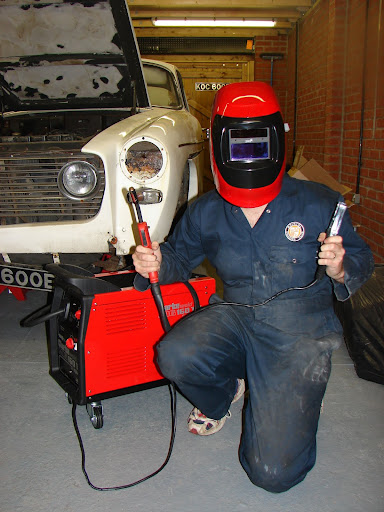
Just as well I bought a welder lost summer!
 |
|
| Back to top |
|
|
Rick
Site Admin
Joined: 27 Apr 2005
Posts: 22447
Location: UK
|
|
| Back to top |
|
|
Bellisin
Joined: 19 Dec 2010
Posts: 16
|
| Posted: Mon Jan 31, 2011 12:02 am Post subject: 409 developments |
|
|
I have now removed the aluminium front body section. Four short cuts were made on the body over A pillar and scuttle. This released the nose and two front wings as a single section. It is a testament to the workmanship of Bristol engineers that it was impossible to find any joins on the alloy body from front to rear.
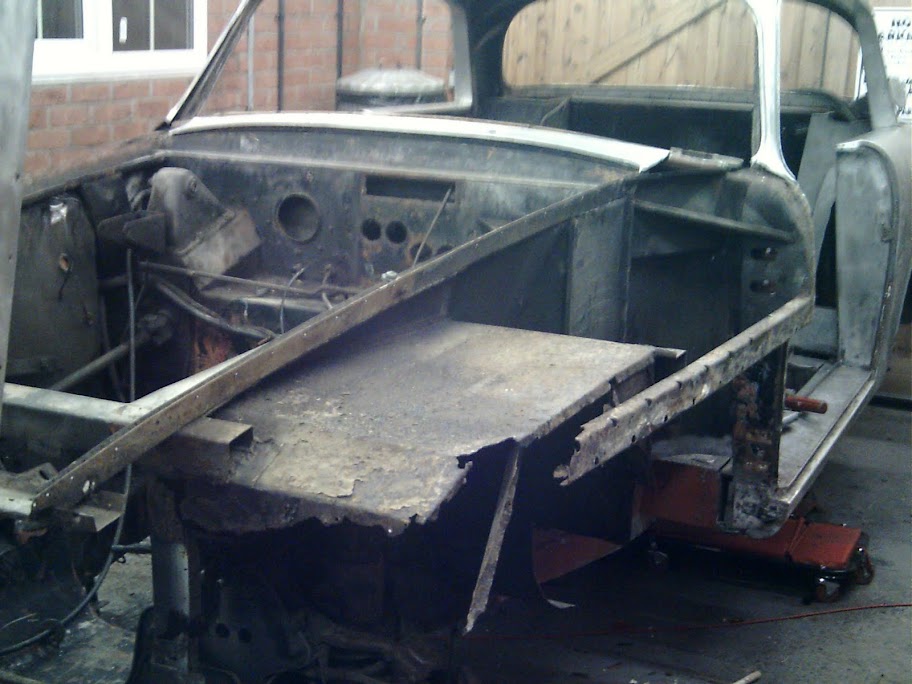
I have also stripped down and removed the front suspension and steering. In addition the engine bay and wing cubbies has been stripped of the remaining bits and bobs such as servos, wiper motors and relays.
I had extreme difficulties removing the lower wishbone bushes which has seized solid. In the end I had to burn the rubber away and carefully grind the steel tube to open it up.
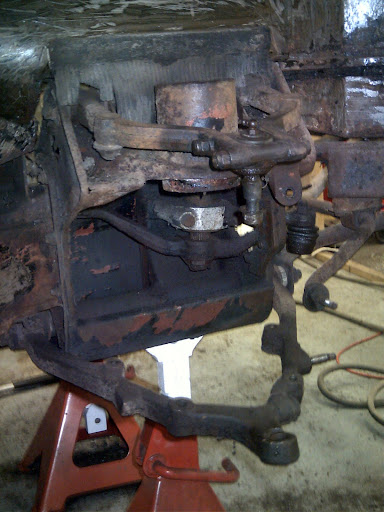
The one remaining issue is removal of the steering arm so I can lift the steering box clear. This is attached to a splined shaft and could not be persuaded free. I have now ordered a heavy duty 2 leg puller which I hope will do the job. I note in the US they use a pitman arm puller. I could not find one for sale in the UK; even on Ebay!
Once the steering box is off I intend to DIY grit blast all the steel on the front half of the car before starting the welding in earnest. |
|
| Back to top |
|
|
Churchill Johnson
Joined: 11 Jan 2011
Posts: 359
Location: Rayleigh Essex
|
| Posted: Mon Jan 31, 2011 11:09 pm Post subject: Re: 409 developments |
|
|
| Bellisin wrote: | I have now removed the aluminium front body section. Four short cuts were made on the body over A pillar and scuttle. This released the nose and two front wings as a single section. It is a testament to the workmanship of Bristol engineers that it was impossible to find any joins on the alloy body from front to rear.
I have also stripped down and removed the front suspension and steering. In addition the engine bay and wing cubbies has been stripped of the remaining bits and bobs such as servos, wiper motors and relays.
I had extreme difficulties removing the lower wishbone bushes which has seized solid. In the end I had to burn the rubber away and carefully grind the steel tube to open it up.
The one remaining issue is removal of the steering arm so I can lift the steering box clear. This is attached to a splined shaft and could not be persuaded free. I have now ordered a heavy duty 2 leg puller which I hope will do the job. I note in the US they use a pitman arm puller. I could not find one for sale in the UK; even on Ebay!
Once the steering box is off I intend to DIY grit blast all the steel on the front half of the car before starting the welding in earnest. |
you have a long job there, the puller you have ordered is it a Sykes-Pickavant hydraulic puller as these are the best, one can buy cheaper but they won't last, i have both but now only use the s/p one, even with a good puller you may have to apply some heat and if the arm is splined have a look to see if its marked to align the correct position before removal, i hope i am not teaching you to suck eggs! |
|
| Back to top |
|
|
|


