
Classic cars forum & vehicle restoration.
|
|
| Author |
Message |
Dyna
Joined: 11 Jan 2011
Posts: 21
|
 Posted: Wed Oct 10, 2012 5:41 pm Post subject: Stirling 14' and Carlight Continental Restoration Posted: Wed Oct 10, 2012 5:41 pm Post subject: Stirling 14' and Carlight Continental Restoration |
 |
|
Hi Folks,
Thought I would write about our 1969 Stirling 14 caravan restoration and our upcoming 1973 Carlight Continental restoration.
We bought the Stirling in March this year (2012), looked to be pretty good caravan project in the pictures from ebay. It was definitely the right model we wanted – being a lantern roof and on the luxury side of caravans from the sixties. We rarely buy anything nice since we rather restore our self, this was however the first caravan restoration of us even if we have numerous full blown car restorations under our belt.
The first problem was that we live in South London and the Stirling was in Inverness Scotland. A Scotland mini vacation had however been on our list for a long time and this was an ample opportunity.
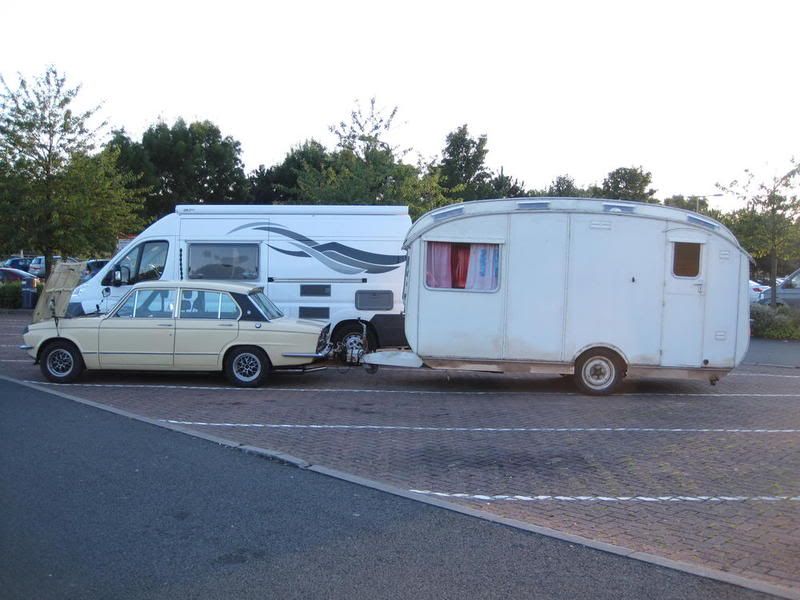
Here we are just arrived outside of Inverness picking up the caravan from Sally.
We could now start the trip south, after some tinkering with lights and other small things. Sally said that the police was rather happy to stop people around where he lived and it after a few miles driving we were stopped.
Luckily we had new lights in the back and new tires, so even if the Stirling look pretty scabby it was up to scratch and the police was happy whit that.
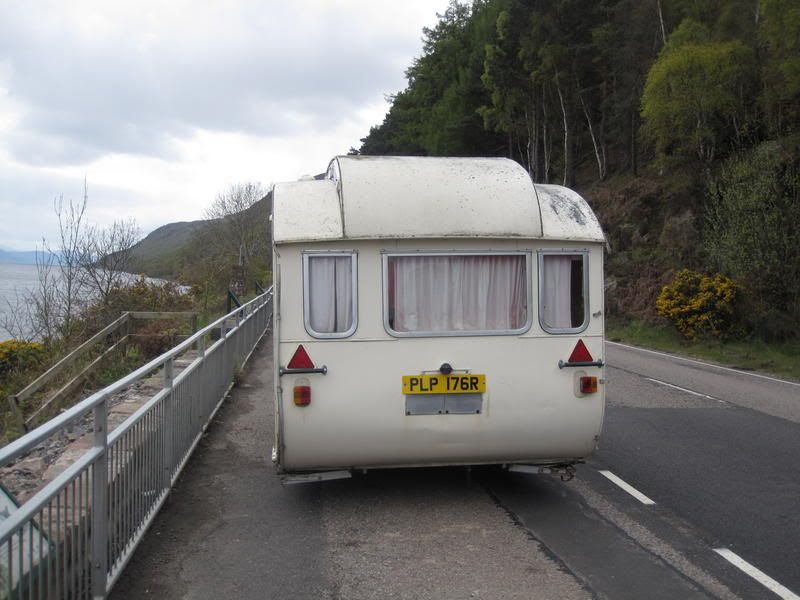
Here we are stopping next to Loch Ness on our way back over Glencoe.
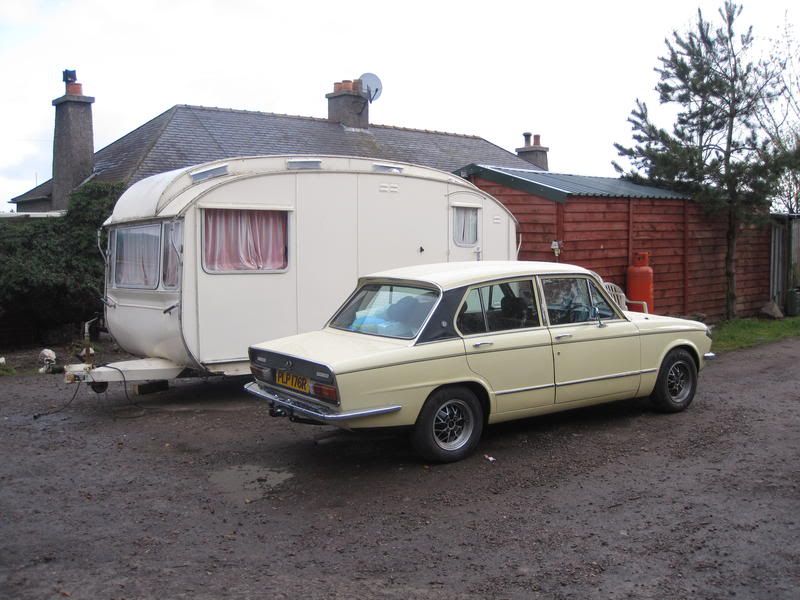
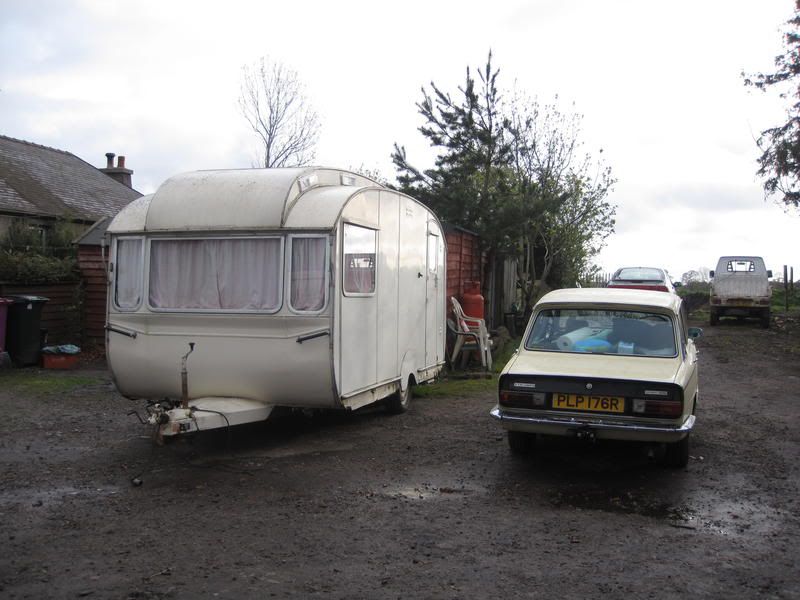
Ah, yes the Dolomite is on the small side to tow the Stirling, here is one of our frequent stop during the way home.
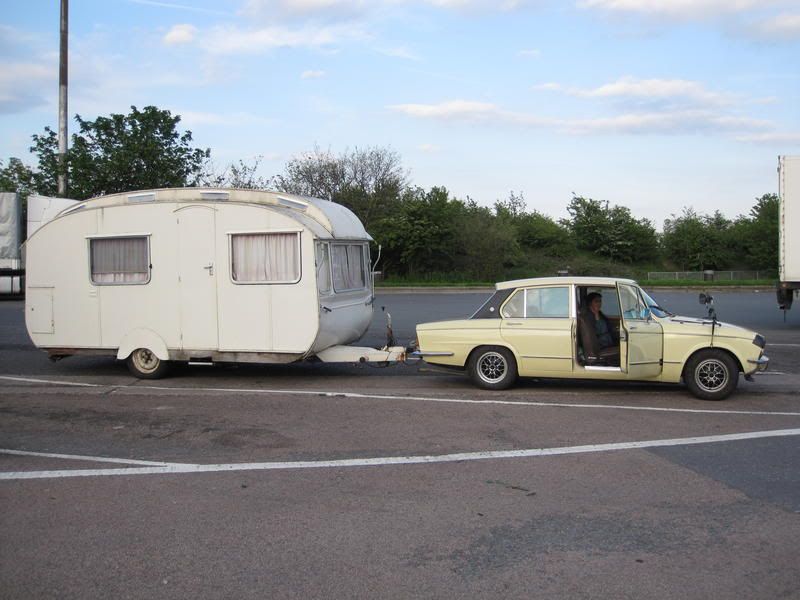
It’s not that it under motorized, the 1850HL has a pretty good engine. It get a bit warm if pressed but you can do around 50mph without much problem. It’s more that it’s too light, making it less stable as towing vehicle, a Triumph 2000/2500 Estate would be much more preferred but we haven’t finished the resto of it.
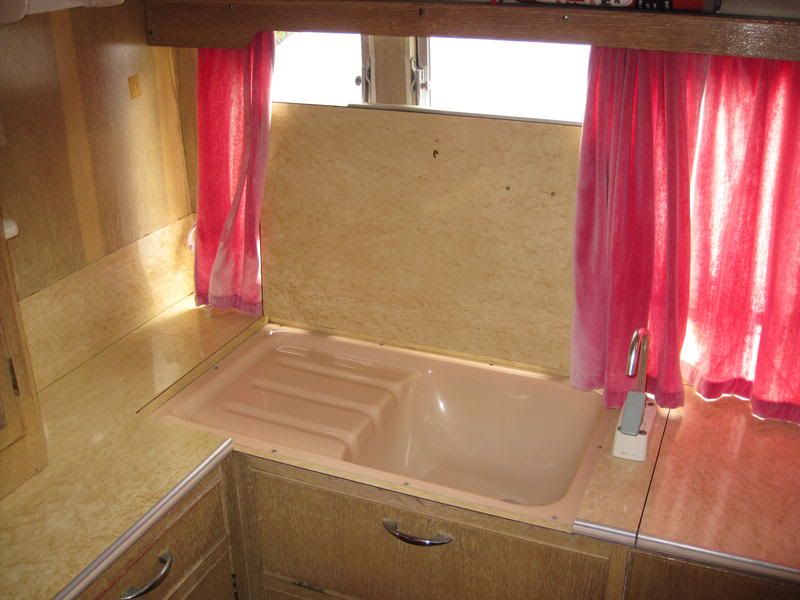
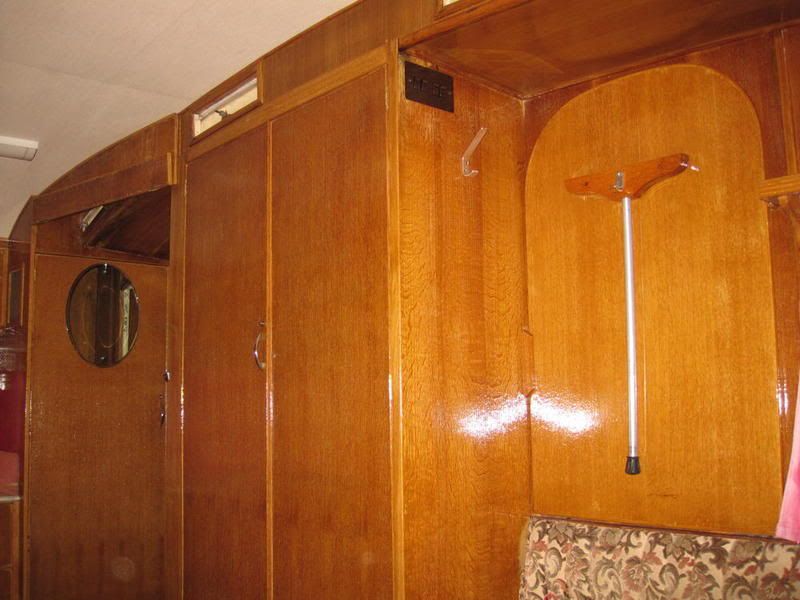
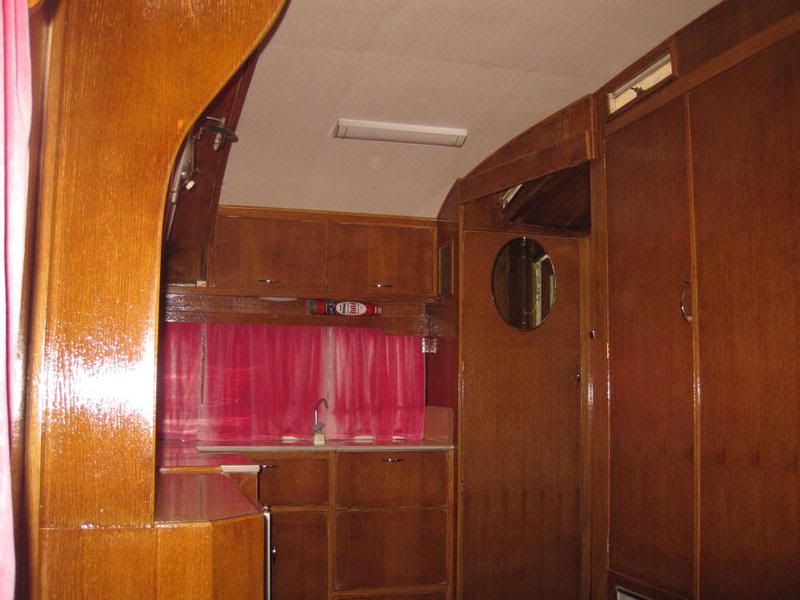
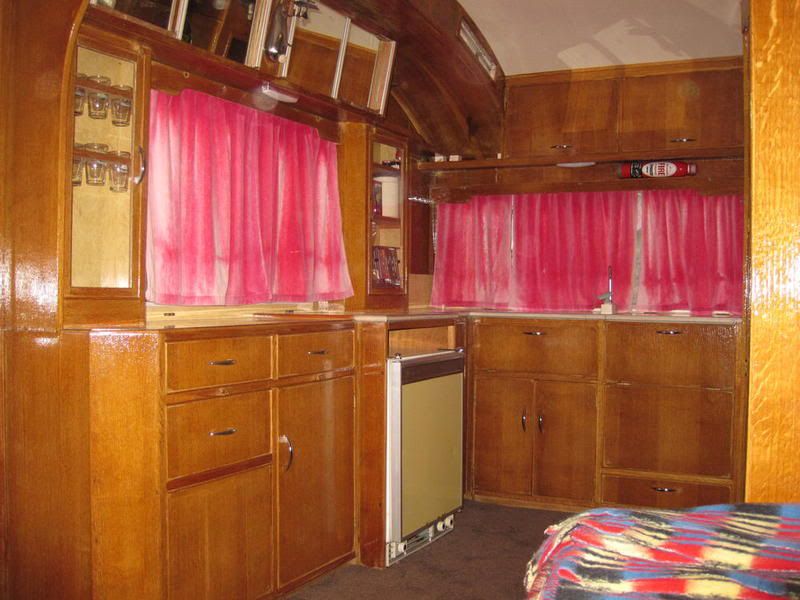
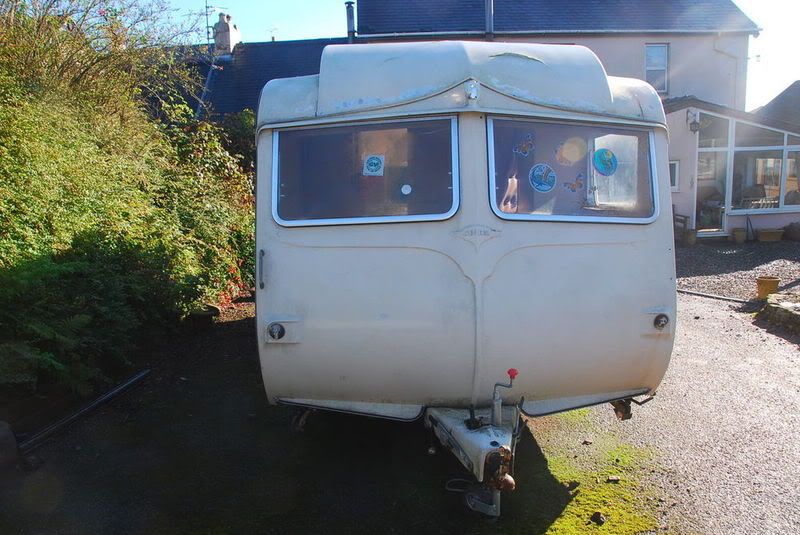
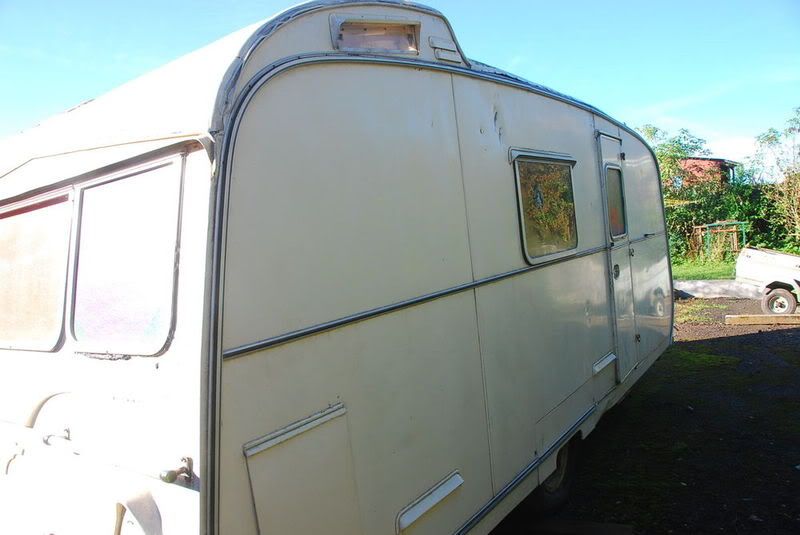
Home at last we could clean up the van and conclude that it in deed was a pretty good object. Here are a few pics how it looked.
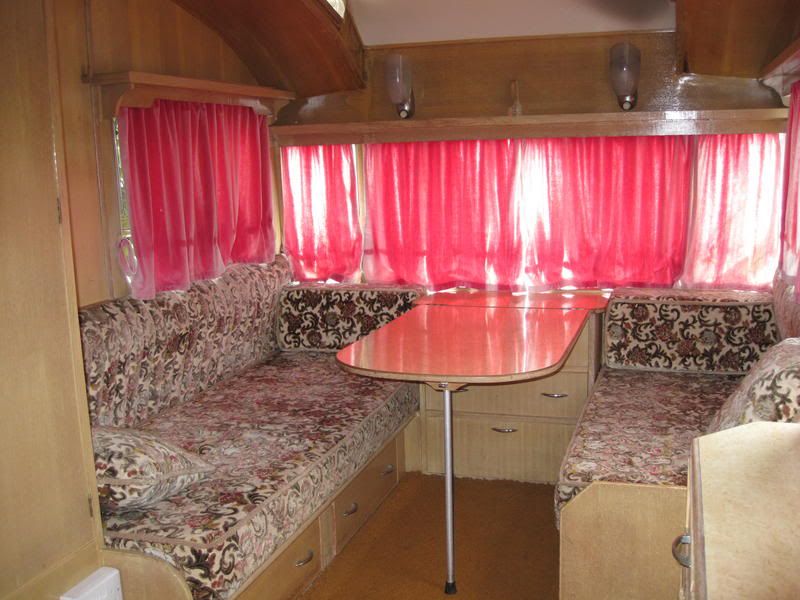
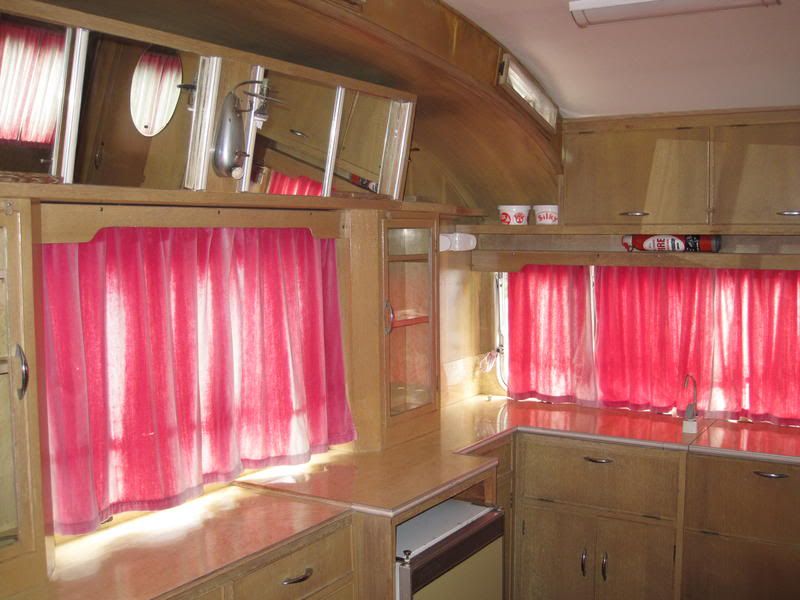

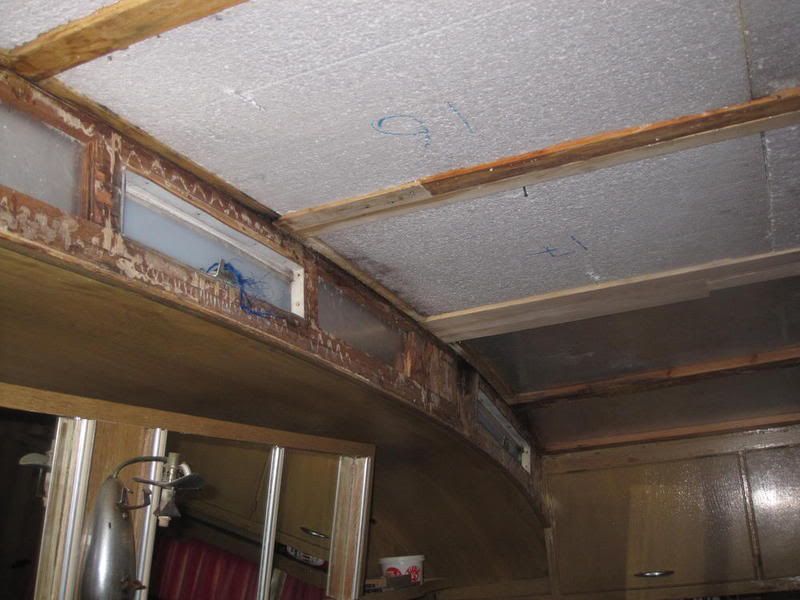
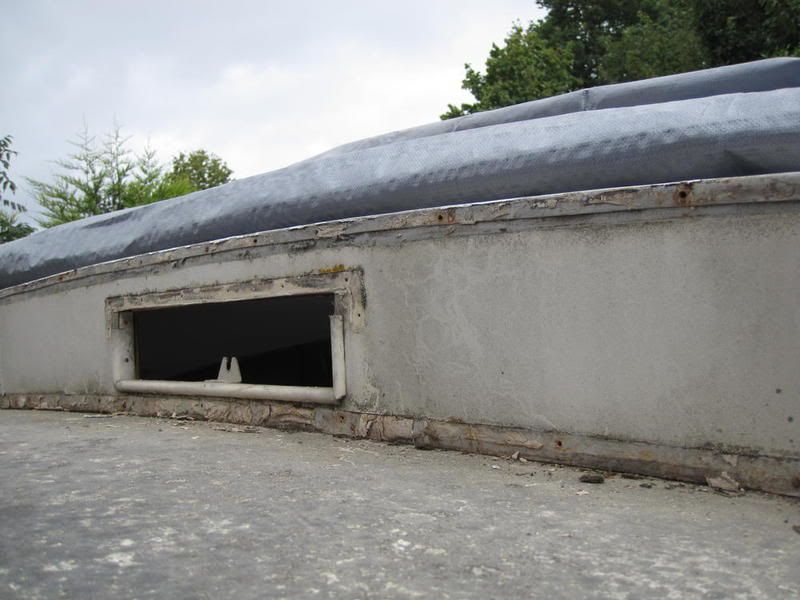
You can spot water stained veneer around the lantern widows and front windows, and we knew from our external inspection that the left side rear corner was in a bad state affecting the whole corner. The lower outer wood paneling was also pretty bad but the floor looked ok from underneath bar the left side rear corner.
We started the restoration June 15, we had fetched the Caravan late April and then we had some other items on our todo list before we could start. Here we are a week in fixing the left rear corner, since the lower sideboard were bad we removed all cladding to assess the floor and if the root gone further up the wall. As you can see we replace quite a few bits along the lower edge , plus a brand new rear corner.
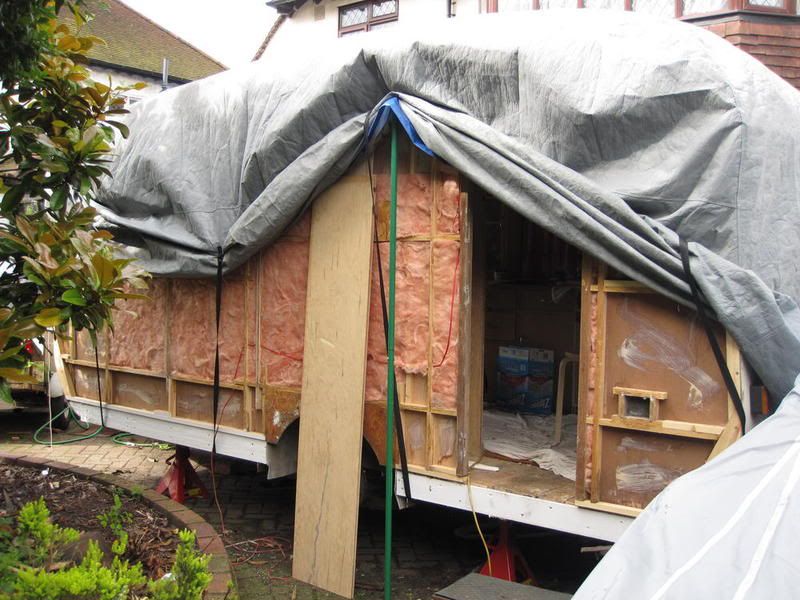
What as worse was that the front corner was bad too so we had make a new one, along with new wood around the front window.
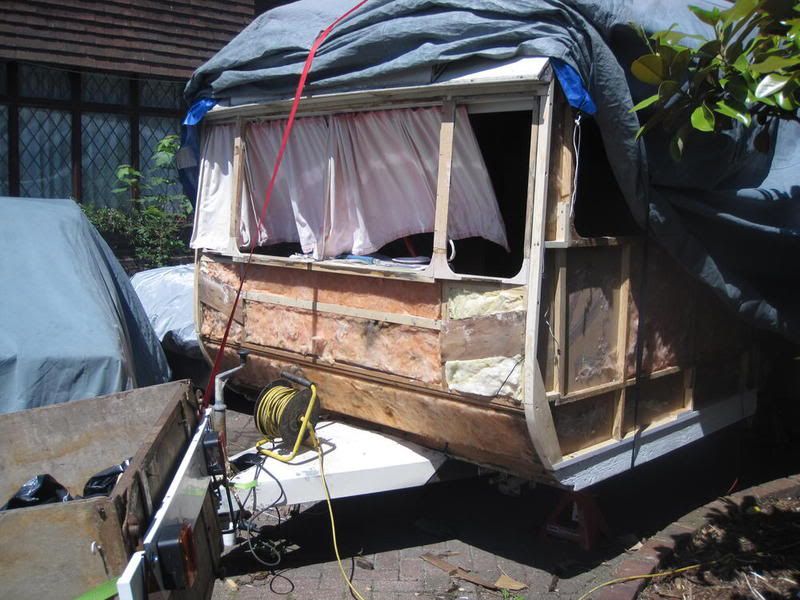
While at it we could as well do the rest of the van, so here we are with the cladding off the other side. In the end we changed three corners and quite a lot of the lower frame work and some bits and pieces of the floor edge.
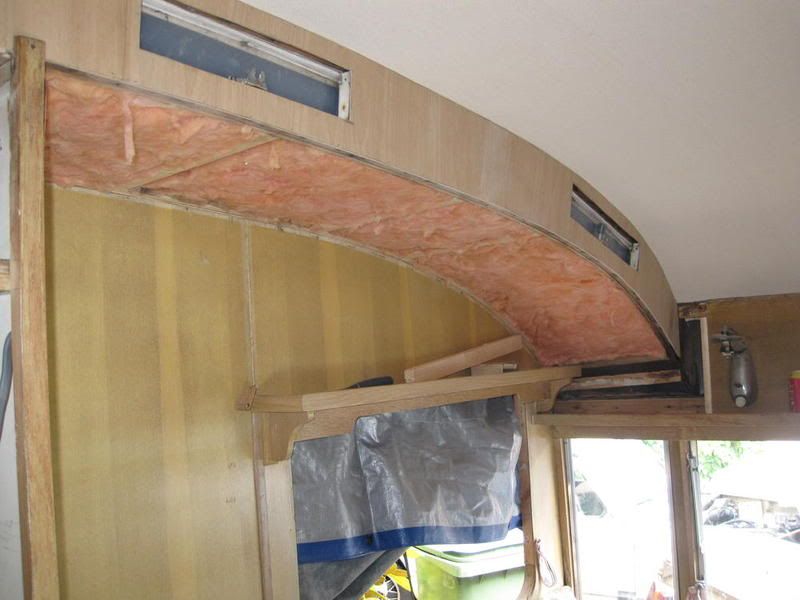
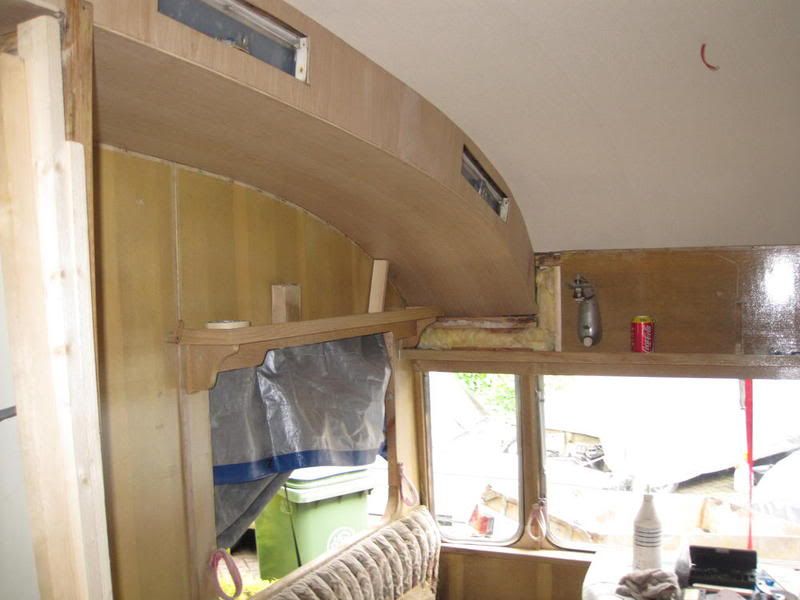
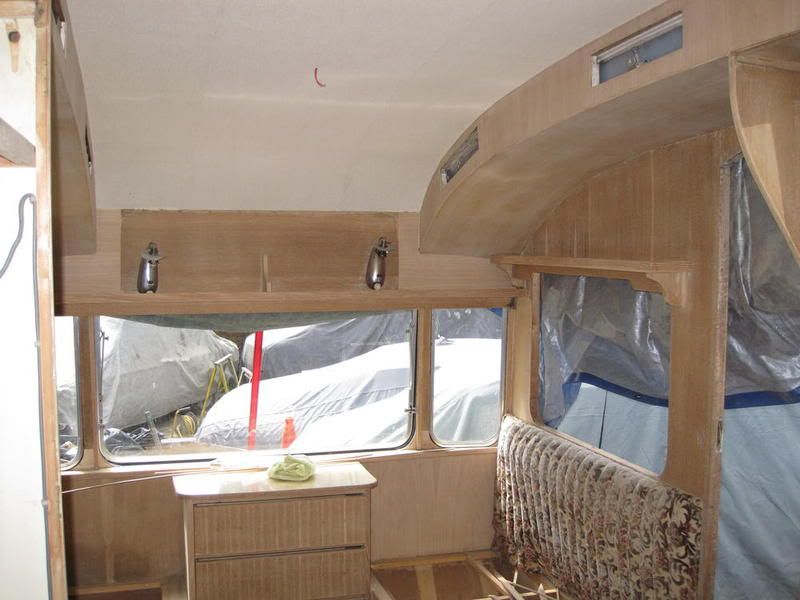
When all of the outside was done it was time to do the inside. The damage was mainly in the ceiling/headliner and around the lantern roof. The headliner might have looked ok but when we had removed the veneered ply around the lantern windows it was evident that there was loads of moisture there beside the wall paper had at some point been painted so down it came along with side ceiling above front sofas and in the wardrobe.
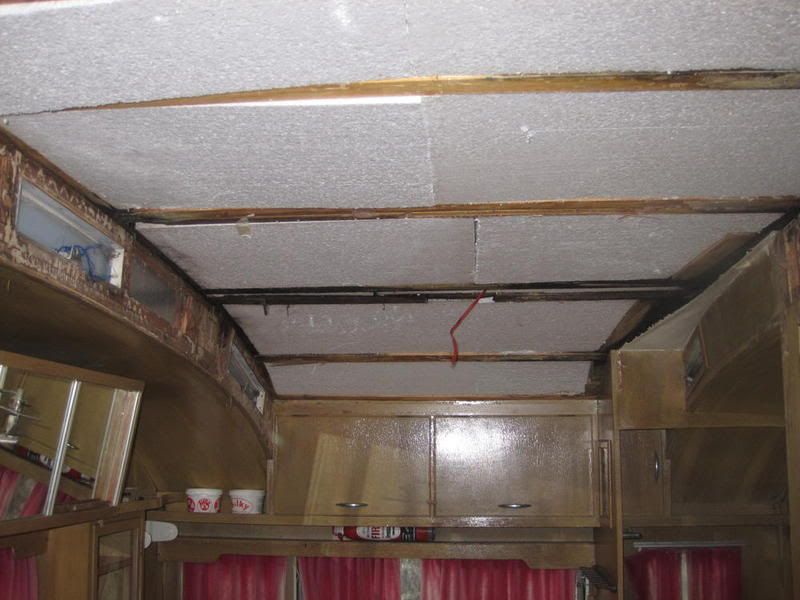
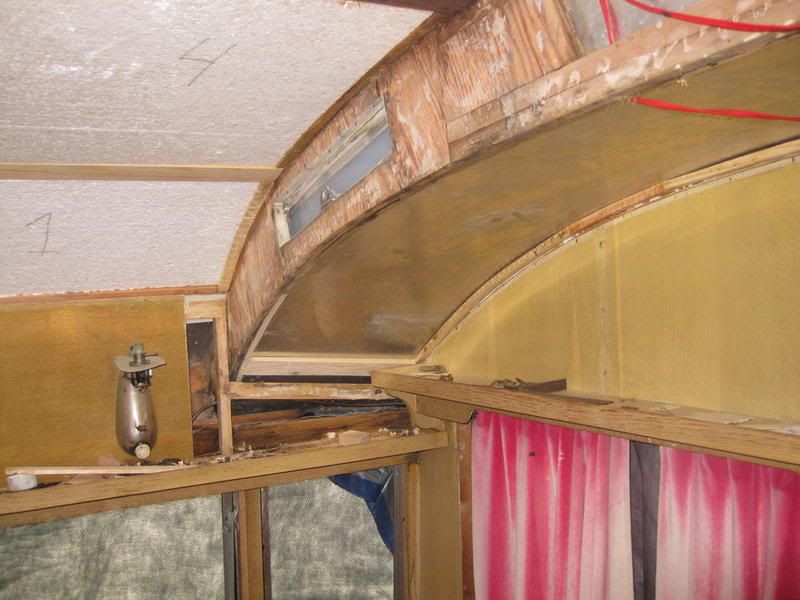
Here are the “new” wooden slats will support the headliner backing ply, plus a picture of work done in towards the front of the ceiling. Again loads of repairs not just the ones in the pictures.
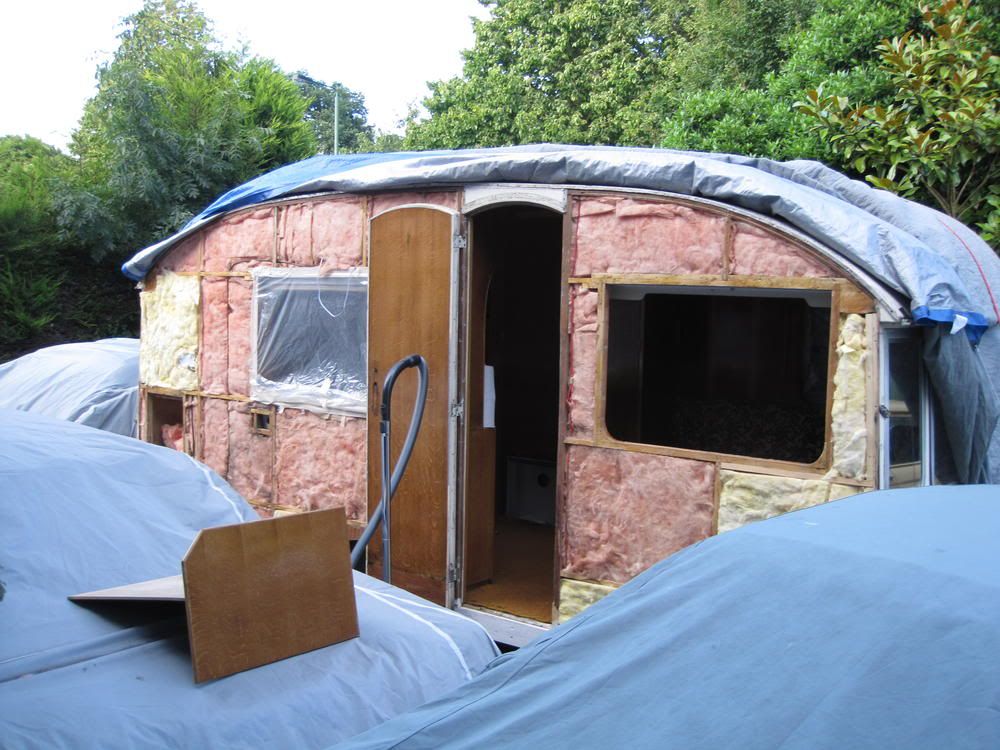
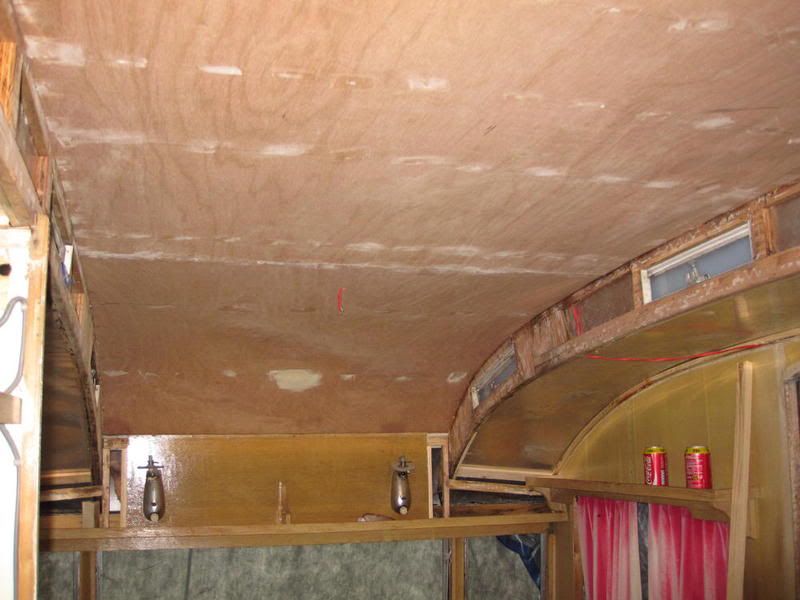
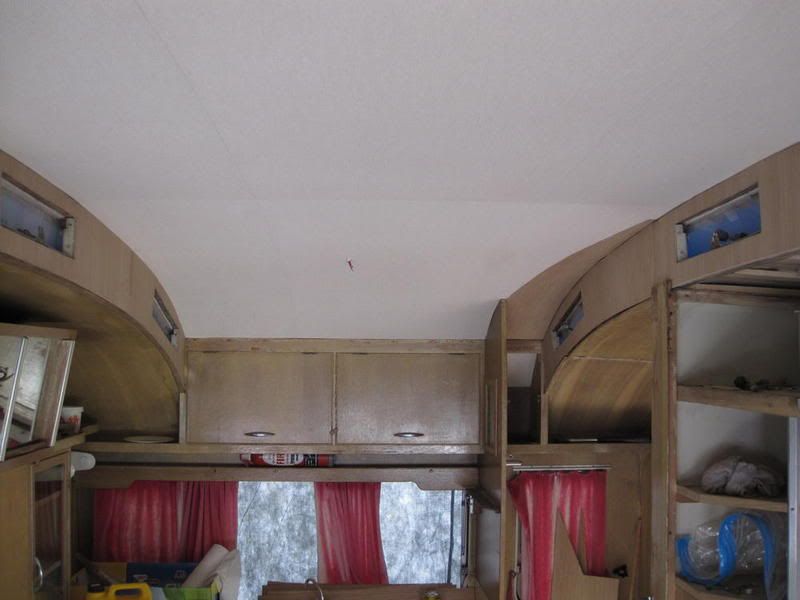
Here we come so far that we can put up the new headliner backing made in marine ply.
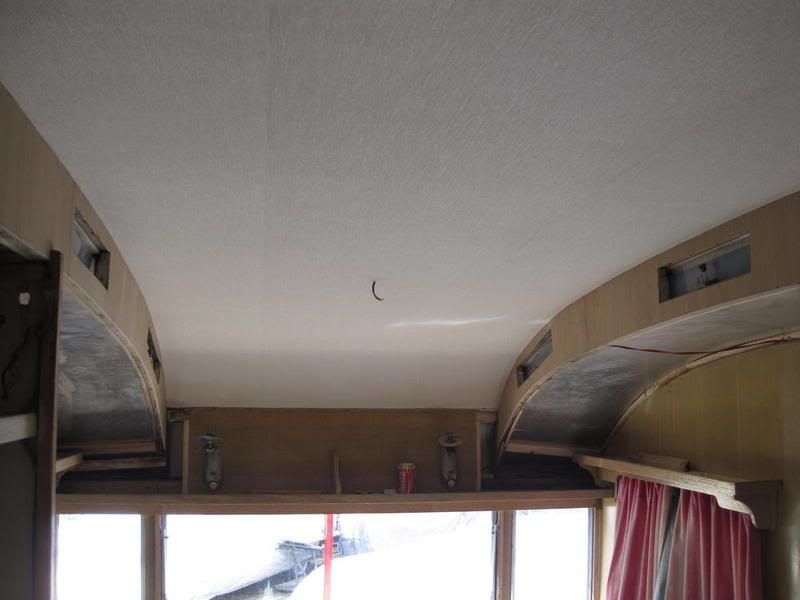
Little bit later we got the woven headliner in along with new oak veneered ply for the lantern windows. It was our choice to use oak veneered ply as ceiling in the toilet area since it would look a bit funny with with just a little strip of woven headliner in one corner.
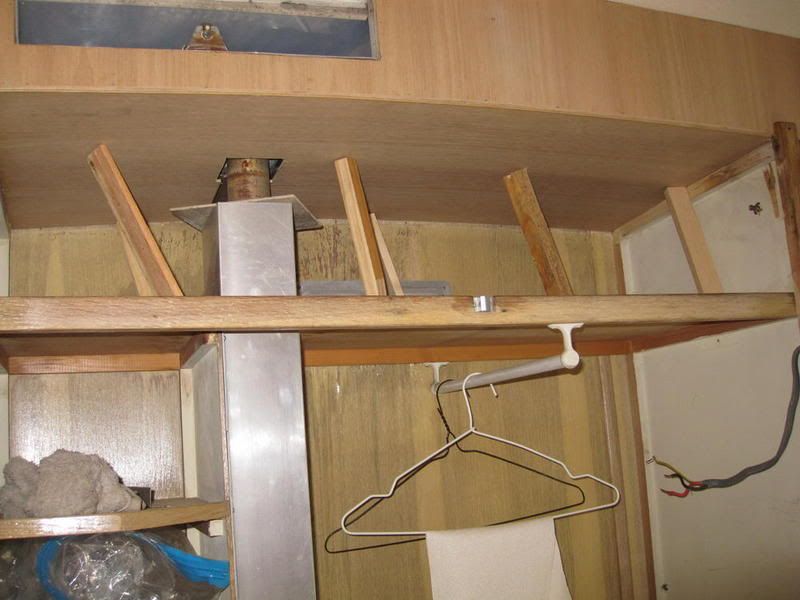
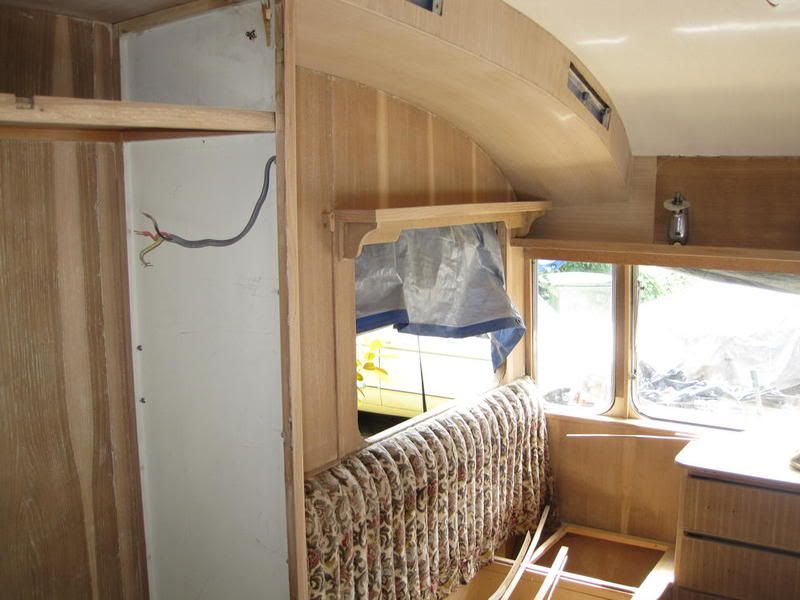
We could now concentrate on finishing of the side roofs, the one in the wardrobe was pretty tricky due to the smoke stack and the limited amount of space. We later found out how to remove the pipe but then it was to late – this is one of a few mistakes we made during our restoration. Caravans are sure not cars..
Finally all wood working was done and we could start sanding off all dead varnish. It was loads of work sanding everything down, and items such as corners were especially trouble some. It takes longer than you think, and you can easily spend a couple of days just sanding small details such as lantern window surrounds moldings.
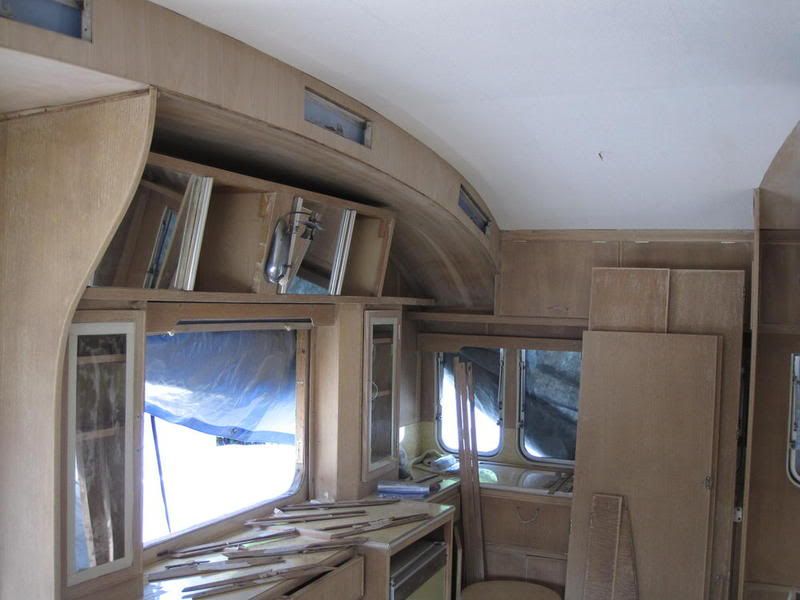
At least it looks nice when done. We used a two component polyurethane which we tinted, to get that old fashion amber color. You might have read my post in regards to zebra look of the wood, its not that evident it the sanded pictures but there is a pretty high contrast between the soft spring wood and the darker summer wood. We used light oak stain to get everything to look uniform and color wise we are very happy with the result.
All that remained now was to seal the roof, old hard caulking doesn't seal no matter how much silicon you apply on the outside  . We used non harding 3M window sealant to seal the whole caravan. Its not to fun to work with and requires a lot of aftercare but it does seal wonderfully and will not harden ever so it will seal even when the joints move. . We used non harding 3M window sealant to seal the whole caravan. Its not to fun to work with and requires a lot of aftercare but it does seal wonderfully and will not harden ever so it will seal even when the joints move.
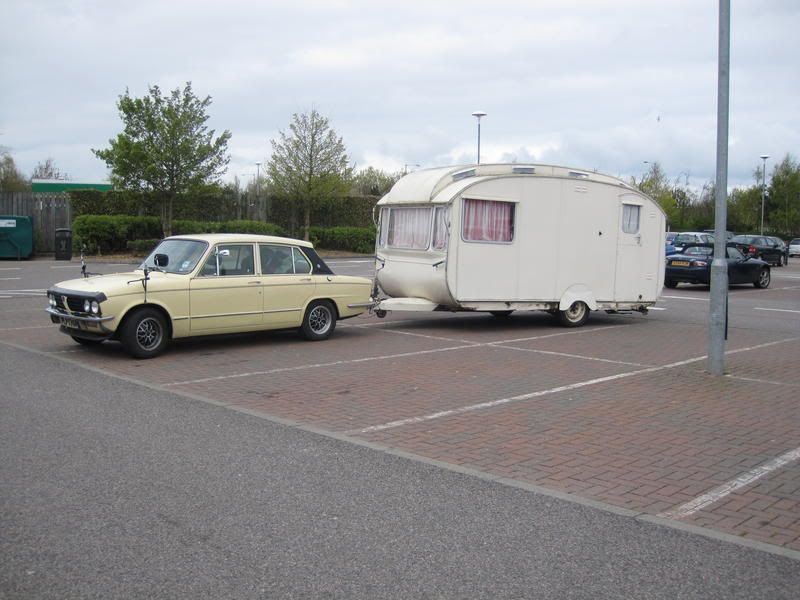
Finally we were done on August 7, when we went out on a small trip to shake everything down. Little bit later we went to the International Triumph meet.
Followed by a trip to Bath, which has a very lovely camping site (sorry for the smudge on the lens).

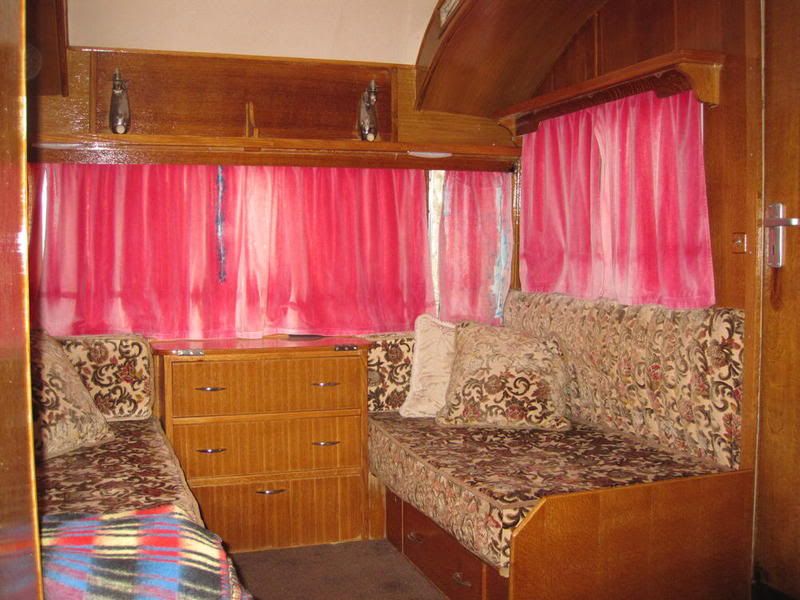
There is still things to do like painting the outside, and fixing new curtains. Sadly the badly faded originals could not be washed and dyed they were simply to frail. Still using them but they are glued to a canvas – a thing we had to do quickly. The cushions are still the original – faded but not frail and of super quality. The tapestry is so deep it silly.
One thing with the Stirling is that its just a two berth, and its on the small side so yesterday we bought a Carlight Continental – we were out looking at it this Sunday and after much deliberation we decided to buy it. Wood wise it will require just as much work as the Stirling if not more. What is a bummer is that there are missing and broken things that we need to either make from scratch, source or adapt some other bits to in there place.
Our small list of missing broken bits needed are:
Tail light lens
Rear reflective triangle
Front parking/side lights
Exterior door handles
2x Skylight opening mechanism (well the whole thing is missing but carlight can provide the “glass it self so if some one has a pair of broken ones it would work)
Tables both would be nice but one would do. We have one but it has the wrong leg, somebody must have fixed it at some point.
Fridge (would be nice with an original)
Hob, the stove bit is there
Wash basin with taps etc
Shower head with fixings
Cushions fabric doesn't need to be perfect but we need the foam at least or measurements of the foam.
Exterior lamp next to the right side door (offside in the UK).
Glass cabinet on the wall to the kitchen (its all gone) – measurements and plenty of pics would do too  . .
One interior lamp – the ones on the side – I.e where the lantern windows are.
Exterior covers for the “fender skirts”/”the wheel house covers” key opening, the mechanism holding the skirts are pretty bust too.
1x front grab handle
May thanks in advance if anyone can help us with the items on the list.
Sincerely Dyna
PS: Yes the Carlight is the same that was on ebay this past weekend.
[/list] |
|
| Back to top |
|
 |
Dalek63

Joined: 15 Aug 2009
Posts: 490
Location: North Cornwall
|
| Posted: Thu Oct 11, 2012 12:47 am Post subject: |
|
|
Well done with the Stirling. A magnificent restoration. We had to do similar to our Car Cruiser and know how much blood, sweat and tears are involved.
_________________
I can resist anything except temptation ! ( Oscar Wilde)
"Don't try to teach a pig to sing. It wastes your time and annoys the pig." ( Mark Twain)
http://www.period-classic-caravan-club.co.uk/ |
|
| Back to top |
|
|
Dyna
Joined: 11 Jan 2011
Posts: 21
|
| Posted: Thu Oct 11, 2012 11:22 am Post subject: |
|
|
| Dalek63 wrote: | | Well done with the Stirling. A magnificent restoration. We had to do similar to our Car Cruiser and know how much blood, sweat and tears are involved. |
Thanks, it was a bit of a labor getting it done that quickly - we kind of wanted to use it ..
Cheers Dyna |
|
| Back to top |
|
|
The Oldtimers
Joined: 23 Jul 2010
Posts: 83
|
| Posted: Thu Oct 11, 2012 12:52 pm Post subject: Stirling and Continental |
|
|
Well done on your Stirling restoration. We had a Stirling, now owned by Swampthing. I see that the toilet door is set back, and I assume that it is a two door.
All the best with your Continental restoration. We were watching it on ebay. |
|
| Back to top |
|
|
Clarina
Joined: 02 Oct 2008
Posts: 32
Location: Wiltshire
|
| Posted: Thu Oct 11, 2012 12:53 pm Post subject: |
|
|
So nice to see all the photos of your restoration, you have done a great job.
Glad to see the blue chair in all it's glory, it looks good infront of your caravan, was just too big for our little 10ft Stirling!
Enjoy your next restoration!
Gill |
|
| Back to top |
|
|
Dyna
Joined: 11 Jan 2011
Posts: 21
|
| Posted: Thu Oct 11, 2012 10:47 pm Post subject: Re: Stirling and Continental |
|
|
| The Oldtimers wrote: | Well done on your Stirling restoration. We had a Stirling, now owned by Swampthing. I see that the toilet door is set back, and I assume that it is a two door.
All the best with your Continental restoration. We were watching it on ebay. |
Thanks, yes it's a two door.
Cheers Dyna |
|
| Back to top |
|
|
Dyna
Joined: 11 Jan 2011
Posts: 21
|
| Posted: Thu Oct 11, 2012 10:49 pm Post subject: |
|
|
| Clarina wrote: | So nice to see all the photos of your restoration, you have done a great job.
Glad to see the blue chair in all it's glory, it looks good infront of your caravan, was just too big for our little 10ft Stirling!
Enjoy your next restoration!
Gill |
Hi Gill,
Yes we are very happy with the Geebro sun lounger, its really comfy. Thanks for selling it, just a shame we could not meet. Hopefully the next resto will be ok - we are a bit worried about the roof since it's sun damaged.
Cheers Dyna |
|
| Back to top |
|
|
Fluffle-Valve

Joined: 30 Dec 2009
Posts: 521
Location: At my computer in a bungalow in Duston, Northampton.
|
| Posted: Thu Oct 11, 2012 11:13 pm Post subject: |
|
|
I have a soft spot for this type of look of these caravans..
Well done on the reburb...
_________________
 Series 3 1972 LWB Truck Cab Pick Up. My daily drive. Series 3 1972 LWB Truck Cab Pick Up. My daily drive. |
|
| Back to top |
|
|
Stirling-in-Oz
Joined: 08 Oct 2012
Posts: 30
|
| Posted: Wed Oct 17, 2012 9:50 pm Post subject: Stirling renovation |
|
|
Hi Dyna
I found your post by searching your user name. Great progress of the reno - very helpful for me.
Yes, I am thinking I have 12 months of weekends ahead of me with this project!
Regards
Nick |
|
| Back to top |
|
|
Dyna
Joined: 11 Jan 2011
Posts: 21
|
| Posted: Wed Oct 17, 2012 10:42 pm Post subject: Re: Stirling renovation |
|
|
| Stirling-in-Oz wrote: | Hi Dyna
I found your post by searching your user name. Great progress of the reno - very helpful for me.
Yes, I am thinking I have 12 months of weekends ahead of me with this project!
Regards
Nick |
Great that you found the post .
Cheers Dyna |
|
| Back to top |
|
|
elot64
Joined: 16 Jun 2008
Posts: 35
|
|
| Back to top |
|
|
welshrover
Joined: 09 Aug 2011
Posts: 326
|
| Posted: Sun Nov 04, 2012 7:17 pm Post subject: |
|
|
nice job ,i like the interior, the wood is a lot nicer than the modern chipboard/mdf. rubbish  |
|
| Back to top |
|
|
|
|
You cannot post new topics in this forum
You cannot reply to topics in this forum
You cannot edit your posts in this forum
You cannot delete your posts in this forum
You cannot vote in polls in this forum
|
php BB powered © php BB Grp.
|


