|
|
| Author |
Message |
D4B

Joined: 28 Dec 2010
Posts: 2083
Location: Hampshire UK
|
 Posted: Mon Feb 10, 2014 5:26 pm Post subject: Posted: Mon Feb 10, 2014 5:26 pm Post subject: |
 |
|
We never doubted you Peter ~ me on the other hand have done almost nothing to my resto and neither am I building a house  |
|
| Back to top |
|
 |
vitesse
Joined: 03 Jun 2013
Posts: 561
|
| Posted: Mon Feb 10, 2014 6:46 pm Post subject: |
|
|
I am with you Steve but that is all about to change  |
|
| Back to top |
|
|
vitesse
Joined: 03 Jun 2013
Posts: 561
|
| Posted: Sat Feb 15, 2014 10:15 pm Post subject: |
|
|
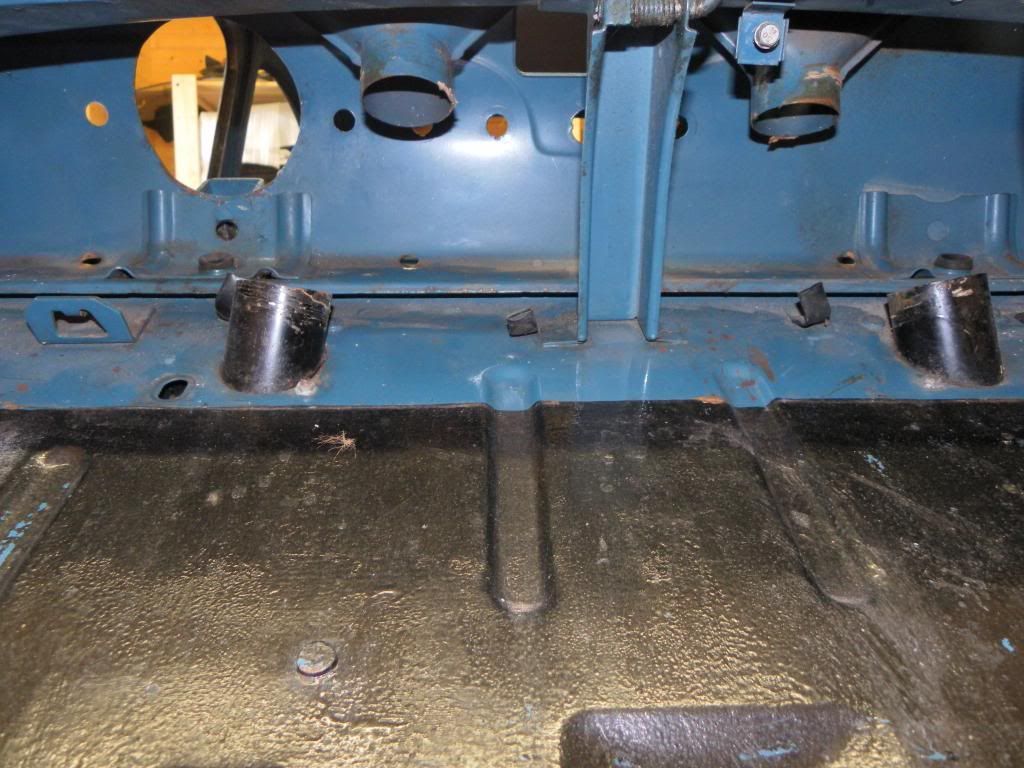
Peter I don't know if you can remember or not but did all the wiring for the indicator and light stalks come through the hole behind the bracket that holds the steering rack in place just below the speedo hole?
In the picture there is a hole below the speedo with no grommet in it and below that is another hole at 90 degrees to the other one that has a grommet but that has been removed by me at sometime after I took this picture and I can't remember if that was a blanking plug or it was a grommet and some of the wires came through it? On the other side of the car which you can also see in the picture it is just a rubber plug but that could be used for left hand drive cars and is a plug because mine is RHD?
I took loads of pictures of the wiring for reference before I removed the loom but none of the show that hole clearly enough to see if it had a grommet or plug in it?
 |
|
| Back to top |
|
|
vitesse
Joined: 03 Jun 2013
Posts: 561
|
| Posted: Sat Feb 15, 2014 10:37 pm Post subject: |
|
|
I think I have found another picture that may clear it up, looks like a blanking plug to me in this picture. Its odd as in all my pictures of the car I have after the car was resprayed, it is still in place but covered by masking tape. Its possible when I got the car home after I removed all the masking tape, I simply pulled the plug out with the tape, if I did then it's still in the bin liner in the garage? Therefore all the wiring must go through the little hole with no grommet.
I read today that just because you forget things as you get older, it isn't the early onset of Dementia. I was rightly relieved, as I put things down and then two minutes later spend 30 minutes trying to find them again.
 |
|
| Back to top |
|
|
colwyn500
Joined: 21 Oct 2012
Posts: 1745
Location: Nairn, Scotland
|
| Posted: Sat Feb 15, 2014 10:56 pm Post subject: |
|
|

[url=http://www.flickr.com/photos/
Hope this helps Tony. There has always been some messy mastic on the more horizontal hole which looks original. There certainly can't have been any wires through here. |
|
| Back to top |
|
|
vitesse
Joined: 03 Jun 2013
Posts: 561
|
| Posted: Sat Feb 15, 2014 11:52 pm Post subject: |
|
|
| Yeah that's great Peter thanks for looking. |
|
| Back to top |
|
|
tjmra
Joined: 17 Feb 2014
Posts: 12
|
| Posted: Tue Feb 18, 2014 11:28 am Post subject: |
|
|
Peter,
first post here so I hope the photo works. (we have exchanged posts on another forum but don't tell anyone.....)
Have owned a 69 F for almost thirty years. Has been through one basic pull apart and tidy up just after I got it, but more recently a fairly significant second effort.
The small hole behind the bracket that holds the steering rack is for the wiring from the steering column switch gear. It should have a rubber grommet that protects the wiring. My photo just shows the grommet at the top of the photo. Is a real tight fit but without it the wires may chafe over time.
The larger hole below it does have just a blanking grommet.
If you need a better photo let me know.

Regards
Joe R |
|
| Back to top |
|
|
colwyn500
Joined: 21 Oct 2012
Posts: 1745
Location: Nairn, Scotland
|
| Posted: Tue Feb 18, 2014 12:34 pm Post subject: |
|
|
Thanks for that clarification Joe. It's Tony, with this restoration:
http://www.oldclassiccar.co.uk/forum/phpbb/phpBB2/viewtopic.php?t=14089
which you may have seen already, who is currently working on that area amongst others.
It would be a great help if you can give us further advice as we work uphill with the restorations. |
|
| Back to top |
|
|
tjmra
Joined: 17 Feb 2014
Posts: 12
|
| Posted: Thu Feb 20, 2014 9:17 am Post subject: |
|
|
Happy to help. Just ask, all will be good.
Joe R |
|
| Back to top |
|
|
colwyn500
Joined: 21 Oct 2012
Posts: 1745
Location: Nairn, Scotland
|
| Posted: Wed Apr 09, 2014 11:35 pm Post subject: |
|
|
With lots of other duties and distractions on the go and single figure temperatures, the Fiat has been sitting alone and untouched for several months now. The weather improves daily and I think I will be back on the case next week.
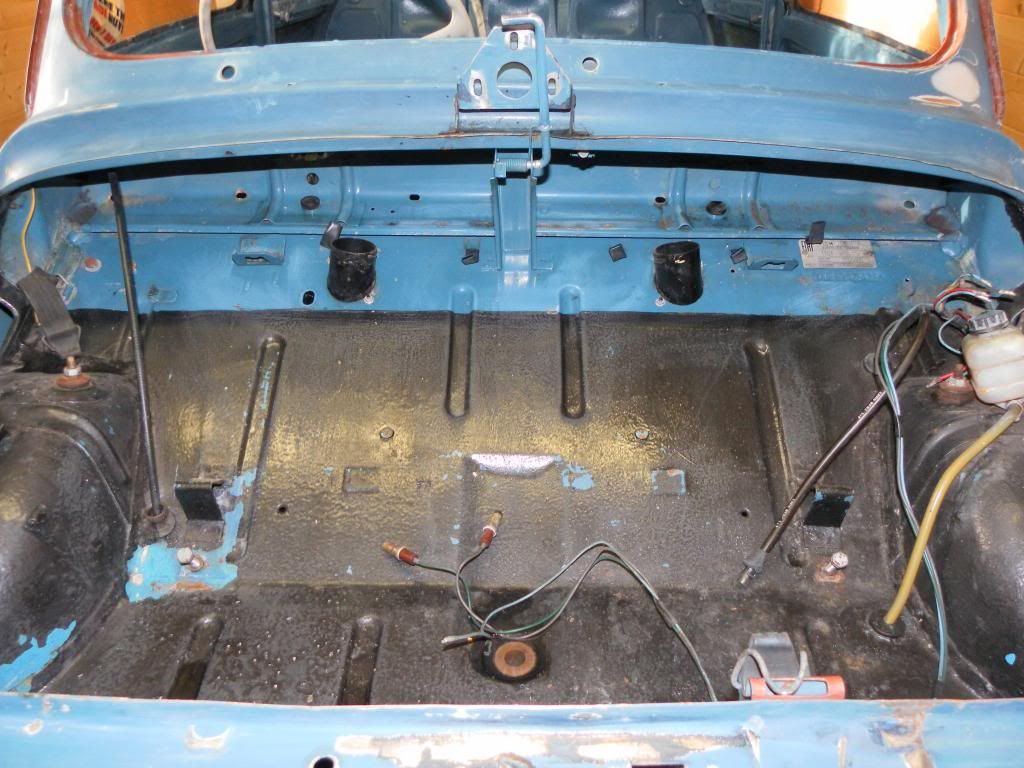
I was spurred on today by looking at a 500 at my local dealer whilst dropping of the modern Fiat for a service. The dealers have had this on display for years..the photo is 10 years old and it still looks the same. Although they restored it ages ago, it has the original interior and is a very good guide as to how the doors and boot should fit.
Lovely car.
  |
|
| Back to top |
|
|
vitesse
Joined: 03 Jun 2013
Posts: 561
|
| Posted: Thu Apr 10, 2014 12:34 am Post subject: |
|
|
I have a modern 500 in the family. It is 3 years old in September so I have to go into the dealership Friday, as they are trying to get me to buy another one or pay the final lump sum and keep it. It is only done 6000 miles so seems a bit pointless to get another. I was considering asking them if they wanted to loan my Classic 500 for the showroom, to negotiate on price but again I don't think I could sleep at night thinking about people's grubby mitts and zippers on their coats rubbing all over the nice paintwork.
The modern is a great little car, it has the same coloured seats as the classic.
It will be great to see your car restoration moving forward!!!!!! I know you have been very busy building a house. |
|
| Back to top |
|
|
kevin2306
Joined: 01 Jul 2013
Posts: 1359
Location: nr Llangollen, north wales
|
| Posted: Thu Apr 10, 2014 8:33 am Post subject: |
|
|
| vitesse wrote: | I have a modern 500 in the family. It is 3 years old in September so I have to go into the dealership Friday, as they are trying to get me to buy another one or pay the final lump sum and keep it. It is only done 6000 miles so seems a bit pointless to get another. I was considering asking them if they wanted to loan my Classic 500 for the showroom, to negotiate on price but again I don't think I could sleep at night thinking about people's grubby mitts and zippers on their coats rubbing all over the nice paintwork.
The modern is a great little car, it has the same coloured seats as the classic.
It will be great to see your car restoration moving forward!!!!!! I know you have been very busy building a house. |
My wife has a 12 month old modern 500 and I love driving it, ive never driven a classic 500 but id imagine its a charming experience.
Regarding loaning the car for display, depending on how well its protected from damage, its worth considering if you dont have the right sort of dry storage and are not planning on using it for a while.
I restored a BSA 350 years ago and once complete didnt get on with it as it was physically too small. I put it on display at a local car museum. One thing led to another and it stayed there for 20 years until it closed last year. As the museum was dry it had remained in fine fettle.
kev |
|
| Back to top |
|
|
colwyn500
Joined: 21 Oct 2012
Posts: 1745
Location: Nairn, Scotland
|
| Posted: Mon Apr 14, 2014 9:34 pm Post subject: |
|
|
 Casing by peterthompson, on Flickr Casing by peterthompson, on Flickr
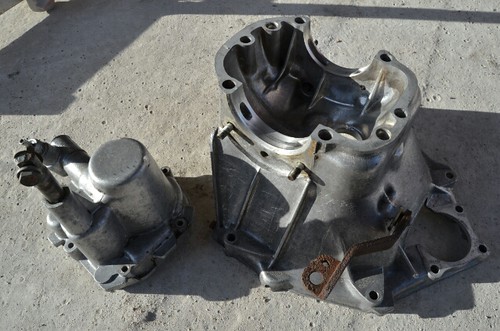
I have continued the gearbox overhaul that has been sitting on the garage floor for a few months now. I'm not the best at going for a better than showroom finish so the casing looks very good to me after a wash in petrol (in the open air) and then with water-based degreaser.
I have now taken off the input shaft which is simply done by removing a small wire circlip which is a bit like a cheap keyring which allows a loose-fitted pin to drop out. Quite amazing that this system is so reliable. As said before the shaft will allow me to align the clutch to perfection. I did struggle with my dry run when doing it by eye.
 Shaft by peterthompson, on Flickr Shaft by peterthompson, on Flickr
I have bought a new bronze bush which supports and centralises this shaft as is heads towards the flywheel. I will be using the original because the new one has more play than the old..[pattern parts again  ) )
 Bush by peterthompson, on Flickr Bush by peterthompson, on Flickr
Don't let on but I am using my bright new house and a bench made from scaffolding to rebuild this. I should be doing the plumbing. |
|
| Back to top |
|
|
vitesse
Joined: 03 Jun 2013
Posts: 561
|
| Posted: Mon Apr 14, 2014 10:19 pm Post subject: |
|
|
Good to see some progress Peter. This is more fun than plumbing surely????
Hey that casing is cleaner than mine that's not allowed!  |
|
| Back to top |
|
|
colwyn500
Joined: 21 Oct 2012
Posts: 1745
Location: Nairn, Scotland
|
| Posted: Tue Apr 15, 2014 6:02 pm Post subject: |
|
|
 url=https://www.flickr.com/photos/peterjthompson/13874451345/] url=https://www.flickr.com/photos/peterjthompson/13874451345/]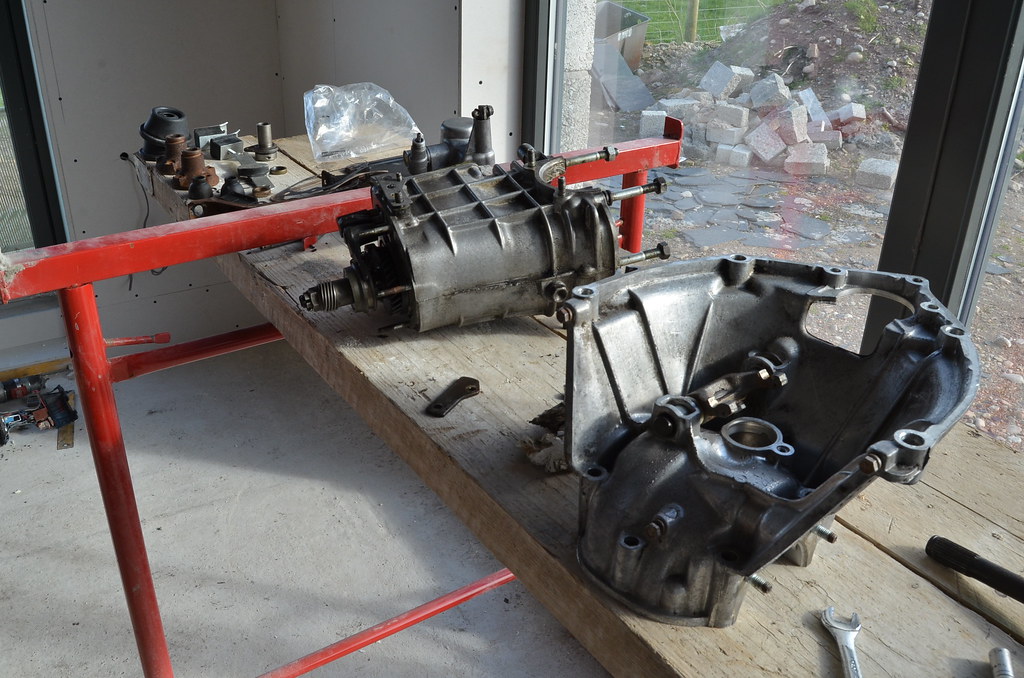 [/url]url=https://www.flickr.com/photos/peterjthompson/13874846744/] [/url]url=https://www.flickr.com/photos/peterjthompson/13874846744/]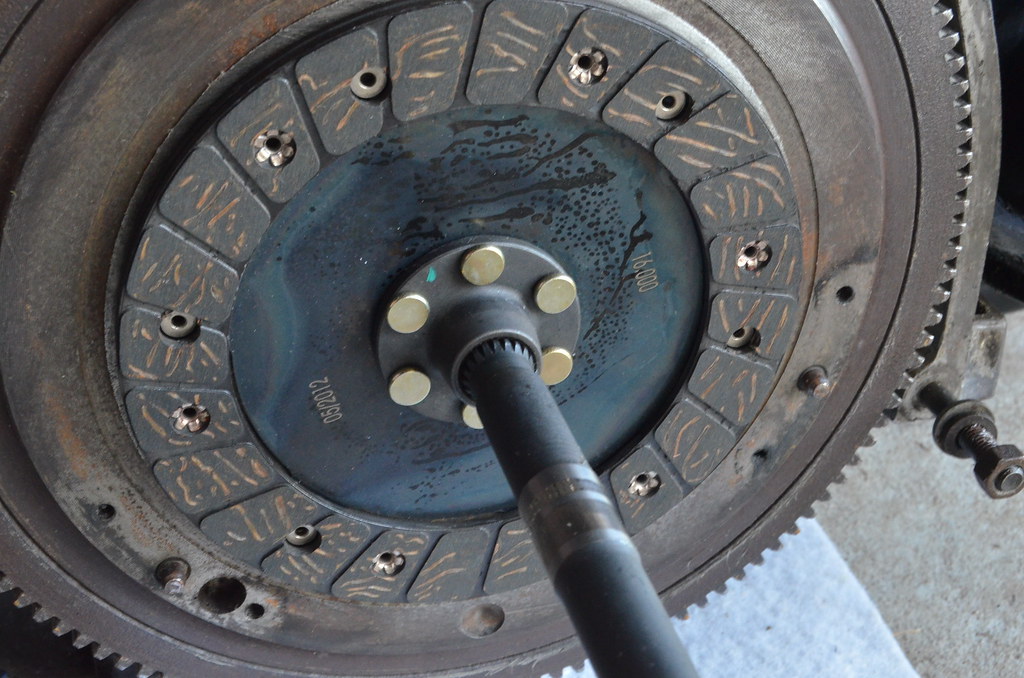 [/url] [/url]
KNO_2999 by peterthompson, on Flickr
You can't do better than using the actual gearbox input shaft to align the clutch plate.
Also a pic of my new "workshop".
And my little car sadly willing me to paint it properly.  |
|
| Back to top |
|
|
|


