|
|
| Author |
Message |
vitesse
Joined: 03 Jun 2013
Posts: 561
|
 Posted: Tue Jul 09, 2013 2:10 pm Post subject: Posted: Tue Jul 09, 2013 2:10 pm Post subject: |
 |
|
Yeah Steve I am not convinced it is those push rod tubes, as after I cleaned it up the seals look physically ok to the eye. I think it is either coming from the rocker cover gasket as suggested by Peter or the distributor.
Yeah parcels are great, even better putting the bits on. So I better get a move on and get the thing painted. |
|
| Back to top |
|
 |
vitesse
Joined: 03 Jun 2013
Posts: 561
|
| Posted: Wed Jul 10, 2013 7:36 pm Post subject: |
|
|
Well I proved myself totally wrong today and Steve correct.
I had to take the cylinder head off after I managed to shear the banjo bolt off the other day. Swarf would get into the cylinders if it was drilled in situ. Which wouldn't be a good idea.
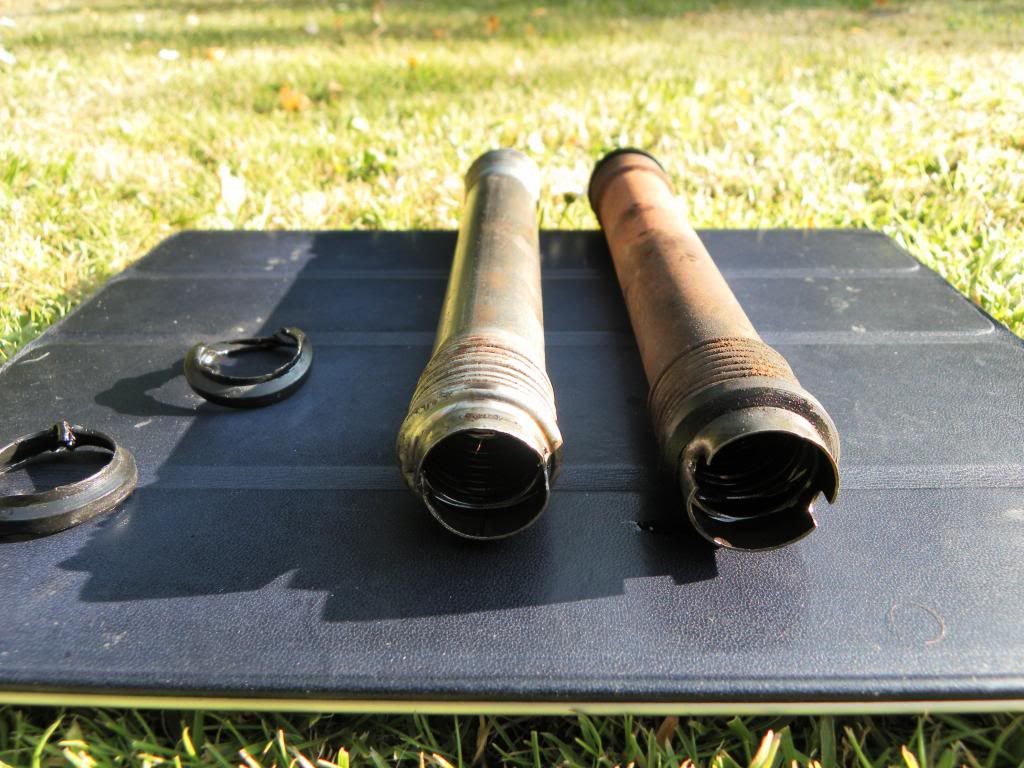
Low and behold the middle pushrod tube which houses the oil feed pipe to the tappets the bottom seal was mangled and must have been like that since the last time the engine was touched by a garage who replaced the bottom end 20 years ago.
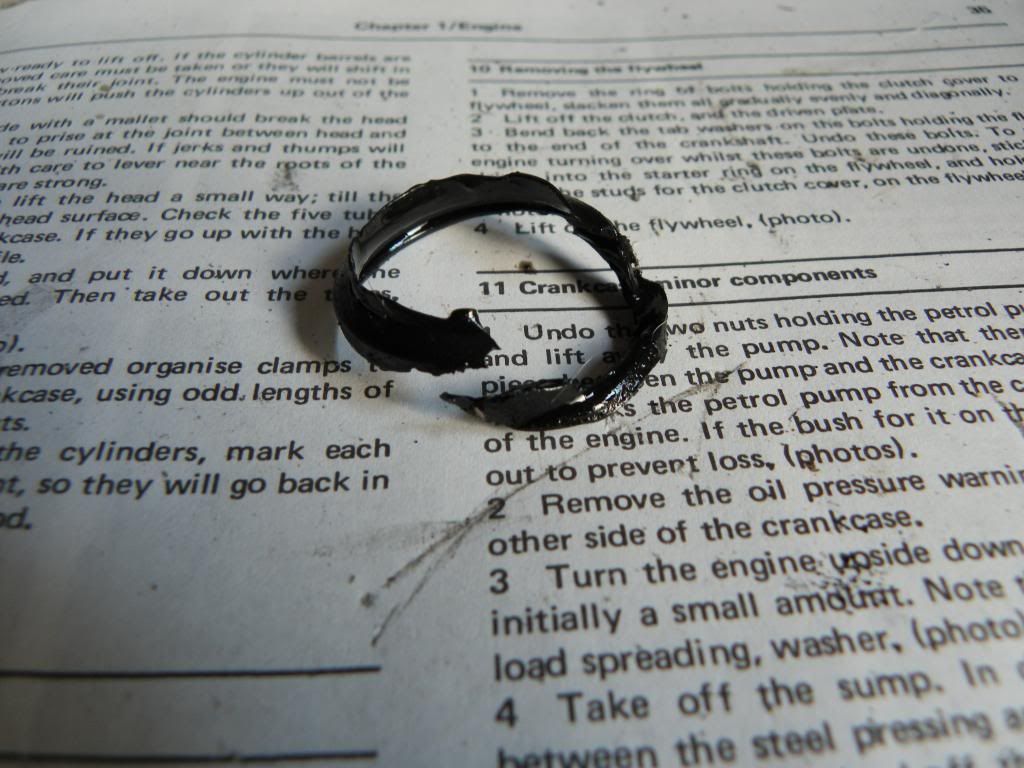
It's a bit of a give away really if you look at earlier picture I posted as the 2 outside tubes on either side have surface rust and the middle one is nice and shiny!
The tube itself is distorted so it may need replacing.
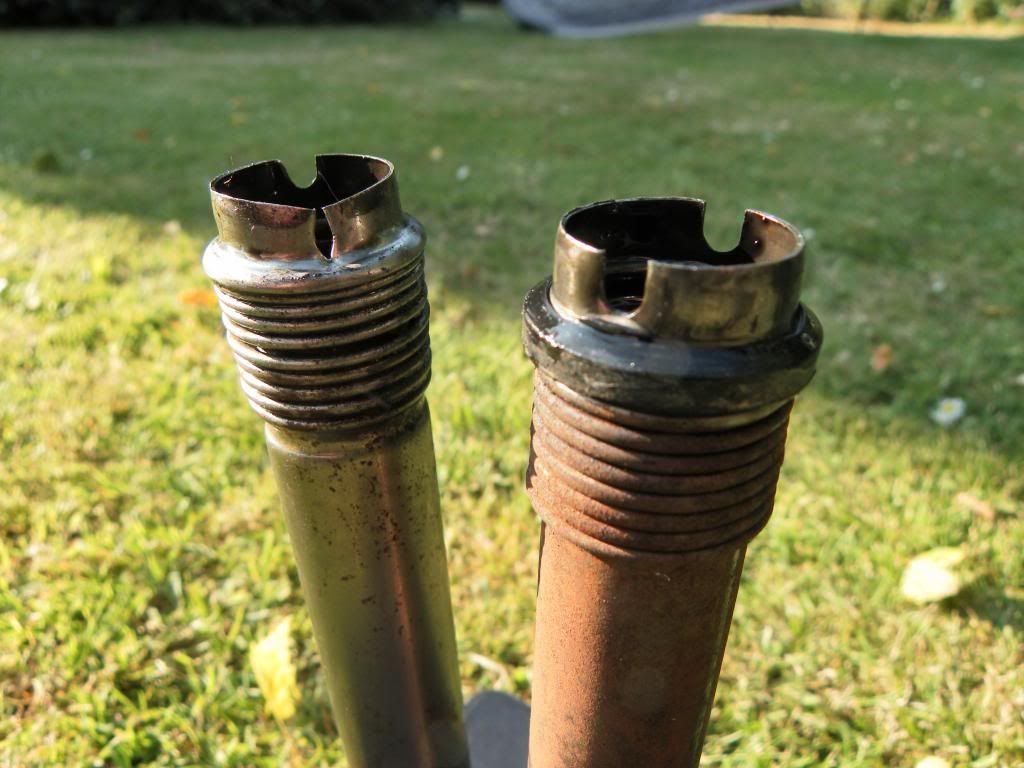
It's been snagged as the tube has been pushed in and trapped, which appears to be because the end of the tube is not level it's sort of concertinaed down on one side.
The head has been taken to a little workshop on the nearby airfield to have the bolt removed. |
|
| Back to top |
|
|
colwyn500
Joined: 21 Oct 2012
Posts: 1745
Location: Nairn, Scotland
|
| Posted: Wed Jul 10, 2013 8:28 pm Post subject: |
|
|
| Pain though that is its good to have found something so obviously wrong that you can now fix. You might be in it a bit deep now though. If those barrels get disturbed at the bottom you are then going to have to replace the seals. |
|
| Back to top |
|
|
D4B

Joined: 28 Dec 2010
Posts: 2083
Location: Hampshire UK
|
| Posted: Wed Jul 10, 2013 10:16 pm Post subject: |
|
|
Glad you have pinpointed the problem  |
|
| Back to top |
|
|
vitesse
Joined: 03 Jun 2013
Posts: 561
|
| Posted: Thu Jul 11, 2013 1:00 am Post subject: |
|
|
| colwyn500 wrote: | | Pain though that is its good to have found something so obviously wrong that you can now fix. You might be in it a bit deep now though. If those barrels get disturbed at the bottom you are then going to have to replace the seals. |
Agreed Peter there is a very Heath Robinson lump of wood holding the barrels down with a clamp over the studs and a dirty great big message that says "DO NOT rotate the fly wheel"!!!!!!!
It was a bit difficult to separate the head from the cylinders and they didn't move at all. It was the seals on the push rod tubes that were difficult to release but they popped with a bit of persuasion from a wooded mallet.
Another thing I really appreciate from this experience is the car has had no real movement in about 17-18 years. Way back I had to find somewhere to helicoil one of the spark plug threads as it had threaded. So I took it to a place in Biggin Hill airfield. It was a total shed of a place, floor covered in oil and grease, bits of engines lying around all over the place in various states of undress. They did it and charged me next to nothing. It was run by two brothers and is called Baldyne Engineering proper old school place.
So I thought I would give them a ring today to see if they could get rid of the sheared Banjo bolt. Low and behold they still exist. So the guy on phone was like "20 years ago we worked on this head" and I am like yeah, thinking I was talking to the same guy from 20 years ago. So I turn up there and this guy in his 20-30's with a pony tail greets me with "hi you're guy with the sheared bolt in the cylinder head I spoke to earlier".
So he goes on to explain that his uncle had died and his dad came in occasionally but had retired years ago. It just goes to show how time catches up with you. Me thinking I was talking to the same guys.
But his son James had obviously picked up the family knowledge and has told me he will get it out no problem. I had read on the Internet about various methods like easyouts, left handed drill bits etc.... But he said definite no to easyouts as they can break off causing even more problems.
The most amazing thing is it hasn't changed in 20 years, bits of aeroplane, car and lawn mower engines lying all over the place. You get stuck to the floor with all the oil and grease. James also seemed really touched that he was working on a cylinder head that his dad had worked on 20 years ago. |
|
| Back to top |
|
|
colwyn500
Joined: 21 Oct 2012
Posts: 1745
Location: Nairn, Scotland
|
| Posted: Thu Jul 11, 2013 12:33 pm Post subject: |
|
|
That's a really nice story and your fixit workshop sounds superbly old school.
It all takes me back thirty years to when we struggled with stripped threads and seized bolts even when these cars were only ten years old. |
|
| Back to top |
|
|
vitesse
Joined: 03 Jun 2013
Posts: 561
|
| Posted: Thu Jul 11, 2013 2:54 pm Post subject: |
|
|
Totally agree. The problem is sometimes as you said before less is more even mechanically. They are quite fragile for stripping nuts and bolts etc...
I really would have liked to have removed the front suspension to just put a lick of paint on the half arms and pin but I have heard of the pin bolts shearing away from the chassis and mechanically it is all sound, shocks and rubbers are all good, so just going to put of Hammerite on the arms in situ. |
|
| Back to top |
|
|
colwyn500
Joined: 21 Oct 2012
Posts: 1745
Location: Nairn, Scotland
|
| Posted: Fri Jul 12, 2013 10:21 pm Post subject: |
|
|
I would wire brush all round those mounting studs and nuts that keep the pivot assembly on. Maybe then some Plus-Gas and then leave grease or Copper grease on the exposed threads to help with future removal.
I snapped one out of the four studs but I ground and drilled it out and replaced with a new high tensile 50mm bolt and stainless steel nuts all round.
I agree though, better left alone if you an get away with it. |
|
| Back to top |
|
|
vitesse
Joined: 03 Jun 2013
Posts: 561
|
| Posted: Sun Jul 14, 2013 9:39 pm Post subject: |
|
|
Off on a slightly different direction again today back to the body work. I am having to do this as I am awaiting the final box of new parts from Germany, that has bits for the brakes and engine in but is delayed as they had to source me a right hand drive carpet set from the manufacturer. Also I am waiting for the guy who is going to spray it and repair the rear wing to give me time when he can do it. So I am having switch back and forth.
There is very little rubbing down left to do only rear panel and a little bit left on the bonnet.
The rear panel has had some sort of shunt at sometime and has distorted whereby it needed a fair bit of filler on it but it has been a bit of a pig to work out where it needs levelling off. There is no impact damage to be seen on the inside because off the way it is built. So I thought I would line it up with the engine lid on. Only to discover that the mounting pin for the lid is way out meaning the rear panel does not line up on one side.
Starting to wonder whether a new panel might be easier? The one on the left is about 5-10mm too far forward.
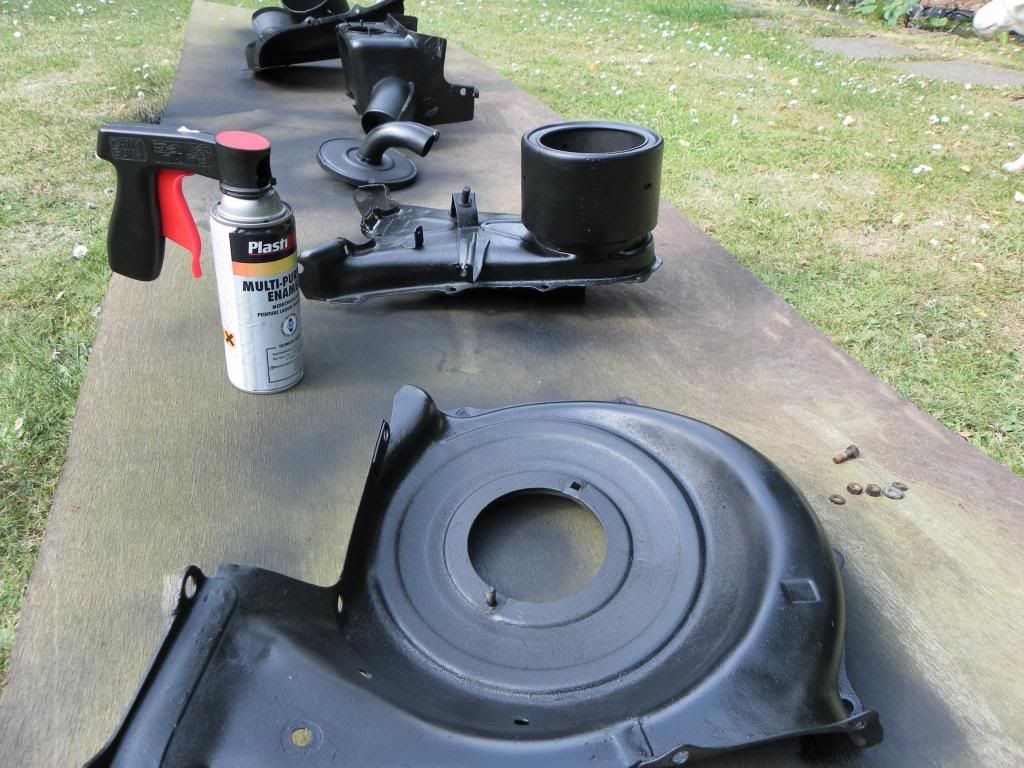
Also sprayed up the engine cowlings with Plasti-kote enamel. It is good as it can with stand the heat and it is very durable, also I like the finish. Oh and it is easy to apply 
 |
|
| Back to top |
|
|
colwyn500
Joined: 21 Oct 2012
Posts: 1745
Location: Nairn, Scotland
|
| Posted: Sun Jul 14, 2013 10:29 pm Post subject: |
|
|
I think I would go for a new panel but someone experienced with a press could probably sort it.
Nice work with the cowliing. |
|
| Back to top |
|
|
vitesse
Joined: 03 Jun 2013
Posts: 561
|
| Posted: Mon Jul 15, 2013 12:25 am Post subject: |
|
|
| Yeah Peter I think I will go with a new panel. It is £40 but the amount of time I have spent trying to get it square and then having to pay somebody else to sort it will almost certainly be cheaper. Hope Fred can fit it in the same box I am waiting for!!! |
|
| Back to top |
|
|
vitesse
Joined: 03 Jun 2013
Posts: 561
|
| Posted: Mon Jul 15, 2013 9:51 pm Post subject: |
|
|
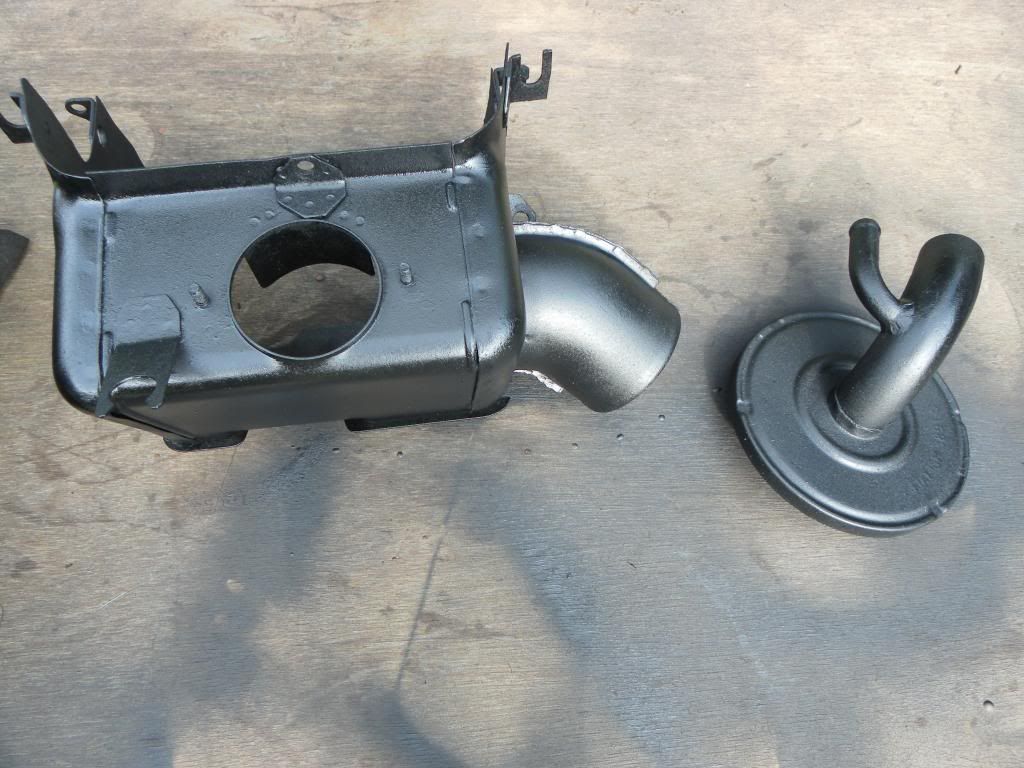
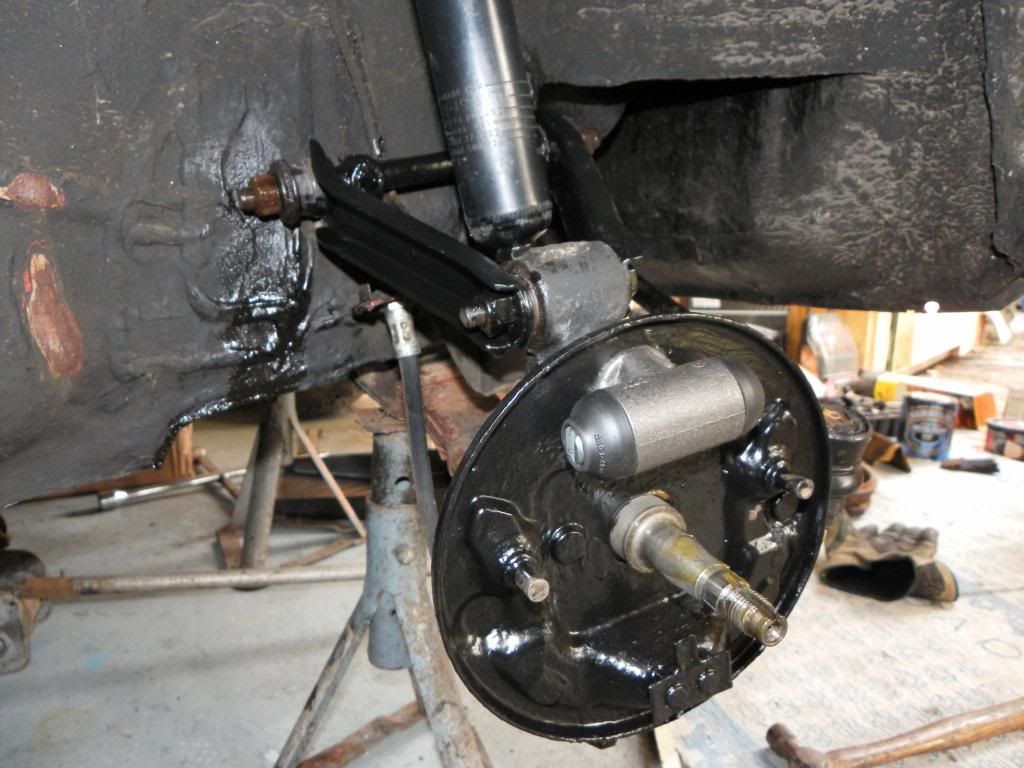
Today I was fiddling around with engine cowling bits again and trying out the nice new nuts, bolts and washers, making sure I got them in the right order, thanks to Peter.
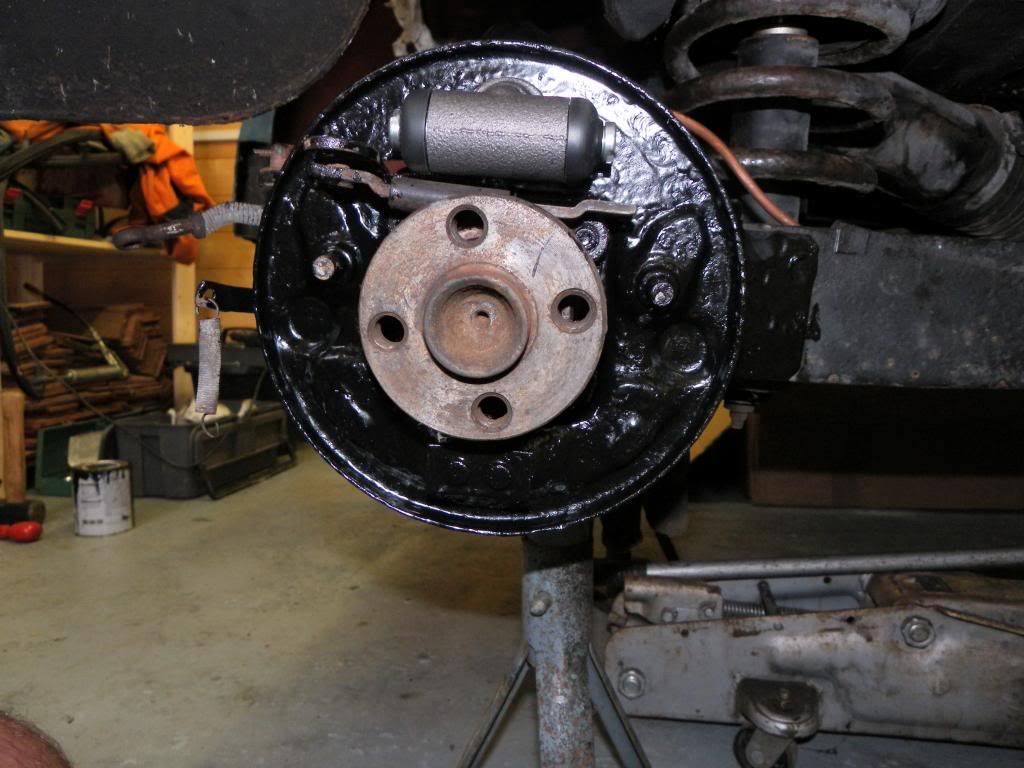
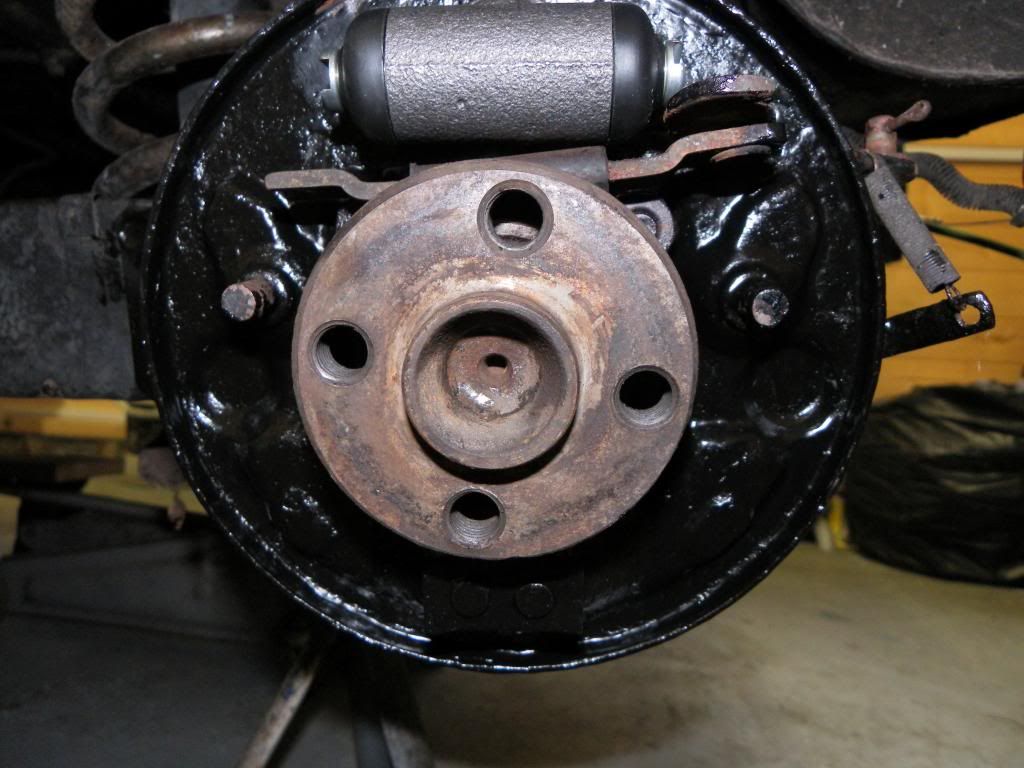
Also fitted the new wheel cylinders and drum pads for the front. I am awaiting the new springs in my outstanding delivery.
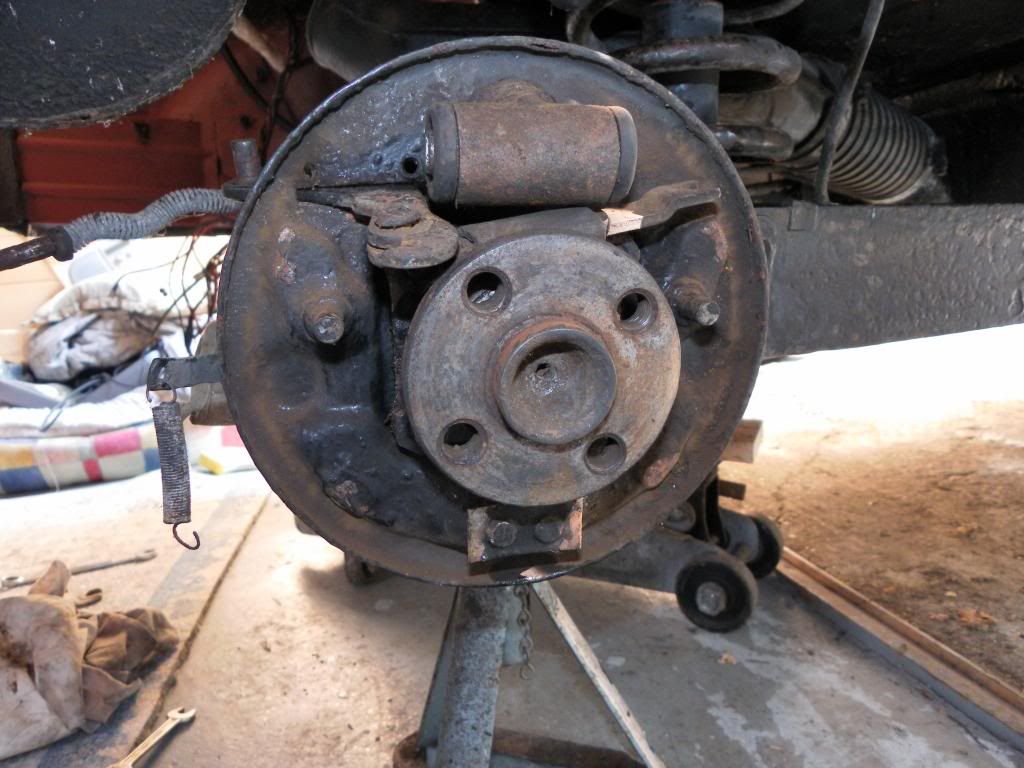
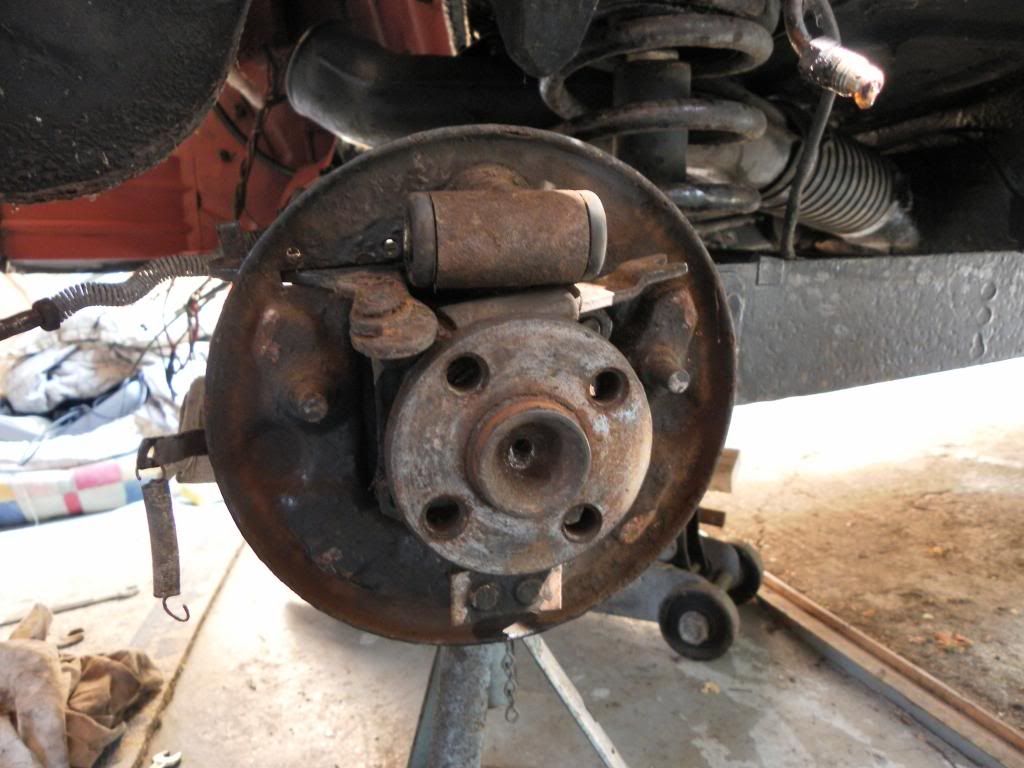
I will fit the backing plates back on tomorrow and then set about the rear brakes and hubs.
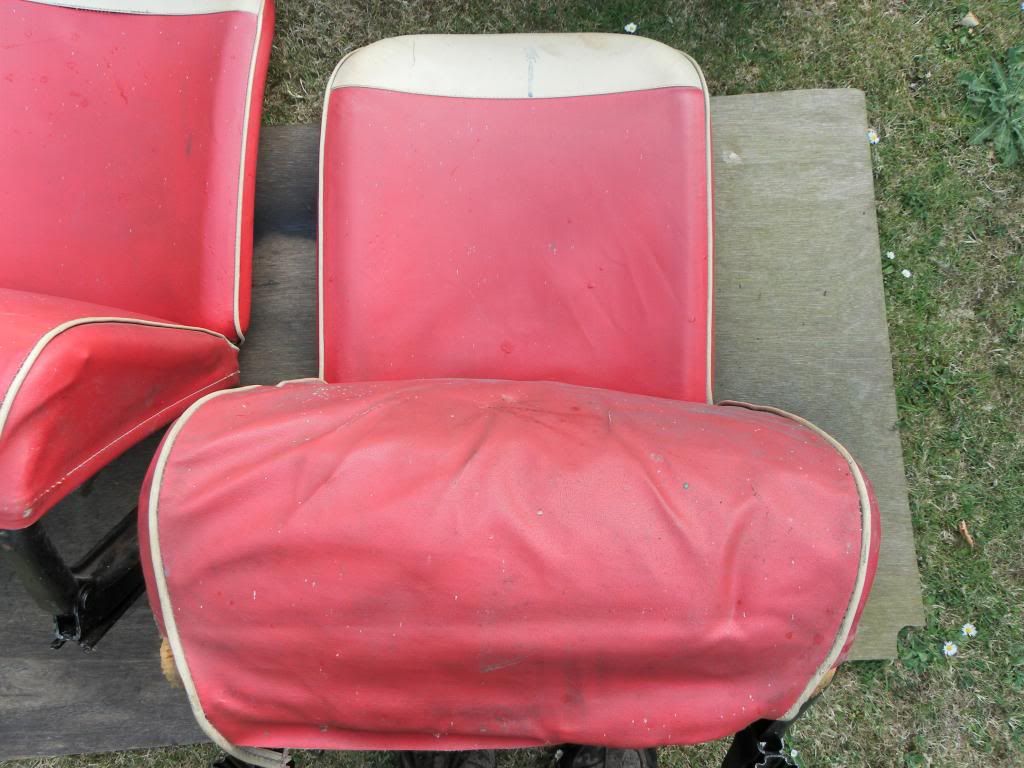
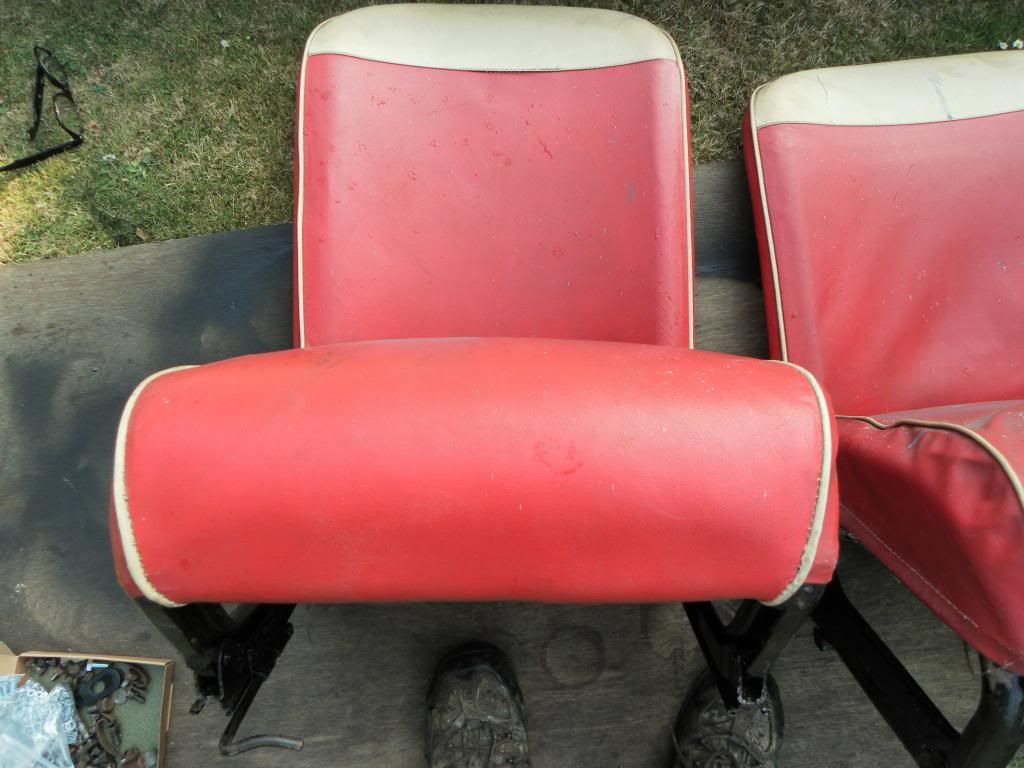
I also started recovering the rear seats so will post some pictures of those tomorrow when they are finished.
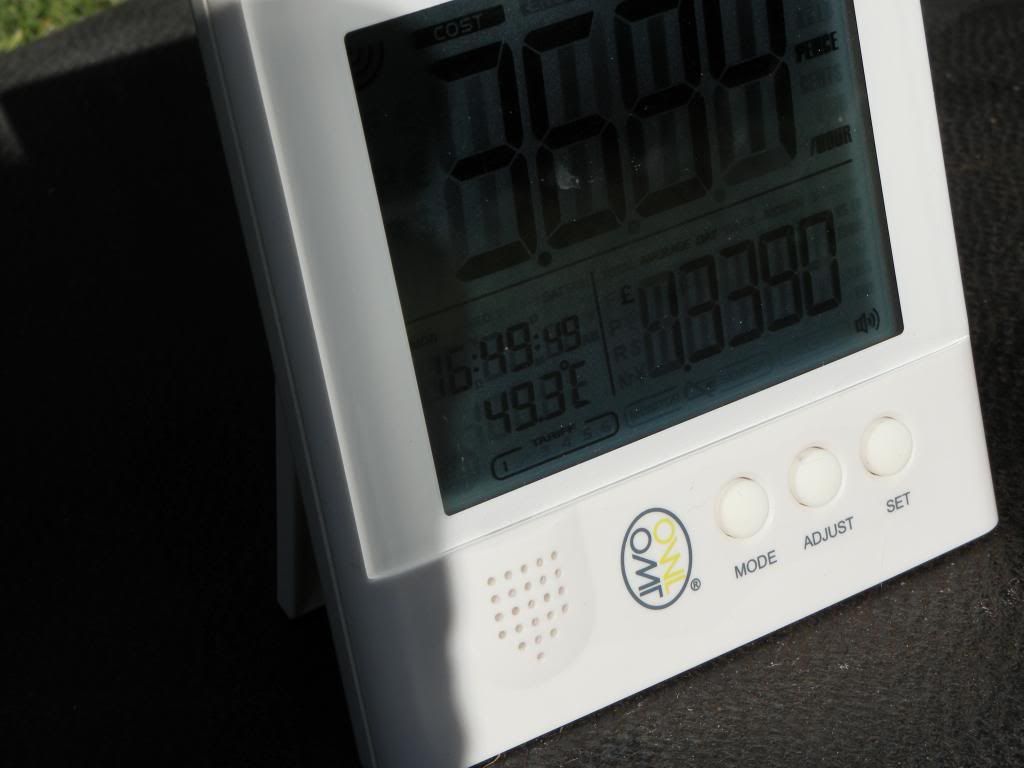
It was hot in the sun though 49.3C 
 |
|
| Back to top |
|
|
vitesse
Joined: 03 Jun 2013
Posts: 561
|
| Posted: Tue Jul 16, 2013 9:11 pm Post subject: |
|
|
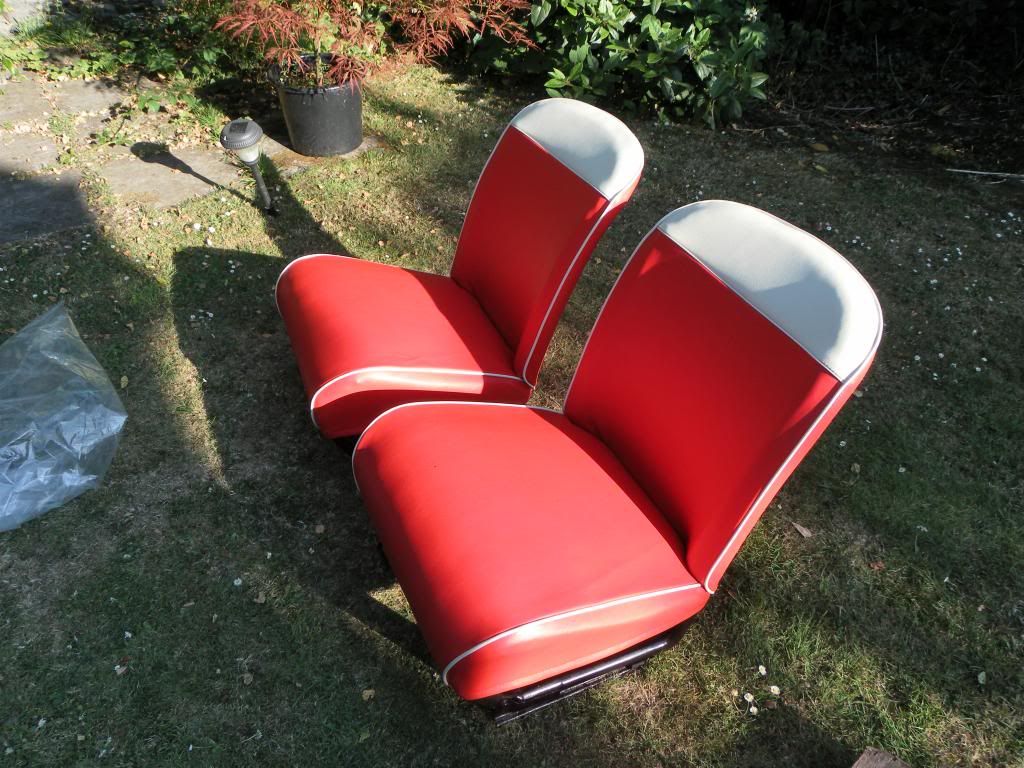
Finished off recovering the rear seats today. The creases should disappear they are from when they have been folded inside the bag. I couldn't stretch them any tighter as the white piping would not sit right. It looks worse in the picture than it actually is. They are good quality though.
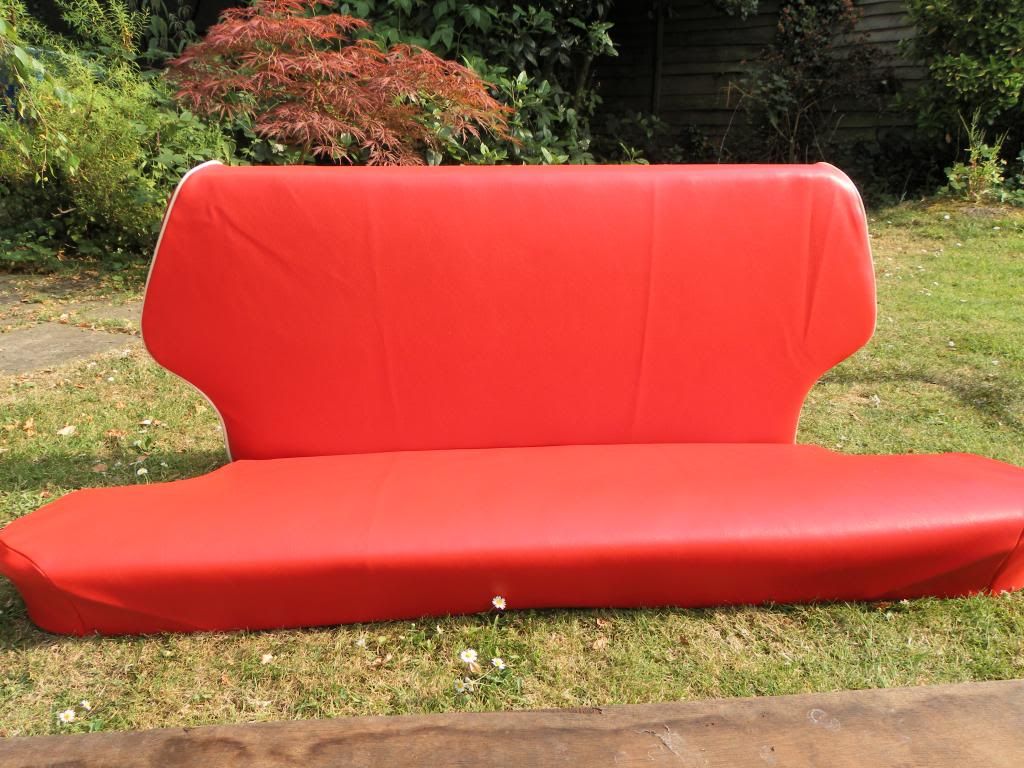
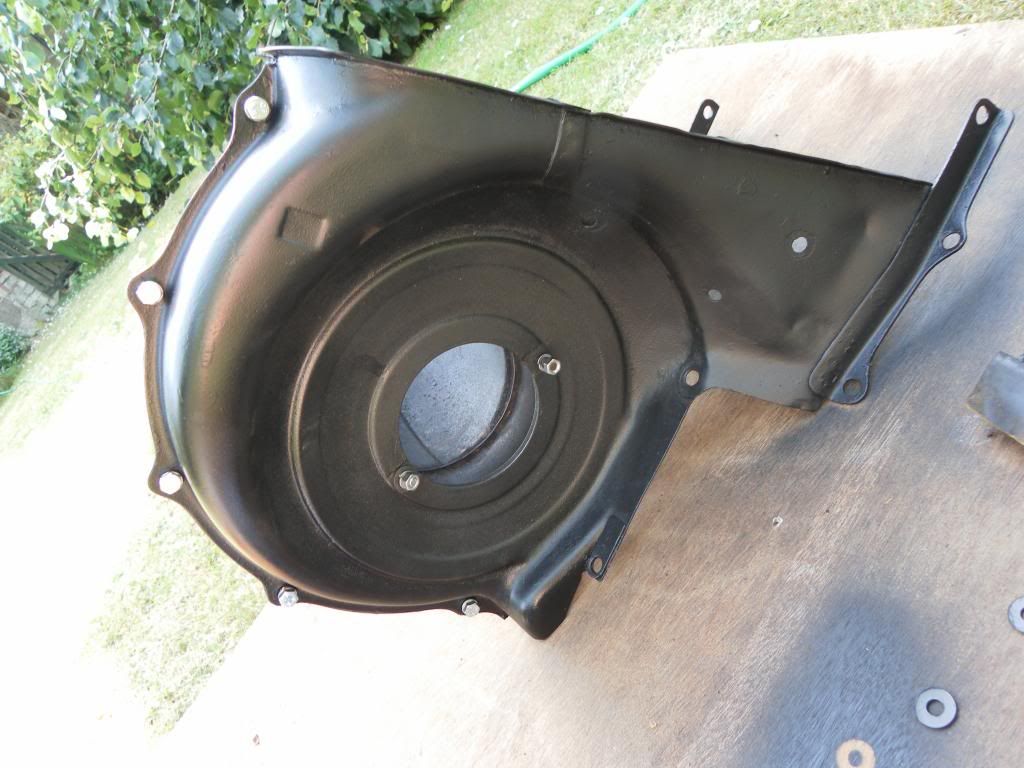
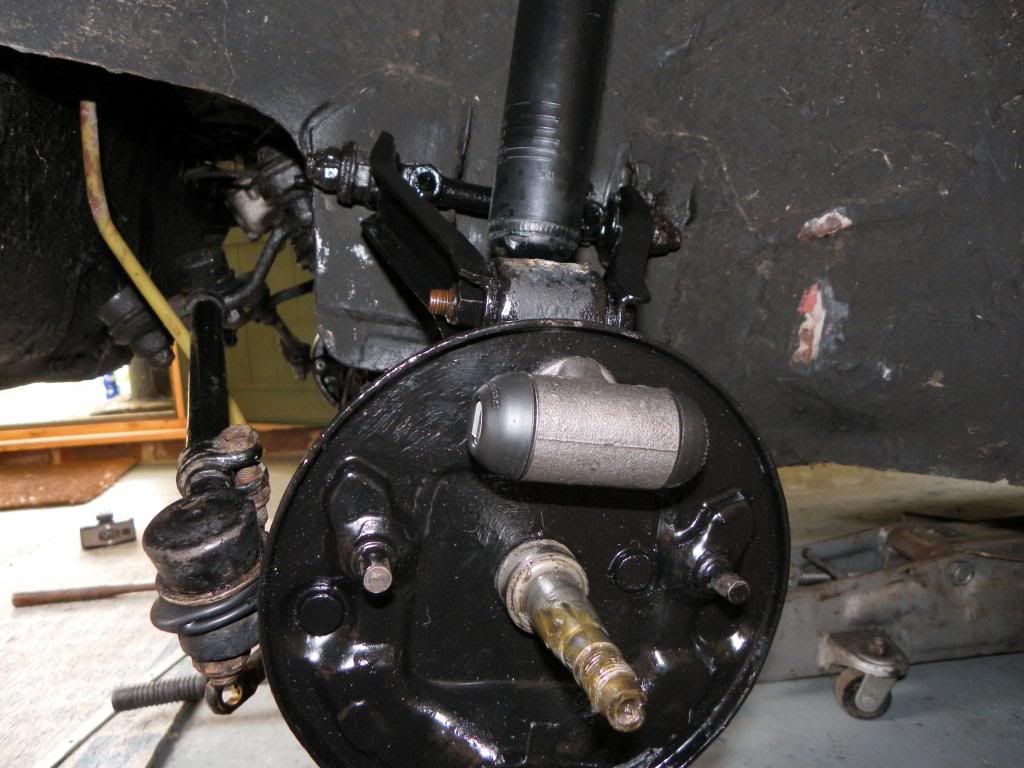
Also put the front brake backing plates back on and did as Peter suggested on the half bars and pin. Just need to slap some copper grease on.
[URL=http://s1291.photobucket.com/user/vitesse11/media/SAM_1844_zps44c76a74.jpg.html]
 [/URL] [/URL]
Didn't get around to doing the rear brakes, so they are on the agenda for tomorrow. |
|
| Back to top |
|
|
vitesse
Joined: 03 Jun 2013
Posts: 561
|
| Posted: Thu Jul 18, 2013 9:33 pm Post subject: |
|
|
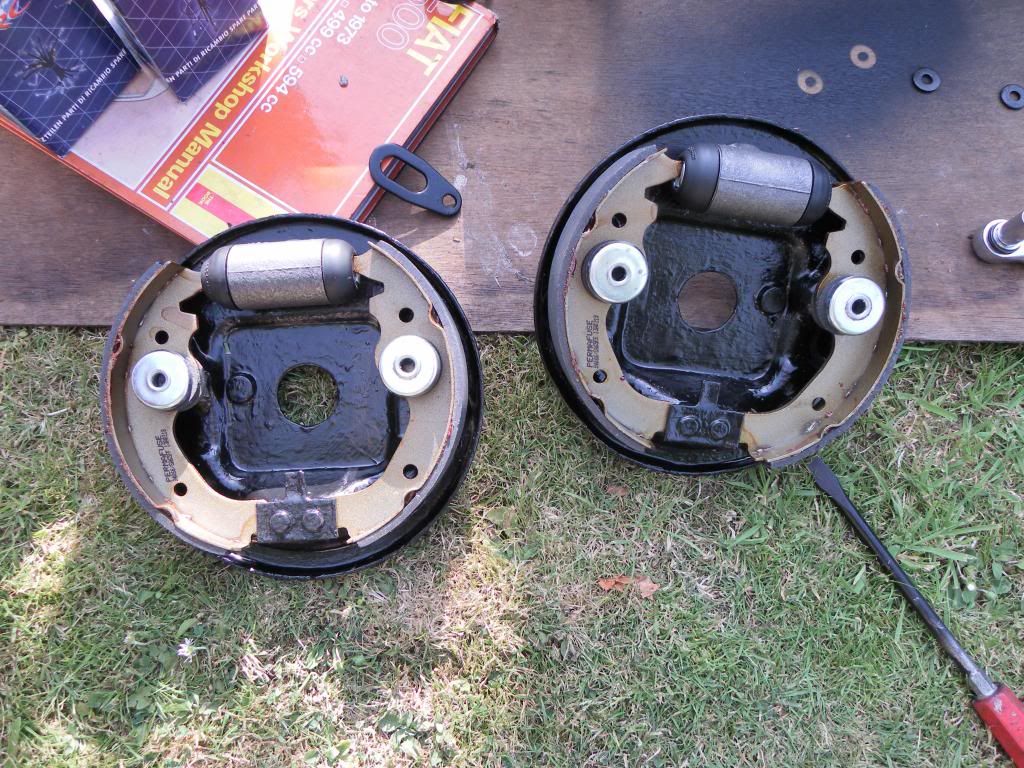
I stripped the rear brakes yesterday. A bit of a pig to get the hubs off as the drums were a bit rusty inside but cleaned up ok with a bit of light grade wet and dry. Just need to clean up the backing plates and fit new wheel cylinders.
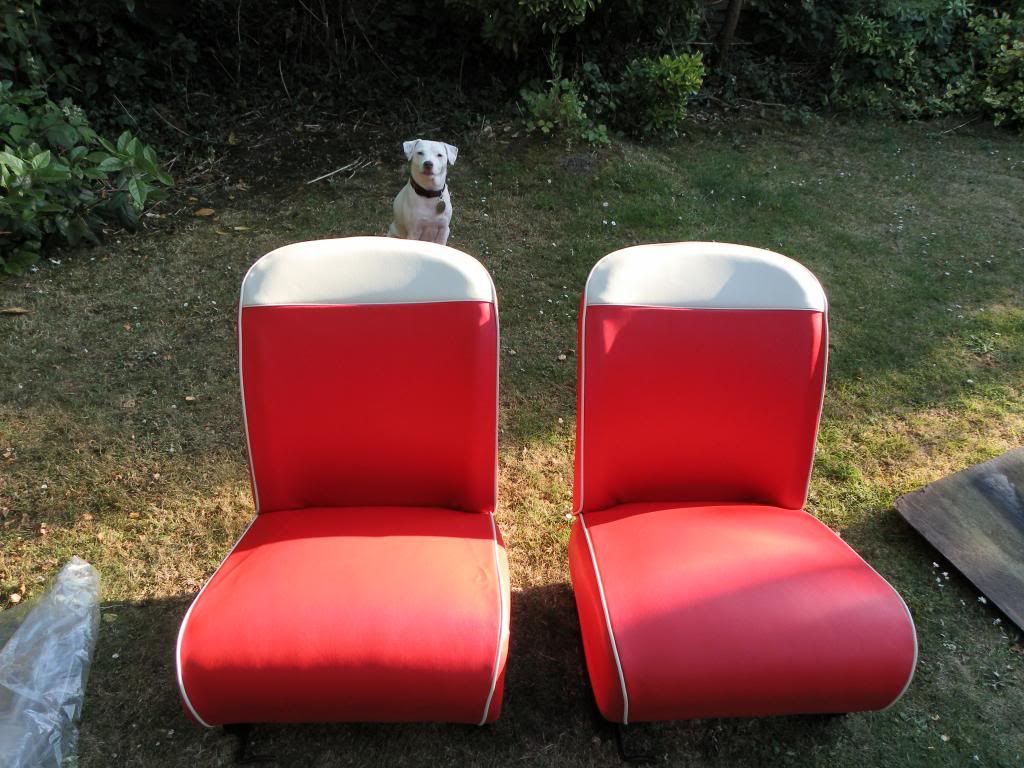
Put the new front seat covers on today. They came with a free nodding dog for the rear parcel shelf.
Old ones first.
The new ones.
 |
|
| Back to top |
|
|
vitesse
Joined: 03 Jun 2013
Posts: 561
|
| Posted: Tue Jul 23, 2013 9:47 pm Post subject: |
|
|
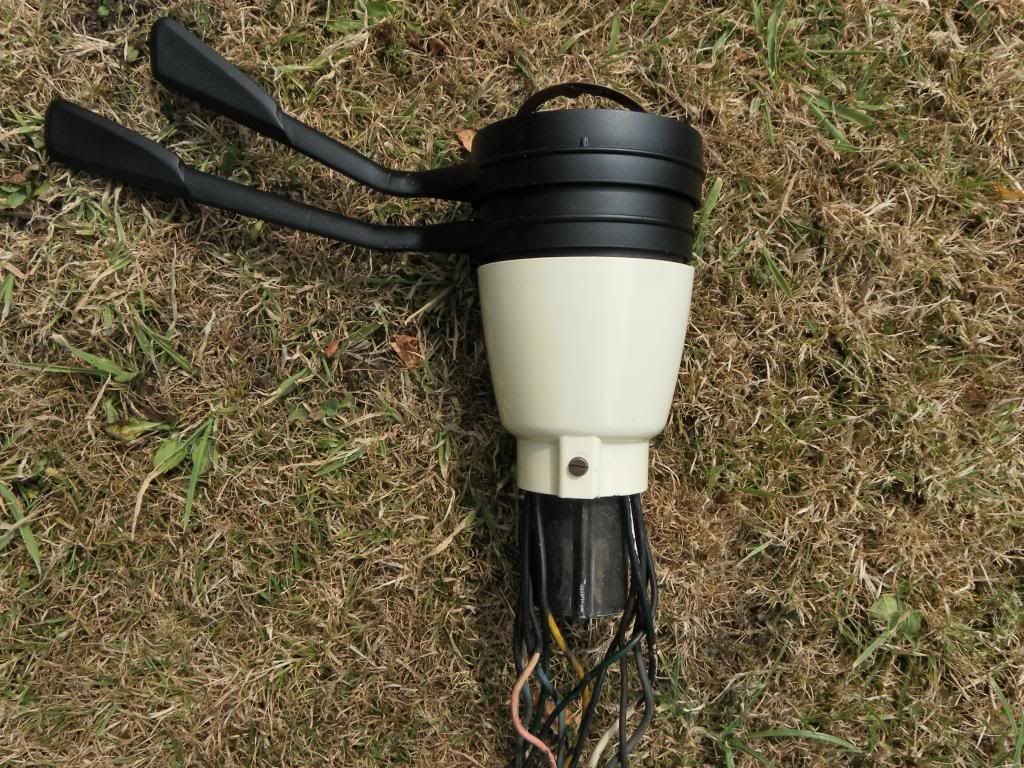
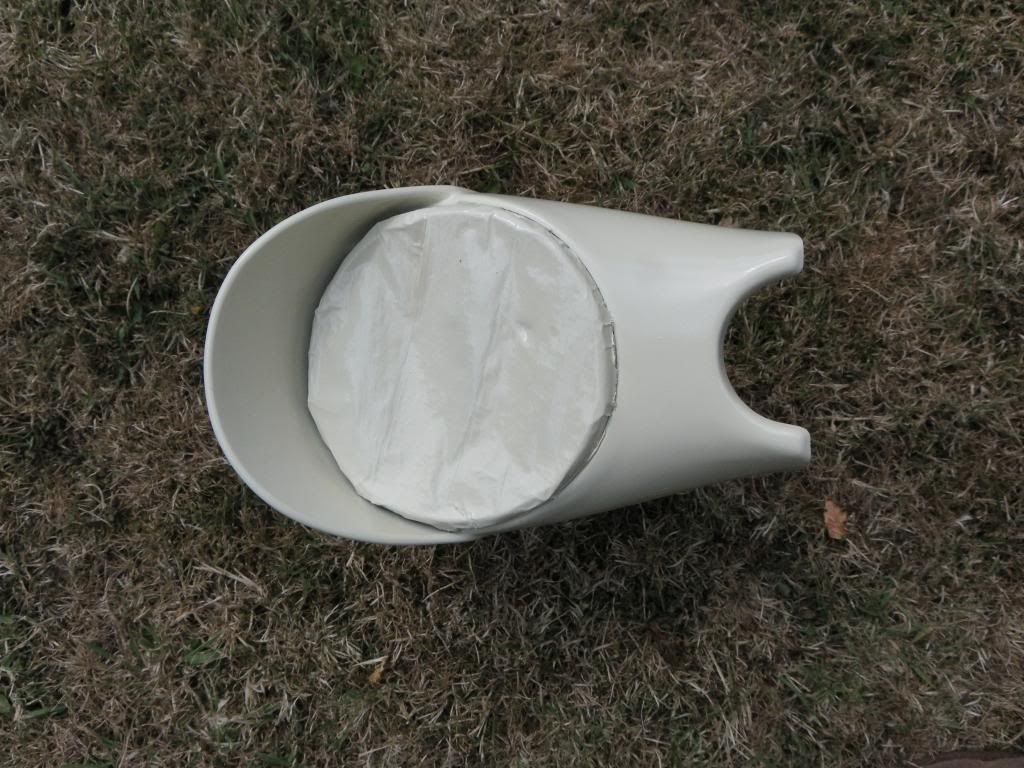
Finished off the rear hubs today and put the wheel brake cylinders on.
Also finished off the stalks and speedo cowling.
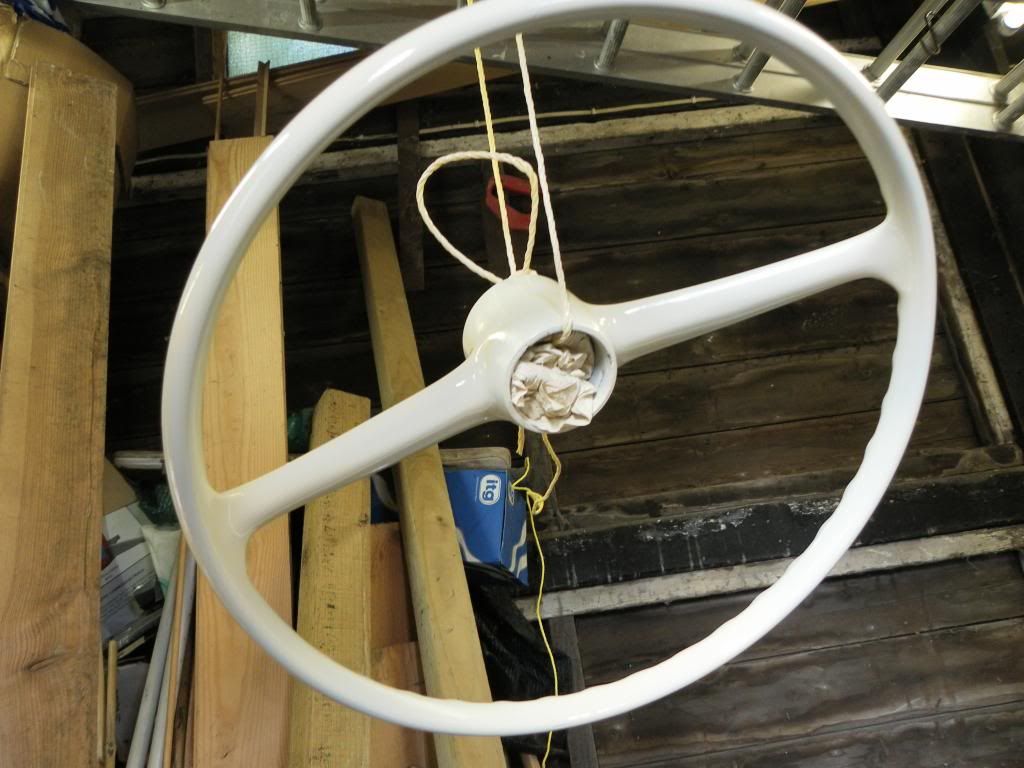
Did the steering wheel as well but succeeded in head butting it before it dried so I need to let it cure for a few days before I can rub down the little mark I left on it and give it a little light respray. But pleased with the results.
 |
|
| Back to top |
|
|
|


