|
|
| Author |
Message |
Greeney in France

Joined: 06 Mar 2008
Posts: 1173
Location: Limousin area of France
|
 Posted: Sun Mar 30, 2014 7:49 pm Post subject: Mercedes leather renovation Posted: Sun Mar 30, 2014 7:49 pm Post subject: Mercedes leather renovation |
 |
|
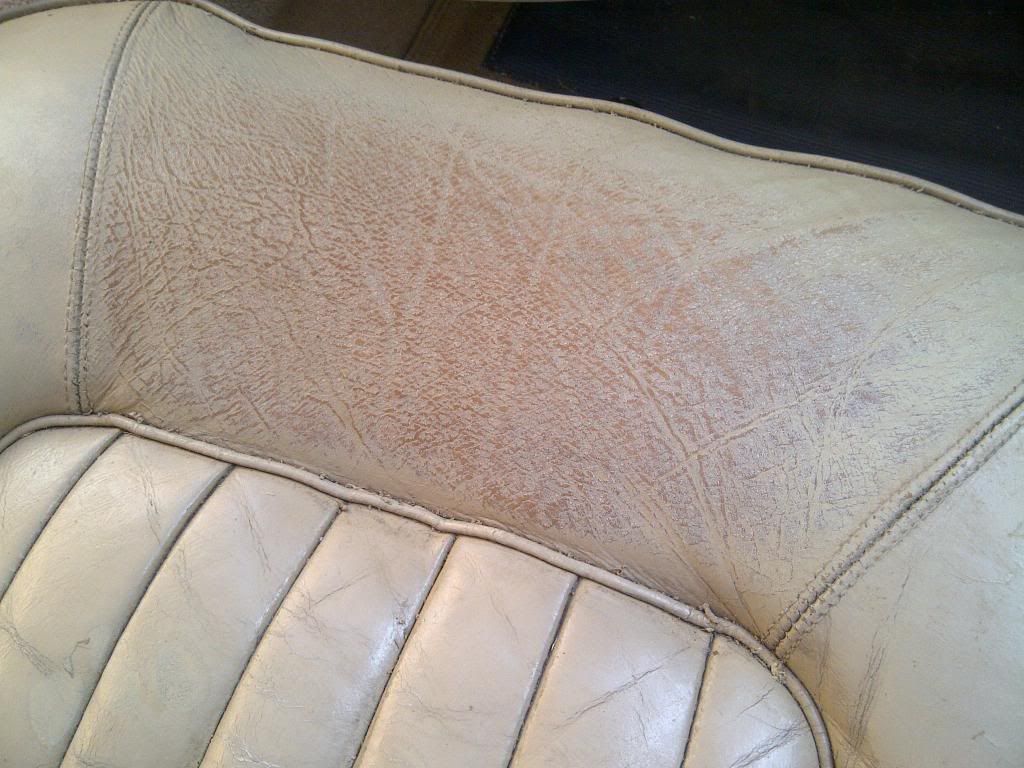
I bought my 560SE from Malaga in Spain and although it has fairly low miles the sun had got to the @brazil' coloured leather and faded it to a horrid grey in places and the drivers seat needed a bit of work.
I have used Gliptone before but thought I would try Furniture Clinic this time round.
The whole job took me about a week but I think you will agree with me it was worth the work.
If you wish me to go further I did a write up, but I wouldnt want to bore you.
.jpg)


_________________
www.OldFrenchCars.com
We do these things not to escape life but to prevent life escaping us |
|
| Back to top |
|
 |
Rick
Site Admin

Joined: 27 Apr 2005
Posts: 22449
Location: UK
|
|
| Back to top |
|
|
Greeney in France
Joined: 06 Mar 2008
Posts: 1173
Location: Limousin area of France
|
| Posted: Thu Apr 03, 2014 2:44 pm Post subject: |
|
|
Okay, here goes...
Preparation, Preparation, Preparation;
You must remove all impurities that the leather has accumulated over the years..
Dirt, grease, make-up, food and even conditioners prior to any dye job.
You need a 100% clean surface and create the bite required for the dye to attach to the leather properly.
There is stuff on the market but I make my own…
This is applied with a damp sponge or rag. You will notice that the finish will be removed as well as some of the color.
5 parts ISOPROPYL 99% PURE ALCOHOL
5 Parts Soapy ammonia (ammonia and fairy liquid)
90 Parts water
The dyes are the easy bit… Most leather restoration companies sell the same sort of dyes which are usually polyurethane water based products. Do not be tempted by thinner based dyes as these tend to dry out the leather
I use Furniture Clinic products this time but have used Gliptone before.
Make sure the quality is good as even though they all charge similar amounts of money, the pigment quantity changes though...
My process is as follows.
I soaked all the leather in a conditioner which ‘this time’ was leatherique, which I found very good.
Once I stripped out the interior I then separated all its components, backs and seat squabs included as you will never get it clean or dyed properly with them together.
I sprayed every piece in a product called G850 which is available TRADE only for car detailers. It is a high foaming alkaline cleaner. This will get rid of the conditioner residue and surface dirt.
I then use my own deglazing, deep cleaner as above.
Leave for a good day to dry out before attempting to dye..
Dying by hand..
I used an ultra absorbent cloth soaked in water first then make a pad of it and dip it in the dye to charge it, the water stops the pigment from being swallowed by the cloth.
With this you can rub it into the pores of the hide and it will not leave too many ‘cloth marks’
Make sure each coat is dry before you apply the next I use a heat gun but a decent hair dryer is okay too and it will open the pores of the leather allowing a deeper dye process.
I did not use ‘crosslinker’ at this point as I wanted to control the absorption naturally..
I did this for 2 or three coats, depending on item.
I left the interior for a week to settle down and dry fully in a warm area.
Using a scourer, (the type supplied by automotive paint stores) I rubbed down all of the leather evenly before I went ahead and sprayed. I only used a lightly dampened microfiber cloth just to wipe off the dust.
To even out the finish I sprayed the last two coats but you can choose not to if you don’t have access to compressor.
The final finish coat was using the leather finish with Cross linker additive and matting agent to get the desired look and Silok 9140 feel agent to give a silky smooth feel to the leather.
This coat only needs to be 2 even misting coats over the entire interior.
Pre-painting repairs..
For the scratches and worn areas I just sealed using the finish coat with cross linker rubbing it into the porous areas.
For the deeper scratches/cracks use a normal household polyurethane decorators caulk, this is exactly what is sold by the leather dye companies but in tiny bottles for lots of money.
Get as near the colour of your leather as you can and then make a paste mixing the caulk with your dye.
Apply to the cracks/ repairs with a filler knife and leave for 5 minutes then using a flat cloth rub off excess. IF the crack is deep you will need to do this a number of times until the crack it filled.
This will adhere to the leather and stay flexible if done properly…
Leave to dry fully for 24 hours and then flat off with 2500 wet and dry paper and water.
Do it properly and it will last a long time.
Voila…
_________________
www.OldFrenchCars.com
We do these things not to escape life but to prevent life escaping us |
|
| Back to top |
|
|
baconsdozen

Joined: 03 Dec 2007
Posts: 1119
Location: Under the car.
|
| Posted: Thu Apr 03, 2014 5:19 pm Post subject: |
|
|
That is an interesting couple of posts.
I am going to start work on the spare interior I bought some time back for my Rover p5b. The seats have been painted with one of the leather or plastic paint and it has made them hard and brittle,unable to accept hide food. They have also cracked in lots of places. Despite that they seem reasonable underneath the paint. I bought at the same time some scrap seats which are also painted (torn badly in a couple of places),these are to be the test bed.
I have already stripped the paint from one section and was pleased to see how supple the leather became almost instantly.
I've purchased some dye and cleaner etc and will start taking some pictures as I start.
I'm going to try to key the leather with fine (1000 grit) wet and dry and use water and glycerine to soften any of the leather that has dried right out.
_________________
Thirty years selling imperial hand tools for old machinery(Now happily retired). |
|
| Back to top |
|
|
Greeney in France
Joined: 06 Mar 2008
Posts: 1173
Location: Limousin area of France
|
| Posted: Thu Apr 03, 2014 5:51 pm Post subject: |
|
|
| baconsdozen wrote: |
I'm going to try to key the leather with fine (1000 grit) wet and dry and use water and glycerine to soften any of the leather that has dried right out. |
Yes I did the same but used a scotch brite as I found the wet and dry clogged too much because I didnt want to saturate the leather.
I thoroughly recommend buying 'Leatherique rejuvinator' My leather had spent 20yrs in Malaga so had dried in places but the stuff really brought it back.
The finish is fantastic and feels natural not 'painted at all'
_________________
www.OldFrenchCars.com
We do these things not to escape life but to prevent life escaping us |
|
| Back to top |
|
|
ukdave2002
Joined: 23 Nov 2007
Posts: 4105
Location: South Cheshire
|
| Posted: Thu Apr 03, 2014 6:10 pm Post subject: |
|
|
Wow that's impressive  oddly (don't know if its the pics?) the drivers seat looks better than the passengers after the restoration . oddly (don't know if its the pics?) the drivers seat looks better than the passengers after the restoration .
Good work
Dave |
|
| Back to top |
|
|
Greeney in France
Joined: 06 Mar 2008
Posts: 1173
Location: Limousin area of France
|
| Posted: Thu Apr 03, 2014 6:55 pm Post subject: |
|
|
| ukdave2002 wrote: | Wow that's impressive oddly (don't know if its the pics?) the drivers seat looks better than the passengers after the restoration .
Good work
Dave |
 Eagle eyes Dave.. I swapped them... MB seats are swap able Eagle eyes Dave.. I swapped them... MB seats are swap able
The drivers seat was worse but I though by changing sides the once bad bits will no longer get the wear...
_________________
www.OldFrenchCars.com
We do these things not to escape life but to prevent life escaping us |
|
| Back to top |
|
|
baconsdozen
Joined: 03 Dec 2007
Posts: 1119
Location: Under the car.
|
|
| Back to top |
|
|
baconsdozen
Joined: 03 Dec 2007
Posts: 1119
Location: Under the car.
|
|
| Back to top |
|
|
Greeney in France
Joined: 06 Mar 2008
Posts: 1173
Location: Limousin area of France
|
| Posted: Thu Apr 03, 2014 9:15 pm Post subject: |
|
|
Done now
_________________
www.OldFrenchCars.com
We do these things not to escape life but to prevent life escaping us
Last edited by Greeney in France on Fri Apr 04, 2014 5:52 am; edited 1 time in total |
|
| Back to top |
|
|
Greeney in France
Joined: 06 Mar 2008
Posts: 1173
Location: Limousin area of France
|
| Posted: Thu Apr 03, 2014 9:18 pm Post subject: |
|
|
Yes I can see now. God knows what the paint is...
Get rid of it all and start again, it will look great.
Remember the leather of those days was tanned very differently too
_________________
www.OldFrenchCars.com
We do these things not to escape life but to prevent life escaping us |
|
| Back to top |
|
|
baconsdozen
Joined: 03 Dec 2007
Posts: 1119
Location: Under the car.
|
|
| Back to top |
|
|
baconsdozen
Joined: 03 Dec 2007
Posts: 1119
Location: Under the car.
|
| Posted: Thu Apr 03, 2014 9:35 pm Post subject: |
|
|
This is the centre leather panel on one of the seats.It looked horrible and was as stiff as hardboard. I cleaned the paint off with thinners and water and the panel is now much more flexible. I'll be starting on the seat later will take some before and after pictures. (Hopefully).
_________________
Thirty years selling imperial hand tools for old machinery(Now happily retired). |
|
| Back to top |
|
|
Greeney in France
Joined: 06 Mar 2008
Posts: 1173
Location: Limousin area of France
|
| Posted: Fri Apr 04, 2014 5:57 am Post subject: |
|
|
It must have been a thinner based colour, they tend to dry out the leather too. The new acrylic ones are much better.
Tip.. Do not start colouring it until you have softened it as if you do you wont be able to use any conditioner/softener on the leather for about 6 months
Soak it in leatherique (or equivalent) first for a few days in a warm room then clean off residue, then colour 
_________________
www.OldFrenchCars.com
We do these things not to escape life but to prevent life escaping us |
|
| Back to top |
|
|
baconsdozen
Joined: 03 Dec 2007
Posts: 1119
Location: Under the car.
|
| Posted: Fri Apr 04, 2014 10:25 am Post subject: |
|
|
Hi,I think it was a cellulose based paint,it comes off slowly with thinners but unless you are quick as they evaporate off it sets again. I like your suggestion of the scotch rite pad. I'm going to use thinners to get the bulk of the paint off (trying to avoid any going on the stitching) then use an alcohol and water mix to remove the rest with a pad. The parts I have treated show the leather to be very,very dry it soaks up water like a sponge. I'll be using a water based dye so it should get a decent key on the leather.
I'm carrying out my experiments on a scrap seat panel but am already pleased with the improvement to the texture.
The tip about using a poly based decorators caulk is welcome,I've heard the same advice before.
_________________
Thirty years selling imperial hand tools for old machinery(Now happily retired). |
|
| Back to top |
|
|
|


