
Classic cars forum & vehicle restoration.
|
|
| Author |
Message |
1935Hillman
Joined: 06 Apr 2010
Posts: 257
Location: Hampshire
|
 Posted: Sun Sep 20, 2015 3:21 pm Post subject: Posted: Sun Sep 20, 2015 3:21 pm Post subject: |
 |
|
Hand brake
I dug out and repainted all of the bits for the handbrake and it all looked very nice save for the actual hand grip which is in a bit of a sorry state for some reason and will require covering with something fit to be seen in the cabin. I'll have to come back to that when I have explored plastidip or something.
Anyway, all looked good until it came to pulling the brake on and I realised I had no ratchet gate to keep it on!
A quick visit to the underbelly of the Aero tourer revealed the required part so I whipped it off and set to thinking about copying it.
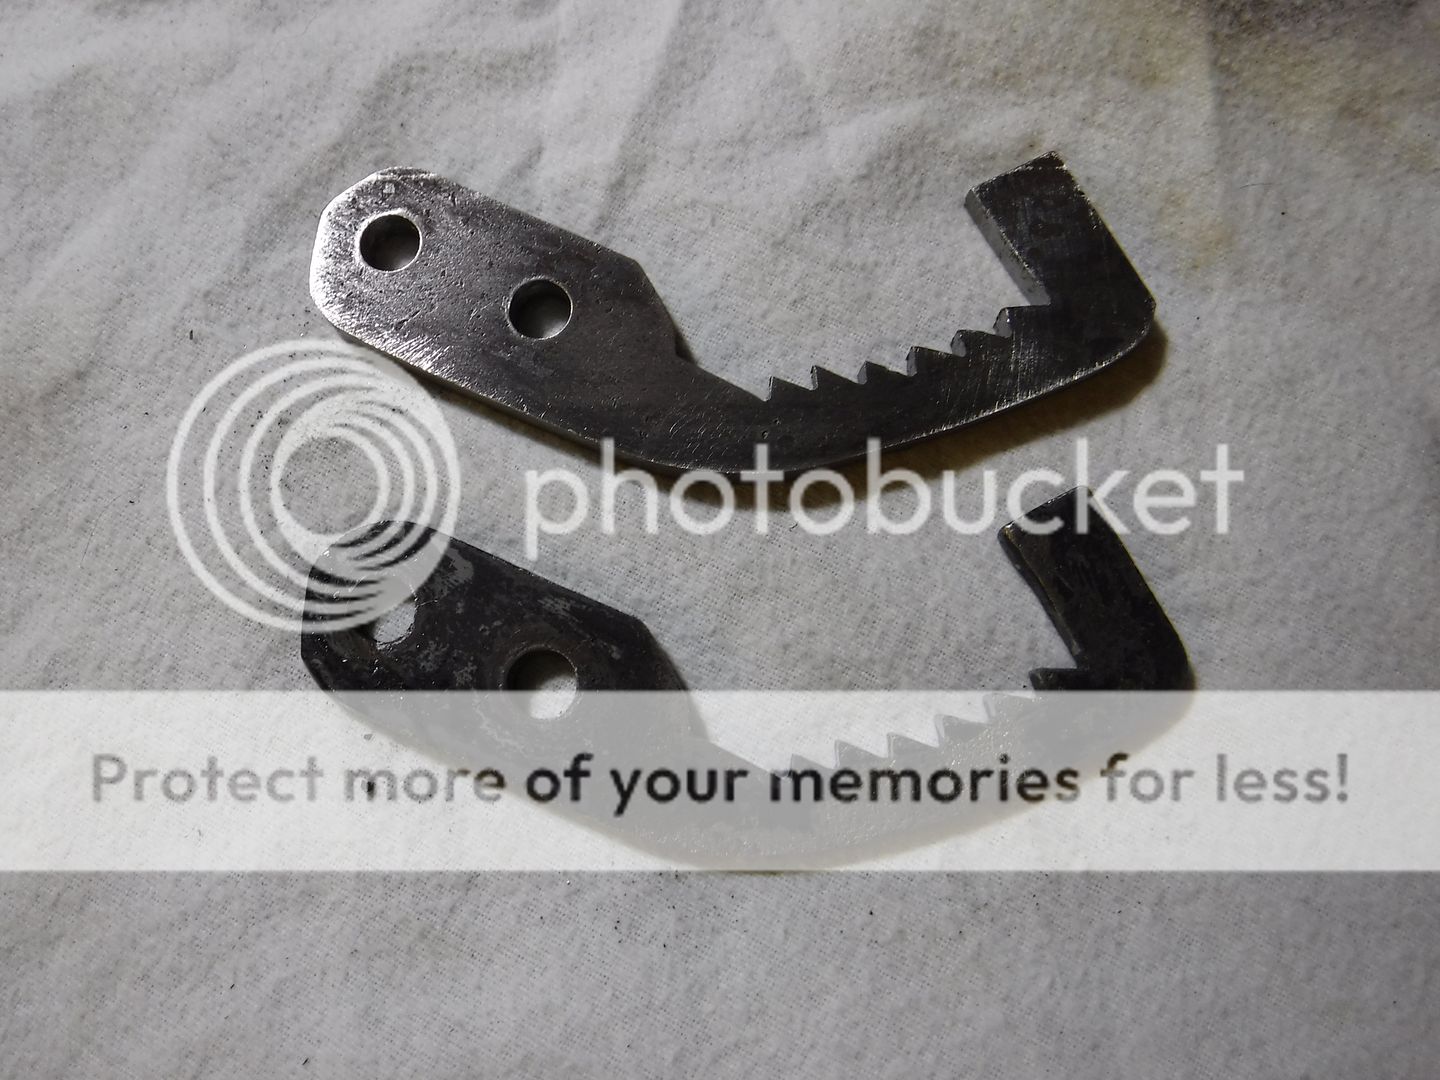
I first selected a likely looking piece of scrap steel and clamping the old one to it, drilled corresponding holes and bolted the two pieces together. I then roughed out the new one by carefully carving around the pattern with a 4" grinder and thin disc, finishing the edge with bench grinder and files. This was relatively easy but the tricky bit was to come, how to make the 'teeth' of the ratchet. I thought of ploughing straight on with the files but slightly lacking the confidence that this was the best way to go, I put everything away and shut the door.
The following day I reviewed the job and decided that as long as I was very careful not to damage the pattern (which was already understandably less than perfect with the wear of eighty years plus) I could file the shape required.
An hour's work, filing, checking, filing and checking again produced a fairly satisfactory result which worked very well when trial fitted and tested.
As usual I got carried away with the process and forgot to take photos of each stage but here are 'before' and 'after' shots
It did occur to me though that such a part, coming under constant wear, should be hardened in some way. Does anyone have any views on this please?

 |
|
| Back to top |
|
 |
peter scott

Joined: 18 Dec 2007
Posts: 7124
Location: Edinburgh
|
| Posted: Sun Sep 20, 2015 9:36 pm Post subject: |
|
|
Looks like a very good copy. I doubt that you will need to harden it.
Peter
_________________
http://www.nostalgiatech.co.uk
1939 SS Jaguar 2 1/2 litre saloon |
|
| Back to top |
|
|
1935Hillman
Joined: 06 Apr 2010
Posts: 257
Location: Hampshire
|
| Posted: Mon Sep 21, 2015 3:19 pm Post subject: |
|
|
| Thanks Peter, I'll paint it and stick it on. Another thing ticked off the list |
|
| Back to top |
|
|
1935Hillman
Joined: 06 Apr 2010
Posts: 257
Location: Hampshire
|
| Posted: Tue Nov 17, 2015 5:23 pm Post subject: |
|
|
Just a brief interlude in progress while she is shown off on the body fabricators stand at the NEC this weekend. Valley Gas Speed Shop have done a fine job and Jimmy and Gary should be very proud. They did say that they could quite see why not many of these little cars had been built, they are simply very complicated bodies. It is interesting that when MG built their Airline PA / PB cars they used many of the same body panels as the tourers such as the wings and bonnets whereas Hillman went for an entirely new design with every panel being new and hand built. The experiment did not last long hence so few survivors.
 |
|
| Back to top |
|
|
1935Hillman
Joined: 06 Apr 2010
Posts: 257
Location: Hampshire
|
| Posted: Sun Jan 17, 2016 8:31 pm Post subject: |
|
|
I was determined to do at least some part of the body and planned all along to have a go at the sliding roof. With the help of a small number of people, particularly Lew, the US owner of an MG airline with a similar roof I was able to ascertain how I was going to do it. Basically a wooden framework with a metal skin. Again the frame was ash with the curved sections cut out on my little but brilliant Record bandsaw. Simple glued halving joints sufficed to create the shape and with a deal more sanding and planing than I had planned (made it too thick) the final shape was achieved.
The rebates for the perspex or acrylic panels were also routed out at this stage
I then made a square frame to create the edge round which to form the skin and set it into a shallow rebate made with a hand held small router. The 'ring beam' was then glued and pinned into place with the added precaution of screws in teh corners - I do not want the subframe lifting at some future date.
I then cut out the top skin and have so far dressed the edges to 90 degrees in preparation for turning over to trap it onto the lip.
The three apertures were cut out with a jigsaw and the edges trued up with files.
Next is dressing the edges and hope for the best.


 |
|
| Back to top |
|
|
1935Hillman
Joined: 06 Apr 2010
Posts: 257
Location: Hampshire
|
| Posted: Fri Apr 22, 2016 12:00 pm Post subject: SCREEN HINGES |
|
|
After many many months I had still been unable to find any windscreen hinges at all and had decided to try to make some. My engineering skills while still basic have advanced some distance in last few years and jobs that only a short time ago I would not have attempted I now feel that I might stand a chance of achieving. I think a fairly common example of this is with welding when you at first seem only capable of melting things despite 'trying everything' The truth is that constant practice at every opportunity is required in order to obtain any level of competency. If your wheelbarrow frame has a crack in it, weld it up. If that old garden gate hinge or catch is worn down to nothing, try welding a piece on. I am still not a good welder but am a darned sight better than I once was that's for sure.
so it was with the screen hinges. Some very helpful old car owners sent me accurate close up images of their hinges and it was from these that I was able to draw up a plan for mine. I assembled the basic elements of any hinge, two ends, a connecting bit and a swivelling bit that goes between them.

To create the 'throw' of the hinge I cut a section out of a steel pipe that I happened to have in the workshop which turned out to be bang on. Other components came out of small angle and flat bar. I then placed all the bits together on a clean white surface and drew the configuration in order that I might stand a chance of replicating it as I would need a pair. Then it was just a case of clamping the parts together in the big bench vice and welding them together.

The plan was to cobble something together to hand over to my engineer friend for him to make them properly but after much fettling and filing they look entirely right and whats more work so I may just polish them and have them plated.
I don't post any of these updates to get a pat on the back and be told what a clever boy I am but seriously wish to encourage others to take on jobs in their own restoration that they might think they are not capable of. With a bit of thought and careful planning you would be amazed at what you can achieve. |
|
| Back to top |
|
|
1935Hillman
Joined: 06 Apr 2010
Posts: 257
Location: Hampshire
|
| Posted: Thu Jul 13, 2017 3:44 pm Post subject: Paint |
|
|
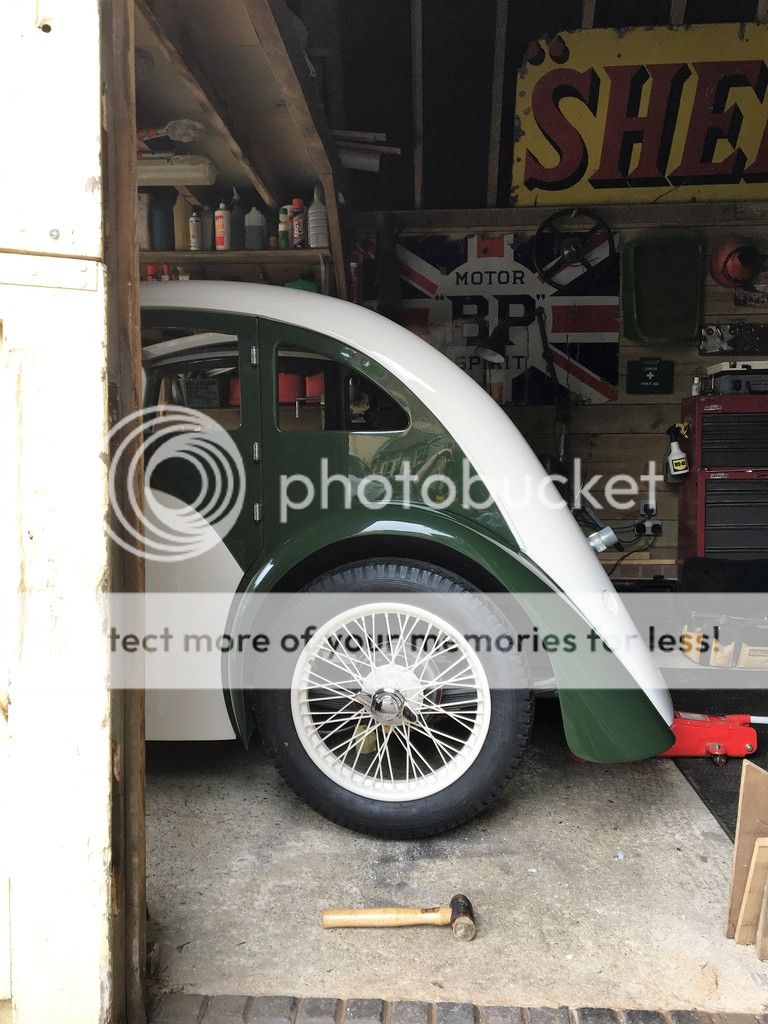
She is now finally back from the paint shop. Quite why they kept her for so very long I have no idea but nevertheless I am very pleased with the results. As usual we were in a hurry when she was returned so no time for a proper photo session but a couple of snaps anyway. Electrics have been resumed and windows and rubbers have been fitted. Some shiny bits are back on and I will wheel her out for some better pictures as soon as the sun returns.


 |
|
| Back to top |
|
|
kevin2306
Joined: 01 Jul 2013
Posts: 1359
Location: nr Llangollen, north wales
|
| Posted: Thu Jul 13, 2017 3:50 pm Post subject: |
|
|
I was just thinking the other night about this project.
How fantastic does it look!!
well done with the project
Kev |
|
| Back to top |
|
|
Rick
Site Admin

Joined: 27 Apr 2005
Posts: 22458
Location: UK
|
|
| Back to top |
|
|
peter scott
Joined: 18 Dec 2007
Posts: 7124
Location: Edinburgh
|
| Posted: Thu Jul 13, 2017 5:02 pm Post subject: |
|
|
Looks like a very good paint job and well done on the preparation.
Peter
_________________
http://www.nostalgiatech.co.uk
1939 SS Jaguar 2 1/2 litre saloon |
|
| Back to top |
|
|
kevin2306
Joined: 01 Jul 2013
Posts: 1359
Location: nr Llangollen, north wales
|
| Posted: Fri Jul 14, 2017 8:21 pm Post subject: |
|
|
Bugger, looks like photobucket has struck again!
Kev |
|
| Back to top |
|
|
Rick
Site Admin
Joined: 27 Apr 2005
Posts: 22458
Location: UK
|
|
| Back to top |
|
|
1935Hillman
Joined: 06 Apr 2010
Posts: 257
Location: Hampshire
|
| Posted: Fri Aug 11, 2017 11:09 pm Post subject: |
|
|
Oh well, that's a shame.
Unless there is an easy and free fix that might just be the end of the story with pictures.
What is the solution ? |
|
| Back to top |
|
|
Rick
Site Admin
Joined: 27 Apr 2005
Posts: 22458
Location: UK
|
|
| Back to top |
|
|
1935Hillman
Joined: 06 Apr 2010
Posts: 257
Location: Hampshire
|
| Posted: Tue Aug 22, 2017 4:21 pm Post subject: Running out of patience(and time) |
|
|
Thought I'd found the answer with IMGUR
Loaded up a number of images and then tried sticking them into the forum but immediately ran into a bizarre problem. If I leave them full size which is far too big for the forum page they load easily but if I resize them WITHIN IMGUR ITSELF they then no longer upload to the forum. Go figure? is apparently the expression for such situations.
I have tried all possible connotations but am totally baffled - well, that's the polite version anyway.
I love this forum but I simply don't have the time to devote to messing around with this any more. I will seek some tech advice and try again when I have regained some patience. |
|
| Back to top |
|
|
|
  |
Classic cars forum & vehicle restoration. Forum Index
-> All our old cars, vans, lorries etc |
All times are GMT + 1 Hour
Goto page Previous 1, 2, 3, 4, 5, 6, 7, 8, 9, 10 Next
|
| Page 8 of 10 |
|
You cannot post new topics in this forum
You cannot reply to topics in this forum
You cannot edit your posts in this forum
You cannot delete your posts in this forum
You cannot vote in polls in this forum
|
php BB powered © php BB Grp.
|


