|
|
| Do you like or dislike the new dashboard ? |
| Yes I do like the new dashboard |
|
100% |
[ 7 ] |
| No I do not like the new dashboard |
|
0% |
[ 0 ] |
|
| Total Votes : 7 |
|
| Author |
Message |
Vintage Fly Guy
Joined: 27 Jun 2024
Posts: 197
|
 Posted: Wed Jan 07, 2026 5:43 pm Post subject: Posted: Wed Jan 07, 2026 5:43 pm Post subject: |
 |
|
| A wise decision I think. Hope he traces the fault and it's an easy fix. |
|
| Back to top |
|
 |
Ray White

Joined: 02 Dec 2014
Posts: 7306
Location: Derby
|
| Posted: Wed Jan 07, 2026 7:03 pm Post subject: |
|
|
Regarding the issue with the steering wheel boss, I spoke to Melvin Rutter today to find out what progress - if any - had been made. I was again asked to send my original boss; but as I had explained before without the original steering wheel I have no means of moving the car about.
Surprisingly, they don't possess an MG TC steering column ...so I have asked for the original boss be returned. As it has been put back into stock they now don't know which one was mine!
The original boss would not clamp onto the shaft. If I get it back I will try heating it and pressing it onto a mandrel the same size as the shaft.
If I get one that was too tight to go onto the shaft, I plan to 'start' it on by gently taper reaming out the end of the boss. Hopefully, once started, it should go on. |
|
| Back to top |
|
|
Ray White
Joined: 02 Dec 2014
Posts: 7306
Location: Derby
|
| Posted: Thu Jan 22, 2026 5:51 pm Post subject: |
|
|
John Marks received the tachometer and can find nothing wrong with it. He has tested it on his calibrator and it appears to be working steadily at various speeds. This is a mystery and he will return it to me in due course. He thinks the cold weather may have contributed to it not working by making the grease "sticky" but in truth he is as mystified as I am.
Meanwhile; on a different matter, I have reminded Melvin Rutter that I would be happy for them to return the steering wheel boss to me. He wanted me to send the steering column to him...but I have already spent too much on postage and I am determined now to fix it myself.
While awaiting the return of parts, I have started the job of fitting the hood. Working alone is not ideal. However, I managed to fit the frame myself but not without causing some minor damage to the paint. I have temporarily covered the area with a blob of red cellulose but it will need to wait for warmer weather before I can repair it properly.
I bought the fabric top and side screens way back in 2019 before I realised that the car needed a whole new body. The delays this caused have meant that I took little interest in the new hood. I had chosen the superior "Stayfast" material over the cheaper option but only time will tell if it was a wise decision as I don't know how much wet weather the car will be driven in.?
On first offering up the hood I realised that I am missing the two lengths of webbing that will need to be attached to the hood bows. Not having an existing hood means learning as I go along. Indeed, if I hadn't insisted to the previous owner that I needed the frame at least, I may not even have had that!
Today I contacted Pickerings - who made the hood and side screens - and was informed that the webbing would not have been included, but was available at an extra cost. Their webbing is simply sold by the metre and does not come with the pre drilled (pocketed) holes as do those in the kits supplied by moss.
Given that I will have to carefully make these holes to align with the hood bows I have decided to source 5 metres of 2" herringbone webbing more cheaply elsewhere.
While I await the webbing, I shall start by wrapping the front wooden rail (new) with the separate length of material that has a seamed flap that should cover the join between the hood and the windscreen.
I am following some 'on line' instructions thus:
http://www.caroholic.com/images/TC%20Top%20Installation_Moss.pdf
https://www.mgbits.com/additional/HoodSide%20Screens.pdf |
|
| Back to top |
|
|
Ray White
Joined: 02 Dec 2014
Posts: 7306
Location: Derby
|
| Posted: Tue Jan 27, 2026 6:56 pm Post subject: |
|
|
The rev counter duly arrived home today. I connected it to the cable and mounted the other end of the cable to my electric drill; set to reverse. Everything seemed fine so I reinstalled it in the car. With it still working I am happy that the mystery problem will remain just that.
On another matter I am not entirely happy with the hood. I knew that the leading edge would need trimming before folding under and tacked to the front bow. However, I believe there should be a seam which has not been stitched.
This is not my forte ,,,to say the least!  |
|
| Back to top |
|
|
ukdave2002
Joined: 23 Nov 2007
Posts: 4288
Location: South Cheshire
|
| Posted: Tue Jan 27, 2026 8:22 pm Post subject: |
|
|
| A lesson I learnt many years ago is when it comes to hoods on a rebuilt car, is get a trimmer to make the hood from scratch, there are too many variables on an older vehicle. |
|
| Back to top |
|
|
Ray White
Joined: 02 Dec 2014
Posts: 7306
Location: Derby
|
| Posted: Tue Jan 27, 2026 11:12 pm Post subject: |
|
|
| ukdave2002 wrote: | | A lesson I learnt many years ago is when it comes to hoods on a rebuilt car, is get a trimmer to make the hood from scratch, there are too many variables on an older vehicle. |
The irony is that I chose Pickerings because they were supposed to make a better job of it than getting a kit from Moss.
I need the seams as a guide for where to cut and fold the material. Perhaps Jean will help with her dress making skills.? |
|
| Back to top |
|
|
Ray White
Joined: 02 Dec 2014
Posts: 7306
Location: Derby
|
| Posted: Wed Jan 28, 2026 7:00 pm Post subject: |
|
|
The steering wheel boss turned up today. It was still too tight to go right onto the shaft.
What I have not yet established is quite where the binding is occurring. Might it the 'peaks'?... or the 'troughs' of the splines in the aluminium ?
It only seems to be the last 1/4 of the splined section of the boss that is too tight. I need to be sure whether it is the peaks or the troughs of the splines that need to be relieved.
I had an email today from Chris Taylor in Australia. He is a fellow TC owner and the Grandson of JB Taylor who owned and raced my car (TC 10030) when new. While restoring his own car, he had to sand down the splines on his new boss to get it to fit; so at least I'm not the only one, as I have been led to believe....
For my part the most obvious solution is to mount the boss in my lathe and - with a boring bar - relieve a small area of splines in the aluminium. I won't need to take much away.
There is one potential difficulty and that is the boss is likely not perfectly round (as it has a slot machined in the side for adjustment.). I may need change to a 4 jaw chuck which will involve much more fiddling to get true adjustment.
. |
|
| Back to top |
|
|
Ray White
Joined: 02 Dec 2014
Posts: 7306
Location: Derby
|
| Posted: Mon Feb 02, 2026 1:04 am Post subject: |
|
|
The steering wheel boss is at last going on the column now. It will be a pretty tight fit - which rules out in/out adjustment "at will" - but at least it now fits... and I can get back to sorting out the hood!
Before I do, however, I am fabricating a simple "puller" as a boss removal tool.
I ordered some 2" webbing which looked beige in the on line photo ...but turns out to be off white. It is also rather thinner than I was hoping for. I thought of doubling it up but there is not quite enough to do that with it.
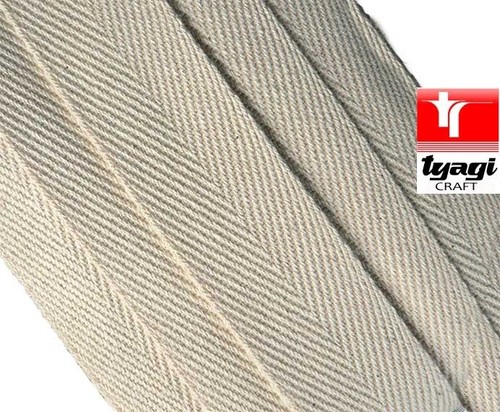
The correct shade of beige to match the "Stayfast" hood material is, apparently, very hard to find now; but Pickerings - who made my hood and side screens some time ago - have some matching beige webbing; 4 metres of which they will be sending me f.o.c. ! 
. |
|
| Back to top |
|
|
Ray White
Joined: 02 Dec 2014
Posts: 7306
Location: Derby
|
| Posted: Wed Feb 18, 2026 3:07 pm Post subject: |
|
|
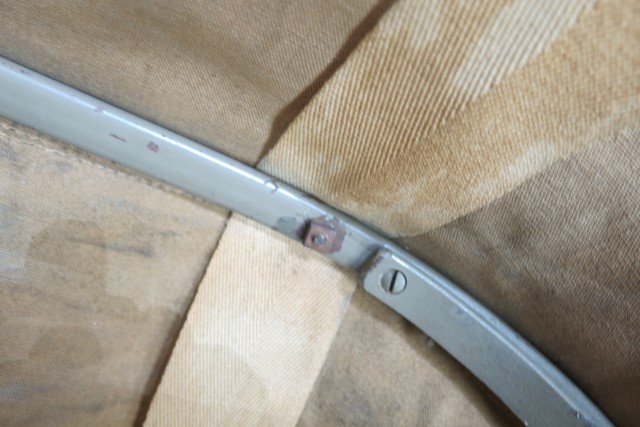
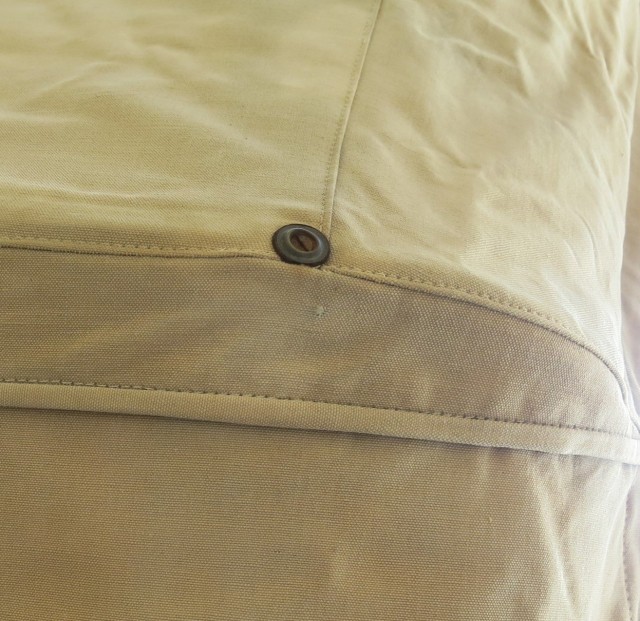
Above are photos of an (apparently original) hood showing how it has been attached to the frame.
In the first photo the webbing is clearly visible. The second shows how a c/s machine screw passes through the hood material with a cup washer and rubber sealing grommet. In my rather obtuse way, I am questioning the need for this screw to pass through the outer covering which although it has a rubber sealing grommet I see as a potential leak problem.
The steel hood frame has a wooden rail at the front to which the hood material is stapled or tacked while the back of the hood is tacked to the wooden body. Across side to side, the frame has two steel bows; the front one is fixed and the other is floating. It is this rear floating bow shown in the pictures. Both bows have pre drilled holes to accept 4BA machine screws and nuts.
When the hood is raised the front rail attaches to the windscreen by thumbscrews and is held taught by the tacks at the rear of the body.
The two lengths of webbing have one purpose as far as I can see. They are tacked to the front rail and to the rear body... but are screwed to the middle bows. This ensures that the floating bow always stops in the same place when the hood is raised.
It seems to me that if the webbing is secured directly to the fixed bow (not through the hood) then it should be fixed in the same way to the floating bow; that is, under the hood and NOT THROUGH IT.
The hood should still be neatly held in tension over both bows when it is up and will fold down in a tidy fashion when stowed.
As a necessary precaution I have stuck patches of hood material over the screw heads to save them from wearing through. |
|
| Back to top |
|
|
bjacko
Joined: 28 Oct 2013
Posts: 549
Location: Melbourne Australia
|
| Posted: Thu Feb 19, 2026 6:40 am Post subject: Hood Webbing |
|
|
Maybe the screws are to keep tension between bows and /or to make sure the webbing does not slip sideways.
_________________
1938 Morris 8 Ser II Coupe Utility (Pickup)
1985 Rover SD1 VDP |
|
| Back to top |
|
|
Ray White
Joined: 02 Dec 2014
Posts: 7306
Location: Derby
|
| Posted: Thu Feb 19, 2026 9:26 am Post subject: Re: Hood Webbing |
|
|
| bjacko wrote: | | Maybe the screws are to keep tension between bows and /or to make sure the webbing does not slip sideways. |
Yes, the webbing MUST be screwed to the bows but my assertion is that they do not need to go in through the top. To me, making holes in the hood is asking for trouble.
I am happy that tacking the hood to the back, sides and front will be sufficient.
If there is a risk of the hood blowing away, then I doubt a couple of small screws will stop it. In fact, there is I would imagine, a great risk that the screws could just pull through.
I Expect they put the screws through the top to reduce annoying flapping. These cheap hoods always flap about a bit. |
|
| Back to top |
|
|
Ray White
Joined: 02 Dec 2014
Posts: 7306
Location: Derby
|
| Posted: Fri Feb 20, 2026 2:32 pm Post subject: |
|
|
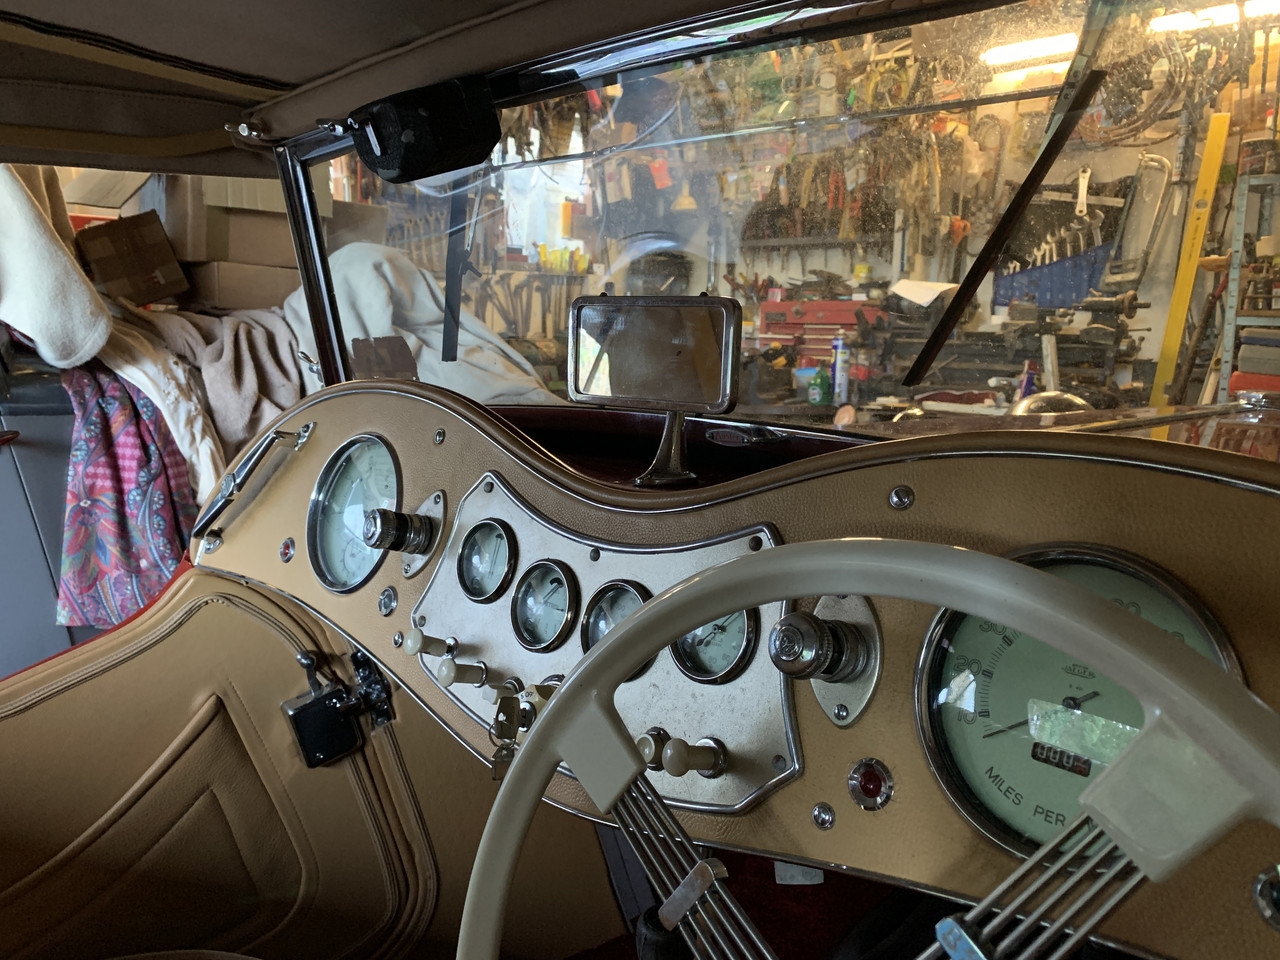
Before I can take the MG on the road I need to fit rear view mirrors. Some time ago I bought a new drivers side mirror which should be mounted on the windscreen stanchion. Two BSF drillings are provided.
I experienced some difficulty in assembling the head to the arm as the clamp was too tight...but eventually the two were persuaded to go together; but not before I had discarded the rubber cup washer as there was simply not enough thread available with it present.
Mounting the mirror was an easy enough job... although I did need to reduce the length of one of the BSF c/s machine screws.
A "demso" mirror came with the car and although not perfect I have decided to use it for the time being. This mirror has a single 'foot' and should be mounted in the middle of the double hump scuttle. Strangely, the hole in the scuttle is slightly too small and it will need to be opened out to 5/16". Also I have discovered that during construction of the new body tub, Andrew Denton had added some strengthening timber to the the scuttle frame. A 1" piece of Ash is now directly under the hole in the scuttle where the mounting bolt should go.!
I have sourced a 1.5" x 5/16" BSF bolt for the job and I shall need to drill a hole through the wood. Obviously I shall need to drill down from the top. Normally the windscreen would obstruct an electric drill but fortuitously the screen folds flat!
I thought it would be a good idea to fit a mirror to the near side ...but there are no drilling's in the windscreen stanchion on that side so I will need to think again about that. |
|
| Back to top |
|
|
bjacko
Joined: 28 Oct 2013
Posts: 549
Location: Melbourne Australia
|
| Posted: Sun Feb 22, 2026 9:33 am Post subject: Mirrors |
|
|
Be careful fitting mirrors on the windscreen stancheons. I had a mirror on my 8 on the door frame and nearly had an accident because the mirror was at head height and blocked my view of oncoming traffic. I now have the mirrors down level with the bottom of the side window on the door.
_________________
1938 Morris 8 Ser II Coupe Utility (Pickup)
1985 Rover SD1 VDP |
|
| Back to top |
|
|
Ray White
Joined: 02 Dec 2014
Posts: 7306
Location: Derby
|
| Posted: Sun Feb 22, 2026 10:47 am Post subject: Re: Mirrors |
|
|
| bjacko wrote: | | Be careful fitting mirrors on the windscreen stancheons. I had a mirror on my 8 on the door frame and nearly had an accident because the mirror was at head height and blocked my view of oncoming traffic. I now have the mirrors down level with the bottom of the side window on the door. |
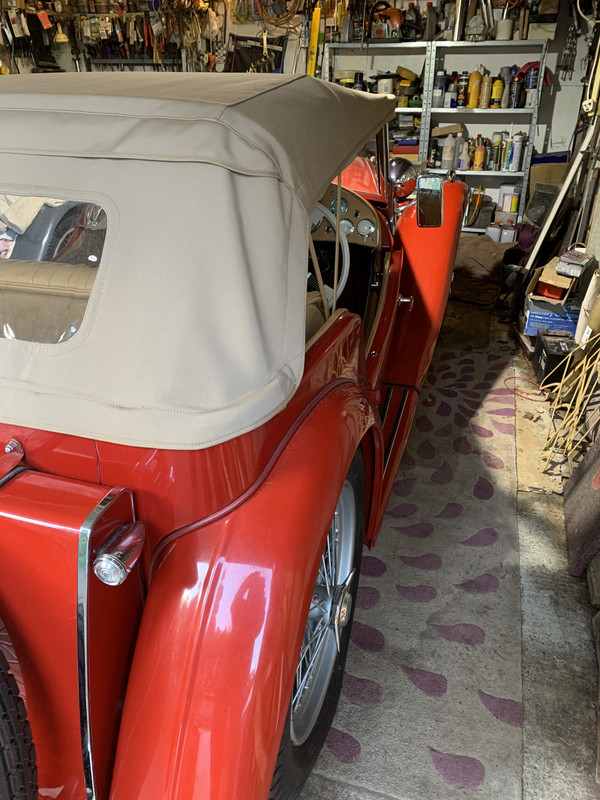
That is very good advice but I don't think my mirrors will be a problem. here they are on the car.
 |
|
| Back to top |
|
|
Ray White
Joined: 02 Dec 2014
Posts: 7306
Location: Derby
|
| Posted: Mon Feb 23, 2026 1:18 pm Post subject: |
|
|
Getting back to the hood. If I have one criticism of the hood supplied, it seems to come up a bit short from front to back. With with the weather strip closing the gap at the windscreen, the rear corners are only just covered. It is understandable, I suppose, because the car has had a new body.
I have finished the n/s front corner
....
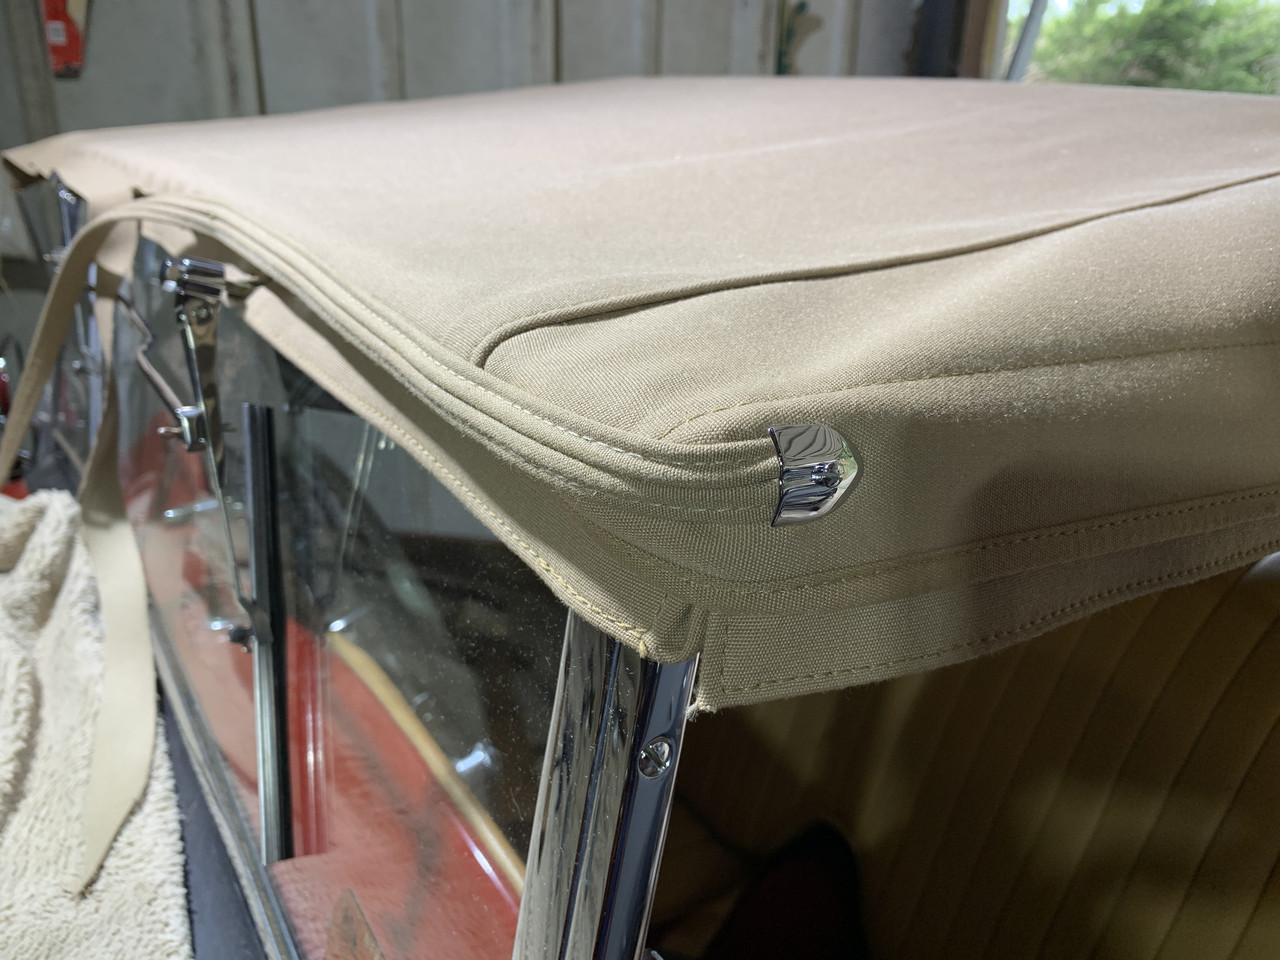
Just the o/s corner remains to be done...

. |
|
| Back to top |
|
|
|


