
Classic cars forum & vehicle restoration.
|
|
| Author |
Message |
British heritage cars
Joined: 10 Nov 2010
Posts: 202
|
 Posted: Thu Apr 05, 2012 8:59 pm Post subject: Posted: Thu Apr 05, 2012 8:59 pm Post subject: |
 |
|
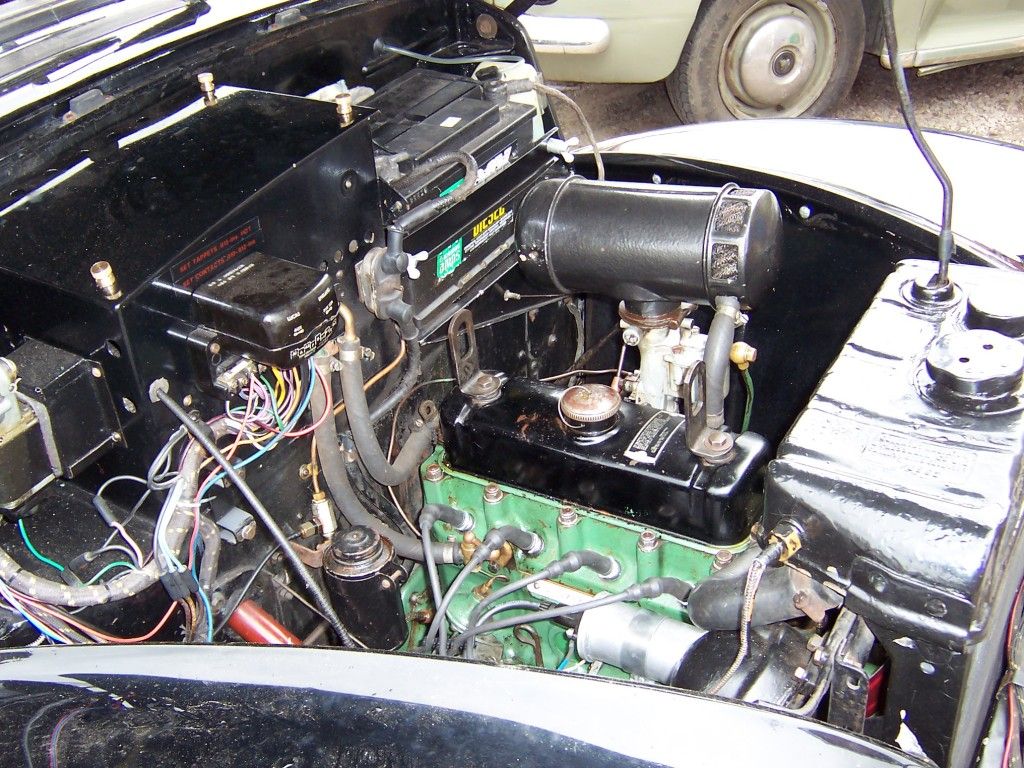
| Nick.S. wrote: | just a small update. i got the starter that i bought put on and it works great, it spins the engine over perfectly 
i also have assembled the water pump and put it back on, now i just need some rad hose and i will have a working coolent system  |
Sounds great!
Do you have pictures from your work?
What's next on your todo job?
Kind regards,
Jonathan |
|
| Back to top |
|
 |
Nick.S.
Joined: 08 Nov 2011
Posts: 64
Location: Manitoba, Canada.
|
| Posted: Fri Apr 06, 2012 6:35 pm Post subject: |
|
|
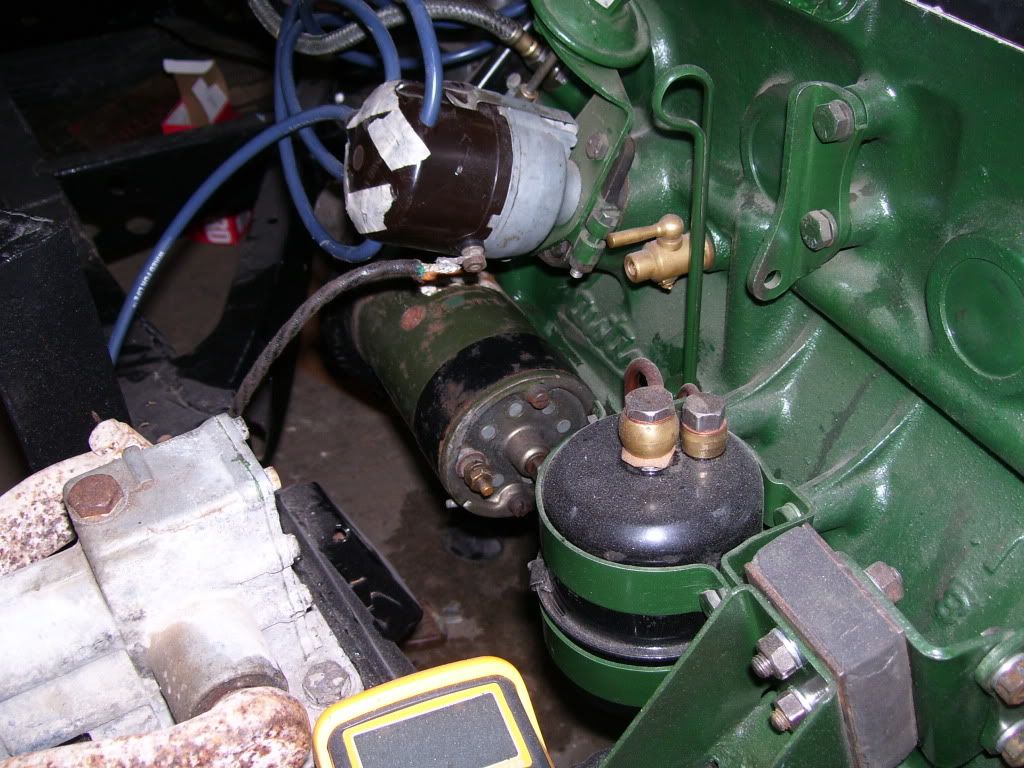
Thanks!
i have a few pics of it
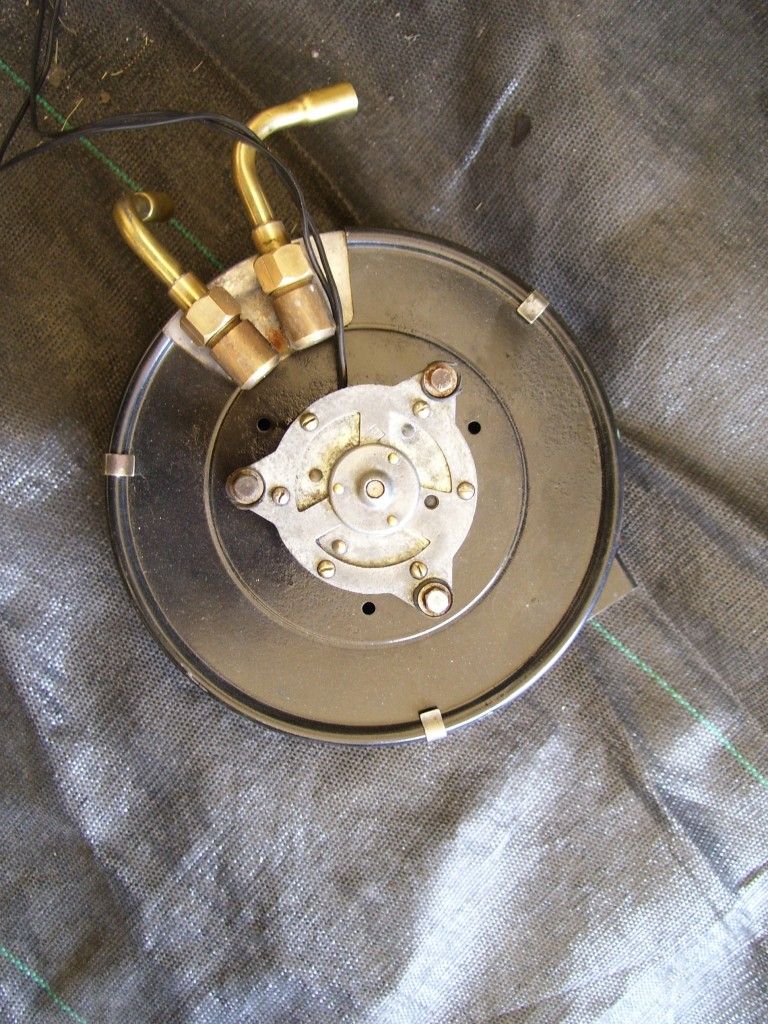
one of the water pump, not painted yet though.
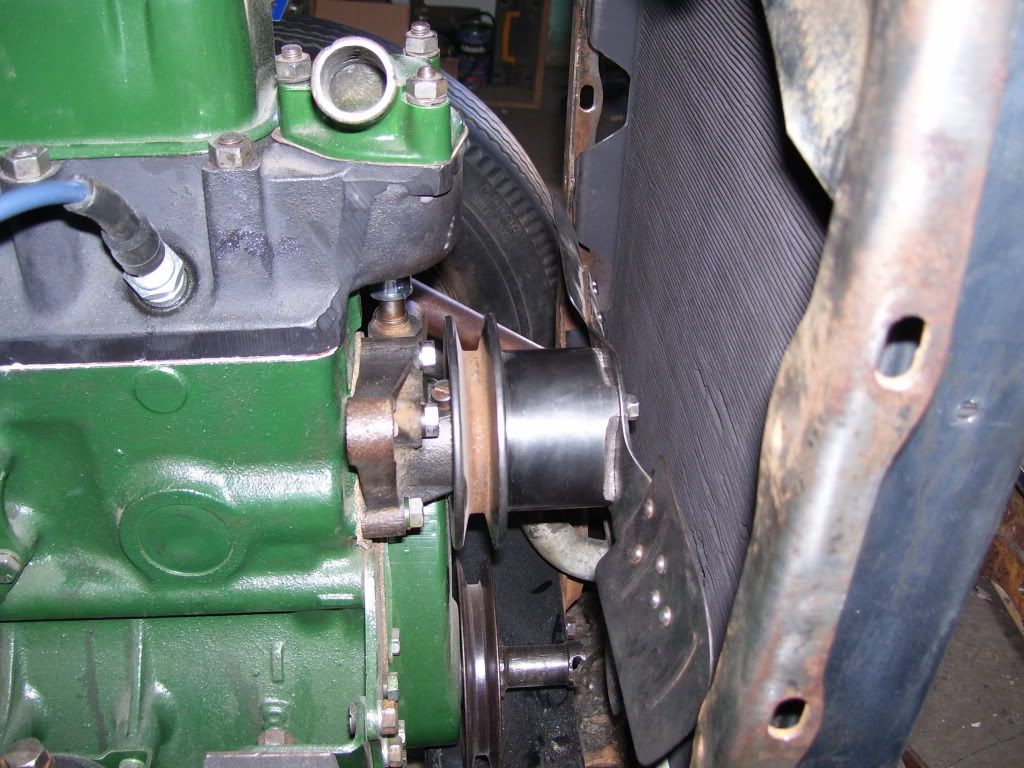
and the new starter (the bits of tape on the dizzy is to keep track of spark wire  ) )
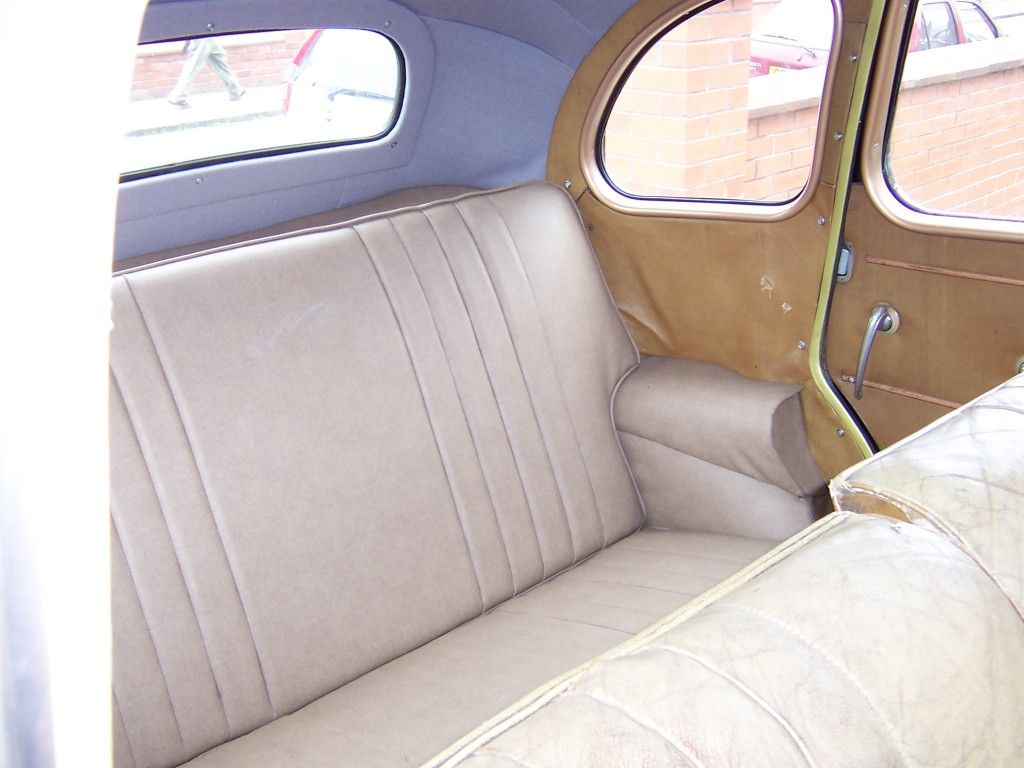
i took the front seats out today, a rather easy job, i was expecting more rust to fight! 
how does one endevor to remove the back seat though? i cant see any obvious bolts or srews to remove....
_________________
1951 Austin A40 Devon |
|
| Back to top |
|
|
British heritage cars
Joined: 10 Nov 2010
Posts: 202
|
| Posted: Fri Apr 06, 2012 10:45 pm Post subject: |
|
|
Hallo!
Again great progress!
The rear seat is the most easiest, you can just take it out, you don't have to lossen any bolts!
Just give it a scharp pull and you'll take it out!
Goot luck!
Kind regards,
Jonathan |
|
| Back to top |
|
|
Nick.S.
Joined: 08 Nov 2011
Posts: 64
Location: Manitoba, Canada.
|
| Posted: Tue Apr 10, 2012 7:31 pm Post subject: |
|
|
got the seats out on friday, i also took part of the headliner out. i plan on using it as a pattern for a new one.
quick question about testing the fuel guage, if i hook 12 volts to the terminal studs on it, the guage should read full, right? or will this fry it?
thanks
_________________
1951 Austin A40 Devon |
|
| Back to top |
|
|
Churchill Johnson
Joined: 11 Jan 2011
Posts: 359
Location: Rayleigh Essex
|
| Posted: Tue Apr 10, 2012 11:14 pm Post subject: |
|
|
| Voltage go's to one side of the dash guage maybe marked +, the other side go's to the seder unit in the tank, if it is wired up putting the sender wire to earth with voltage on should send the guage to full ,if ok reconnect to sender and earth the sender body, moving the float slowly you should see the guage moving as well ,when right up full ,when right down empty, if first test is ok then sender is at fault, check carefully as sometime's they can be repaired maybe a dry solder joint, you could check the sender with a multi-tester on ohm's setting. |
|
| Back to top |
|
|
Nick.S.
Joined: 08 Nov 2011
Posts: 64
Location: Manitoba, Canada.
|
| Posted: Thu Apr 19, 2012 2:34 am Post subject: |
|
|
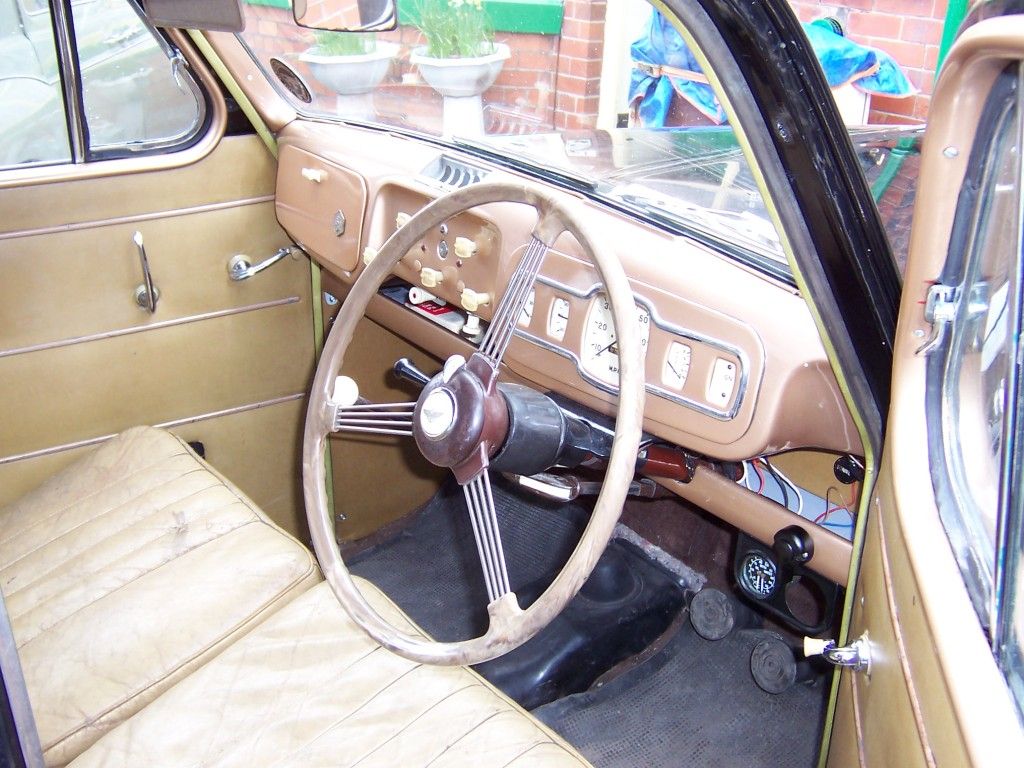
my sister and i painted the dashboard so it looks like the original wood grain, looks smashing now!
im working on taking the door handles off now, they are a little stubborn to come off the splines so im heating them and soaking them in penitrating oil ( i lined the handles up and slid the door card off them so it wouldnt catch fire)
i am kinda wondering how the door windows come out, do i undo all the bolts on the lifter unit and just wiggle it out?
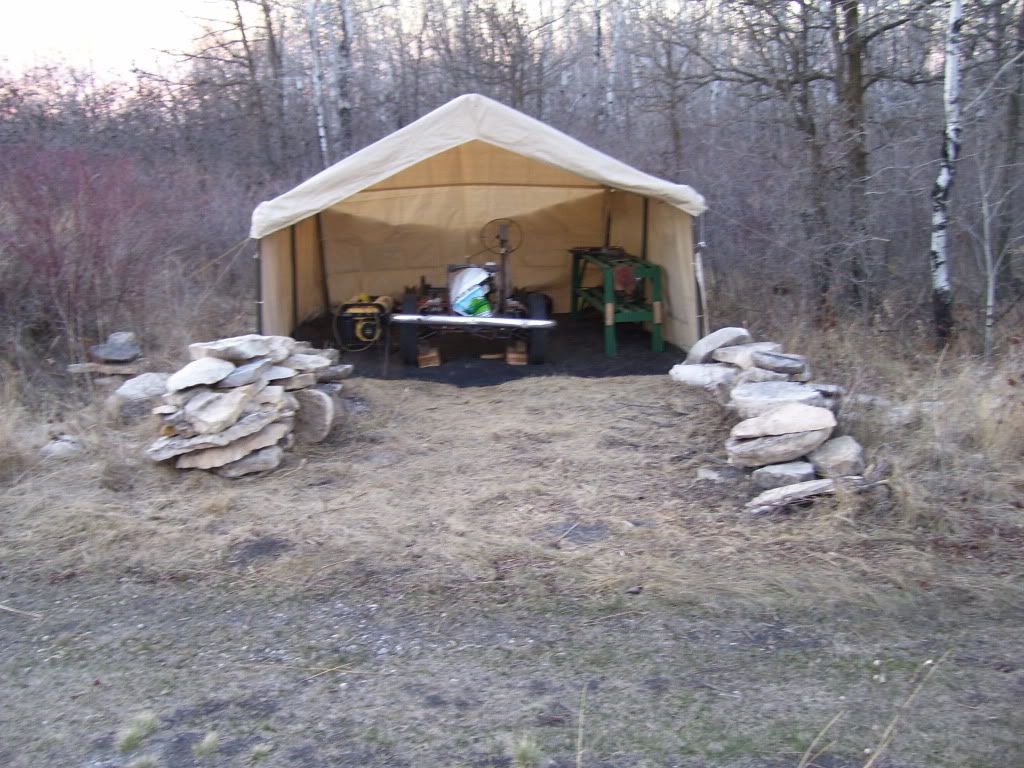
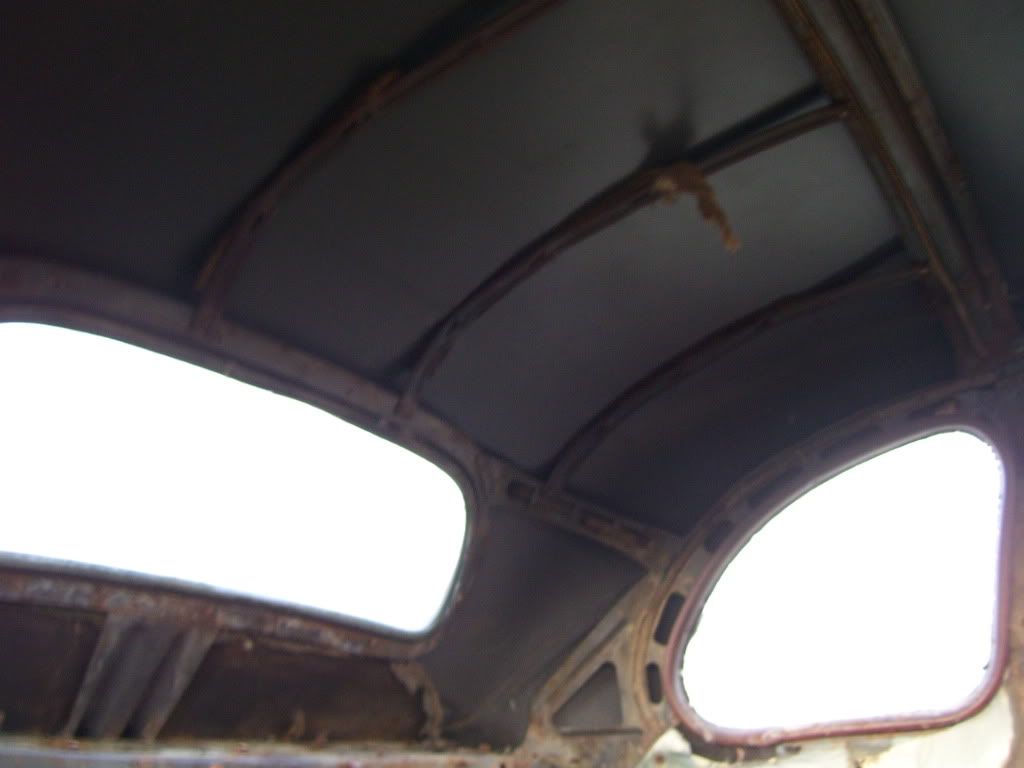
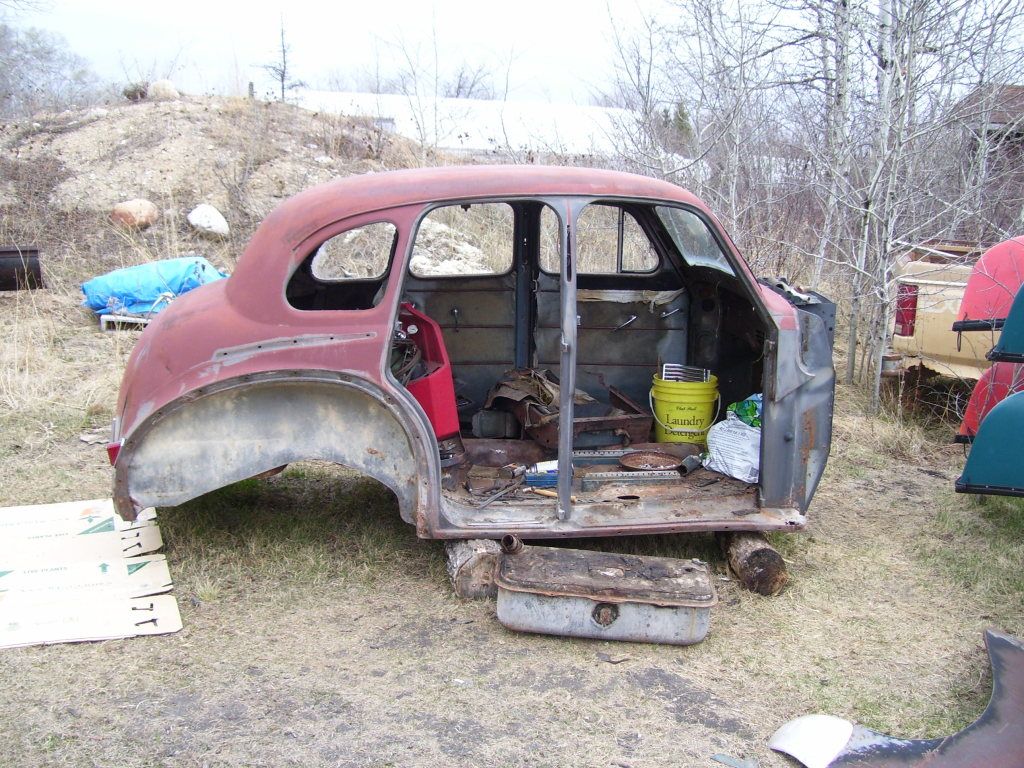
here are some pictures of the on going progress,
this one is the frames new home for the summer,
( i didnt plan on making a stacked rock entrance, there was just a rock pile in the way )
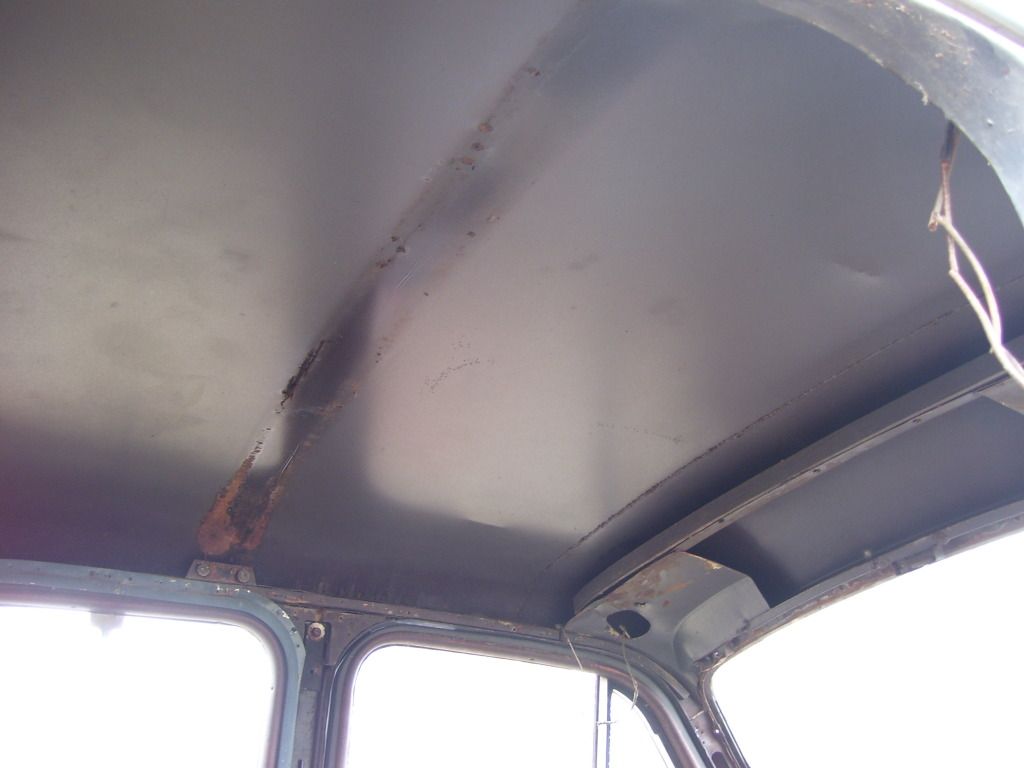
this is the inside of the body with out the natty old headliner,
_________________
1951 Austin A40 Devon |
|
| Back to top |
|
|
British heritage cars
Joined: 10 Nov 2010
Posts: 202
|
| Posted: Sat Apr 21, 2012 8:26 pm Post subject: |
|
|
Hallo Nick,
Looks great! 
I'll look forward for next pictures from your work!
Kind regards,
Jonathan |
|
| Back to top |
|
|
Nick.S.
Joined: 08 Nov 2011
Posts: 64
Location: Manitoba, Canada.
|
| Posted: Sun Apr 29, 2012 10:32 pm Post subject: |
|
|
well got a bit more progress on the teardown!
woodgrain affect paint
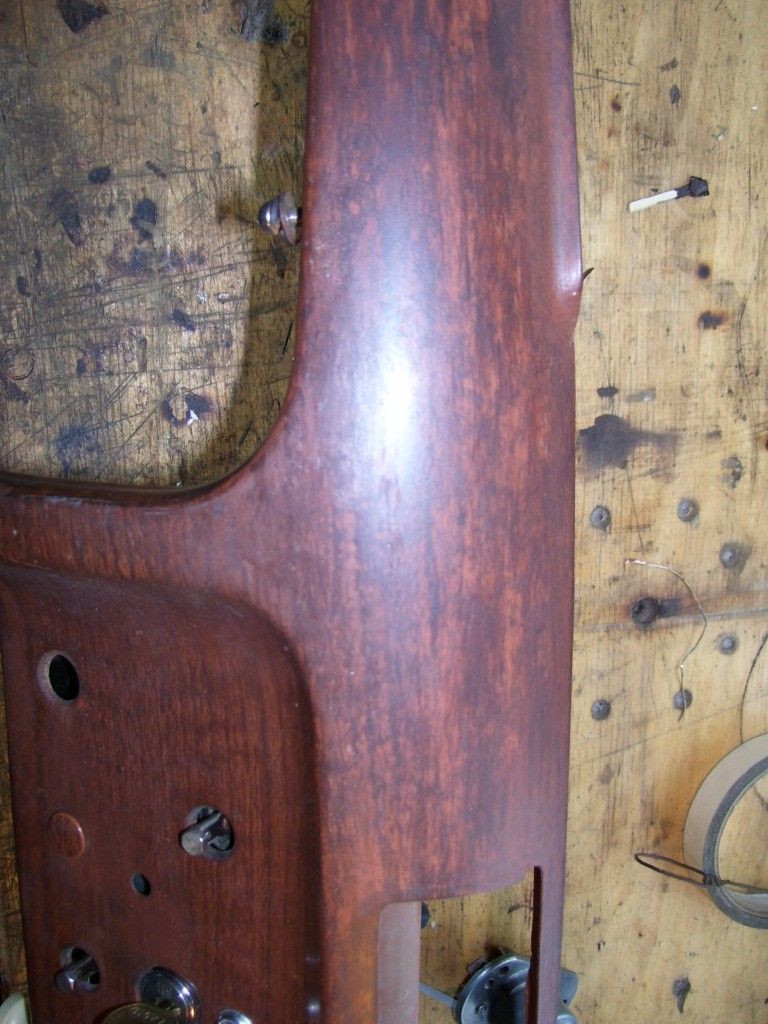
almost the entire upper strip is repainted
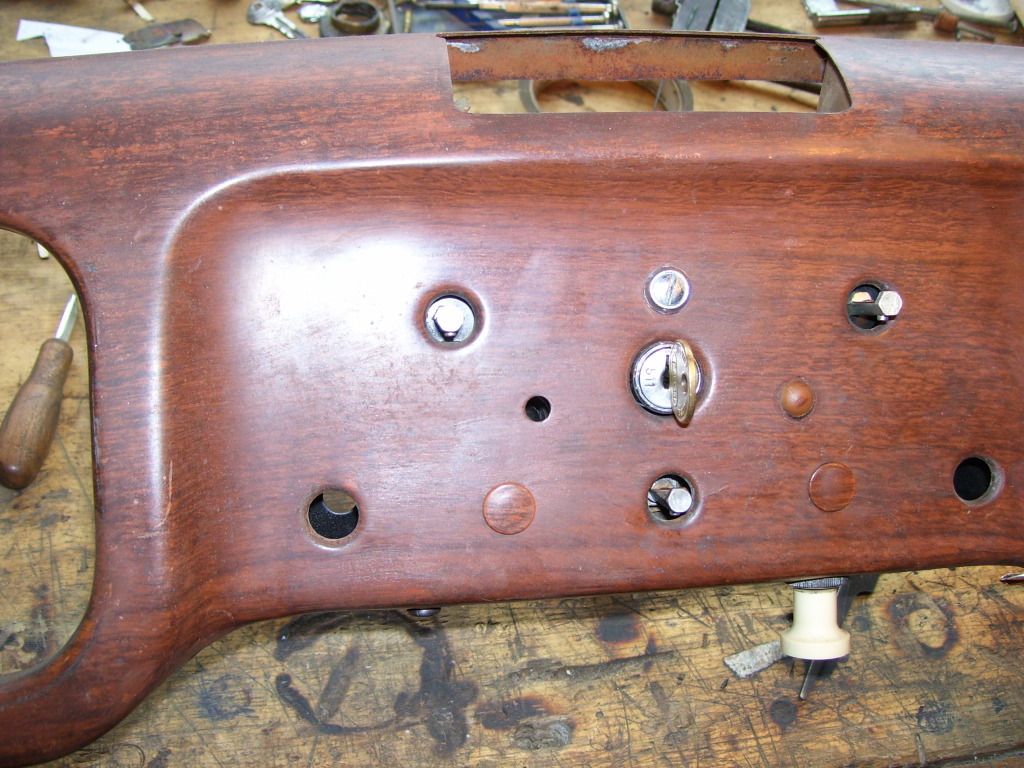
the hand painted graining

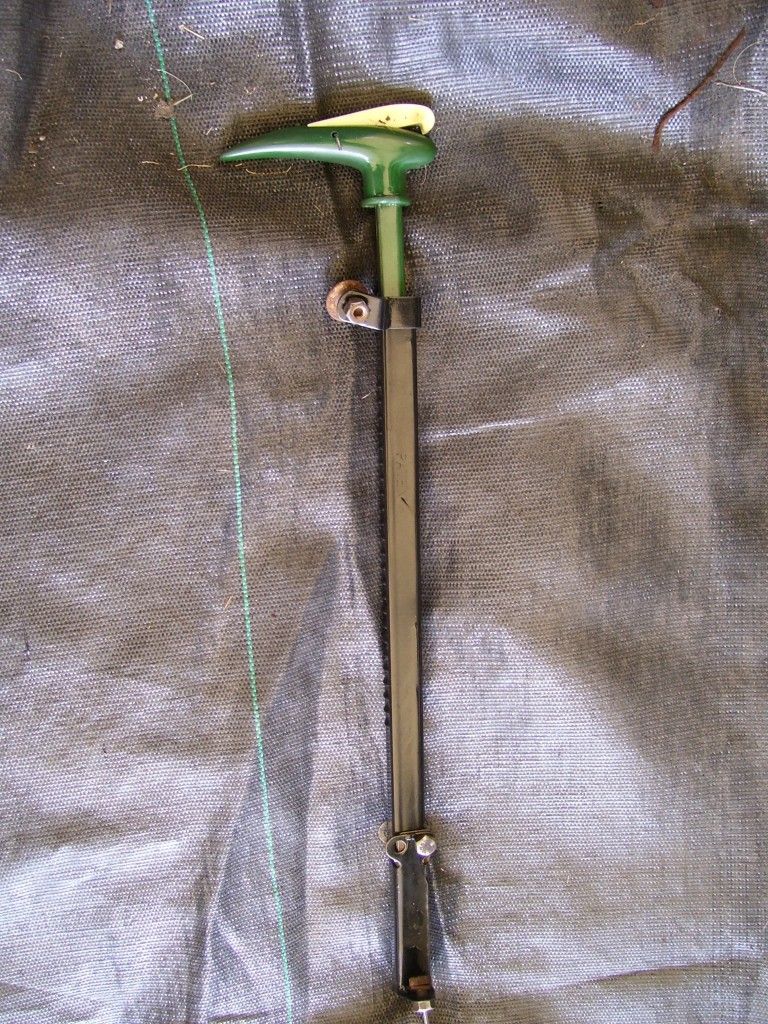
parking brake handle cleand and painted
figured out how to get the glass out of the doors with out breaking it!

looks like on of those cut away diagrams
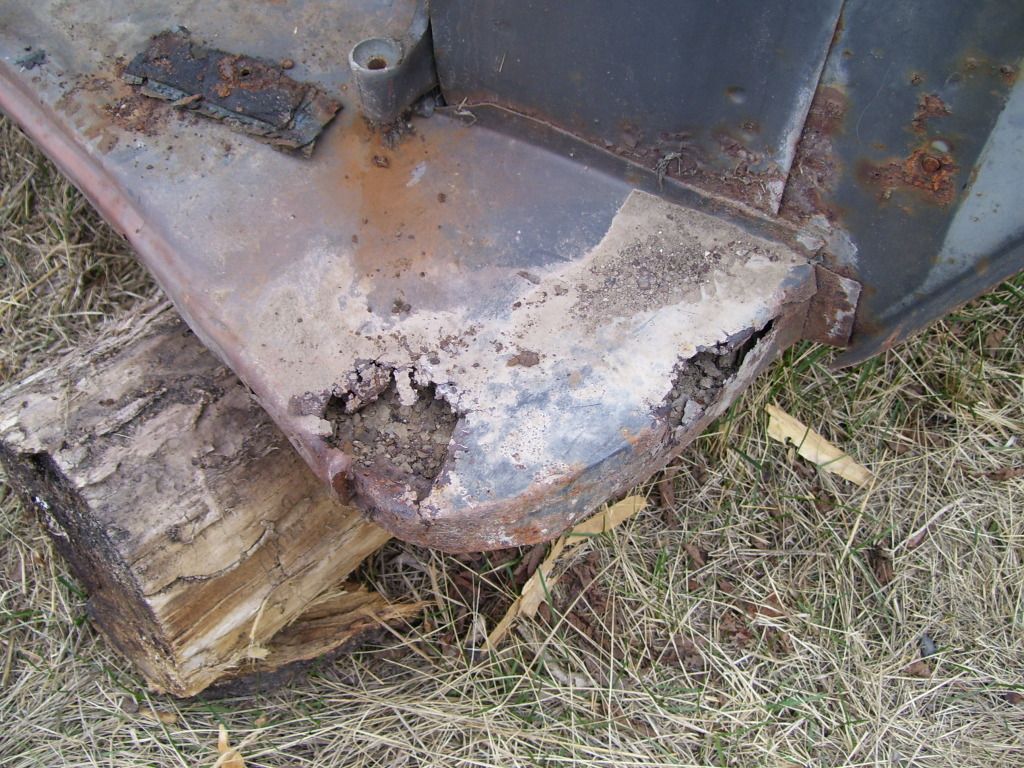
found some rust around the right hand side under the front door
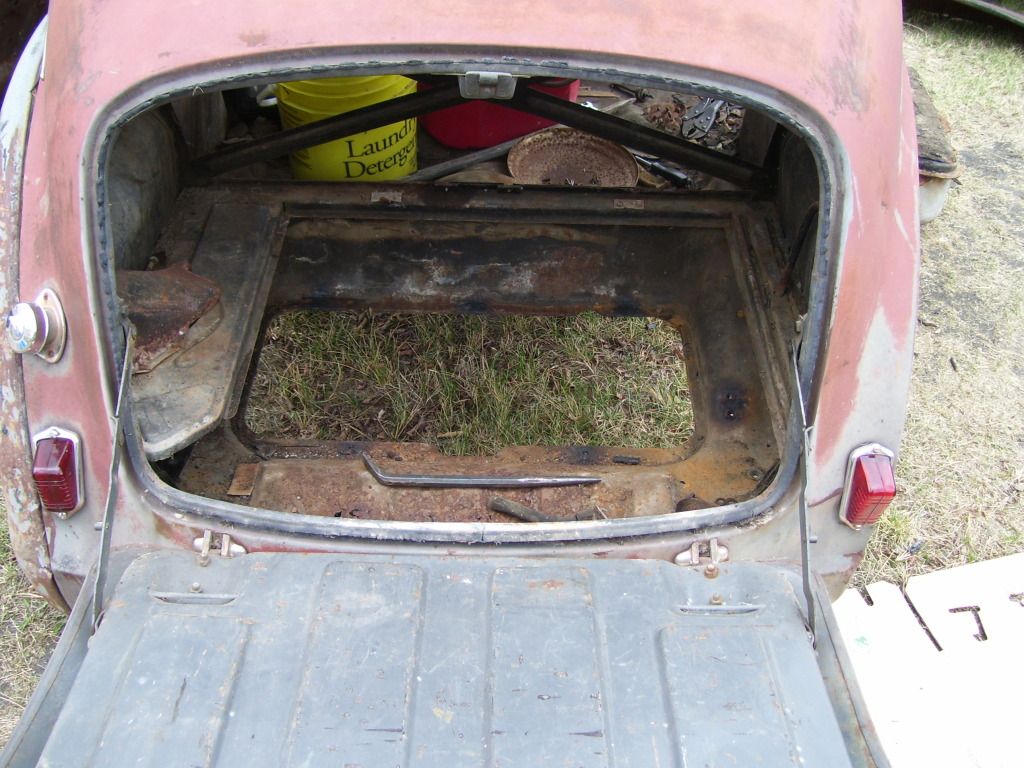

the roof looks good
thats about all for now, though on the gas tank, is it built in two sections that can be split? or are the two pressing welded together?
Thanks
_________________
1951 Austin A40 Devon |
|
| Back to top |
|
|
Rick
Site Admin

Joined: 27 Apr 2005
Posts: 22477
Location: UK
|
|
| Back to top |
|
|
Nick.S.
Joined: 08 Nov 2011
Posts: 64
Location: Manitoba, Canada.
|
| Posted: Tue May 01, 2012 5:22 pm Post subject: |
|
|
Thanks Rick the dash was actually not to bad to do, we used four colours of acrylic paints ( red ochre, burnt umber, sepia, and a flesh colour) with a bit of careful mixing we matched the original paint perfectly, then a bit of terry cloth was used as a graining tool. Im planning on giving it a couple coats of spray lacquer to protect it.
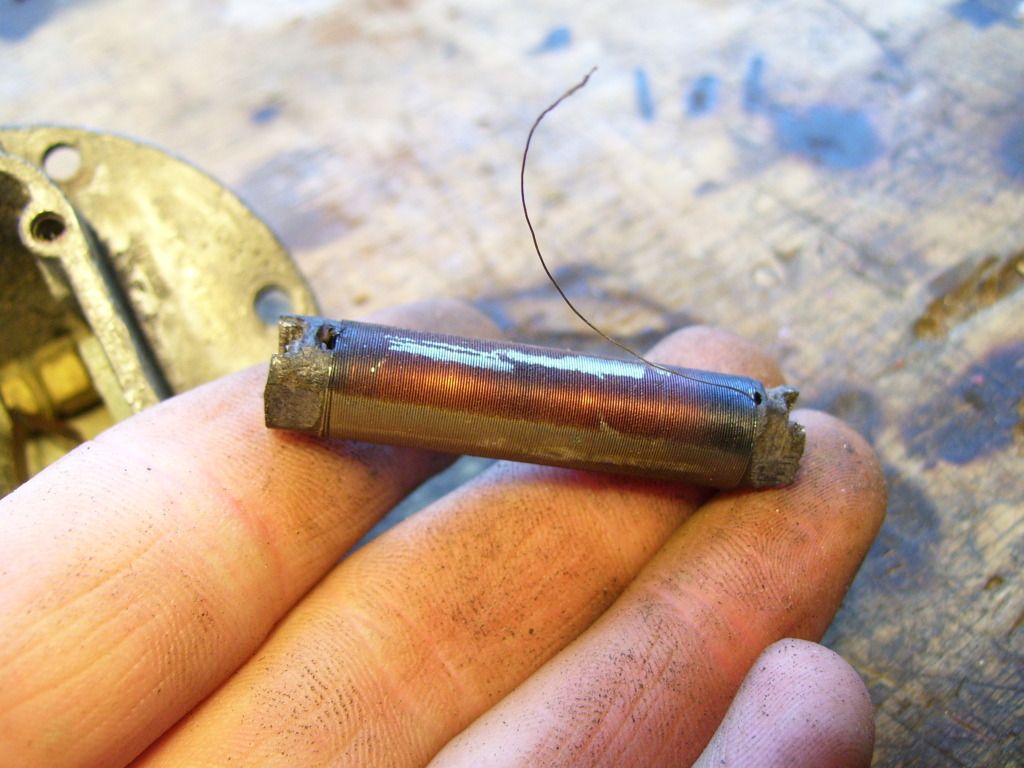
yesterday i pulled the sender unit out of the fuel tank, bit disapointing i think i might have to replace it  the float has hole rusted though, the rheostat is stuck and i cant seem to get anything apart on it. If i can get the wiper arms on the rheostat moving and cleaned then i will just make a new float the float has hole rusted though, the rheostat is stuck and i cant seem to get anything apart on it. If i can get the wiper arms on the rheostat moving and cleaned then i will just make a new float
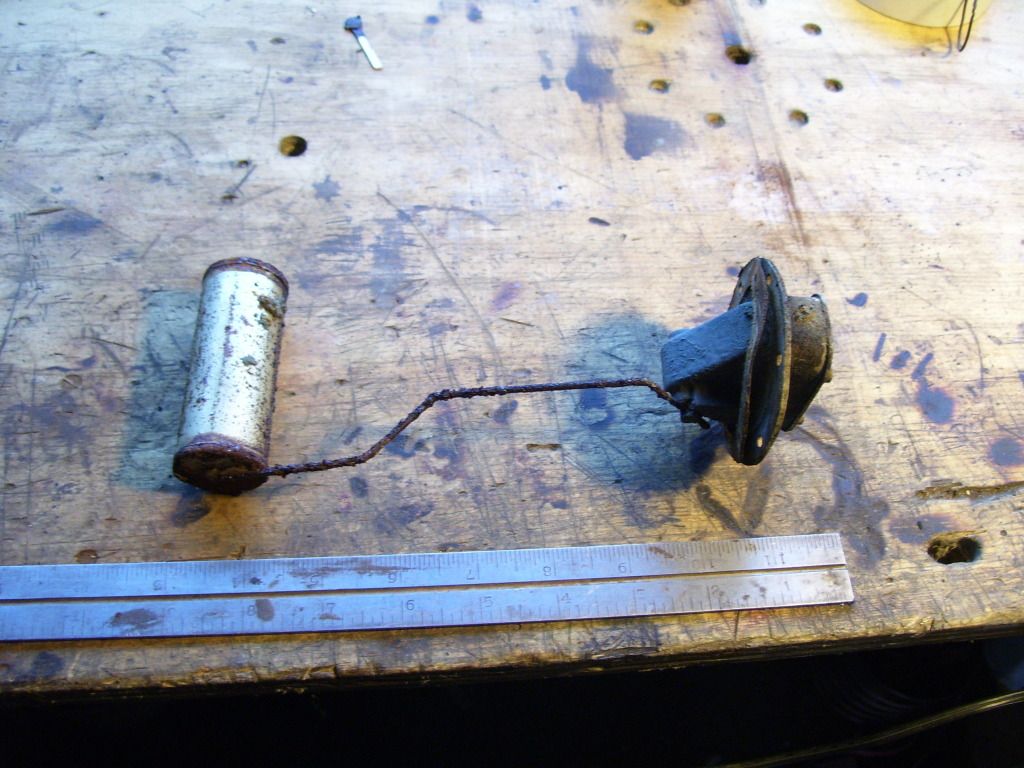

does any one have some tips on rebuilding the sender? Many thanks
_________________
1951 Austin A40 Devon |
|
| Back to top |
|
|
Nick.S.
Joined: 08 Nov 2011
Posts: 64
Location: Manitoba, Canada.
|
| Posted: Fri May 04, 2012 5:43 pm Post subject: |
|
|
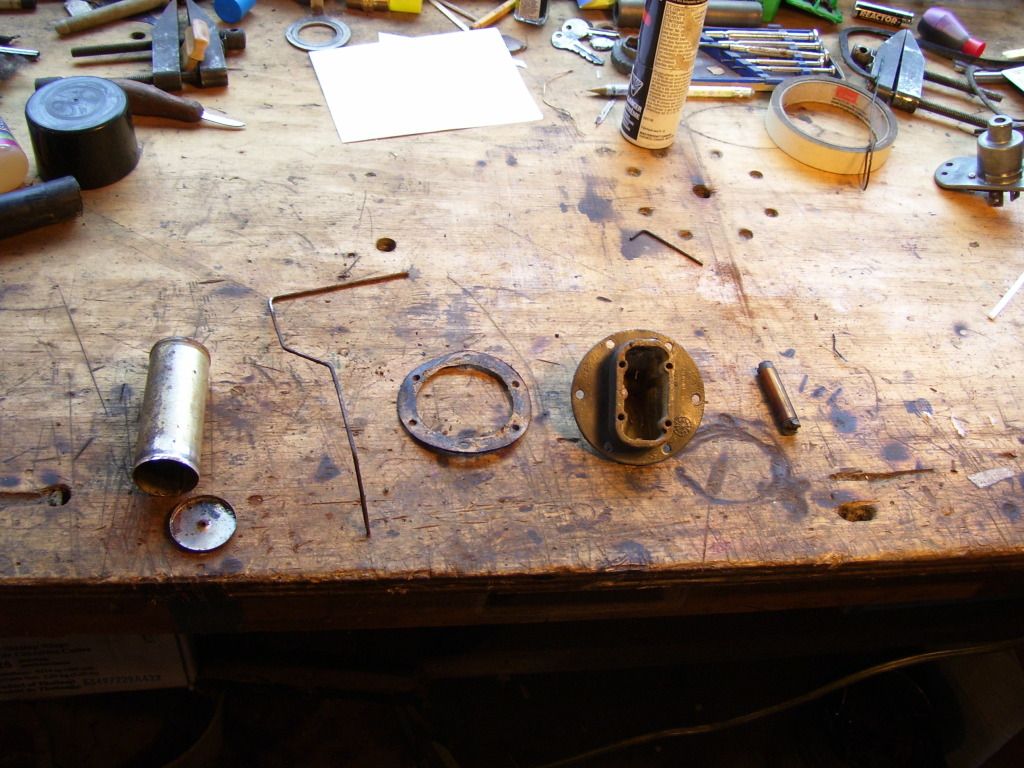
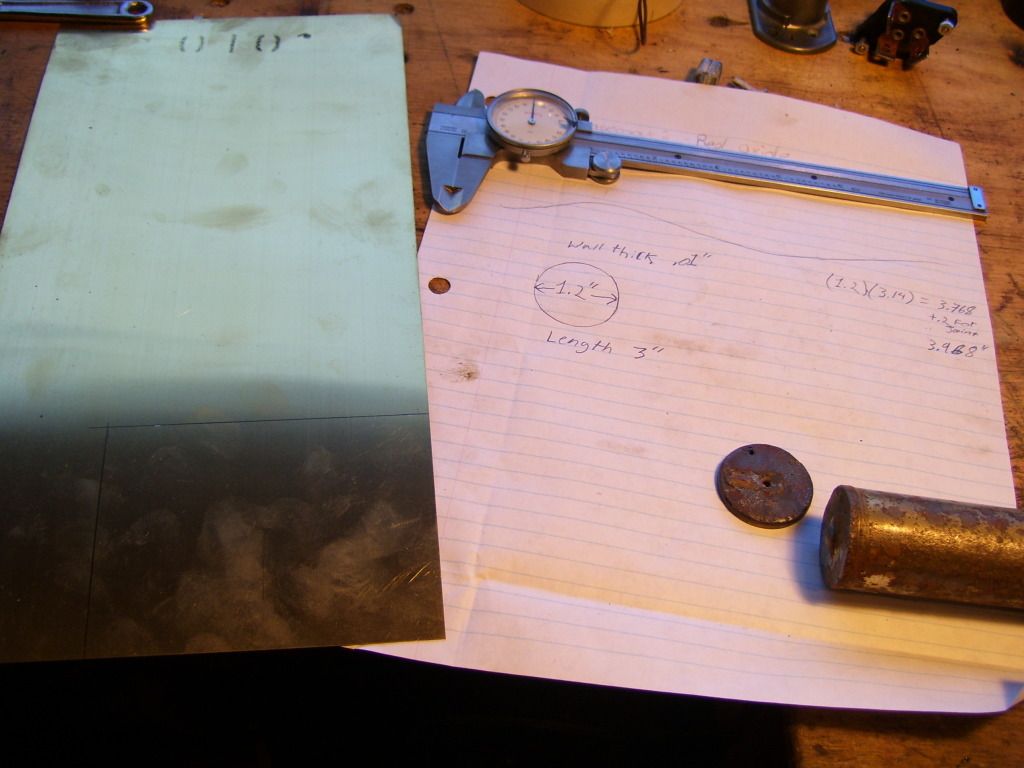
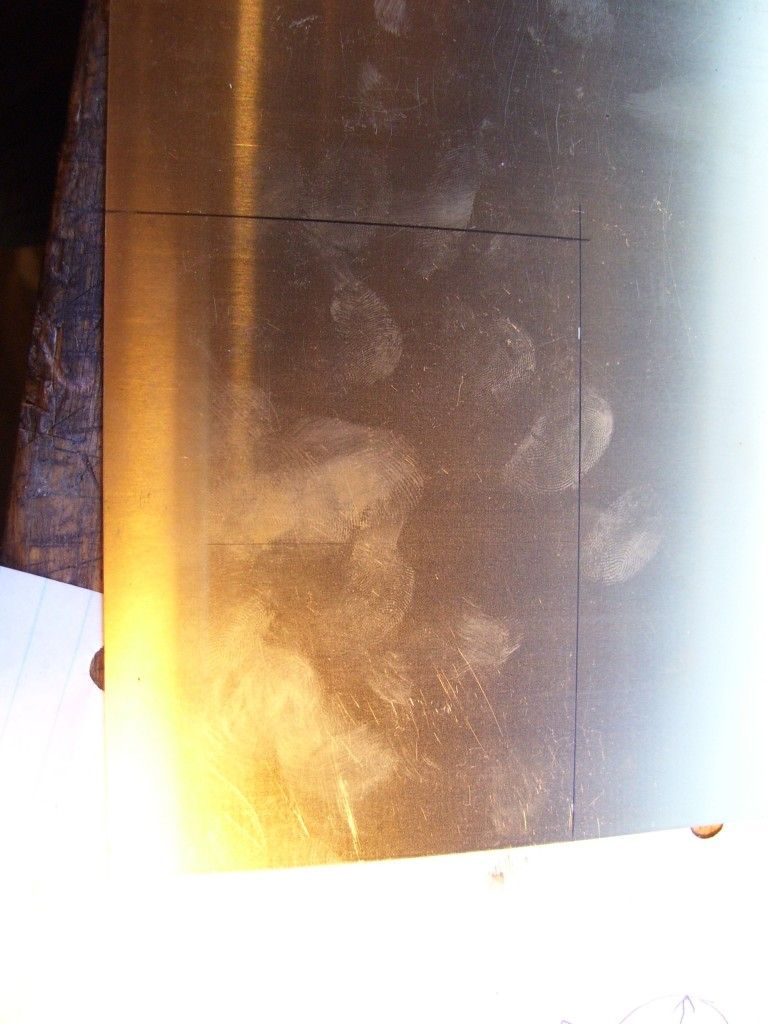
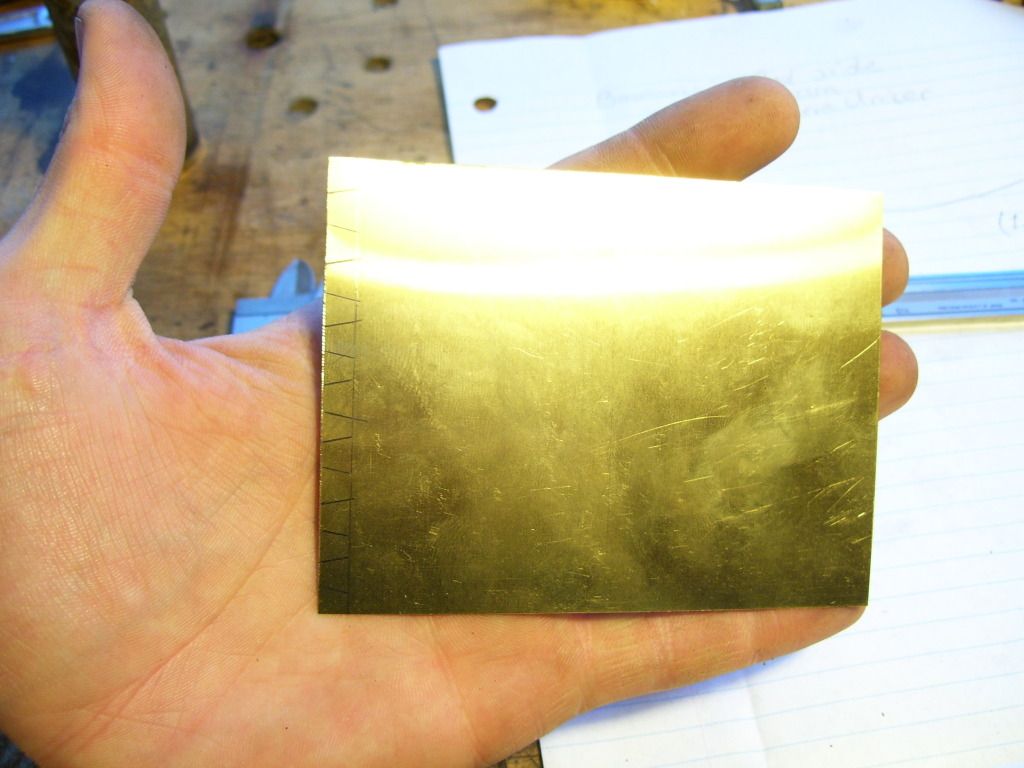
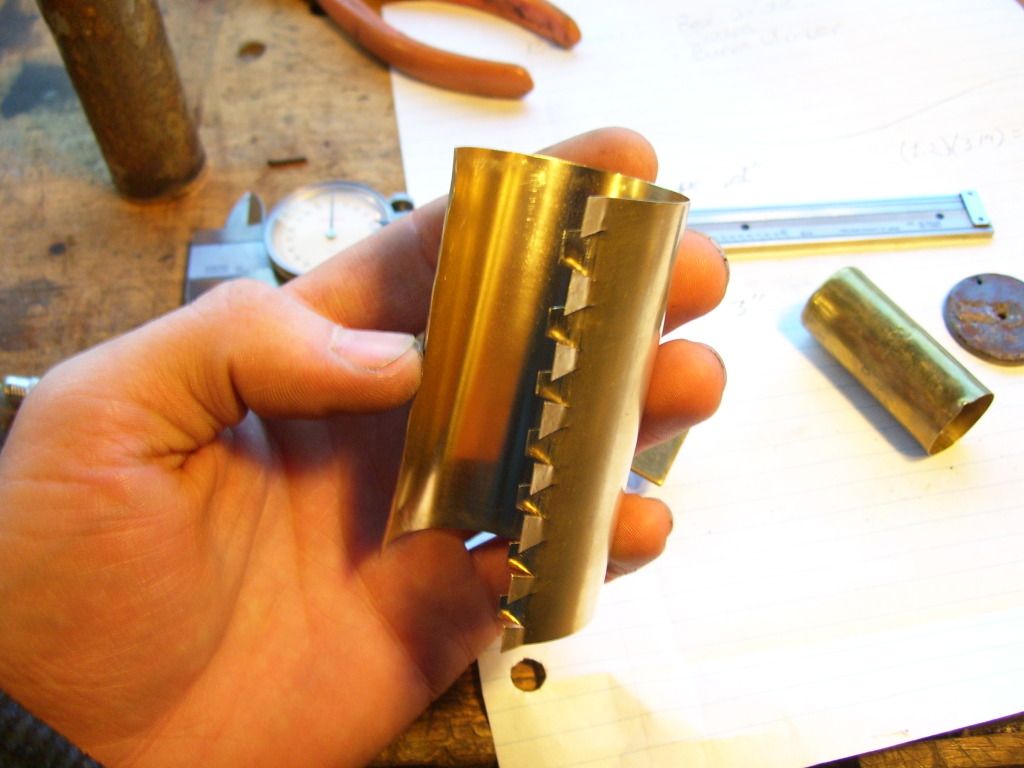
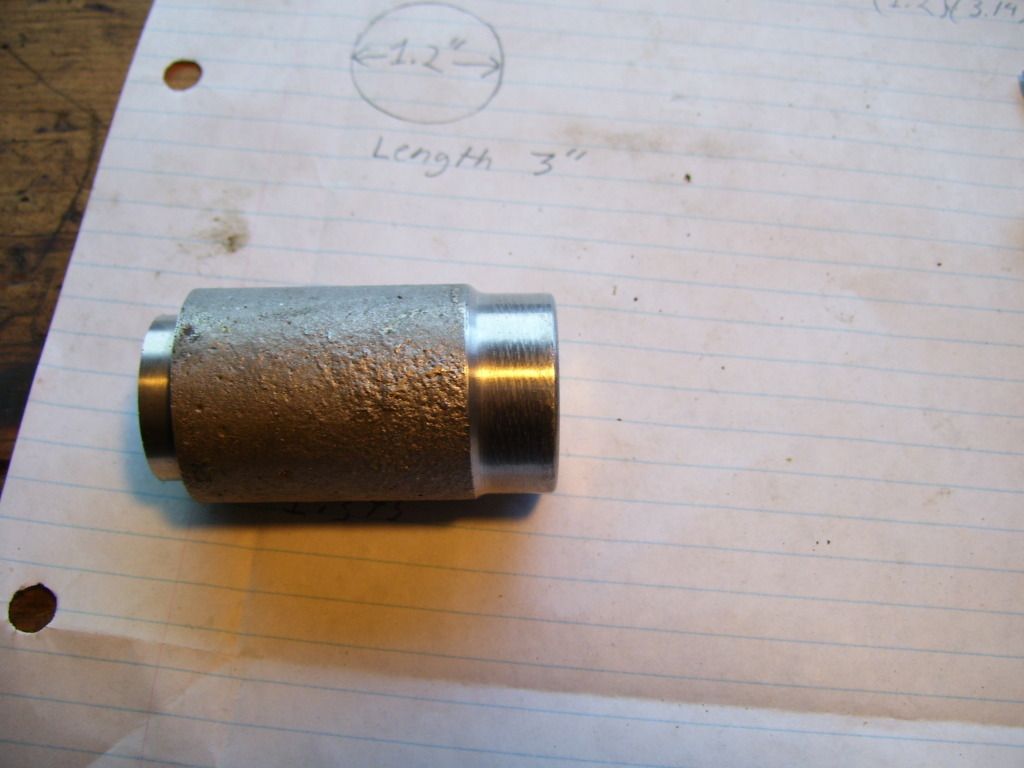
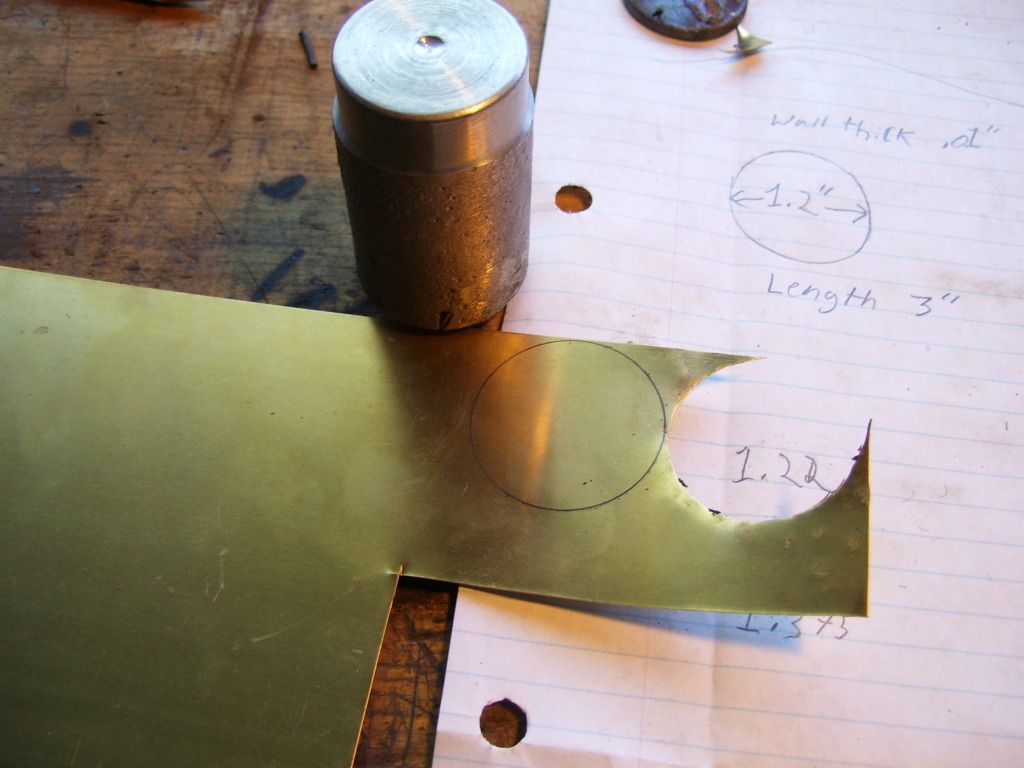
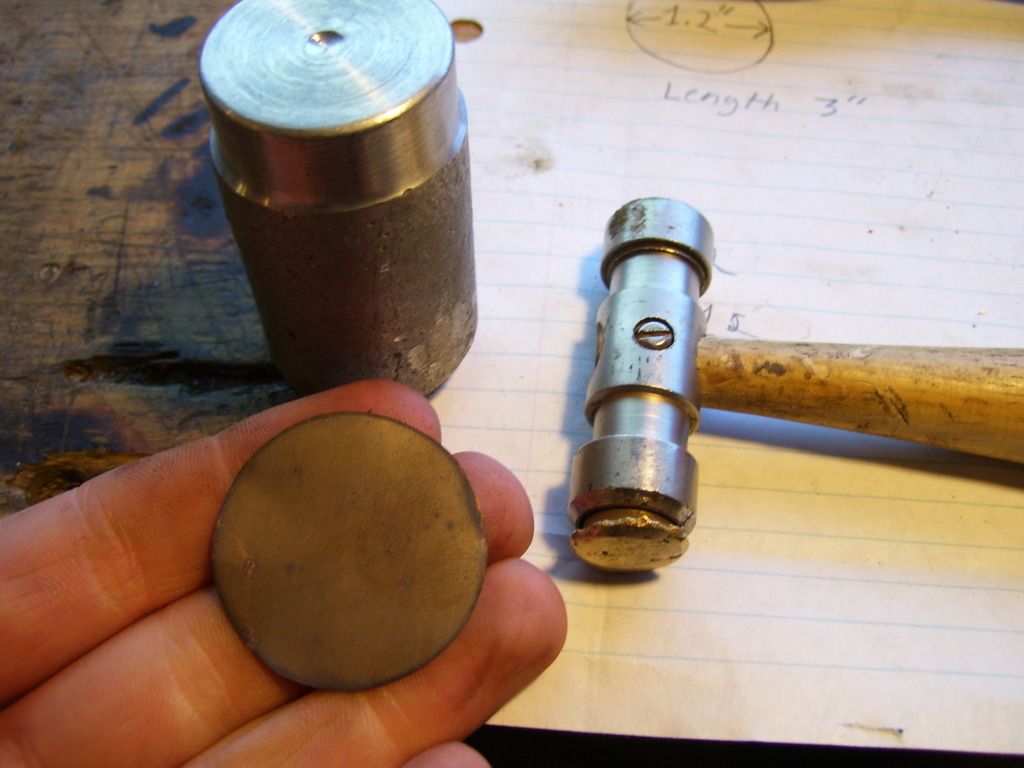
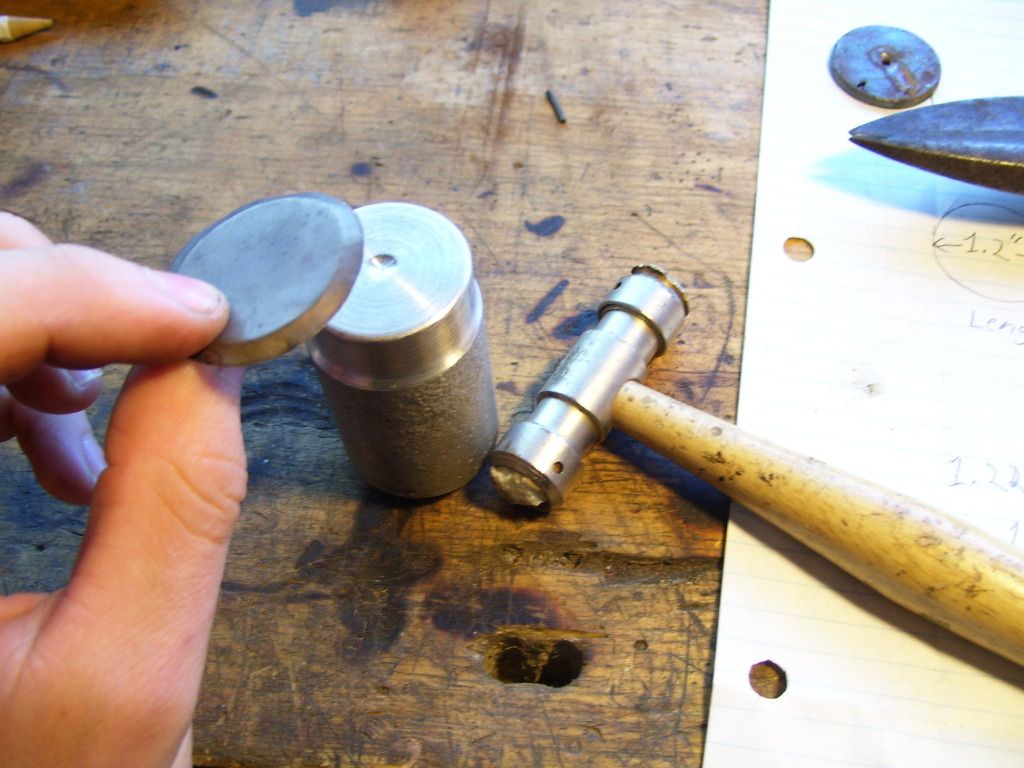
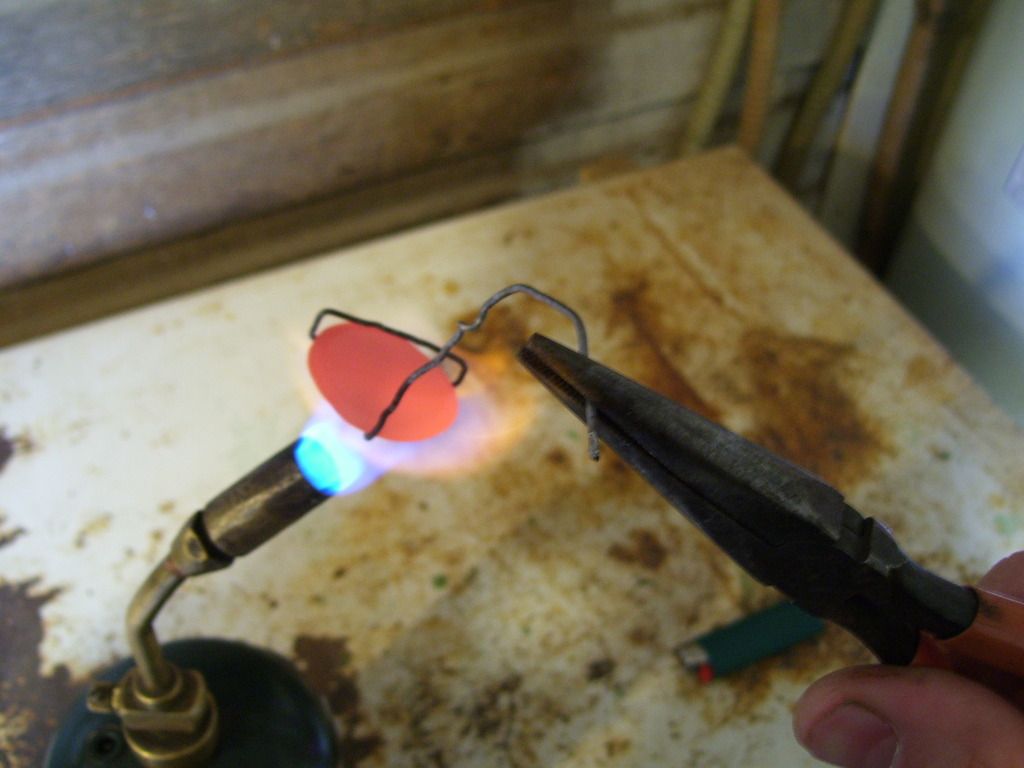
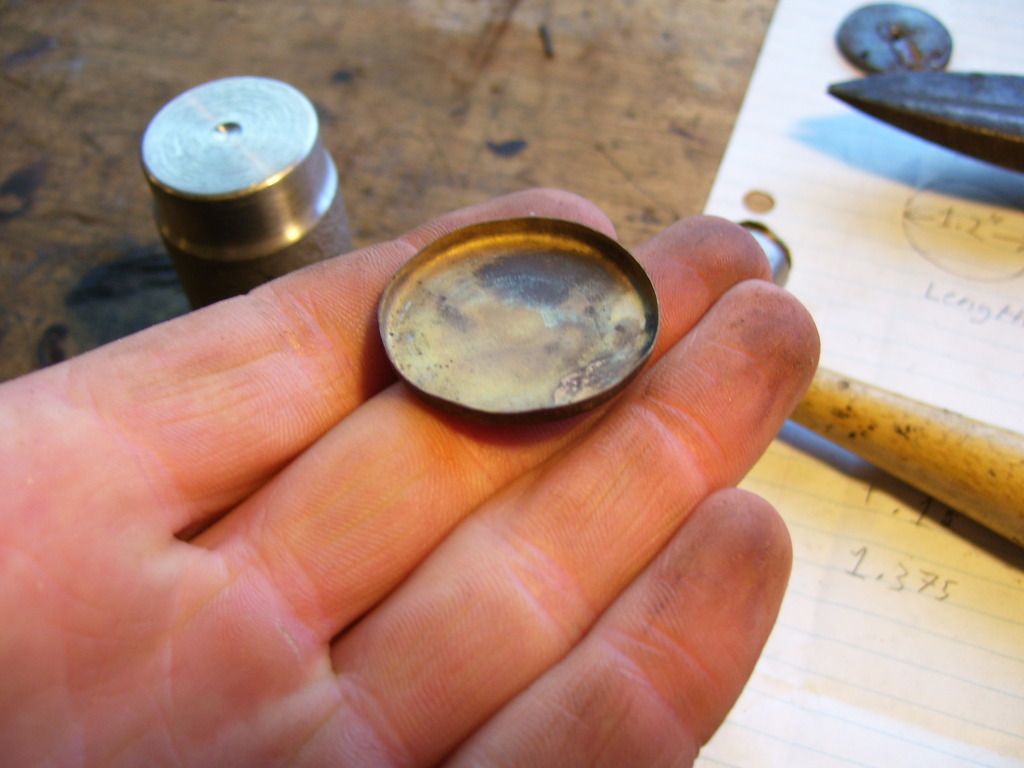
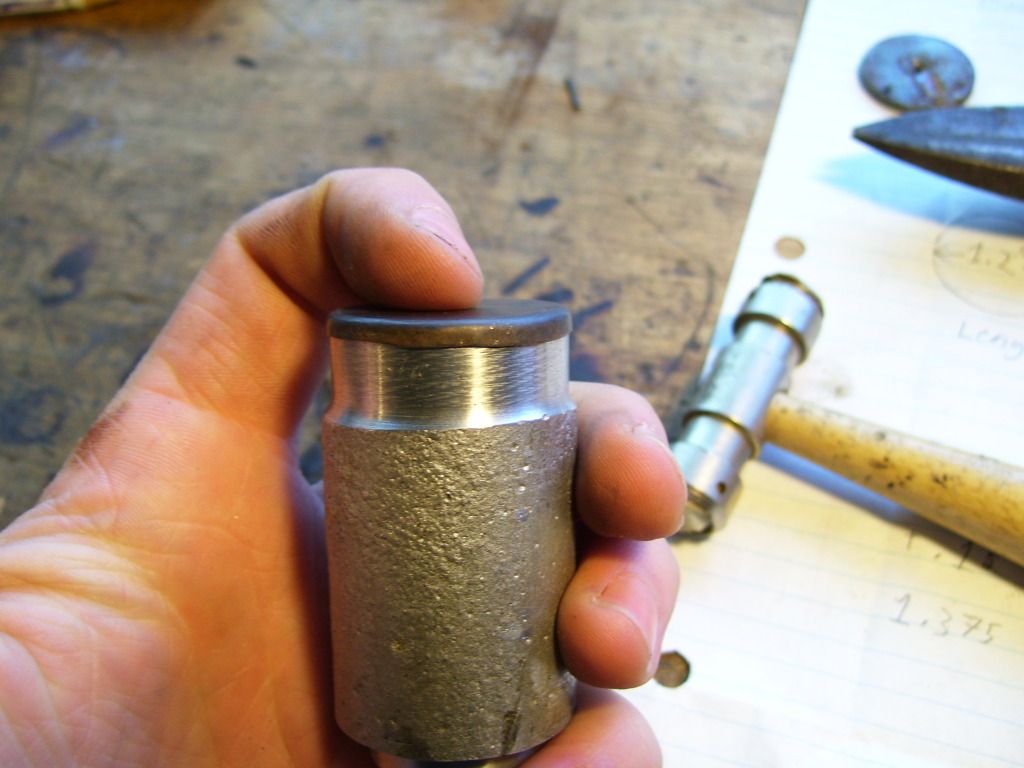
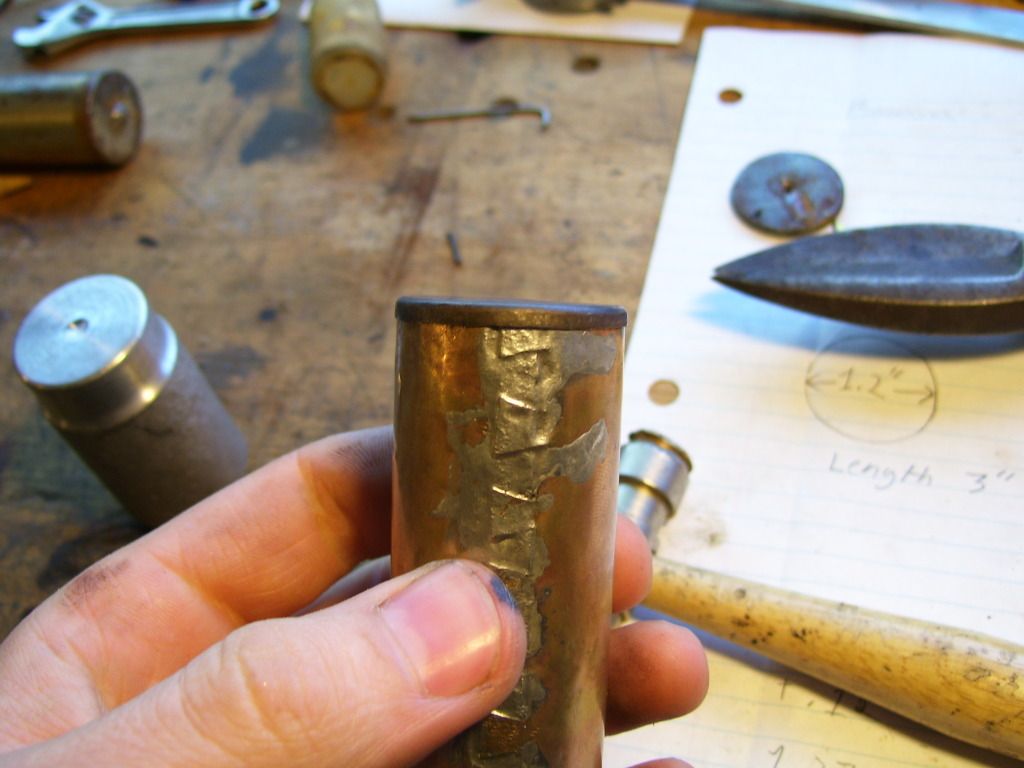
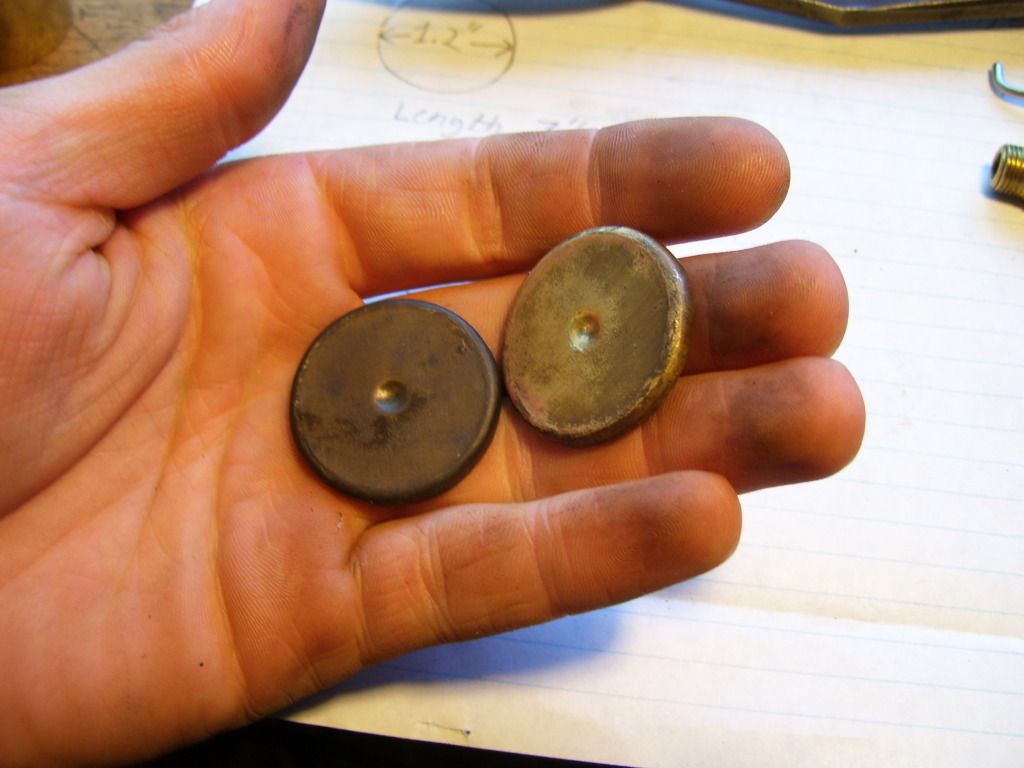
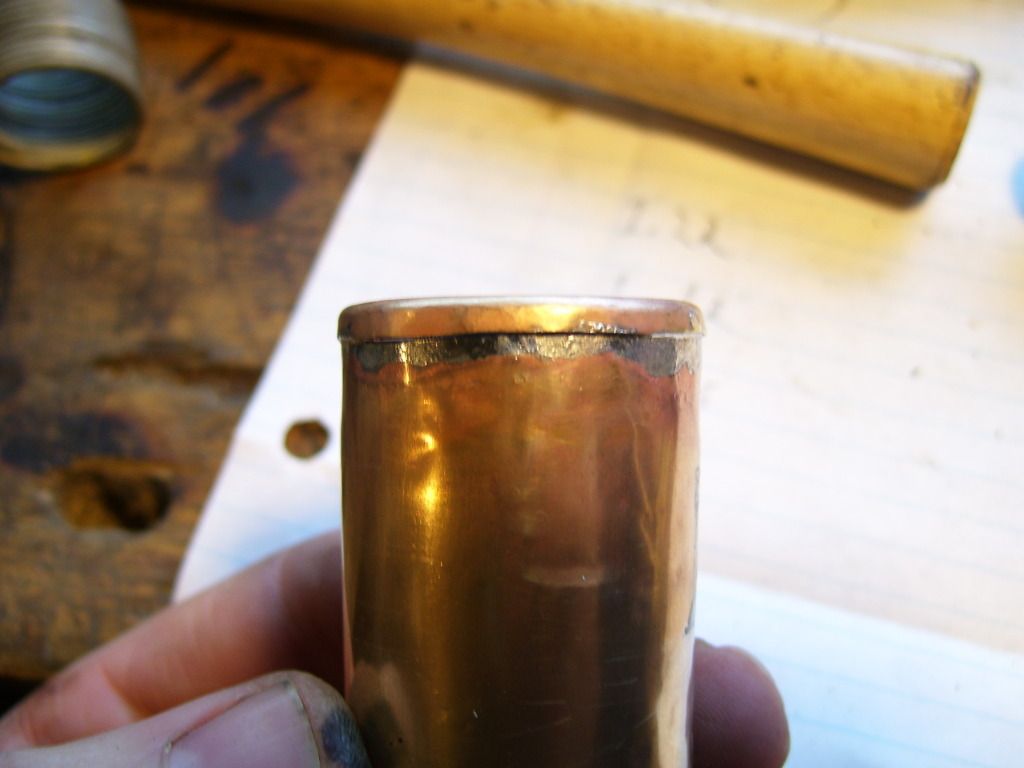
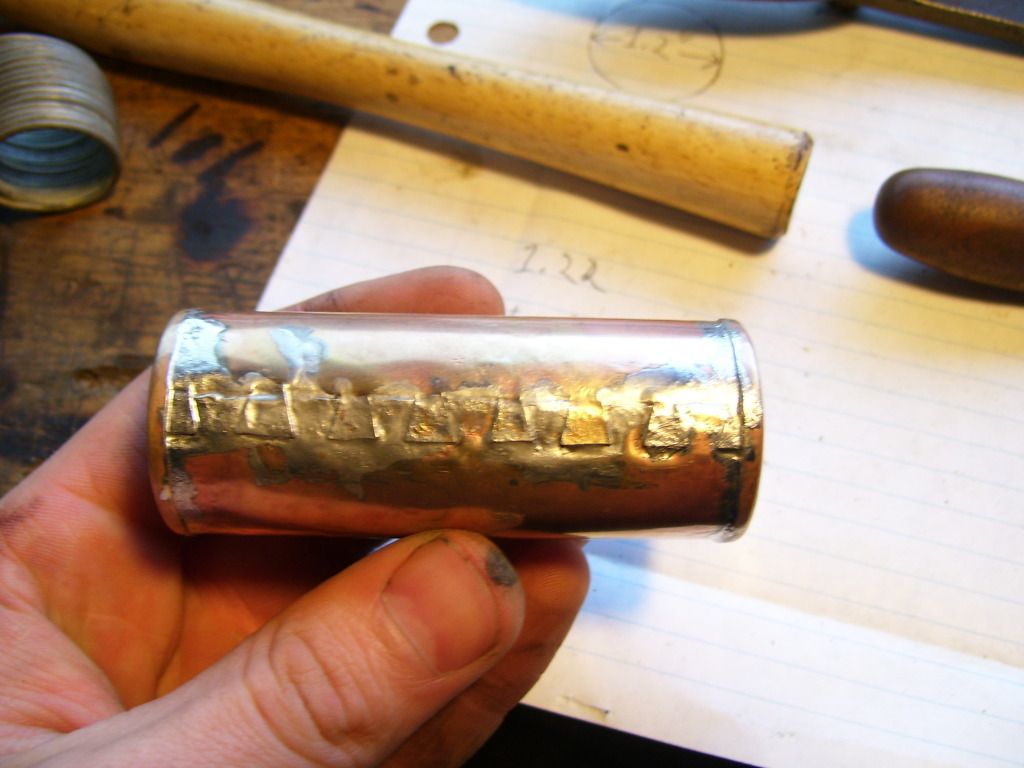
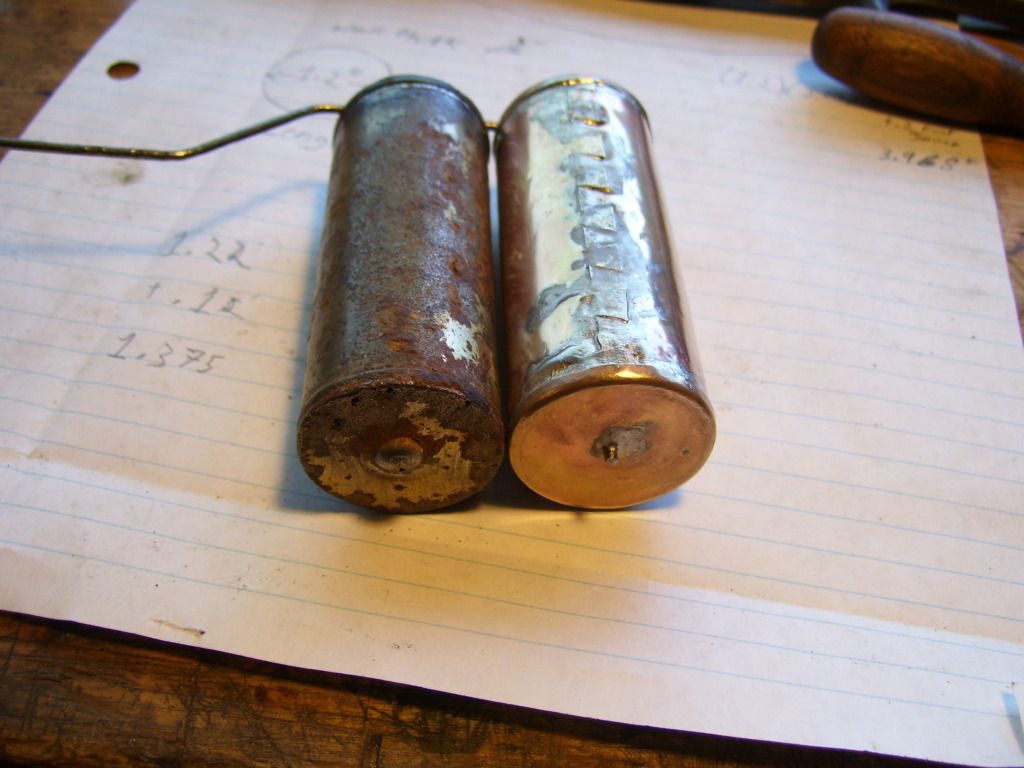
well, i'm making more progress. i managed to wiggle the resistant wire coil out of the rheostat and got the wiper arms moving nice and smoothly. got every thing cleaned up and now i am working on making the new float, i decided to use 0.01" brass shim stock for this ( same thickness as the old float, but brass is nicer to work with) instead of making a roll lock joint on the float body im using a coppersmiths joint. i will make a mandrel later on to form the end caps.
on to some pictures
everything dis-assembled

now on to making the new float,
this is the type of joint im going to use, looks kinda neat

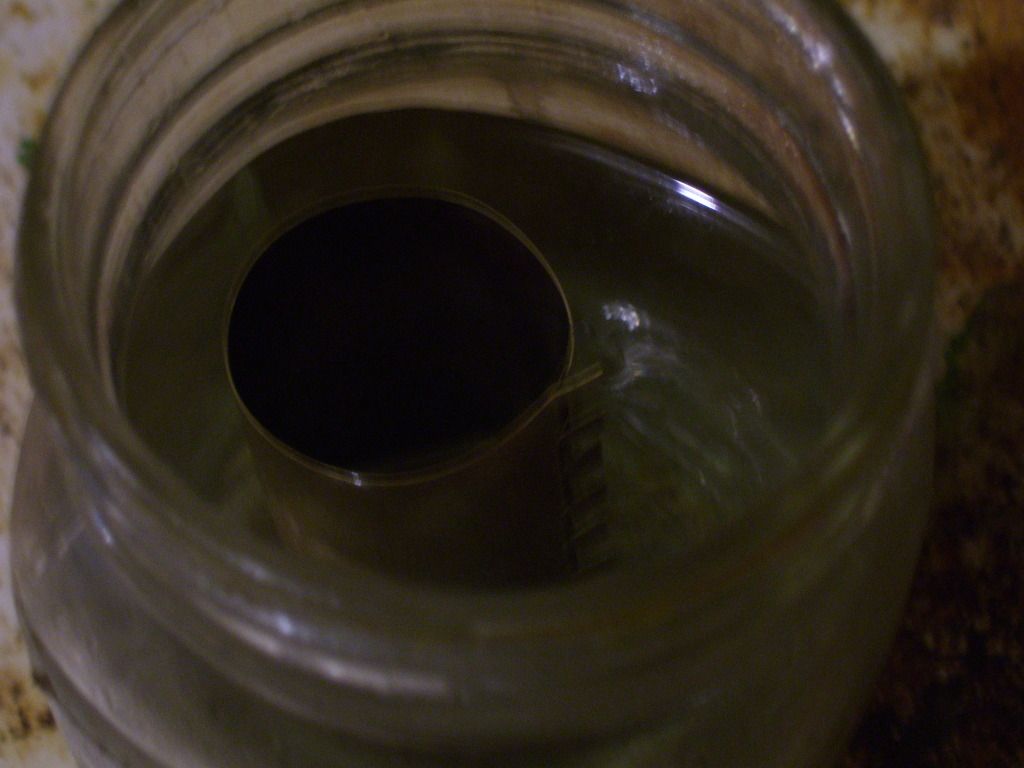
a quick pickling before soldering
wired up to solder


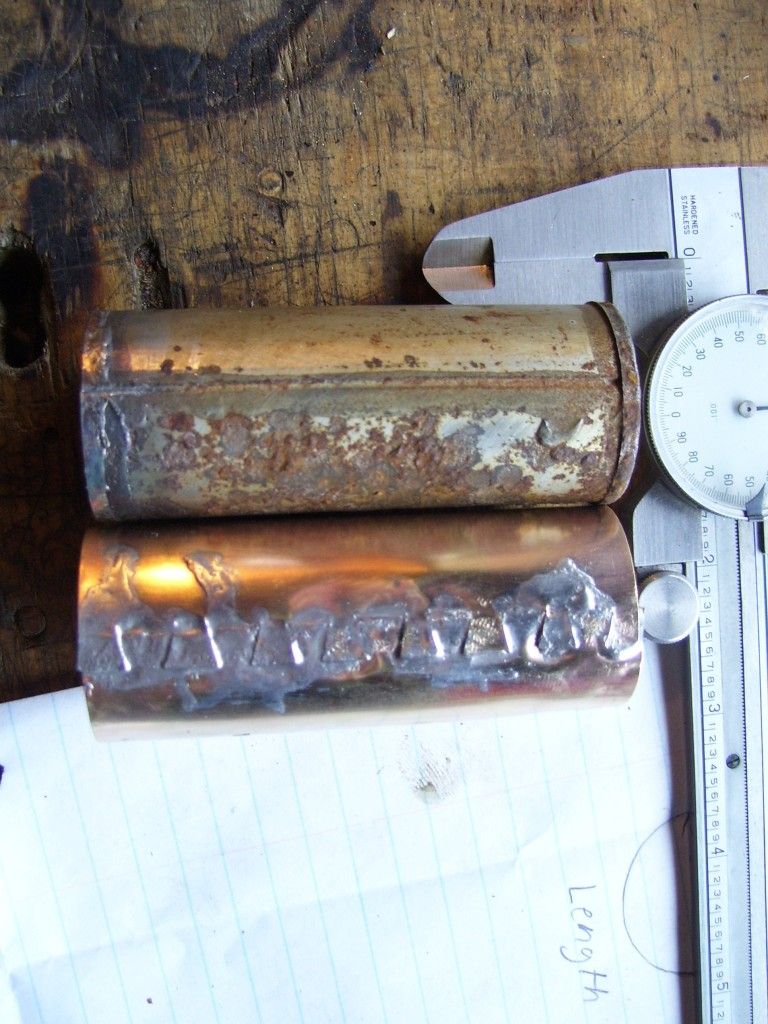
well thats it for now, just have to make the end caps and solder it all together.
_________________
1951 Austin A40 Devon |
|
| Back to top |
|
|
D4B

Joined: 28 Dec 2010
Posts: 2083
Location: Hampshire UK
|
| Posted: Fri May 04, 2012 6:19 pm Post subject: |
|
|
Great work Nick, this car was very lucky to meet you  |
|
| Back to top |
|
|
NONORT
Joined: 26 Apr 2012
Posts: 55
Location: Southampton
|
| Posted: Mon May 07, 2012 9:27 am Post subject: |
|
|
| Sorry I didn't read this earlier. The Rolls Royce that I work on has a cork for a float. I believe it is the original 1927 vintage? A cork is also used on the engine oil level float. Modern fuels don't seem to have done any damage to the corks in either position. May be you could have put a cork inside the old can! |
|
| Back to top |
|
|
welshrover
Joined: 09 Aug 2011
Posts: 326
|
| Posted: Mon May 07, 2012 1:09 pm Post subject: |
|
|
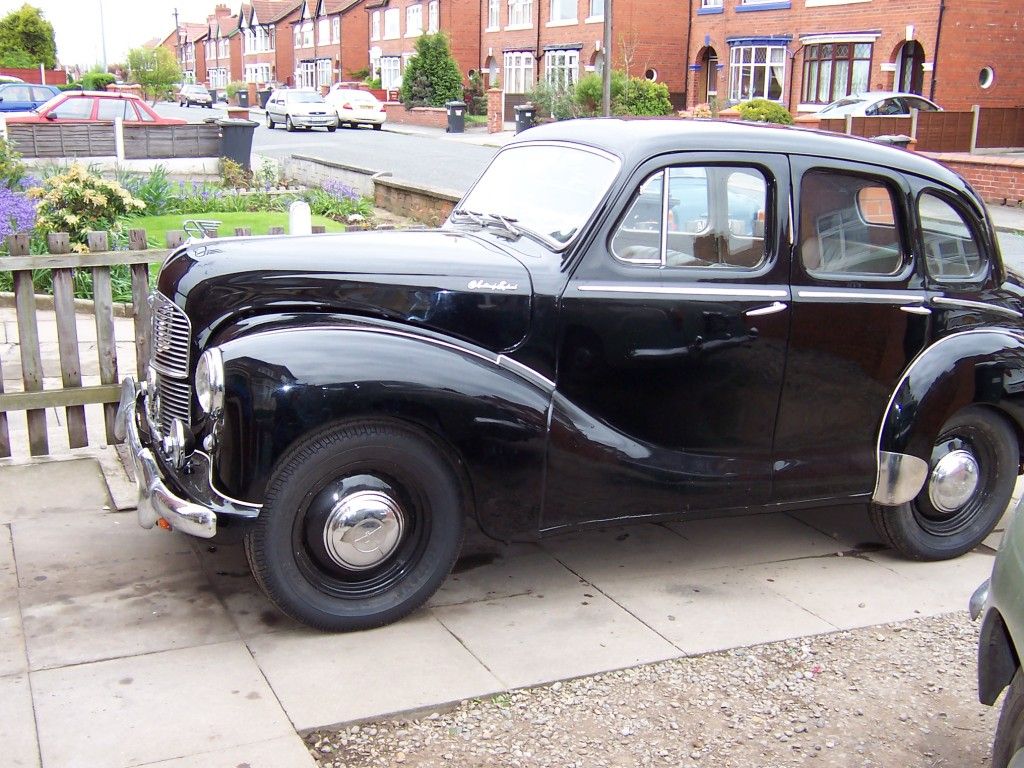
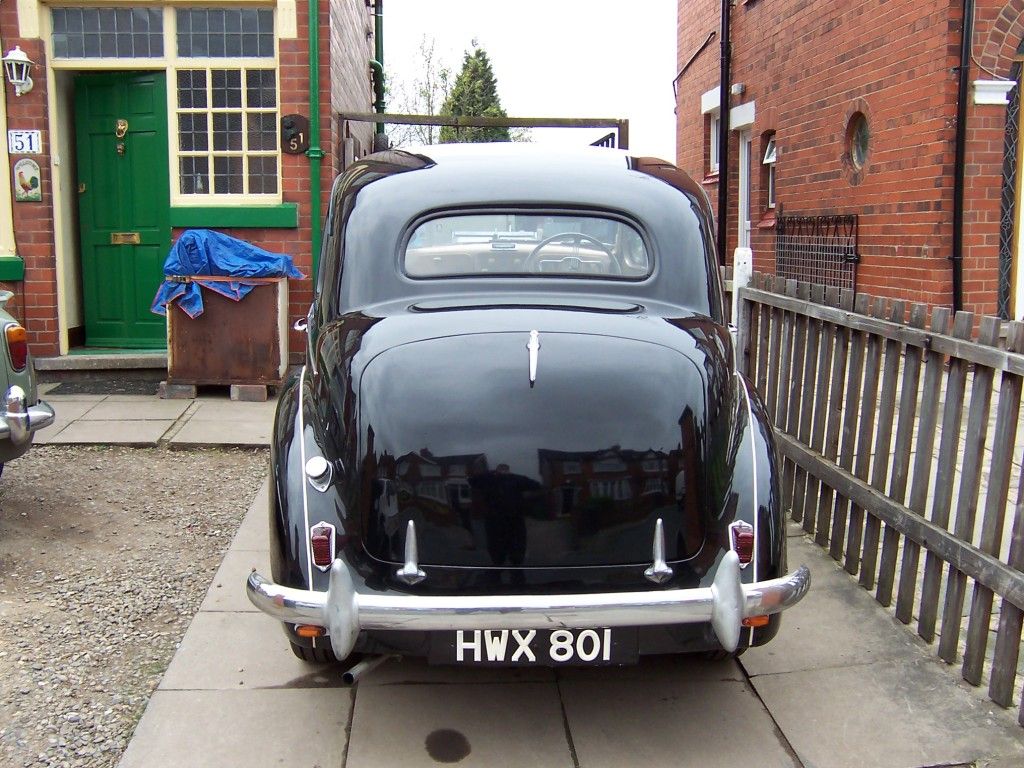
keep up the good work ,i thought id give you a bit of inspiration heres a few pictures of an a 40 i used to own a few years ago
craig
 |
|
| Back to top |
|
|
Nick.S.
Joined: 08 Nov 2011
Posts: 64
Location: Manitoba, Canada.
|
| Posted: Wed May 09, 2012 7:41 pm Post subject: |
|
|
D4B, Thanks!
NONORT, i thought of using cork, but i figured making a new float would have less head aches the old float is pretty lacy
welshrover, WOW! thats beautiful! is the white T-beading standard with the black paint? mine was grey paint with black T-beading, i like the contrast of the white beading though.
on to some pictures of my progress
hope no one minds that there are a lot of pictures, if you do just say!
the end cap mandrel, just a scrap of cast aluminum

thats it for now
_________________
1951 Austin A40 Devon |
|
| Back to top |
|
|
|
|
You cannot post new topics in this forum
You cannot reply to topics in this forum
You cannot edit your posts in this forum
You cannot delete your posts in this forum
You cannot vote in polls in this forum
|
php BB powered © php BB Grp.
|


