|
|
| Author |
Message |
Kelsham
Joined: 18 Jan 2009
Posts: 349
Location: Llandrindod Wells Powys
|
 Posted: Mon Feb 25, 2013 11:22 am Post subject: campervan Posted: Mon Feb 25, 2013 11:22 am Post subject: campervan |
 |
|
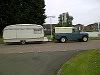
I have just bought a 1981 VW LT35 campervan, it came with moss and algae as part of the package. It is the early petrol version. To my surprise I am finding spares for the engine difficult to source. I can buy parts for my 1932 BSA trike more easily.
I have started to remove the moss and algae, treating the rust and making up a repair front wheelarch. This spare is available for several hundred pounds. I bought a sheet of steel for 30 pounds.
I tried to follow the instructions for posting photographs but it seems photobucket has changed its format.
Given up for the time being.
regards kels |
|
| Back to top |
|
 |
D4B

Joined: 28 Dec 2010
Posts: 2083
Location: Hampshire UK
|
| Posted: Mon Feb 25, 2013 5:03 pm Post subject: |
|
|
Yes Photobucket asked if I wanted to "upgrade" to their new look site, and I said no thanks, I don't like it, please don't fix what isn't broke.....
But they took no notice and then said if I didn't upgrade I would no longer
be able to access my pics.... so I had to persevere with the new site.
As far as I can tell, to post a pic is now much more long winded:
1) open your Library in Photobucket (you should see small thumbnails of your pics)
2) Hover over the little cog (in the top right of the image you wish to post)
3) Click on "share"
4) click on Links
5) now you can click on IMG code as before
Hope this helps
VW spares what about Just Kampers ?
or found this on Google (don't know anything about them tho)
http://justlts.com/
Last edited by D4B on Mon Feb 25, 2013 7:04 pm; edited 1 time in total |
|
| Back to top |
|
|
Margo
Joined: 16 Jul 2012
Posts: 9
Location: Essex
|
| Posted: Mon Feb 25, 2013 5:31 pm Post subject: |
|
|
I used to work on VW LT's many years ago and the early 4cyl petrol engines are essentually detuned versions of what was fitted to the car range of the same era - Golf, Passat, Audi 80/100 etc. Parts should be plentiful 
The 6 cylinder petrol engines might be more difficult to find parts for but these were produced well in to 80's. |
|
| Back to top |
|
|
Kelsham
Joined: 18 Jan 2009
Posts: 349
Location: Llandrindod Wells Powys
|
| Posted: Wed Feb 27, 2013 10:11 am Post subject: |
|
|
I have emailed the company suggested, awaiting a reply, I need a water coolant tank and suspect it is only used on the Lt petrol 2litre engined variant.
Regards Kels. |
|
| Back to top |
|
|
D4B
Joined: 28 Dec 2010
Posts: 2083
Location: Hampshire UK
|
| Posted: Wed Feb 27, 2013 2:34 pm Post subject: |
|
|
Hi Kels,
Might also be worth calling your local branch of GSF:
http://www.gsfcarparts.com/ |
|
| Back to top |
|
|
Kelsham
Joined: 18 Jan 2009
Posts: 349
Location: Llandrindod Wells Powys
|
| Posted: Wed Mar 06, 2013 3:40 pm Post subject: |
|
|
I started to make a wheel arch repair panel, I made a form out wood and hammered the shape out. I got the radius slightly out but think it is repairable.
I am unable to source a water coolant tank in spite of trying all suggested suppliers and a few not mentioned. It seems because it has the 2 litre engine parts are in short supply.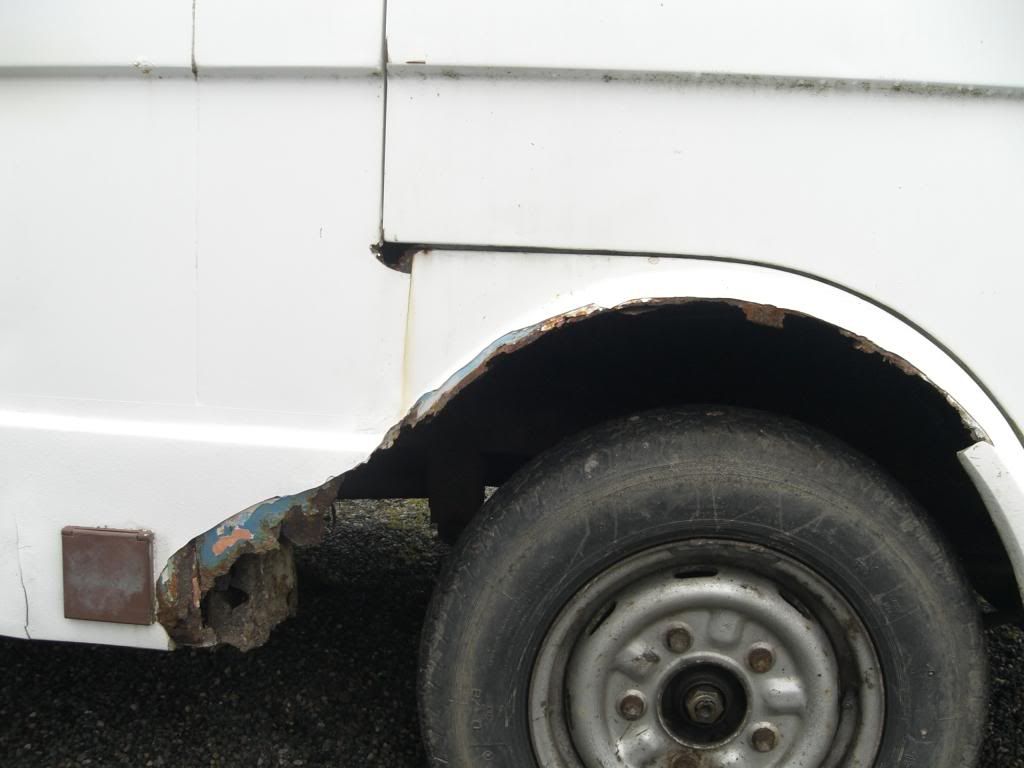 |
|
| Back to top |
|
|
Kelsham
Joined: 18 Jan 2009
Posts: 349
Location: Llandrindod Wells Powys
|
| Posted: Wed Mar 06, 2013 3:43 pm Post subject: |
|
|
seem unable to send more than one picture at a time. Heres the repair panel, I hope.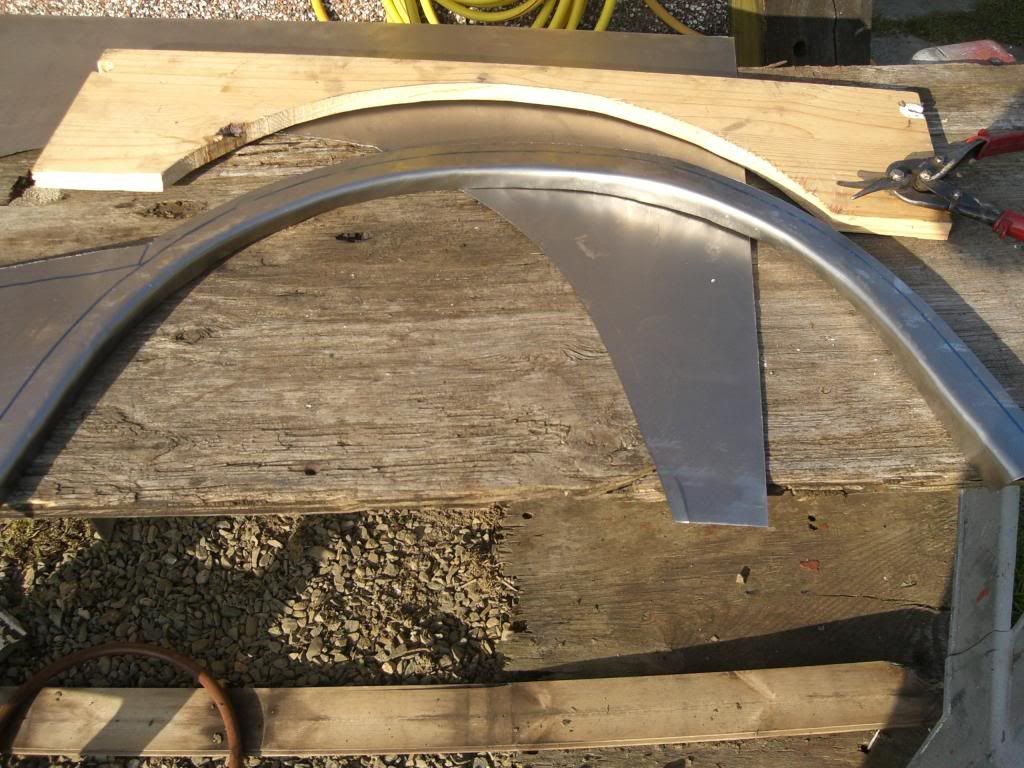 |
|
| Back to top |
|
|
D4B
Joined: 28 Dec 2010
Posts: 2083
Location: Hampshire UK
|
| Posted: Wed Mar 06, 2013 5:45 pm Post subject: |
|
|
Nicely done, did you fold the edge over the wood form then? or was there
more to it than that? |
|
| Back to top |
|
|
Kelsham
Joined: 18 Jan 2009
Posts: 349
Location: Llandrindod Wells Powys
|
| Posted: Wed Mar 06, 2013 10:21 pm Post subject: |
|
|
No, that's it. I cut the wooden form out using the other side of the van as a pattern, placed the piece of wood against the wheelarch and drew round it.
Then I cut the wooden shape.
Then used the wooden pattern to mark the new steel. allowed enough surplus to form the lip, clamped the metal on the wood and to the bench and worked from the centre round each side in turn.
It is important when using wood as the hammer form to make sure it is clamped firmly.
Once I had the inner lip, I cut the width of the arch and used the resulting former to tap the other side down.
I fear I did not clamp it well enough at this juncture and the panel closed inwards slightly. I may have to cut and weld if I can't stretch it.
Overall I am pleased with the result.
Kels. |
|
| Back to top |
|
|
Margo
Joined: 16 Jul 2012
Posts: 9
Location: Essex
|
| Posted: Thu Mar 07, 2013 11:04 am Post subject: |
|
|
Fair amount of work there. I take it you are making a new inner arch as well as that area is structural – you could end up sitting on the wheel 
The jacking point has seen better days as well and how much filler – some history there  |
|
| Back to top |
|
|
Kelsham
Joined: 18 Jan 2009
Posts: 349
Location: Llandrindod Wells Powys
|
| Posted: Thu Mar 07, 2013 2:30 pm Post subject: |
|
|
Yes the inner arch will be needed, it did not take long to make the outer, clamp wood to N/S arch mark with a marker quick cut with a jigsaw.
Use wood as cutout guide and then recut wood and form second angle.
Easy, not much skill needed, the inner is more challenging, due to curvature.
In some ways I find it easier to replace larger pieces as needed here.
All i need is some sun, raining again.
Kels. |
|
| Back to top |
|
|
|


