
Classic cars forum & vehicle restoration.
|
|
| Author |
Message |
john-saab
Guest
|
 Posted: Sun Jul 01, 2007 7:24 pm Post subject: Volvo PV445 Posted: Sun Jul 01, 2007 7:24 pm Post subject: Volvo PV445 |
 |
|
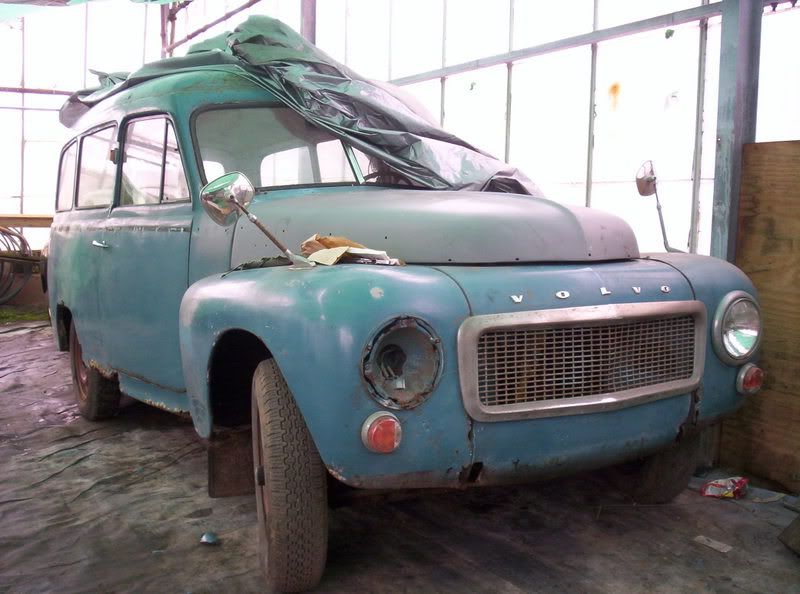
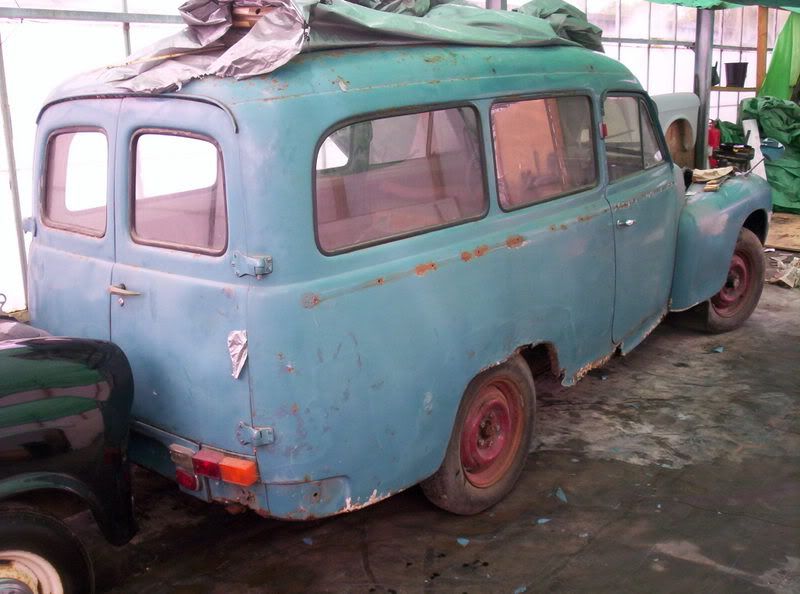
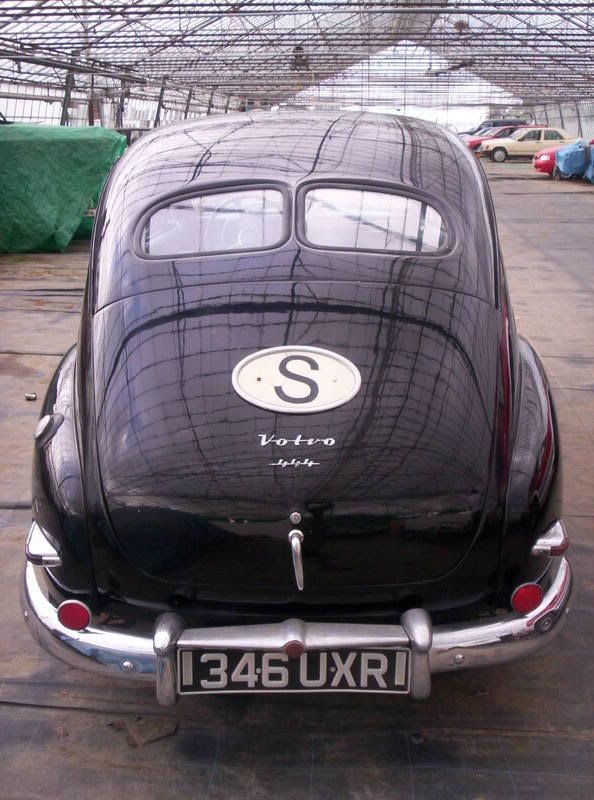
Over the next few months (years?) i will be helping a friend restore one of only 3 known Volvo PV445's in the U.K.
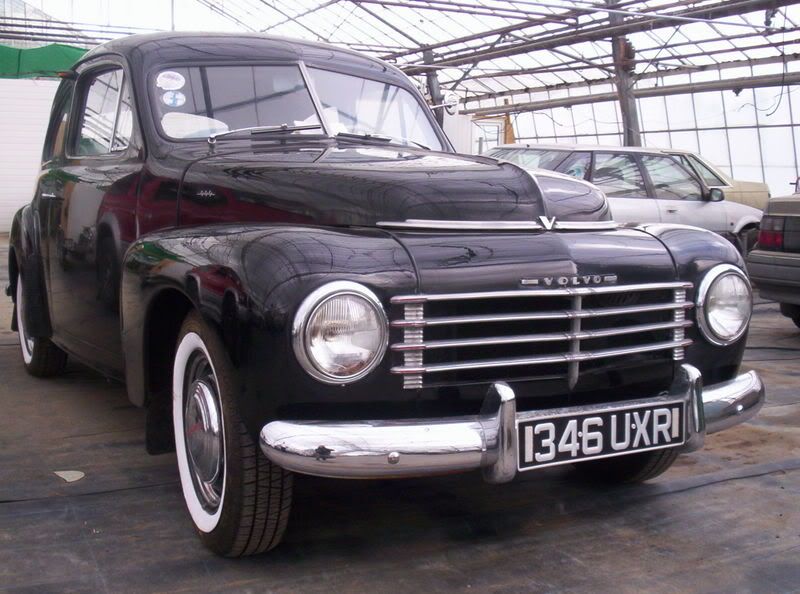
Ray has collected many parts in preperation...he has a PV444 so we have a "reference vehicle"
The PV will need quite a bit of welding and we hope to finish it so that it can be shown next year...a few other vehicles may get in the way though (at the moment i have 7 "projects" and Ray has more)
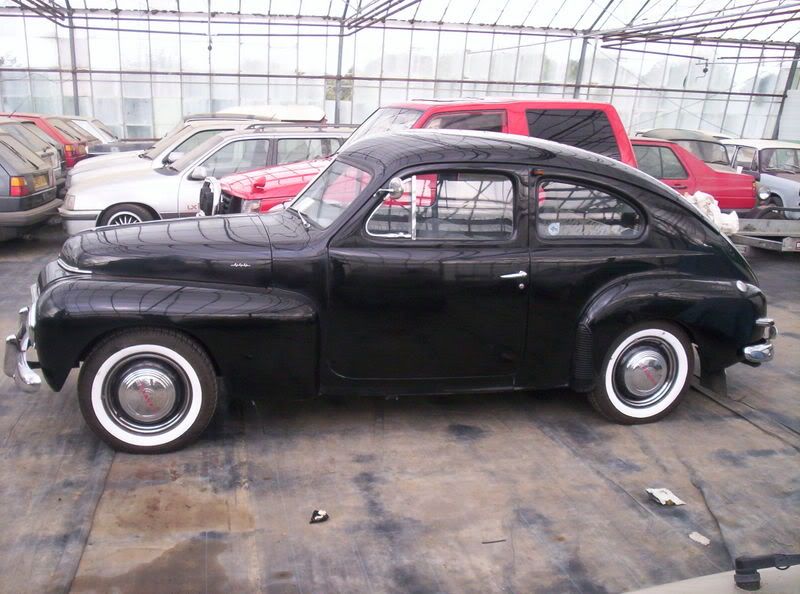
And heres Rays PV444
 |
|
| Back to top |
|
 |
Rick
Site Admin

Joined: 27 Apr 2005
Posts: 22834
Location: UK
|
|
| Back to top |
|
|
Rick
Site Admin
Joined: 27 Apr 2005
Posts: 22834
Location: UK
|
|
| Back to top |
|
|
JC T ONE
Joined: 30 Oct 2008
Posts: 1139
Location: Denmark
|
| Posted: Mon Apr 08, 2013 5:03 pm Post subject: |
|
|
Hi,
in that last photo you posted, I spot what might be a Austin/Morris 1100/1300 behind the Red VW Jetta ?
or is it a Wood & Pickett Margrave ?
Jens Christian
_________________
http://www.eurods.eu/wp/index.html |
|
| Back to top |
|
|
john-saab

Joined: 06 Dec 2007
Posts: 341
Location: West Dorset
|
| Posted: Wed Apr 10, 2013 8:32 am Post subject: |
|
|
Copied from a thread I posted on another forum...
If it seems a bit dis-jointed that's because I had to edit 9 pages to make this one post..enjoy..
The time has come to pull out a project thats been sitting on the back boiler for 6 months and has been passed from owner to owner for 10 years...we have all the panels...a new engine and 99% of the bits to finish it...including a genuine roof rack  . The plan is to have it ready for summer and drive it to the Volvo nationals in Sweden...this could be one of teh most exciting projects to date . The plan is to have it ready for summer and drive it to the Volvo nationals in Sweden...this could be one of teh most exciting projects to date 
Jan 12th 2008
I spent the whole day clearing a space for the Volvo...and i'm ready to start tomorrow ..more pics..
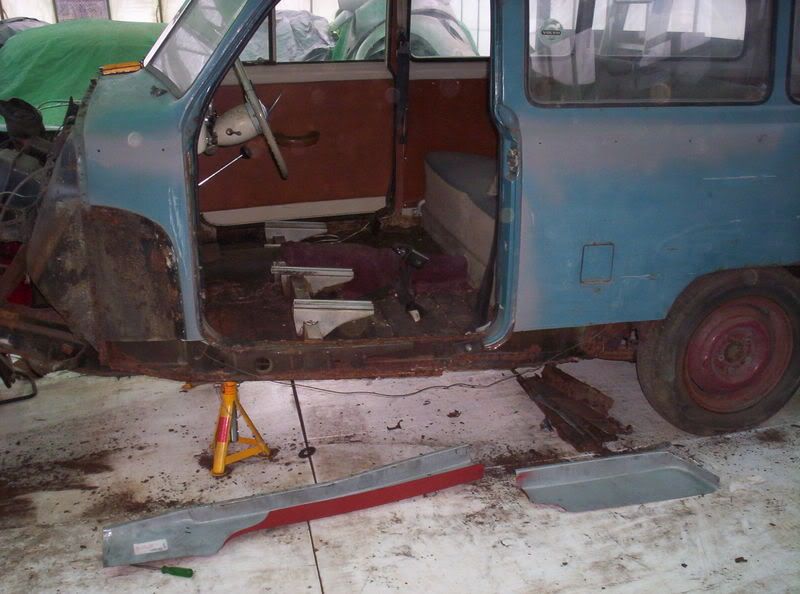
Whats got to go onto...this is one side...the other is the same...the panels look to be excellent!
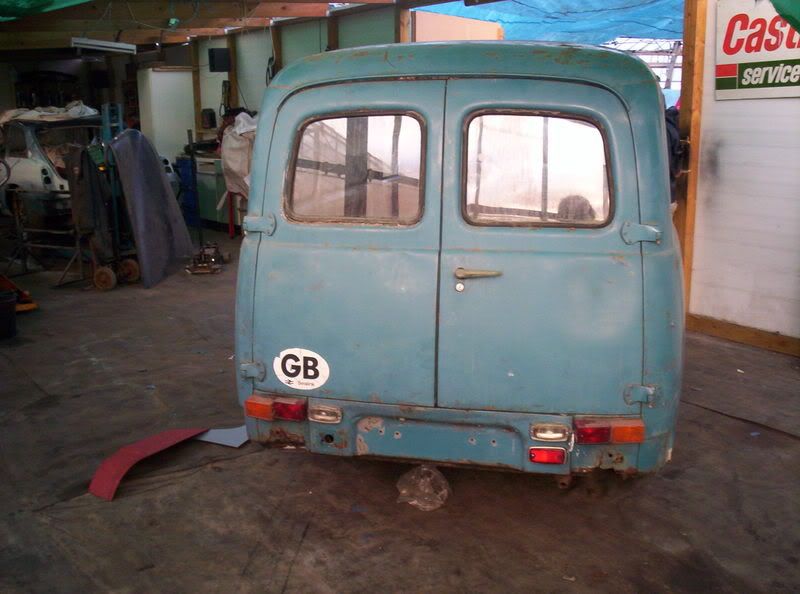
The sexy rear...
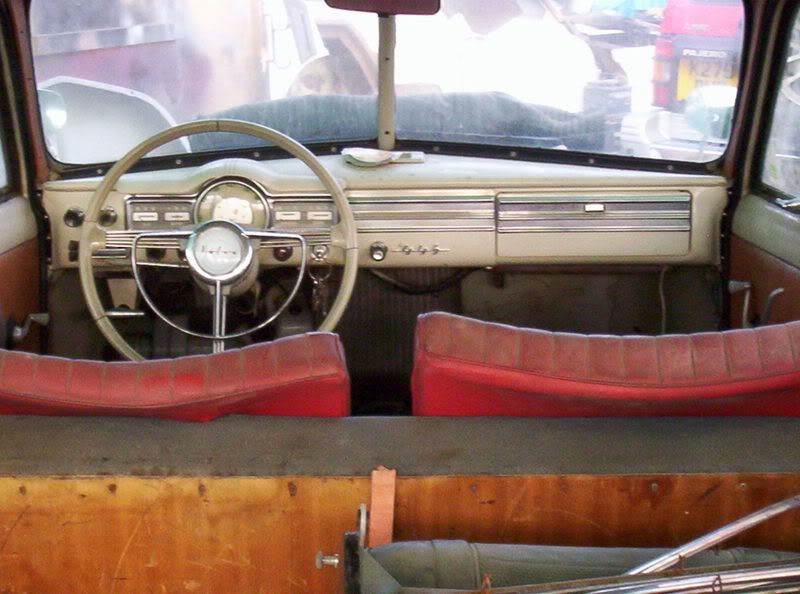
And the sexy inside...
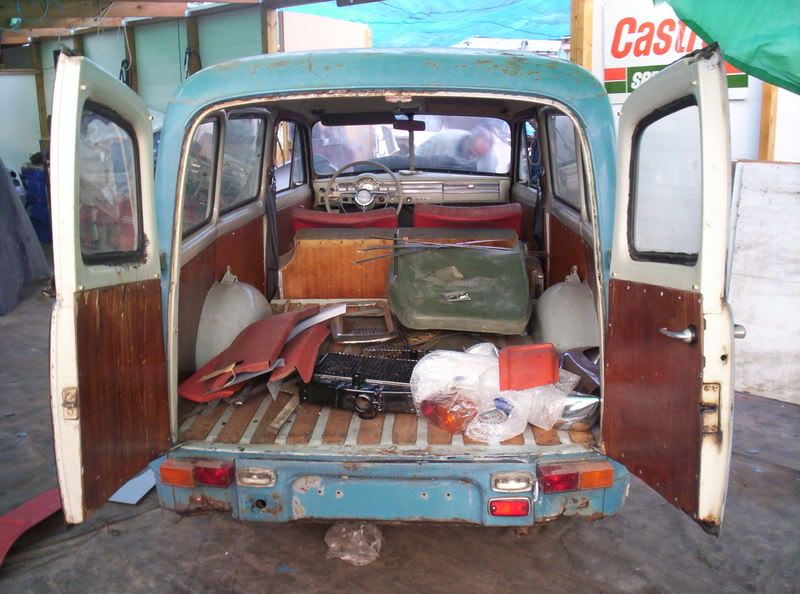
the view from the rear seats....
Jan 13th 2008
I made a start today... here's a few pics...................
Lets get started
Out with the angle grinder
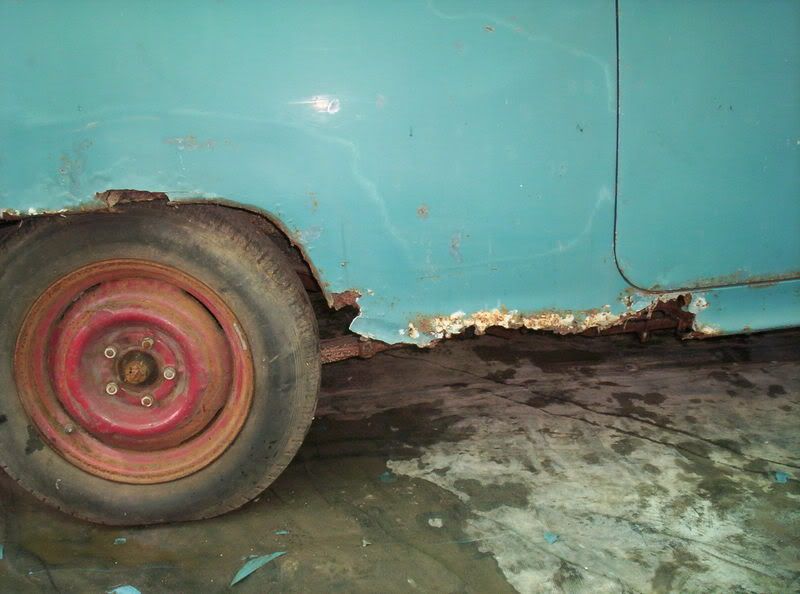
theres signs that the car had ben repaired in the past...there are 2 innerwings ..trapping the rust inbetween
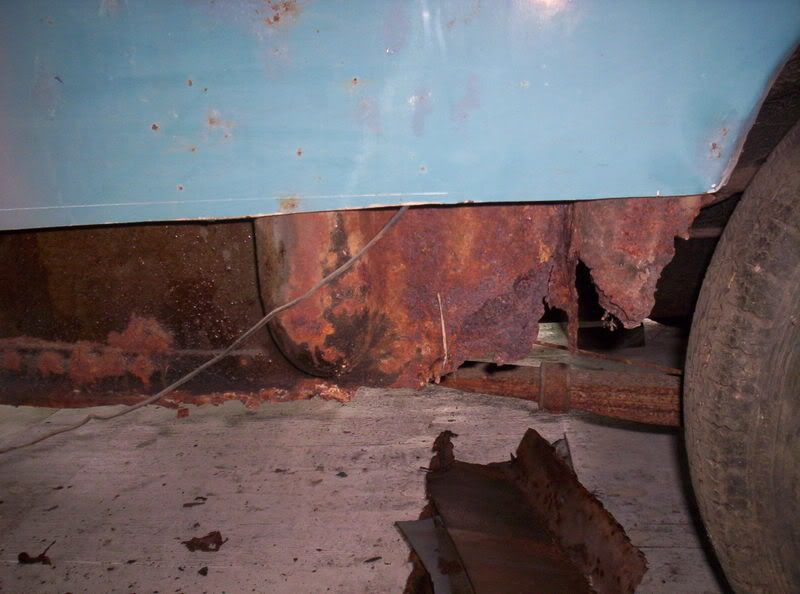
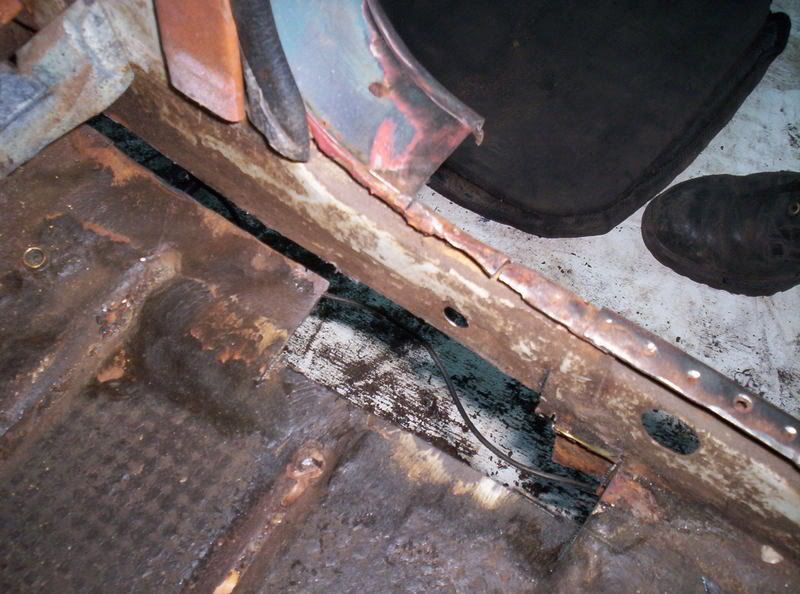
small patches will be required in a few places...heres the front of the inner sill
wing and front panel off...most of the nuts had siezed and sheared off..most were captive so will need replacing.
Jan 15th 2008
I have been rained off from work today so thought i would update yesterdays work...day 2
I started by welding up a small patch near the lower seat belt anchor point...the floor and sill have rotted in this area and the inner sill needed replacing for the last 60cm.....
A small patch was needed at the front of the inner sill just where its meets the baulkhead..
In order to determin where the inner sill ends at the rear i needed to retro fit all of the panels so the rot was cut back to good metal...the edges stepped with a joggler and the panels held in place with self tapping screws...
Heres the sill, wheel arch and intermediate part in place....

generally the panels are a good fit only needing a small cut or bend but the intermediate piece was poorly finished where it meets the end of the outer sill..this will need a bit of work to get a satisfactory fit...but thats where i finished for the day!
Jan 24th 2008
DAY 3.
No pictures today as i have left the camera down the workshop  i will add them later! i will add them later!
First job of the day was to remake the middle section so that it meets up with the sill...i had to cut the panel and reform the corner...this was done on a vice and using a rounded chisel to create the fold.
Next on the list was to determin where the inner sill finishes...this was done by screwing all of the panels into place and making cardboard templates...then cutting the panel out of sheet steel and welding it in place.
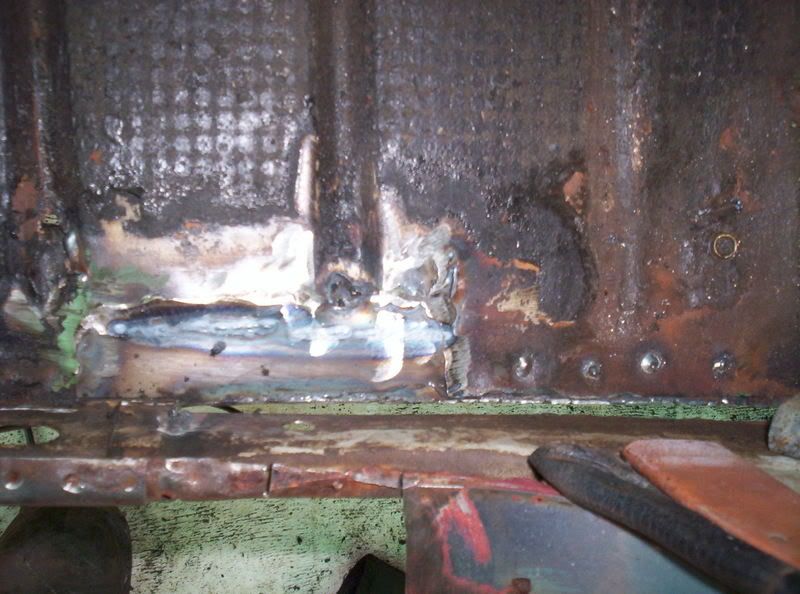
The front sill was then welded into place...first by tacking it...checking the door shut lines then welding everything into place.

Job 4 of the day was one i wasn't looking forward to and that was making the rear inner wheel arch..i had a few lengths of pre-folded steel and by cutting into the steel and holding it against the outer wheel arch with mole grips and welding clamps the panel was formed...when everything was cut and folded the cut-outs were welded back up.

With the inner wheel arch repair panel held in place it was tacked..checked by holding the outer panel over it and then welded into place...the welds were difficult because no matter how much i cleaned the steel there was something in it or on it that reacted and the welds ended up blobby...so progress was slow.

Jan 27 2008
Day 4 started with the mother of all hangovers...a beer festival the night before made for a slow start while bacon sandwiches were consumed...and started by grinding and cutting  ....so i bottled out and removed the other wing...this needed heat and a grinder... ....so i bottled out and removed the other wing...this needed heat and a grinder...

I needed to move the car forward but was fed up with the brakes binding so the front drums were taken of...after they had the adjusters heated up to free them...even then they wouldn't come off so a large puller was used to reveal almost new brake shoes...a relief as the shoes were going to cost something in the region of £120 to replace  ..the reason the hubs refused to budge was that the wheel cylinders were seized solid...i hit the pistond with a 2lb lump hammer and a thick, round chisel and they took several wacks before they went back in......dislodging a lot of crud in the process..... ..the reason the hubs refused to budge was that the wheel cylinders were seized solid...i hit the pistond with a 2lb lump hammer and a thick, round chisel and they took several wacks before they went back in......dislodging a lot of crud in the process.....
SAFTEY NOTE!!!! old brakes contain ASBESTOS...so a mask was worn and the dust damped down with water while i was working.

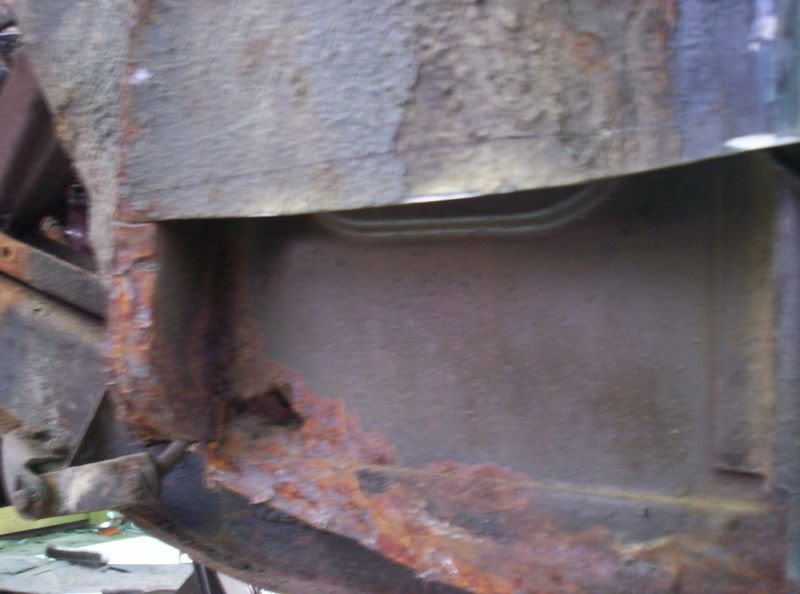
A lot of preperation went into getting the steel sorted in the area at the bottom of the "B" post...this area is where the wheel arch starts..the inner wheel arch catches teh mud and 4 other angles come together ...including the fuel filler neck...all of the new steel was held in place with self tapping screws before anything was welded..then it was all tacked into place.
The centre panel sits in a "joggled" dip so it is flush with the original panels..


onto the cruddy corners..these didnt look too bad from the outside..the inner panels..were..err...hmmm..


I left the outside of the panels for later reference as i wanted to concentrate on the inner panels.
The area behind the wheel was bad and there was little of the original inner panel left but i could see that there were 2 ribs in the original...i like to try and keep panels (even those out of sight) as original as possible..this makes later work easier and looks better for the few who will see it from below at a later date.
So i created one of the panel with 2 ribs...these ribs don't go to the bottom as this is the lower lip...heres how it was done..
The ribs were created by clamping a bar (in this case a trolley jack handle) to it and clamping the bar in a vice...

a chisel was used to make a crease along pre-marked lines...a bit at a time and then the other side was done to create the rib..

After all that it was time for a beer......ooooohhhh nnnnnooooooo...my head was still thumping 
Jan 28th 2008
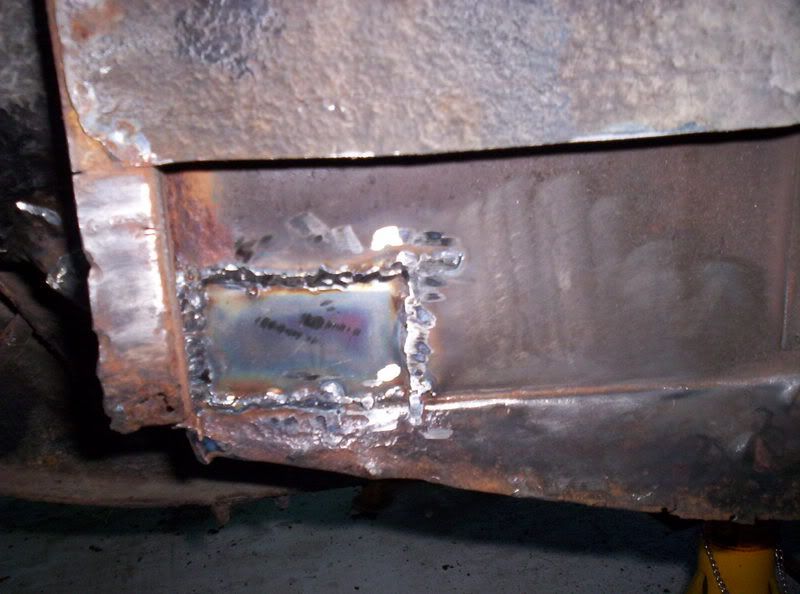
It seemelike i got nowhere fast today and a small hole in the rear deck turned out into a large repair.
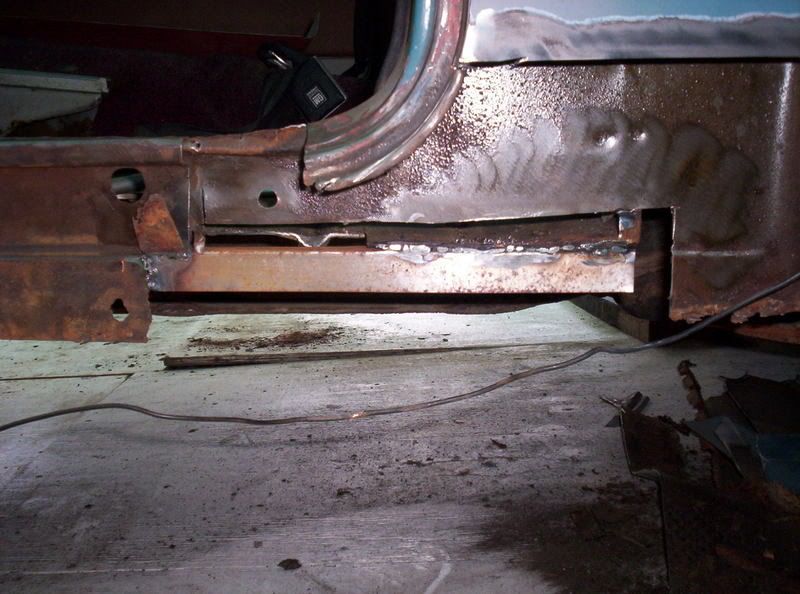
There was daylight comming through the wheel arch and there was signs of an old repair rotting again (this is what happens when the rot is covered rather than cutting it out)..this was above the rotten out rigger so i decided to cut it out for 2 reasons...first to repair it and second was for better access to the top or the inner sill panel and the new outrigger...


I welded the inner sill panel in then made a new outrigger section..

and welded it into place....

How about this for a bit of forward planning...Volvo left a string of holes along the top of every outrigger and box section...then filled the holes with a rubber bung...just right for injecting wax-oil...it's just a shame no one ever made use of them......

I have cut the panel to close the floor back up and it has ribs to match the existing ribs in the floor...hopefully i will be able to finish this corner in the next day or two.
Feb 7th 2008
Day...6 i think...only a half day as i had a late start and Ray turned up with the door of his van ..in the van as it had dropped off.
Back to the PV and i started..by finishing the floor deck..

Then the upper wheel arch went on....


Although it looks like teh panel was a quick job it was all about the preperation..this wheelarch alone was over a days work...onto the rear corner.
Feb 8th 2008
Day 7 and i'm almost finished on the drivers side (i still have a small section below the rear light and the florr in the drivers footwell to do).
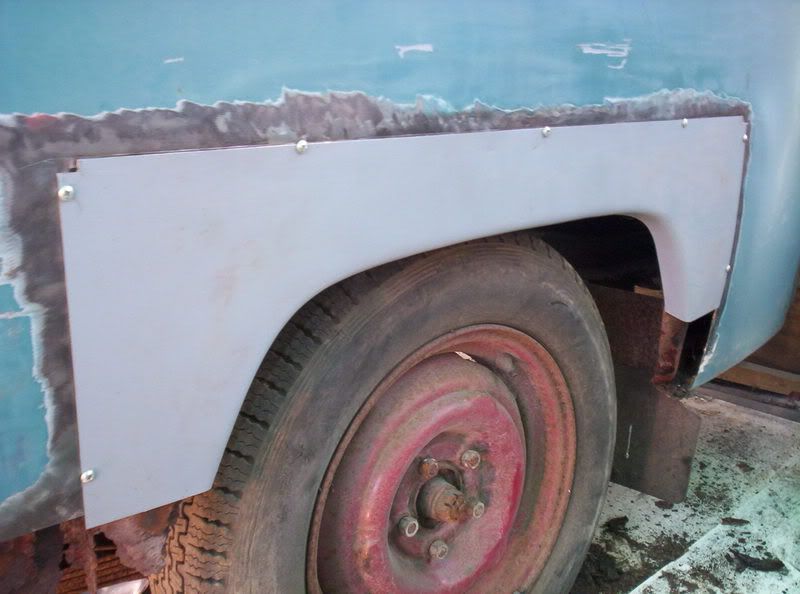
All of the outer panels are now finished...


But thats only half of the story...it's what went in before i closed this corner that took the time...just a bit of finishing with the grinder and it's onto the other side...

March 14gth 2008
it's been a few weeks since any work was done on the PV but the drivers side is almost done...the car turned around and teh angle grinder made to earn it's living...the passengers side looks like it needs less work than the drivers side...time will tell but i cut the lower door frame away and the section infront of the rear wheel...it needs new metal on the inner sill area but that shouldn't take too long...
outer panels make it look better than it really is...


by the end of the day progress had been made...but its only held in place with screws for now..

The door frame lower had been covered with another panel sometime in the past...both came off today.
March 20th 2008
Back on track...Easter weekend ahead so hopefully most of the welding should be finished by the bank holiday Monday...as i said hopefully.
I left teh PV with some of the rot cut out and a few panels hung in place...but no welding done and a long way to go.
I went back to the workshop and with renewed energy out came Mr cutter...and out came the rot..

A bit fuzzy and still a bit to cut out...

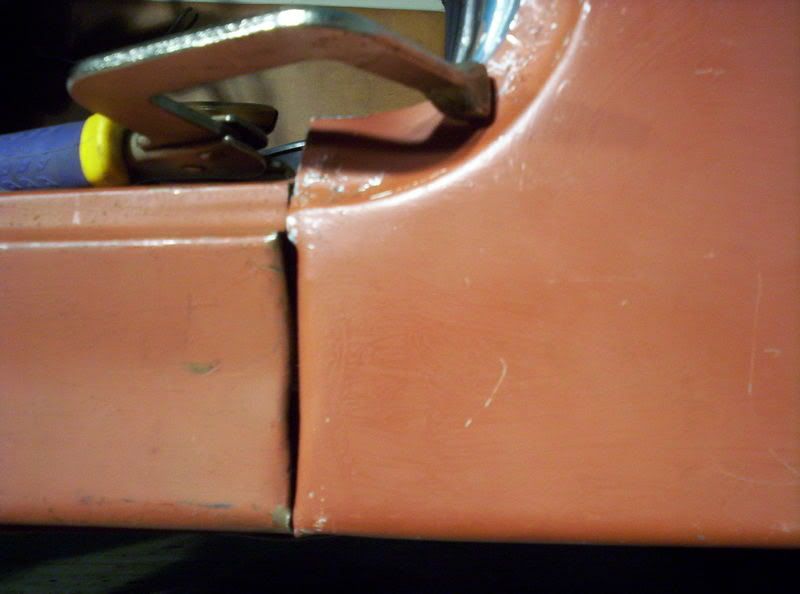
I welded in a new section at the front lower edge...it had been welded in the past but this had rotted out...

The wheel arch was a bit frilly around the edges so i mad a repair panel ...using the outer skin as a template...i will do the rear later but so far the repair is clean and solid..i also had to add a new lower inner edge so that the new sill has something to hold onto...from this..

to this...

All of the front lower edge repaired it was time to fit the front sill section...

then the centre sill section...


Time to go home...unfortunatly i had to work during the week so i didn't get time to do anything else...but the long weekend ahead should produce results.
April 8th 2008
i thought i had updated this but last week the PV welding was finished on the 2nd side...work has started on the wings and the radiator cowl.
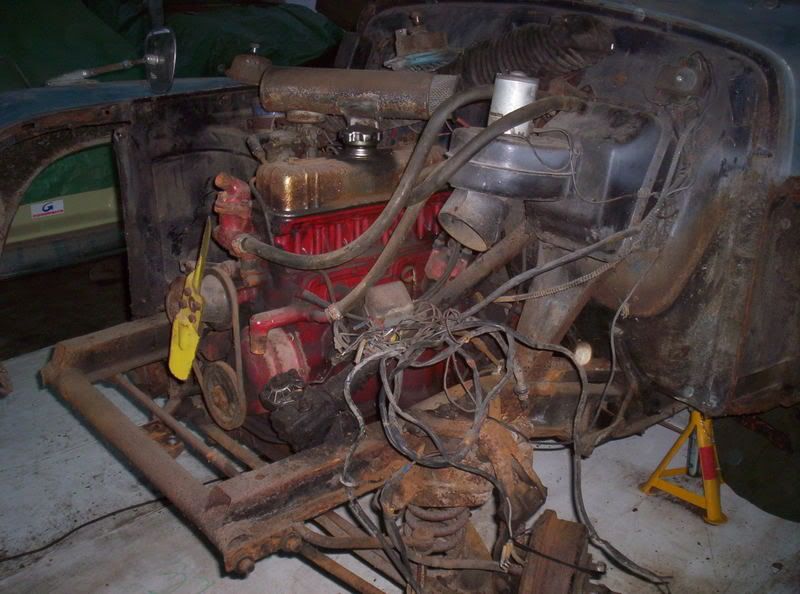
ray has bought a few more bits..the bumpers have been re-chromed and a replacement engine has been found.
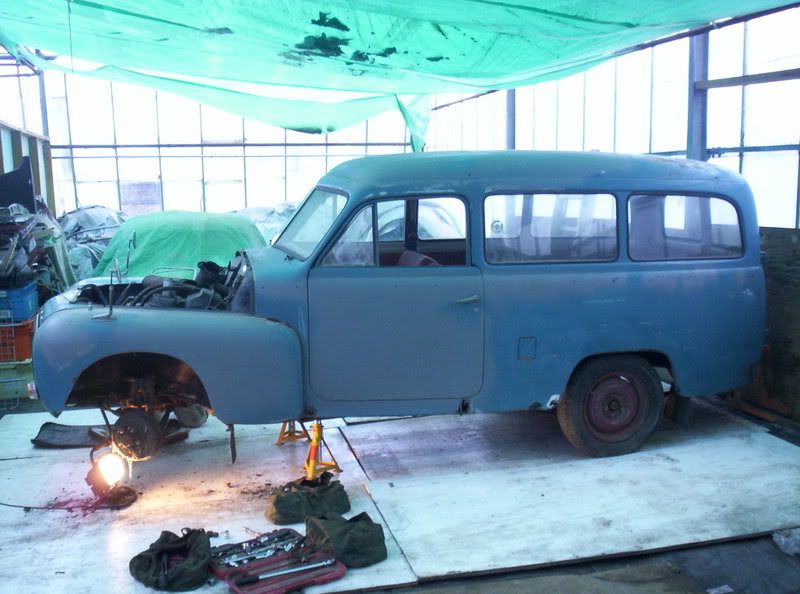
This was the state of play at the end of last week...


April 16th 2008
My work on the PV is almost done but i'm sure i will get more involved as time goes on.
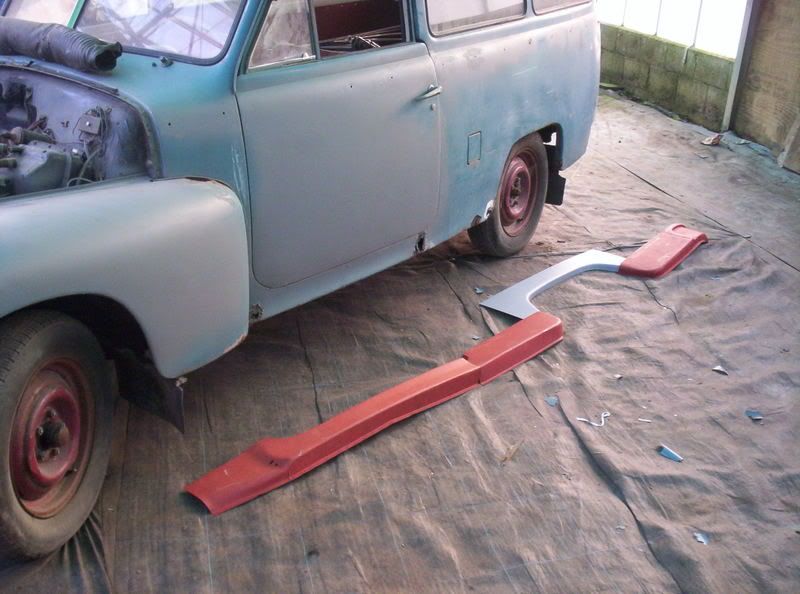
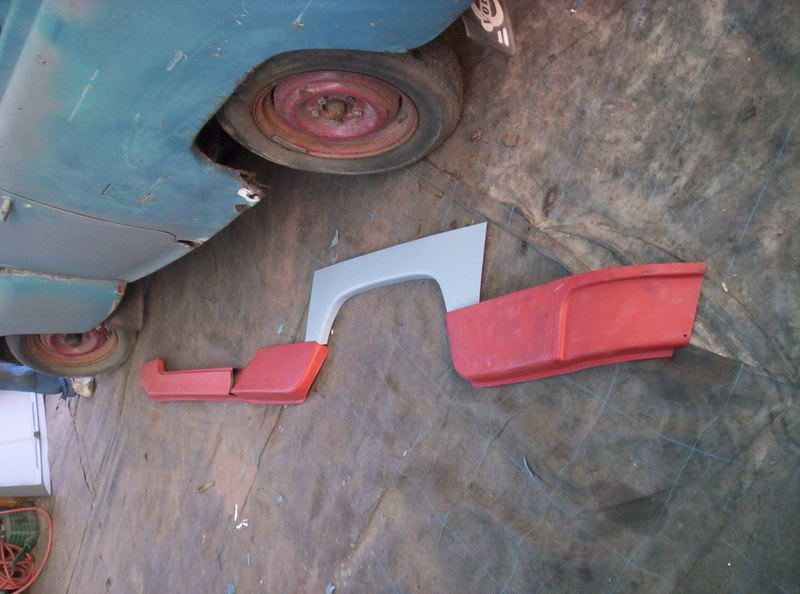
Ray has been busy while i have been away and i turned up today to find he has been filling, flattening and undercoating, all the glass is out...sorry about the colour..blue tarps hanging..bright sun and grey primer...


The engine is out and stripped..it had a siezed piston, that was given a gentle tap...i'm not sure yet if Ray wants to buy 2nd hand or renew the existing engine
Some time later....
Dec 18th 2008
and here she is.


Feb 23rd 2009
I went to the workshop on Saturday to meet up with forum member Nick C and to get on with welding Brendans Spitfire but when i arrived Ray had a box of windscreen rubbers for the PV so i changed plans and we fitted the new rubbers..they were an excellent fit and within the hr they were all fitted.
The rears were an easy fit but the front was a bit harder..although the screen is split the rubber is one piece and needed a small section of the rear at the top and bottom of the central divider to be cut out..something that took several attempts before the knife was used..we got it spot on and the results look fantastic!


The door glass is a bit more of a challenge and is next on the cards...we have the rubbers and they look like a good fit..the lower outside weather strip is a complicated shape and this reproduction looks to be as good as the original.
(also managed to get on with the spitfire..very pleased with the way things are going)
At this point the owner had a massive change in life and the PV was sold on..it re-surfaced a while later but since then I have no idea where it is now and how much work has been done.
_________________
Rust Junky & oil addict. |
|
| Back to top |
|
|
|
|
You cannot post new topics in this forum
You cannot reply to topics in this forum
You cannot edit your posts in this forum
You cannot delete your posts in this forum
You cannot vote in polls in this forum
|
php BB powered © php BB Grp.
|


