
Classic cars forum & vehicle restoration.
|
|
| Author |
Message |
alastairq
Joined: 14 Oct 2016
Posts: 1954
Location: East Yorkshire
|
 Posted: Wed Aug 11, 2021 7:14 pm Post subject: Posted: Wed Aug 11, 2021 7:14 pm Post subject: |
 |
|
Ran a die along 5 wheel studs. Tapped out 5 wheel nuts.
Darned windygun tyre emporiums...with very little effort, they manage to chew up stud ends, and mess up wheel nuts.
3 more wheel stations to do now.
_________________
Dellow Mk2, 1951 built, reg 1952.
Fiat 126 BIS
Cannon special [1996 registered. Built in 1950's]
----------------------------------------------
Ford Pop chassis, Ashley 1172 bodyshell, in pieces. |
|
| Back to top |
|
 |
Ray White

Joined: 02 Dec 2014
Posts: 6318
Location: Derby
|
| Posted: Wed Aug 11, 2021 7:32 pm Post subject: |
|
|
| alastairq wrote: | Ran a die along 5 wheel studs. Tapped out 5 wheel nuts.
Darned windygun tyre emporiums...with very little effort, they manage to chew up stud ends, and mess up wheel nuts.
3 more wheel stations to do now. |
You have my sympathy. Those places are just a rip off anyway.
For the past 20 years or so In have used a local independent and have no complaints. That said, they did refuse to touch the wheels of my Dodge. In the end I took them to a commercial vehicle place who were O.K. with them. |
|
| Back to top |
|
|
Bitumen Boy
Joined: 26 Jan 2012
Posts: 1735
Location: Above the snow line in old Monmouthshire
|
| Posted: Wed Aug 11, 2021 10:50 pm Post subject: |
|
|
| Ray White wrote: | | alastairq wrote: | Ran a die along 5 wheel studs. Tapped out 5 wheel nuts.
Darned windygun tyre emporiums...with very little effort, they manage to chew up stud ends, and mess up wheel nuts.
3 more wheel stations to do now. |
You have my sympathy. Those places are just a rip off anyway.
For the past 20 years or so In have used a local independent and have no complaints. That said, they did refuse to touch the wheels of my Dodge. In the end I took them to a commercial vehicle place who were O.K. with them. |
I always prefer to drop off loose wheels at the local tyre depot if possible, and usually pick them up the following day. Saves a lot of hanging around and keeps me in practice for having to change a wheel at the roadside, a good thing as I seem to be doing a lot of it lately - had more punctures in the last year than in the previous 10. I suspect the councils in this part of the world are using coronavirus as an excuse not to sweep the roads, no logic to it but there's not much logic in any of it that I can see...  |
|
| Back to top |
|
|
MikeEdwards
Joined: 25 May 2011
Posts: 2471
Location: South Cheshire
|
| Posted: Thu Aug 12, 2021 6:28 pm Post subject: |
|
|
Dug out all the filler from the top half of the rear quarter on the hatch. It has two fairly deep dents in it, and it looks as if they haven't tried to push them out, just filled them with filler. I doubt I can get them perfect, but I can use a lot less bog on them.
_________________
1976 Vauxhall HP Firenza, 1976 Vauxhall Sportshatch (x2), 1986 Audi coupe quattro, 2000 Audi TT |
|
| Back to top |
|
|
MikeEdwards
Joined: 25 May 2011
Posts: 2471
Location: South Cheshire
|
| Posted: Thu Aug 19, 2021 6:23 pm Post subject: |
|
|
Replaced the front end of the nearside chassis rail today, as it was as badly repaired as the other side. Also tidied a bit of stuff in the front of the shed as I've got a show this weekend and I need to get both cars out tomorrow. Fortunately I picked a metal cabinet out of the skip earlier this week, so that's helped a little.
_________________
1976 Vauxhall HP Firenza, 1976 Vauxhall Sportshatch (x2), 1986 Audi coupe quattro, 2000 Audi TT |
|
| Back to top |
|
|
badhuis

Joined: 20 Aug 2008
Posts: 1391
Location: Netherlands
|
| Posted: Thu Aug 19, 2021 9:38 pm Post subject: |
|
|
Removed both front seats (just four 7/16" bolts each seat) from my 1967 Chamois because the drivers seat had two issues. First a seam split on the squab was getting bigger each time, and secondly a spring had come loose at the backrest at the rear and was dangerously poking through the vinyl.
I removed the vinyl from the squab and gave it to a neighbour. Angelique makes all kinds of things with leather and is very experienced with her heavy duty sewing machine. For her it was just a matter of minutes whereas if I would have done it by myself, I would need to do it by hand and it probably would take me an hour or two.
Removed the vinyl from the backrest and cut away the nasty spring. I noticed the backrest springs had cut into the foam so I put a thin layer of closed cell foam between the springs and the original foam. Replaced the vinyl which was a little more difficult compared to removing it.
In the mean time I upgraded the passenger seat to drivers seat - this seat of course is less worn. This does not show on the vinyl but the foams are a little thicker and the springs probably are less sagged. The beauty of these older cars is that the seats are identical, and that repairs are fairly simple to do. The whole seat is very simple but made with quality materials, even for a cheap car like this.
Tomorrow I will refit the drivers seat squab vinyl and put it back as the passenger seat into the car again.
_________________
a car stops being fun when it becomes an investment |
|
| Back to top |
|
|
badhuis
Joined: 20 Aug 2008
Posts: 1391
Location: Netherlands
|
| Posted: Sun Aug 22, 2021 12:44 pm Post subject: |
|
|
Seat covers are in place again and the seat is in the car.
Compared to the XJS seat I recovered a few weeks ago this one was much simpler, with materials that are more durable. No rubber diaphragm for the base but strong springs.

I am not out of seat troubles yet as the Elite has a shoulder / bolster foam part missing. This car came from the USA and while the vinyl parts of the seats are still good (supple and no rips), the cloth parts have partly disintegrated and as said one foam part gone missing or disintegrated as well.
I want to keep the vinyl and replace the cloth parts with new. Yesterday I visited someone who broke a few Elites and Eclats over the years. I bought a ripped leather passenger seat which still has good foams, will use the foams when rebuilding the drivers seat.

The back seat is still pretty good, the cloth part (a whitish corduroy) has survived but has stains. Not sure these can be removed, maybe a better bet is to replace that as well.

_________________
a car stops being fun when it becomes an investment |
|
| Back to top |
|
|
Rootes75
Joined: 30 Apr 2013
Posts: 3819
Location: The Somerset Levels
|
| Posted: Sun Aug 22, 2021 1:42 pm Post subject: |
|
|
Nice bit of sunshine today so we managed to finish priming the chassis of the Commer. The springs and running gear are just about ready to also have some paint.
_________________
Various Rootes Vehicles. |
|
| Back to top |
|
|
Rootes75
Joined: 30 Apr 2013
Posts: 3819
Location: The Somerset Levels
|
| Posted: Sun Aug 29, 2021 9:06 am Post subject: |
|
|
We took our Hillman down to a local Military show yesterday, will take her down again today as it was actually a very well attended event.
Really good to see people back enjoying talking to each other about classic vehicles!
_________________
Various Rootes Vehicles. |
|
| Back to top |
|
|
Vulgalour
Joined: 08 May 2018
Posts: 474
Location: Kent
|
| Posted: Fri Sep 10, 2021 11:48 pm Post subject: |
|
|
Finally got the rear arch on the Maestro rebuild and welded together bar a couple of small patches. This job began when I accidentally washed the old arch off. Couldn't get proper repair panels for this side (inners aren't available at all) so improvised with a couple of front wings that have an almost identical profile. Fiddly work all the same and looks pretty ugly right now. Nothing a grinder and some filler can't fix, happily.
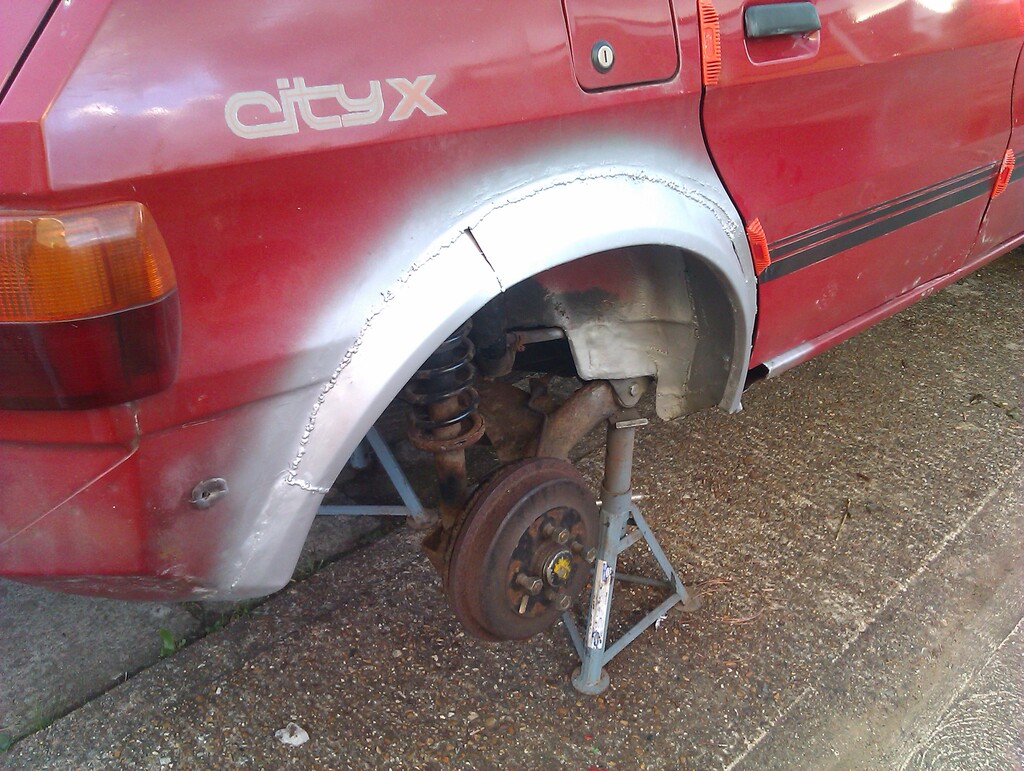
The inner arch had rotted as far as the outer I've replaced here, as well as having a couple of extra patches needed inside. Rather a lot more work than I wanted to get into. Trouble is, this is my everyday car so I didn't have much choice but to get it done really. |
|
| Back to top |
|
|
Peter_L
Joined: 10 Apr 2008
Posts: 2680
Location: New Brunswick. Canada.
|
| Posted: Sat Sep 11, 2021 4:37 am Post subject: |
|
|
| Vulgalour wrote: | Nothing a grinder and some filler can't fix,
|
Filler and paint makes me the welder I 'aint |
|
| Back to top |
|
|
Vulgalour
Joined: 08 May 2018
Posts: 474
Location: Kent
|
| Posted: Sat Sep 11, 2021 6:32 pm Post subject: |
|
|
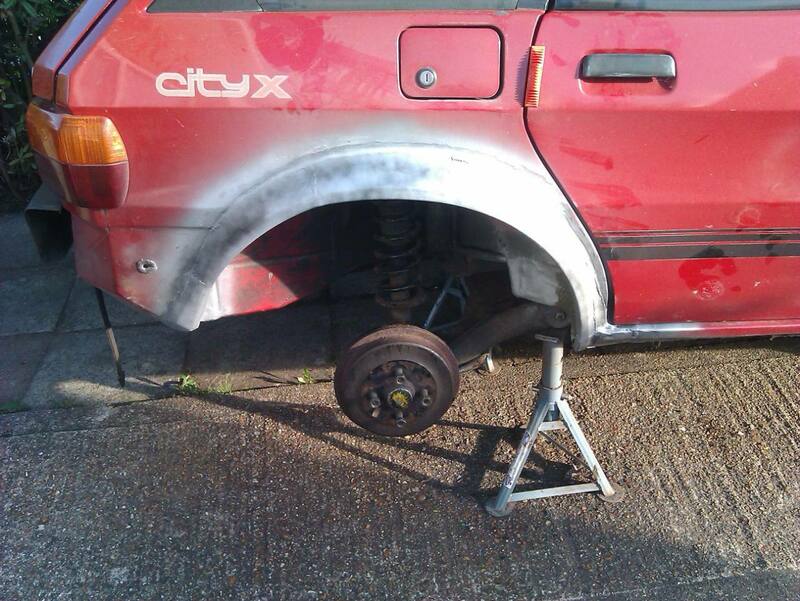
Absolutely! I waved the magic spinning disc at the welds and they look much better. Inner arch is all sealed up and (not pictured here) painted. Tomorrow I'll get some filler (I'm all out) so I can finish the outside. It's not exactly the shape a Maestro arch should be, but it's plenty close enough.
Then we have to do it all again on the passenger side which on the surface doesn't seem as bad, and at least I have the proper panels for that side which will speed things up. We'll see what it has in store for me later. |
|
| Back to top |
|
|
peter scott

Joined: 18 Dec 2007
Posts: 7119
Location: Edinburgh
|
| Posted: Sat Sep 11, 2021 7:31 pm Post subject: |
|
|
I stupidly reversed into a projecting part of a skip in our street that took a nasty gouge out of my rear wing. After much filling sanding, refilling etc x N, I got the wet & dry out and then a few coats of paint etc x N and finally some Brasso to blend the new cellulose into the existing. I haven't done this for many years but I think might now tackle some of the other little nasties around the car. Colour matching is not really a problem with black.

Peter
_________________
http://www.nostalgiatech.co.uk
1939 SS Jaguar 2 1/2 litre saloon |
|
| Back to top |
|
|
Peter_L
Joined: 10 Apr 2008
Posts: 2680
Location: New Brunswick. Canada.
|
| Posted: Sat Sep 11, 2021 7:53 pm Post subject: |
|
|
| Vulgalour wrote: |
Then we have to do it all again on the passenger side which on the surface doesn't seem as bad, and at least I have the proper panels for that side which will speed things up. We'll see what it has in store for me later. |
As there is no way that both sides can be seen at the same time, no worries.. |
|
| Back to top |
|
|
Vulgalour
Joined: 08 May 2018
Posts: 474
Location: Kent
|
| Posted: Sun Sep 12, 2021 5:18 pm Post subject: |
|
|
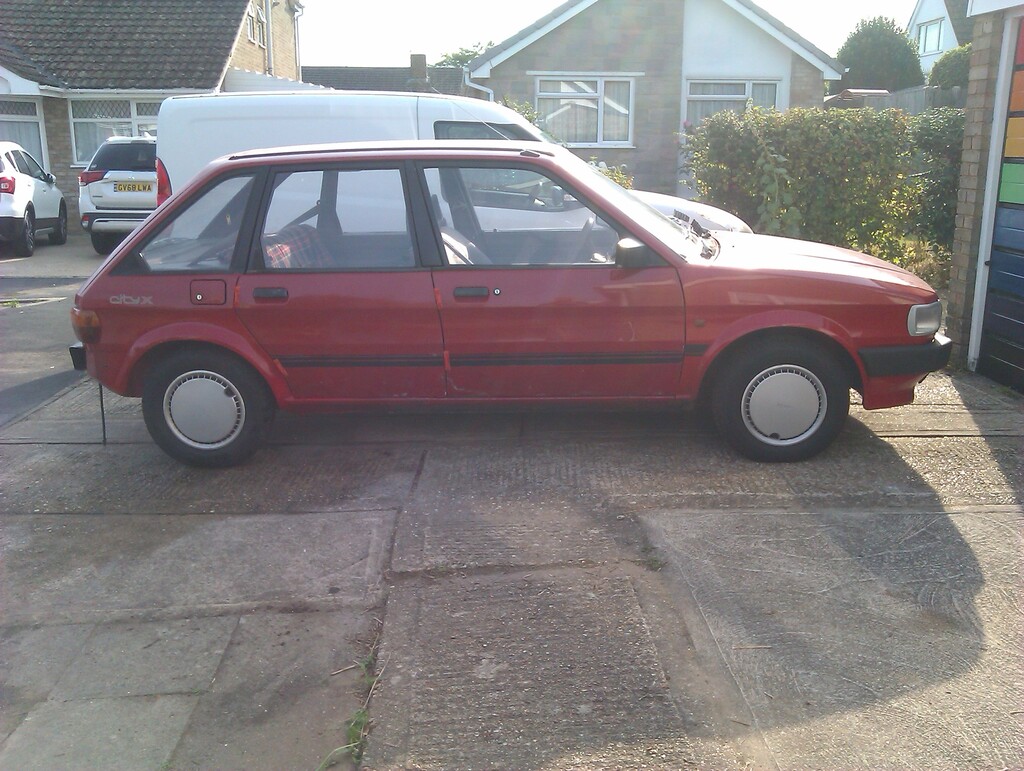
That's a nice clean repair on that arch, tyre says it all.
I've had some luck with paint and arches today too, after three full days of graft the rear arch on the Maestro is as finished as it needs to be. There's a couple of areas that would benefit from a little more profiling work which I will do in the future. For now I needed it in paint rather than bare primer and filler since the car lives outdoors. I can address the minor profiling issues at my leisure and blend them in more easily in the future now, probably when I work through the various bodywork scabs on this side.
 |
|
| Back to top |
|
|
|
|
You cannot post new topics in this forum
You cannot reply to topics in this forum
You cannot edit your posts in this forum
You cannot delete your posts in this forum
You cannot vote in polls in this forum
|
php BB powered © php BB Grp.
|


