
Classic cars forum & vehicle restoration.
|
|
| Do you like or dislike the new dashboard ? |
| Yes I do like the new dashboard |
|
100% |
[ 7 ] |
| No I do not like the new dashboard |
|
0% |
[ 0 ] |
|
| Total Votes : 7 |
|
| Author |
Message |
Ray White

Joined: 02 Dec 2014
Posts: 6316
Location: Derby
|
 Posted: Fri Sep 18, 2020 9:12 pm Post subject: Posted: Fri Sep 18, 2020 9:12 pm Post subject: |
 |
|
Today I went further with refurbishing the headlamps. The chrome is not too bad and the small dents and scratches that are carelessly caused by the bonnet corners would normally be acceptable but I am not about to start cutting corners. The chrome platers want the lamp bowls and rims free of fittings etc so I have (carefully as I can) removed the rivets that hold the lamp fittings. I am keeping a careful record of where all the bits and pieces go so that I can reassemble them in the right order.
Some of you may remember I bought a fog lamp. Lucas SFT 462 - which are quite scarce now - to replace the incorrect one. I have taken the same approach with this and removed anything that the chrome platers might object to. Again, care is needed in removing the rivets and as with the headlamps the Lucas "King of the road" medallions have been removed and a photographic record made of the sequence.
One concession to originality is the fog lamp reflector, which - unlike those with the headlamps - is in reasonable condition. There is also an issue with disturbing the reflector and glass lens which, unfortunately, are crimped together. Best leave well alone I think!


 |
|
| Back to top |
|
 |
Ray White
Joined: 02 Dec 2014
Posts: 6316
Location: Derby
|
| Posted: Sat Sep 19, 2020 9:03 pm Post subject: |
|
|

The petrol cap needs a new cork seal and re plating so I drilled out the little hinge pin using my Dremel with flexible attachment.

With the cap removed from the tank I carefully ground off the end of the rivet releasing the two steel cups and spring; the cork seal had long ago disintegrated.

It was tricky prising off the outer brass cover; the edge was peened over a steel disc and required patience... but it came apart eventually.


I can now include the brass outer part of the cap with the other items to be chrome plated.
. |
|
| Back to top |
|
|
Ray White
Joined: 02 Dec 2014
Posts: 6316
Location: Derby
|
| Posted: Sun Sep 20, 2020 1:26 pm Post subject: |
|
|
The radiator shell will require work. there is a fracture at the bottom of the central bar which will have to be brazed and then the shell will need to be chrome plated.

As can be seen the original rubber bonnet rest tape is badly perished and will need to be replaced. It quite literally fell to bits.
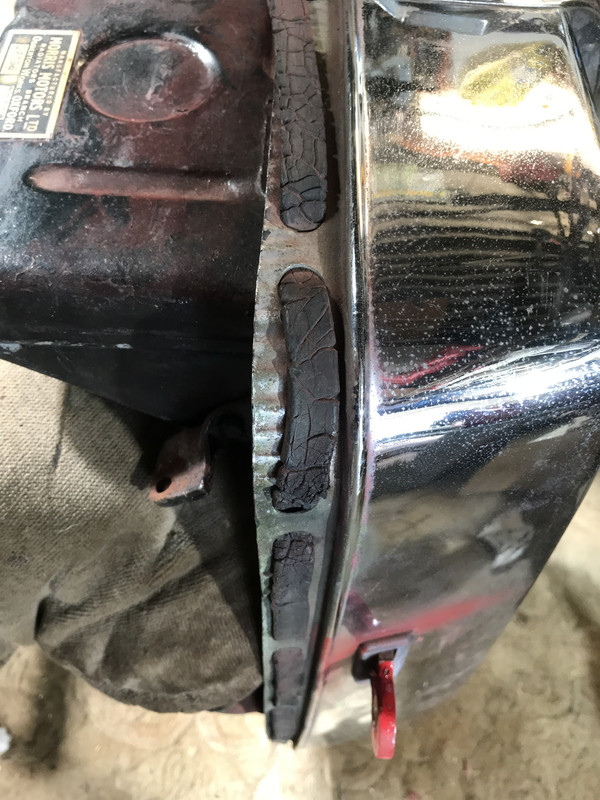
It is obvious that red paint had been applied in haste. With the shell removed it will give me the chance to strip and paint the slats properly. The new upholstery will be "biscuit" and as the slats should traditionally match the interior the question is which shade of beige would I use.
I have yet to order the seat coverings etc. as the body tub is still not ready; however, I do have a new hood and sidescreens so perhaps I should use them as a guide.
True to form, the radiator shell was only held on with two screws = and even they were wrong. On removal of the headlamp supports, I discovered that the p.o. had even managed to get 1/4"" UNF set screws into BS threads!.
(So help me God....) |
|
| Back to top |
|
|
Ray White
Joined: 02 Dec 2014
Posts: 6316
Location: Derby
|
| Posted: Sun Sep 20, 2020 8:40 pm Post subject: |
|
|
| Ray White wrote: | The radiator shell will require work. there is a fracture at the bottom of the central bar which will have to be brazed and then the shell will need to be chrome plated.
The break has been held together by a set screw and washer. Derby plating say they can braze this for me.
 
As can be seen the original rubber bonnet rest tape is badly perished and will need to be replaced. It quite literally fell to bits.
It is obvious that red paint had been applied to the slats in haste. With the shell removed it will give me the chance to strip and paint them properly. The new upholstery will be "biscuit" colour and as the slats should traditionally match the interior the question is which shade of beige would I use.
I have yet to order the seat coverings etc. as the body tub is still not ready; however, I do have a new hood and sidescreens so perhaps I should use them as a guide.
True to form, the radiator shell was only held on with two screws = and even they were wrong. On removal of the headlamp supports, I discovered that the p.o. had even managed to get 1/4"" UNF set screws into BS threads!.
(So help me God....) |
Last edited by Ray White on Mon Sep 21, 2020 7:01 pm; edited 1 time in total |
|
| Back to top |
|
|
Ray White
Joined: 02 Dec 2014
Posts: 6316
Location: Derby
|
| Posted: Mon Sep 21, 2020 1:33 pm Post subject: |
|
|
The double hump scuttle top is a prominent feature of T series cars and fortunately mine is in reasonable condition; the Australian climate again has saved it. Surface rust, however, is inevitable and there is some deeper corrosion at one end where the screen mounts can trap moisture. There are also a couple of small cracks on the front edge that want welding. I expect this is from where the panel has been stored since the original dismantling back in 1960.
Of course, there is no excuse for the plonker who painted straight over the rust and this can be seen in the photo. I am kept busy with rust removal and prep for paint. Achieving a good outcome with this panel will be a challenge.
  |
|
| Back to top |
|
|
Ray White
Joined: 02 Dec 2014
Posts: 6316
Location: Derby
|
| Posted: Wed Sep 23, 2020 12:46 pm Post subject: |
|
|
Derby Plating must have a lot of work on; I delivered my parts today and they quoted an eye watering price with a 10 week wait.
In addition to various repairs they will chrome
plate all my brightwork for a negotiated price. |
|
| Back to top |
|
|
Bitumen Boy
Joined: 26 Jan 2012
Posts: 1735
Location: Above the snow line in old Monmouthshire
|
| Posted: Wed Sep 23, 2020 1:40 pm Post subject: |
|
|
| Ray White wrote: | The double hump scuttle top is a prominent feature of T series cars and fortunately mine is in reasonable condition; the Australian climate again has saved it. Surface rust, however, is inevitable and there is some deeper corrosion at one end where the screen mounts can trap moisture. There are also a couple of small cracks on the front edge that want welding. I expect this is from where the panel has been stored since the original dismantling back in 1960.
Of course, there is no excuse for the plonker who painted straight over the rust and this can be seen in the photo. I am kept busy with rust removal and prep for paint. Achieving a good outcome with this panel will be a challenge.
|
The trouble is that inexperienced people get taken in by the claims of several paint manufacturers that their products can be applied over rust. Any paint can be applied over rust; no paint will last over rust or protect whatever sound metal remains. Paint makers seem to think that if they are honest about the amount of preparation and sheer hard graft required then they won't sell any paint. Maybe they are right? |
|
| Back to top |
|
|
Ray White
Joined: 02 Dec 2014
Posts: 6316
Location: Derby
|
| Posted: Wed Sep 23, 2020 2:07 pm Post subject: |
|
|
With respect, old Henry has been bodging MG T series for years. Unknown to me at the time, this individual was well known to the MG fraternity and when I said from whom I had bought the car there was a deafening silence ...followed by hoots of laughter.
I was not the only one to be taken in, however, as the MG car club gave TC 10030 their approval so it could be issued with an age related registration number. It is now a requirement that the vehicle must be restored before hand.
The paint used was Ford "radiant" red which to my eyes is rather gaudy. I have opted for the rather deeper "Reno" red; an original MG colour.
On these cars, the colour of the radiator slats should match the interior. In this case it would be beige but I am not sure that (despite being a convention) I like it. I think I prefer red.
What the purists would say about such a break with tradition , I don't know!
(Well, yes, I do actually!)  |
|
| Back to top |
|
|
Ray White
Joined: 02 Dec 2014
Posts: 6316
Location: Derby
|
| Posted: Wed Sep 23, 2020 5:08 pm Post subject: |
|
|
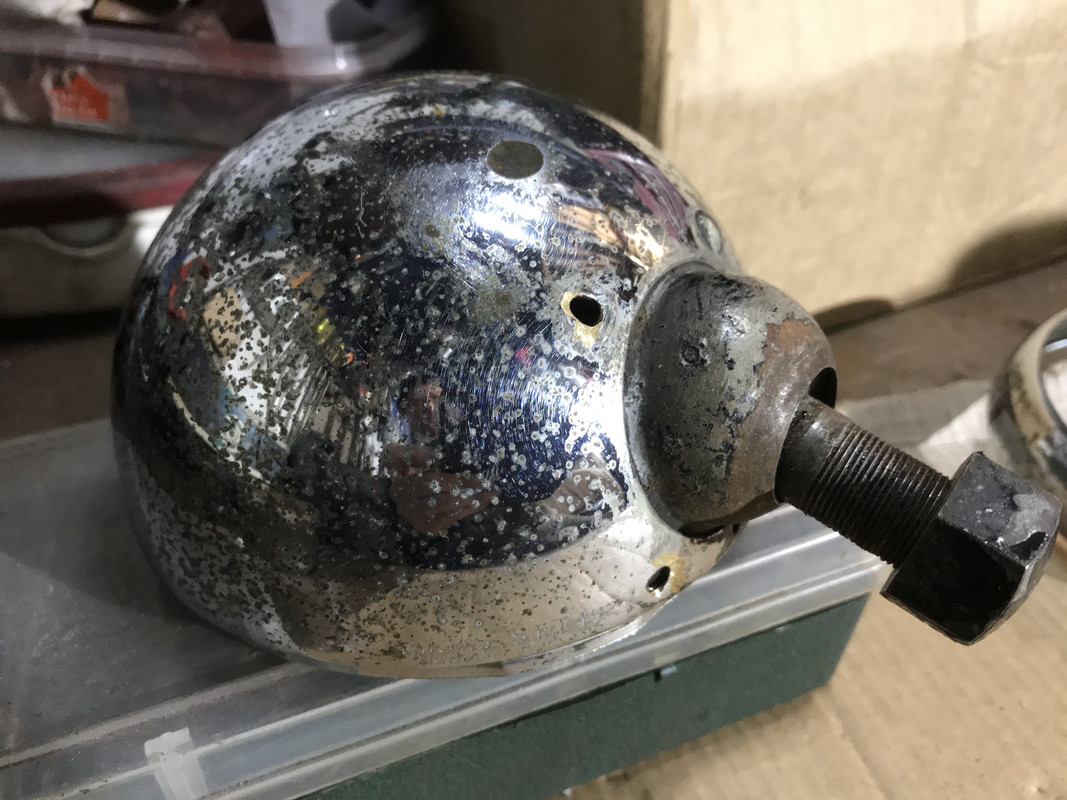
Something which I think needs attention is the Lucas Altette horn. I have started on the overhaul and discovered rust under the rippled tone disc; it covers a steel diaphragm which is also a bit rusty - but I am hoping to restore these parts.
The distinctive chrome bezel is just beginning to go rusty so I have included it in the box of parts now with the platers. It is a genuine Lucas part but interestingly, there is no makers stamping of any kind. I have discovered from hooter expert Taff the horn's website that this is correct for 1949 or thereabouts.
It would appear that the horn I have is mounted upside down. (the car was exported to Australia, after all ...)
Parts are available but I need to dismantle the horn to establish exactly what I need.
The central 9/16" dome nut is in good condition as are 5 of the six acorn nuts; one of them will need replacing.


I want to remove the studs from the cast iron housing but so far they are rusted solid. Some penetrating oil overnight might free them.
 . : . :
This evening I delved further into the horn and removed the diaphragm. Unfortunately I was unable to get a resistance reading from the coil so it may be game over. 
 |
|
| Back to top |
|
|
Ray White
Joined: 02 Dec 2014
Posts: 6316
Location: Derby
|
| Posted: Sun Sep 27, 2020 12:40 pm Post subject: |
|
|
I have to say I am feeling quite pleased with myself this morning because I have found the reason why the horn was not working.
Yes, there was an electrical fault which indicated the coil was not passing a current but that problem has been resolved by cleaning the points. I have a resistance of 0.8 Ohms which is close enough to the 0.75 required.
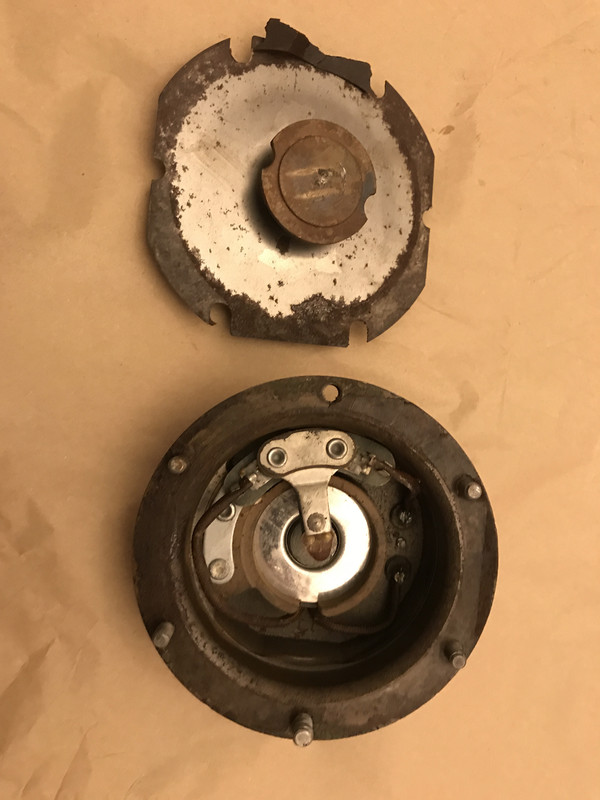
The main problem is that someone has separated the diaphragm from the armature ... but put it back the wrong way round.
The diaphragm will only vibrate if the armature - to which it is attached - is drawn to the core by electromagnetic attraction. In order for this to happen the diaphragm has 'in' and 'out' positions.
According to the Luca instructions:
"..when the horn push is pressed, current flows through the closed contacts of the contact breaker and energises the coil. The coil core is thus magnetised and attracts the armature to towards the core face. The contact breaker opens each time the armature is pulled down to the core; de energising the magnet system and causing the cycle to be related at a frequency determined by the characteristics of the diaphragm..."
Someone had replaced the diaphragm in the 'in' position so the magnetised core was attempting to pull the armature down... but as it was already 'in' it couldn't move any further.
The parts have cleaned up quite well and I have replaced them in the correct order. I now hope to have a working horn before long.
diaphragm before and after.


 |
|
| Back to top |
|
|
peter scott

Joined: 18 Dec 2007
Posts: 7118
Location: Edinburgh
|
| Posted: Sun Sep 27, 2020 12:56 pm Post subject: |
|
|
Excellent news!
Peter 
_________________
http://www.nostalgiatech.co.uk
1939 SS Jaguar 2 1/2 litre saloon |
|
| Back to top |
|
|
Ray White
Joined: 02 Dec 2014
Posts: 6316
Location: Derby
|
| Posted: Sun Sep 27, 2020 2:06 pm Post subject: |
|
|
Thanks for your help, Peter.
Thanks also to all the other contributors who have given so generously of their time and advise. |
|
| Back to top |
|
|
Peter_L
Joined: 10 Apr 2008
Posts: 2680
Location: New Brunswick. Canada.
|
| Posted: Sun Sep 27, 2020 5:46 pm Post subject: |
|
|
| Ray White wrote: | Thanks for your help, Peter.
Thanks also to all the other contributors who have given so generously of their time and advise. |
It's what this forum is about, sharing. Good result.. |
|
| Back to top |
|
|
Vulgalour
Joined: 08 May 2018
Posts: 474
Location: Kent
|
| Posted: Sun Sep 27, 2020 8:29 pm Post subject: |
|
|
| These recent posts are really nicely written, illustrated, and paced. A very welcome read of your progress. I wonder, did your car used to be blue originally? If it were, then the cream grille inserts to match the interior would look a lot nicer. I'm with you on the red grille inserts on a red car, the cream ones don't look quite right even though it is 'correct'. |
|
| Back to top |
|
|
Ray White
Joined: 02 Dec 2014
Posts: 6316
Location: Derby
|
| Posted: Sun Sep 27, 2020 9:36 pm Post subject: |
|
|
| Vulgalour wrote: | | These recent posts are really nicely written, illustrated, and paced. A very welcome read of your progress. I wonder, did your car used to be blue originally? If it were, then the cream grille inserts to match the interior would look a lot nicer. I'm with you on the red grille inserts on a red car, the cream ones don't look quite right even though it is 'correct'. |
Yes; the TC was originally "Clipper" blue. The grille was a cream colour and some traces survive. What to do about the colour was one of the most difficult decisions that I had to make. Should I paint the car in it's original colour or repaint in red.?
I decided that as the original paint had been lost there was little point in trying to re create it. I take the view that a car is only original once and with that originality having been lost there seemed little point in faking it.
There was a more personal reason for my choice of red. When I was a teenager living at home one of my Dad's business acquaintances turned up in an immaculate red MG TC. To me it was a "dream" car. I vowed that one day I would have a similar MG and it too would be red with biscuit interior.
Old Henry Wakerley who sold me the car is a really nice chap and we got on well. The point I would like to make is that Henry never claimed to have "restored" the car...he only ever admitted to having "re - assembled" it. He even admitted that in painting the car he had "probably ruined it". I sometimes wonder what an incredible oil rag car it could have made with a significant patina if it had not been re painted.
Having decided on the colour and faced with the reality that I would need a new body tub and interior, I found it much easier to embark on a "last nut and bolt" rebuild. I didn't even have an original dashboard - although the instruments had fortunately survived and I have had them restored - so the idea of having a veneered, as opposed to original vinyl, dashboard with a different layout and extra instruments, was hatched.
This is when the "mission creep" started. The earlier T series MGs were undeniably pretty cars... but they were built down to a price and although they have their good points, there are a number of design flaws. The modifications I am incorporating are mainly tried and tested mechanical improvements and always reversible but I want to be able to take the car on European tours so it needs to be not just reasonably quick but also reliable, safe and pleasant to drive.
I am always happy to answer questions and I fully understand that there are other enthusiasts who would have taken a different approach. All I can say is that my rebuild is not being done on the cheap and the finished car will have cost considerably more than its monetary worth. For me, this rebuild is about enjoying the journey as much as the hoped for destination.
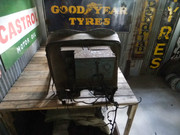
Here are a few shots of how my car - one of the last MG TC's to be built - was found. It is a matching numbers car with a racing history that I am researching.
It was dismantled in 1960.
   / /  
      |
|
| Back to top |
|
|
|
|
You cannot post new topics in this forum
You cannot reply to topics in this forum
You cannot edit your posts in this forum
You cannot delete your posts in this forum
You cannot vote in polls in this forum
|
php BB powered © php BB Grp.
|


