
Classic cars forum & vehicle restoration.
|
|
| Author |
Message |
Peter_L
Joined: 10 Apr 2008
Posts: 2680
Location: New Brunswick. Canada.
|
 Posted: Fri Sep 18, 2020 3:13 pm Post subject: Posted: Fri Sep 18, 2020 3:13 pm Post subject: |
 |
|
| Ray White wrote: | | some 35 years ago, the thing to do was to rip everything out and start again. You ended up with a virtually new car. |
Just as with Geronimo's war axe. "Except for replacing the handle and the head, this axe is completely original" |
|
| Back to top |
|
 |
alastairq
Joined: 14 Oct 2016
Posts: 1954
Location: East Yorkshire
|
| Posted: Fri Sep 18, 2020 5:45 pm Post subject: |
|
|
| Quote: | | I took my cue from Mike Worthington Williams who urged people to conserve the original cars rather than fully restore them |
I used to enjoy reading about his exploits with that huge, disreputable Austin of his...
_________________
Dellow Mk2, 1951 built, reg 1952.
Fiat 126 BIS
Cannon special [1996 registered. Built in 1950's]
----------------------------------------------
Ford Pop chassis, Ashley 1172 bodyshell, in pieces. |
|
| Back to top |
|
|
Ray White

Joined: 02 Dec 2014
Posts: 6313
Location: Derby
|
| Posted: Sat Sep 19, 2020 12:38 pm Post subject: |
|
|
| alastairq wrote: | | Quote: | | I took my cue from Mike Worthington Williams who urged people to conserve the original cars rather than fully restore them |
I used to enjoy reading about his exploits with that huge, disreputable Austin of his... |
Arthur. Yes, as Austin 20s go it was probably one of the most travelled.
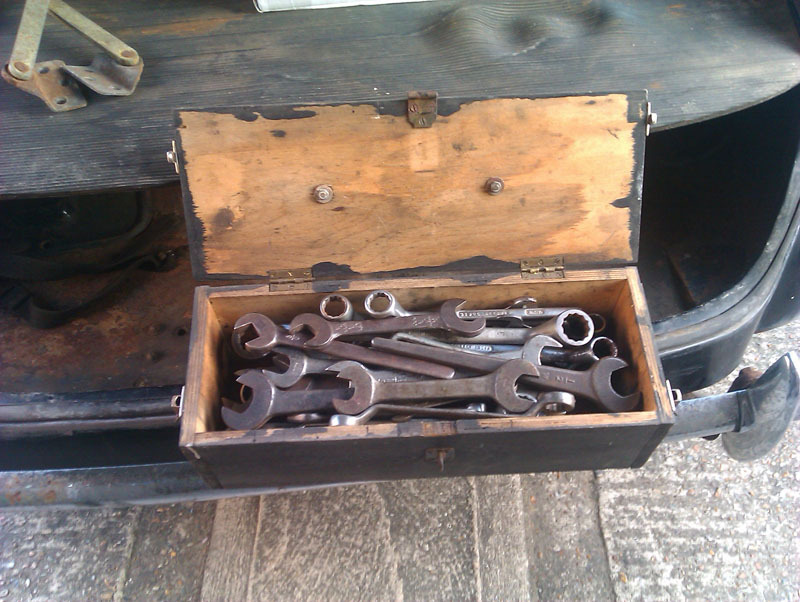
Incidentally, V posted a photo of his spanners by make. How about this? This is my collection "Austin" spanners. They don't get used much. If you go back far enough, all spanners were open ended and the larger sizes were very heavy like this. They were primitive, clumsy things but were ideally suited to the BS/ Whit fasteners of the time which were much deeper than we are used to.
I wonder if the Lanchester has it's own set?
 |
|
| Back to top |
|
|
Vulgalour
Joined: 08 May 2018
Posts: 474
Location: Kent
|
| Posted: Sat Sep 19, 2020 3:10 pm Post subject: |
|
|
Apparently, the Lanchester should have a tool roll though whether or not they're specifically Lanchester I'm not sure. That Austin set is lovely to see, just needs to be bundled up in a nice old tool roll.
----
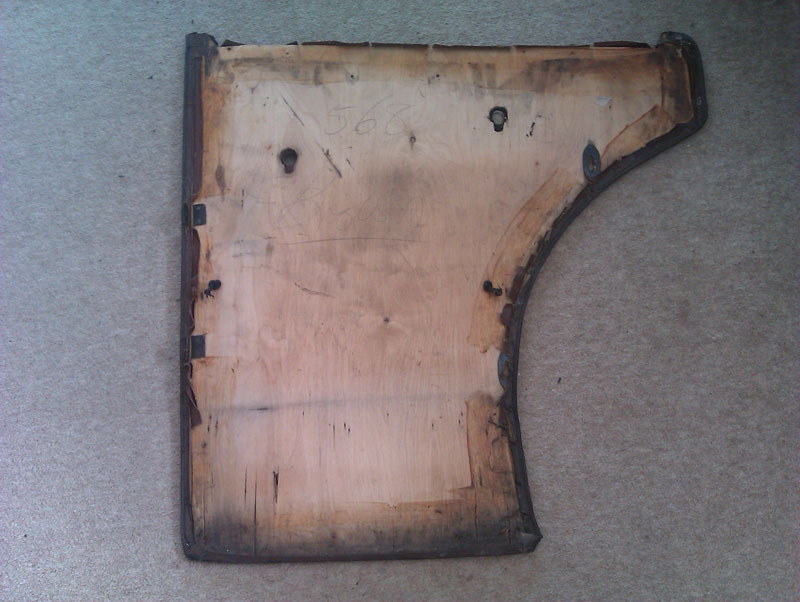
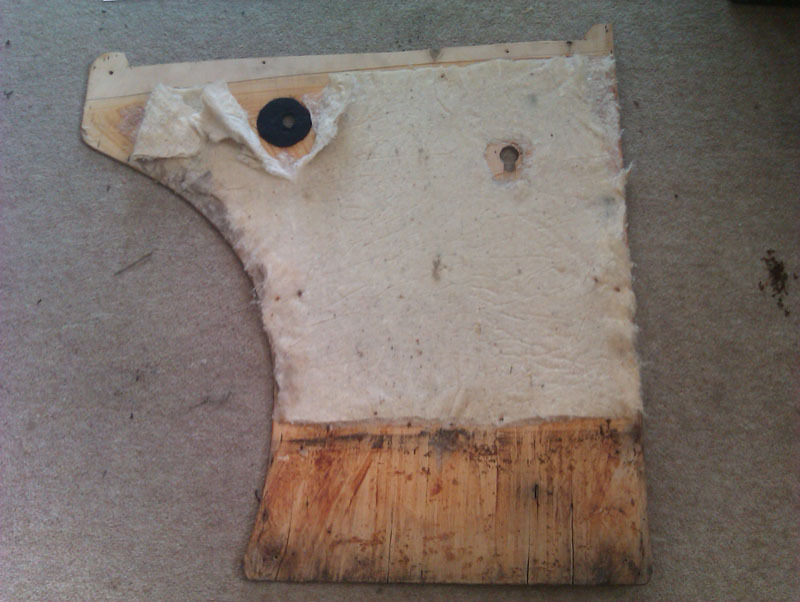
Today on the Lanchester, it's time to backwards engineer a door card. There's a lot of different ways to redo door cards, and this is one of the more involved approaches since we're trying to save and reuse as much of it as possible. The thing that makes this more difficult than it might be is that we're having to replace the board itself so that means stripping the whole thing into the component pieces to understand how to put it back together on a new board. The first stage of the process is to take a lot of photographs so you have the best record you can of construction. You'd be amazed how often something is confusing on assembly that a photograph will help explain, even if you weren't deliberately taking a photograph of the confusing item at the time. We've opted to go for the least damaged of the door cards, they all follow the same basic construction and this will give us the most accurate reference point since it has the least amount of missing or damaged parts. This approach can help if you're trying to rebuild a door card that's pretty far gone, it allows you to make educated guesses. The damage on this door card is limited to water damage along the bottom edge, the glue coming unstuck on the top edge, and a couple of missing tacks.
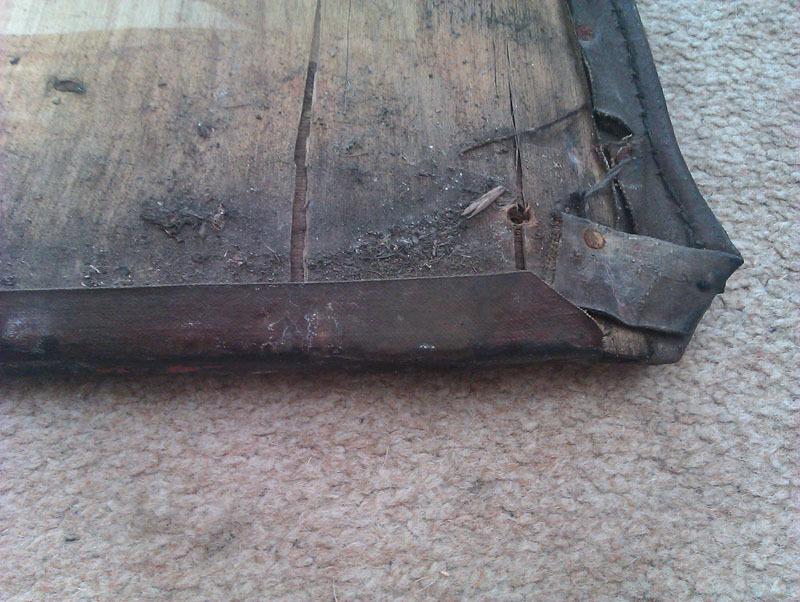
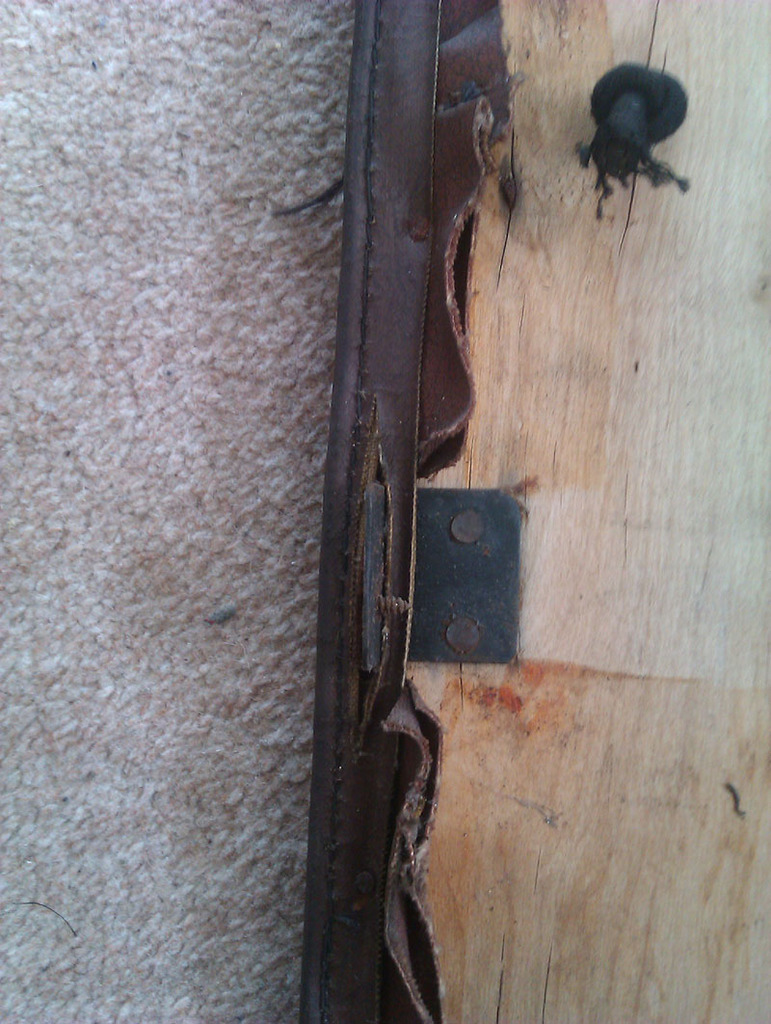
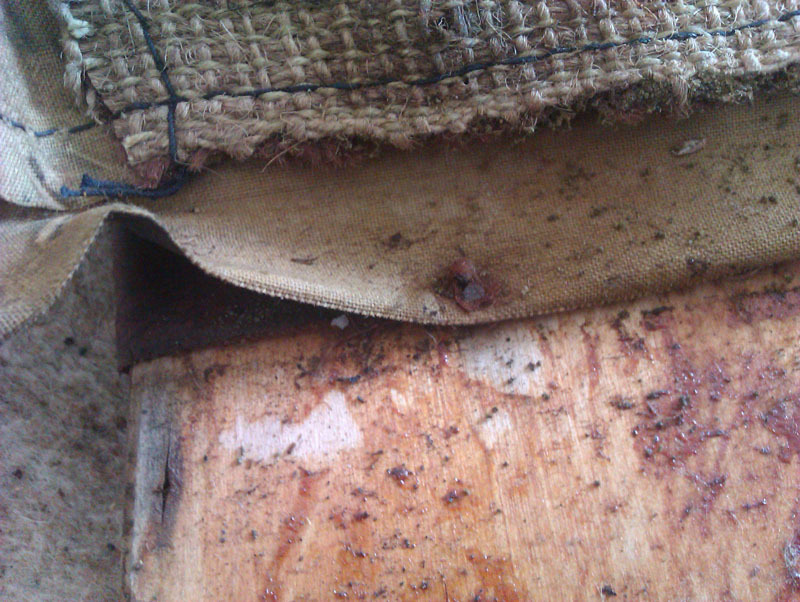
When you take your detail shots, pay special attention to where materials overlap and how they interact. You'll find as you unpick each layer you'll need to take more images. If you're reusing the original material, as we intend to do, it's easier to see where things go because generally they want to go back where they were. Understanding the original construction means you're less likely to put undue stress on the fabric, and retain an original looking finish, especially when it comes to things like the way the end of the piping trim is closed, or the way it hooks around bracketry to keep a good clean line when the card is refitted.
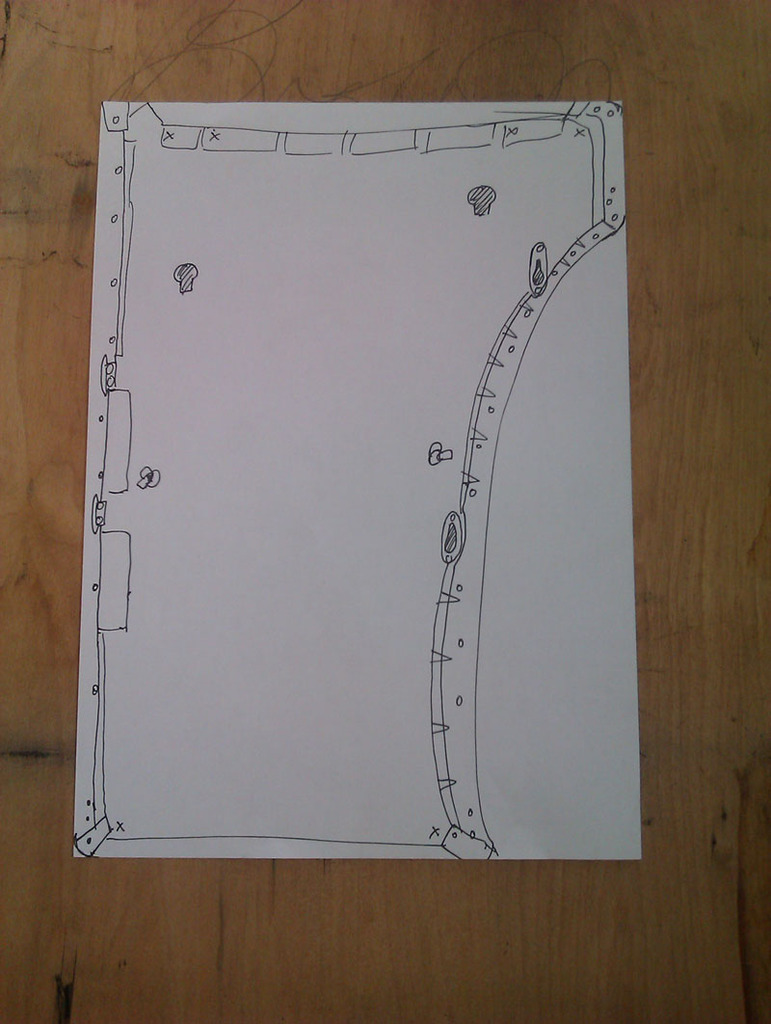
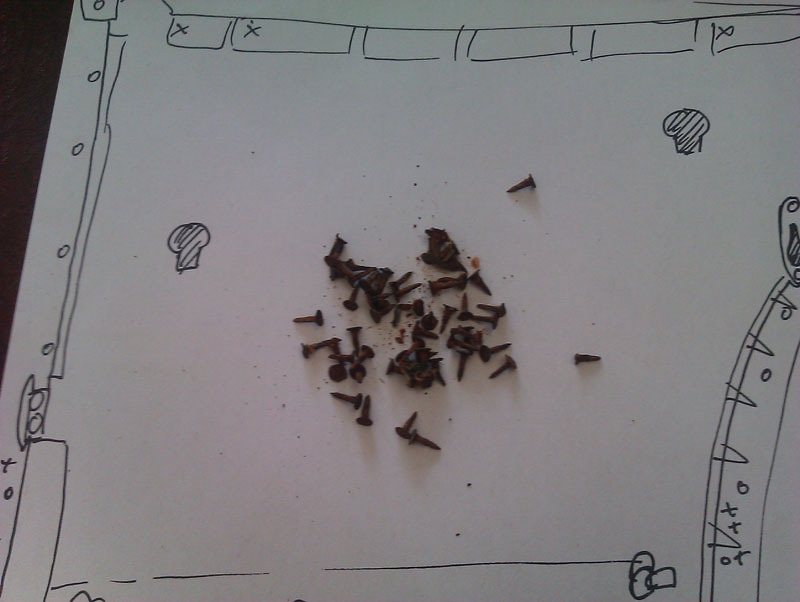
I also make a rough plan as I go along, marking all the details as I find them. I don't worry about measurements every time I do it, and I didn't in this instance either. I'll be transferring the measurements from the old card to the new pretty much by tracing, so the measurements aren't that vital at this stage. If the door card was more badly damaged then a to-scale diagram would be the choice. I also generally draw what I see to save on annotation and a confusing diagram, this used with the photographs gives me a very clear idea of what goes where and saves some time plotting everything out.
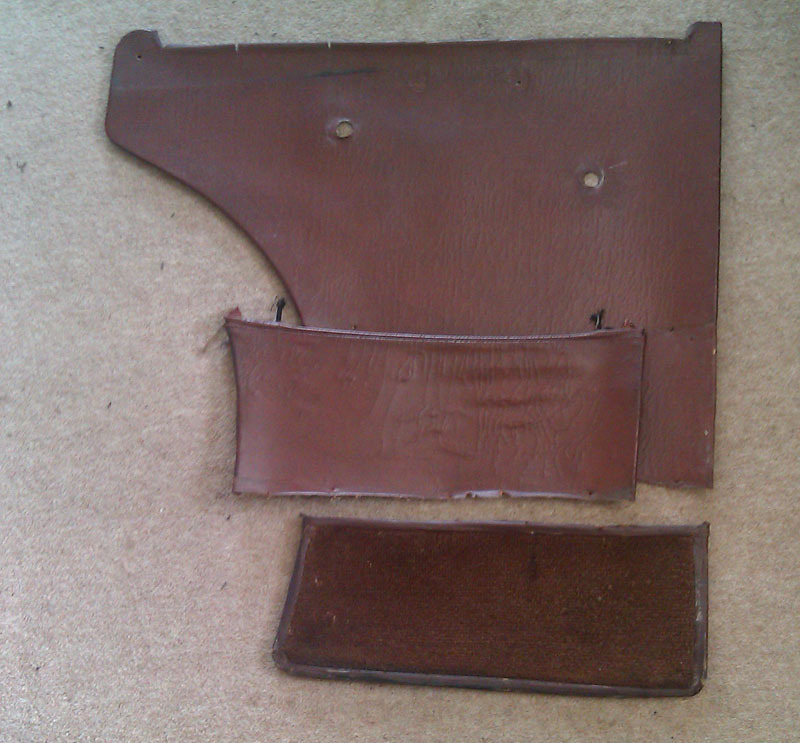
The whole panel is held together with tacks and some glue and the cover is a layered construction. It makes for a quick assembly and a smart finish without need of specialist tooling. The only stitching is on the edge piping, the binding edge for the carpet panel, and the piping seam for the pocket elastic, that's a benefit of Rexine not fraying, you can save a lot of time by not having to finish raw edges. The first task was pulling the tacks I could see, this removed the edge piping and revealed some more tacks underneath holding the main cover in place. Once those tacks were removed the carpet panel could be carefully folded up so it lid face down on the rest of the door card and that revealed the three tacks holding it down. To get a nice sharp edge, Barker opted to tack the panel and then fold it rather than sewing and pressing, and that makes the job of removal a lot easier.
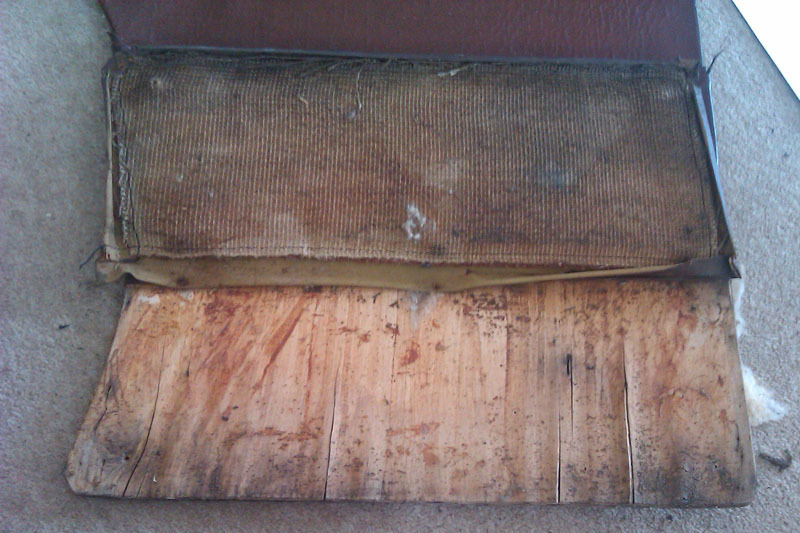
With the carpet panel tacks removed there were several more tacks holding the bottom of the pocket in place.

With those removed, the pocket panel could be opened, again up so it's face down against the door card, and that revealed the doubled-over cotton wadding used to give the pocket shape and softness.
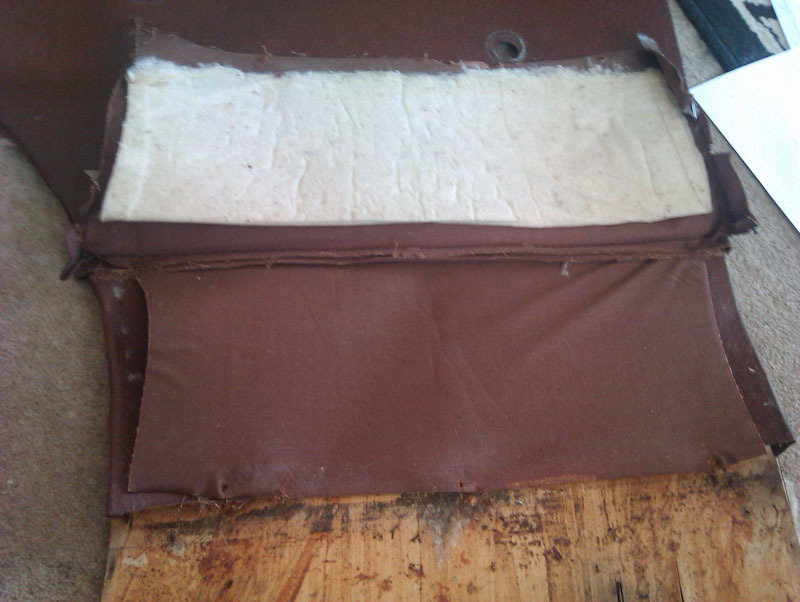
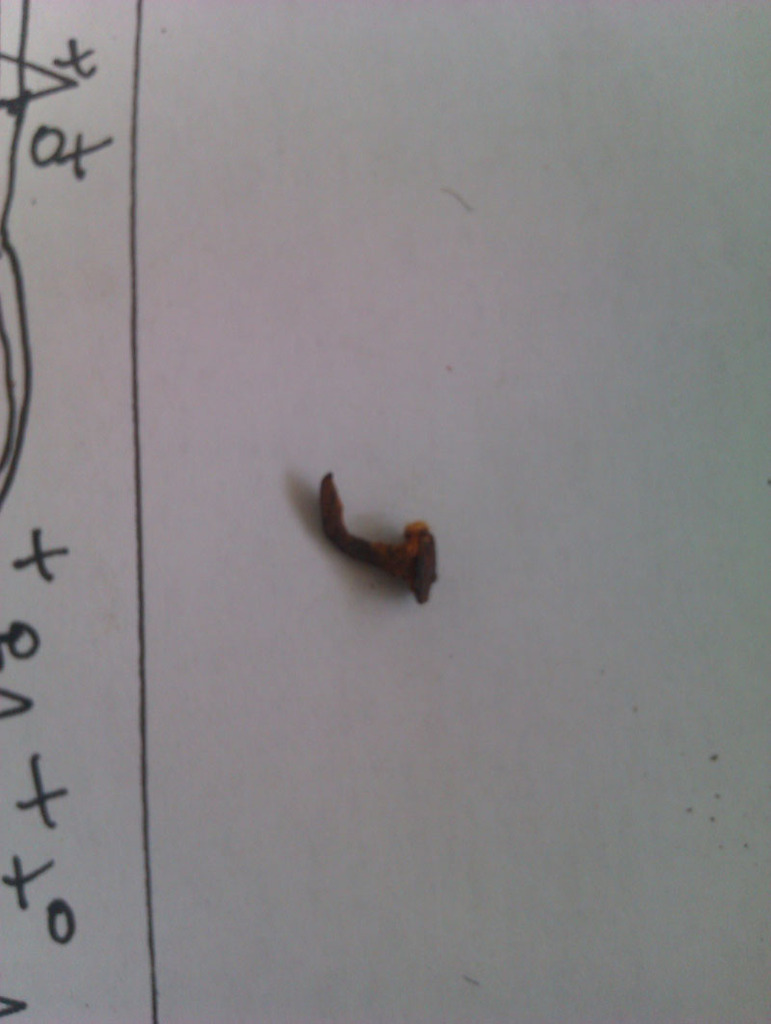
After that, fold the fabric upwards again until you get to the elastic cord. The cord is held in place by both the knots in it that stop it pulling through the door card, and two half inch tacks that are driven through the board (through the pocket fabric rather than the cord itself) and then bent over. This will be reduce strain on the corners of the pocket panel and prevent it tearing, also to prevent overstretching of the elastic cord that would result in saggy pockets. All of that removed we could carefully lift the rest of the cover free and reveal what was underneath. From the carpet panel up, the door card has a single layer of cotton wadding glued on. This is to give a smoother finish and a 'soft touch' to the rexine. It's understandably quite flat now and water damaged so will need replacing. Fortunately, this is a readily available material both from automotive suppliers and craft stores, the latter selling it for use in quilting.
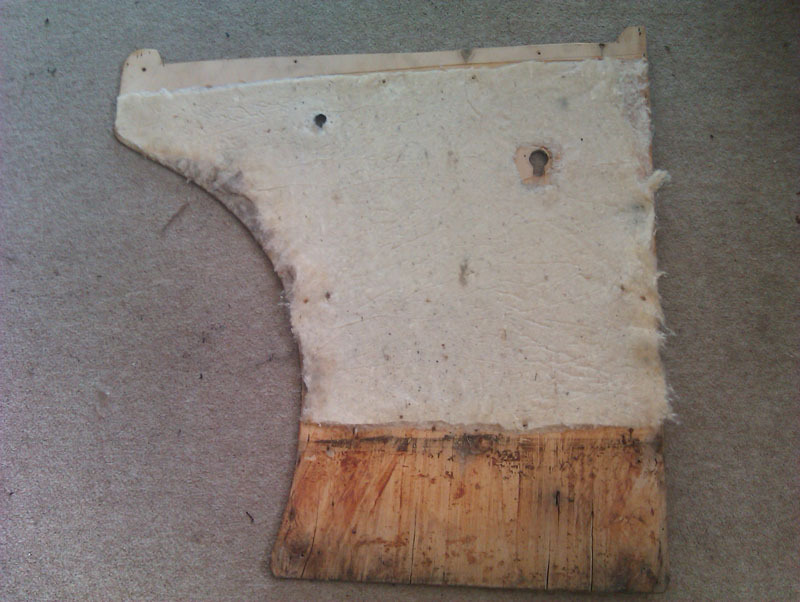
We will be using the same material rather than a modern foam equivalent for a number of reasons. The first is cost, there really isn't any saving to be had by using foam over the original cotton wadding. The second is smell, the interior of this car is almost entirely natural materials and as a result has a complex combination of smells that give it that 'old car smell', as soon as you start introducing modern materials like foam, you start getting 'new car smells' and we don't want that. The smell of a car is just as important as all the rest of the details. That said, there was one other item underneath the wadding layer and that's a felt pad for the door handle. There doesn't seem to be one for the window winder, it doesn't look like it's fallen off or worn out, there just isn't any evidence that one was there, so we shan't be fitting one unless the other door cards suggest there should be one there.
Finally, we have all our pieces separated and ready for the next phase.

In all, I removed 55 of the shorter 1/4" or 6mm tacks, and two of the bigger 1/2" or 12mm tacks. We're undecided if we're using tacks or staples to put everything back together, tacks are more original and possibly easier to remove should we have to, but staples do the same job and are easier to install. We'll figure it out when we try and acquire suitable hardware of either variety.
After all that, the plan of the door card had evolved somewhat. There's still a couple of items to remove from the backing board, we've opted to leave them in place for now so we don't loose them, we'll remove them when we cut the new card so they can be transferred straight over.

Given how easily the carpet sections come off, and that these are the most badly damaged portion of all the doors, we're considering replacing all of them when we fit the new carpet. That way it should blend in since the change between old and new is also a point where the materials change in type and texture so, in theory, it shouldn't be that noticable. That does give us an element of Project Creep since it means to finish the door cards we've got to get the carpet, and to do that we've also got to replace the missing kick panels since the carpet goes onto those and if we're doing that we should really get the front speakers for the entertainment centre... so we'll probably just redo the old door cards and leave the carpetted section off for now and then do all the carpet and kick panels later when we have the materials for that and have completed some of the other jobs instead. |
|
| Back to top |
|
|
Vulgalour
Joined: 08 May 2018
Posts: 474
Location: Kent
|
| Posted: Sat Sep 19, 2020 3:15 pm Post subject: |
|
|
| peter scott wrote: | Well done! An excellent piece of conservation. What leather filler did you use?
Peter |
As with the other leather care products, it's from Wakeson, who have a convenient little eBay shop. https://www.ebay.co.uk/str/wakeson
There's more expensive products out there, and cheaper, but I like the quality of their products for the price, and orders have always turned up on time and done exactly what I wanted them to do so I'm more than happy to recommend them. |
|
| Back to top |
|
|
peter scott

Joined: 18 Dec 2007
Posts: 7118
Location: Edinburgh
|
| Posted: Sat Sep 19, 2020 4:37 pm Post subject: |
|
|
Thanks Vulgalour.
Peter
_________________
http://www.nostalgiatech.co.uk
1939 SS Jaguar 2 1/2 litre saloon |
|
| Back to top |
|
|
Miken
Joined: 24 Dec 2012
Posts: 544
|
| Posted: Sat Sep 19, 2020 10:26 pm Post subject: |
|
|
I have a question.
For anyone;
Why are they called door "cards"?
There's not much cardboard in them, so it probably not that. |
|
| Back to top |
|
|
Ray White
Joined: 02 Dec 2014
Posts: 6313
Location: Derby
|
| Posted: Sat Sep 19, 2020 11:49 pm Post subject: |
|
|
| Miken wrote: | I have a question.
For anyone;
Why are they called door "cards"?
There's not much cardboard in them, so it probably not that. |
According to Wiki they were originally covered cardboard - but I am not so sure. Vintage era cars generally used thin plywood covered in Rexine. |
|
| Back to top |
|
|
Vulgalour
Joined: 08 May 2018
Posts: 474
Location: Kent
|
| Posted: Sun Sep 20, 2020 2:27 am Post subject: |
|
|
| I thought it was because it was a large, flat, stiff rectangle rather than what it was made from. Like playing cards, and wool cards. |
|
| Back to top |
|
|
alastairq
Joined: 14 Oct 2016
Posts: 1954
Location: East Yorkshire
|
| Posted: Sun Sep 20, 2020 8:39 am Post subject: |
|
|
I have more often found the backing to be hardboard, rather than the more damp-resilient plywood [which is a more costly material than hardboard anyway]
I hate the hardboard backings, as the inevitable use of wire clips rips the holes out of shape. Damp, or not. Despite my using the 'correct' tool for the job, usually a previous owner has had to get behind the card for one reason or another, and the holes get destroyed in the process.
_________________
Dellow Mk2, 1951 built, reg 1952.
Fiat 126 BIS
Cannon special [1996 registered. Built in 1950's]
----------------------------------------------
Ford Pop chassis, Ashley 1172 bodyshell, in pieces. |
|
| Back to top |
|
|
mikeC

Joined: 31 Jul 2009
Posts: 1775
Location: Market Warsop, Nottinghamshire
|
| Posted: Sun Sep 20, 2020 8:41 am Post subject: |
|
|
I'm inclined to agree with Vulgalor; the term certainly goes back to horse-drawn carriages of the nineteenth century, and I very much doubt that they were made of cardboard.
_________________
in the garage: 1938 Talbot Ten Airline
Recently departed: 1953 Lancia Appia, 1931 Austin Seven, 1967 Singer Chamois, 1914 Saxon, 1930 Morris Cowley, 1936 BSA Scout, 1958 Lancia Appia coupe, 1922 Star 11.9 ... the list goes on! |
|
| Back to top |
|
|
Vulgalour
Joined: 08 May 2018
Posts: 474
Location: Kent
|
| Posted: Sun Sep 20, 2020 11:56 pm Post subject: |
|
|
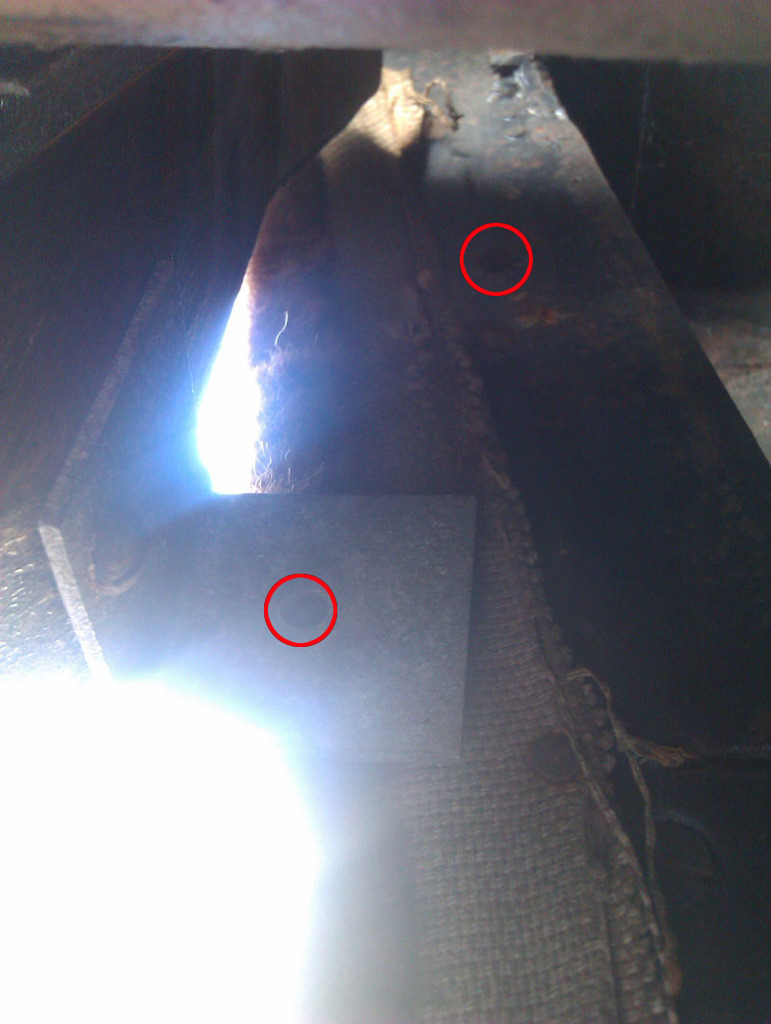
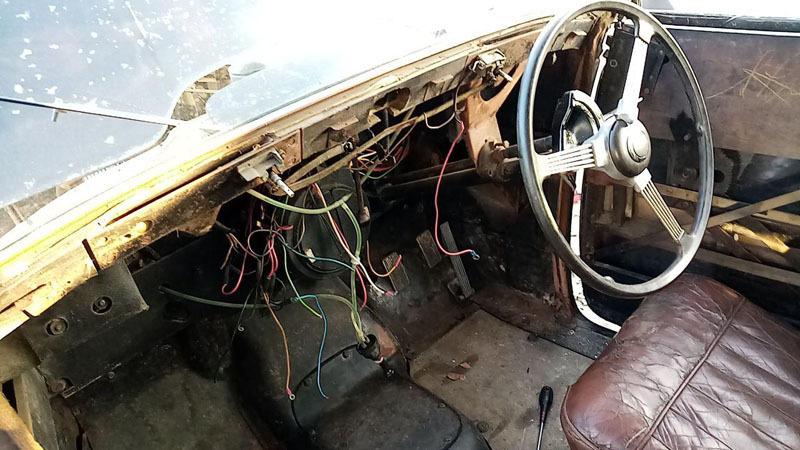
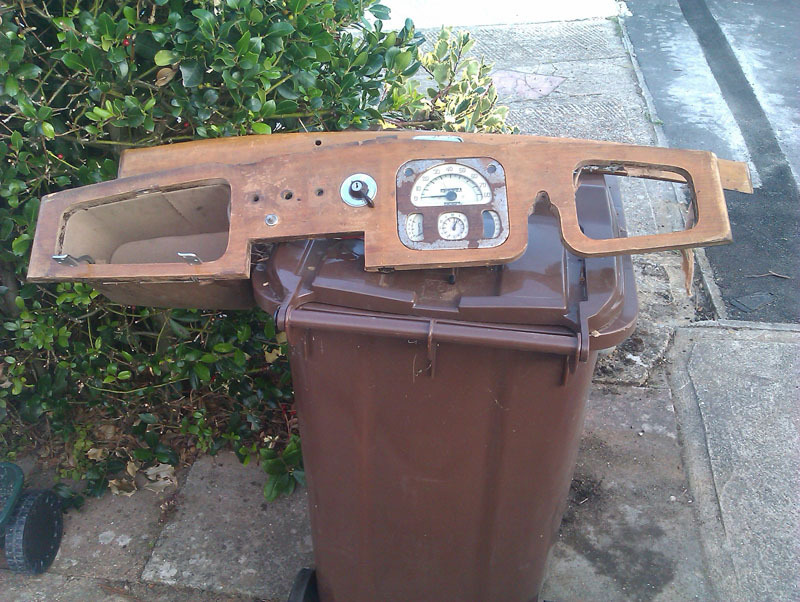
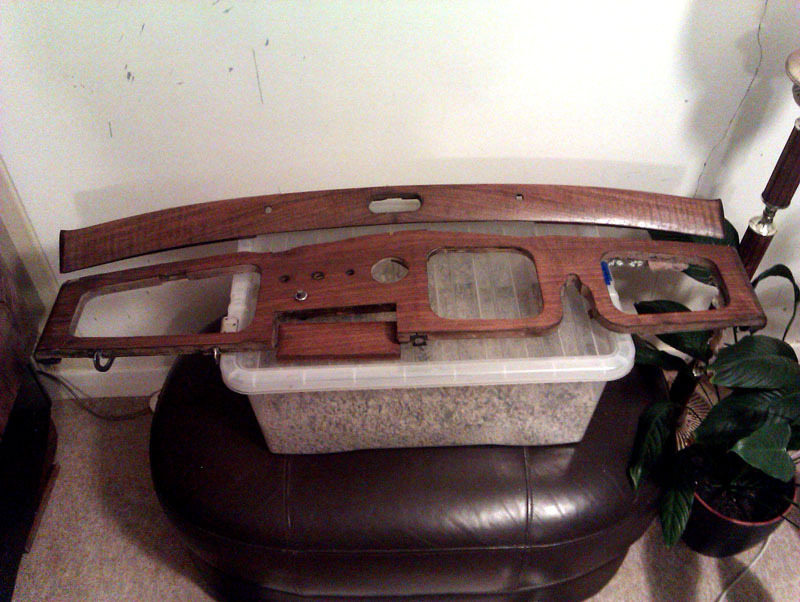
Our goal today was to remove the dashboard and starter motor so that they could be refurbished. We started with the dashboard since it looked to be a more involved job and it was going to take a while to figure out how it was held in place. As it happens, the main fascia of the dashboard is held in by three screws, on in each A pillar, and one in the centre, hidden from view. I couldn't get the camera to focus on the hidden one because of all the other items it wanted to focus on instead. Access to all the fixings is tricky and since it's all flathead screws that have gone a bit soft with rust, removal was a fraught endeavour. The two circles are the hole in the bracket, and the hole in the A pillar and this gives you some idea of what it was like to try and see what we were doing while working under the dashboard today. Also imagine bits of the floor jabbing into your back when you least wanted it, and stuff falling out of the dashboard into any part of the face you don't want it to.
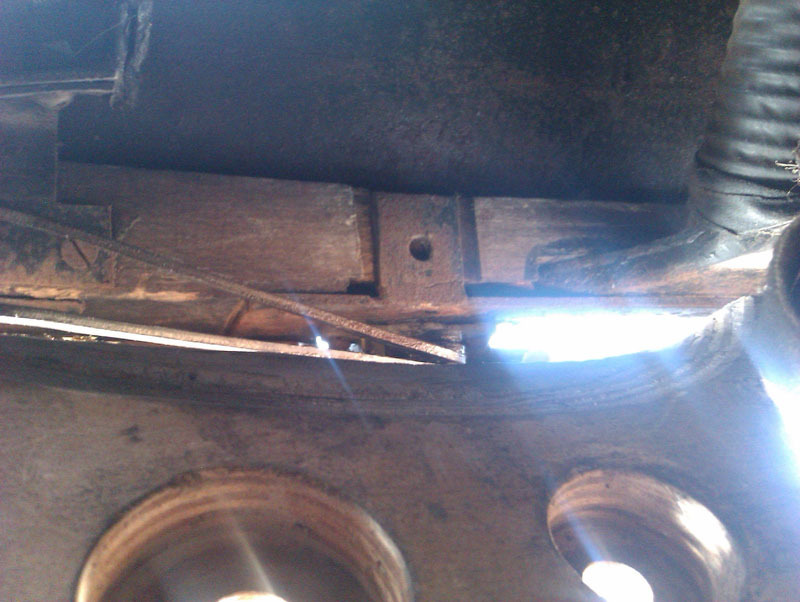
With that removed it was then time to figure out how to get the panel out. We couldn't risk removing the steering wheel as we didn't have the screws needed to replace the one that was threatening to self destruct last time, and there were a lot of items attached the dashboard that needed to not be. While we were under the dashboard we saw one possible reason for the wiper motor linkage rubbing against the back of the dashboard, there seems to be a missing screw in the plate that holds it.
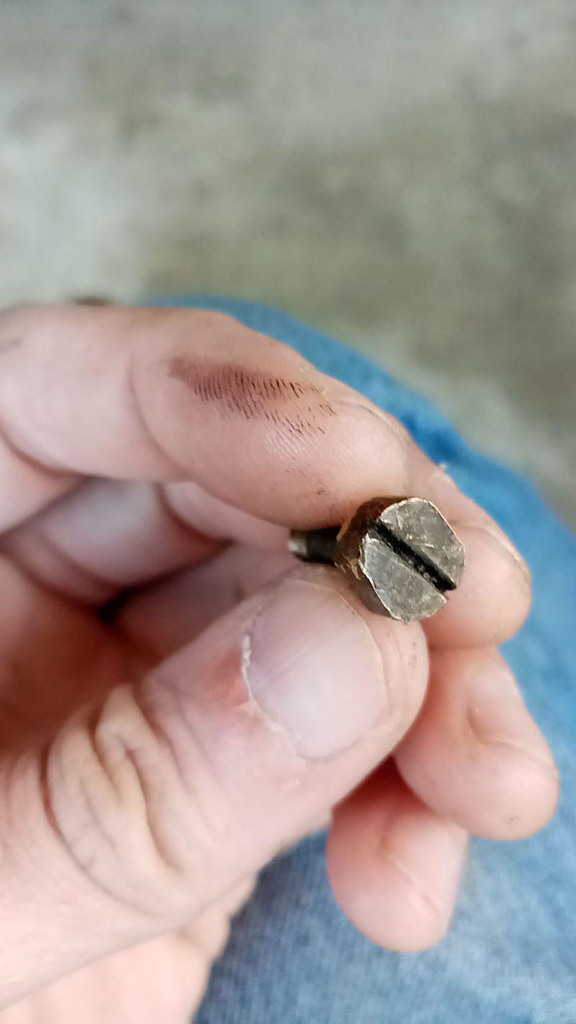
The other items we needed to disconnect were the heater switch, ignition switch, instrument binnacle, choke cable, starter cable, and fuel reserve cable. All of the cables are held to the back of the dash with a large nut recessed into the wood of the dashboard. All bar the fuel reserve cable nut came undone by hand, the fuel reserve required careful use of narrow pliers since none of the spanners could fit in the gap. The choke cable was disconnected from the carburettor and on trying to pull it through the bulkhead, the cable came out of the sheath and now doesn't want to go back in, judging by the state of the cable it's not the first time it's done that. To disconnect the fuel reserve cable we had to remove the passenger side front floor board for access, the fixings were just too difficult to get to from underneath the car. The starter cable proved the most difficult, the fixings for the cable on the starter motor are in such a place that it's really difficult to get to them, added to that the size of the bolt head that screws in to clamp the cable in place didn't seem to match any metric or imperial tool we owned, it was only after we finally got it out with pliers that we understood why.
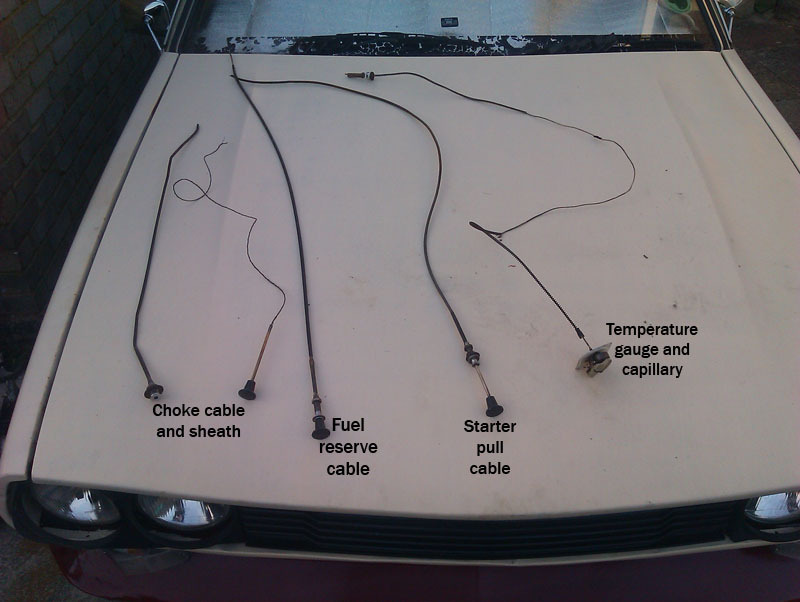
The capillary line for the temperature gauge was removed when we got the dashboard free, we unscrewed the temperature gauge from the instrument binnacle and then very carefully fed the capillary line through from the engine bay into the car. We couldn't see any other way to do this at the time, there didn't seem to be any obvious way to disconnect the line from the gauge. Our biggest obstacle to removing the dashboard now was the steering wheel, but I knew that on some cars if you unfasten the bracket that holds the column to the bulkhead, the column will drop down a bit, preventing the need to remove the steering wheel. I can also tell you that undoing the three bolts that hold the column to the bracket is nigh on impossible with the dashboard in place because you can't actually see all the nuts and bolts you're trying to undo. We did get there in the end. The top rail of the dashboard is held in with four screws, one at the outer corners, and one near each wiper spindle, all of these screws are awkward to get to, we are not looking forward to trying to reassemble everything.
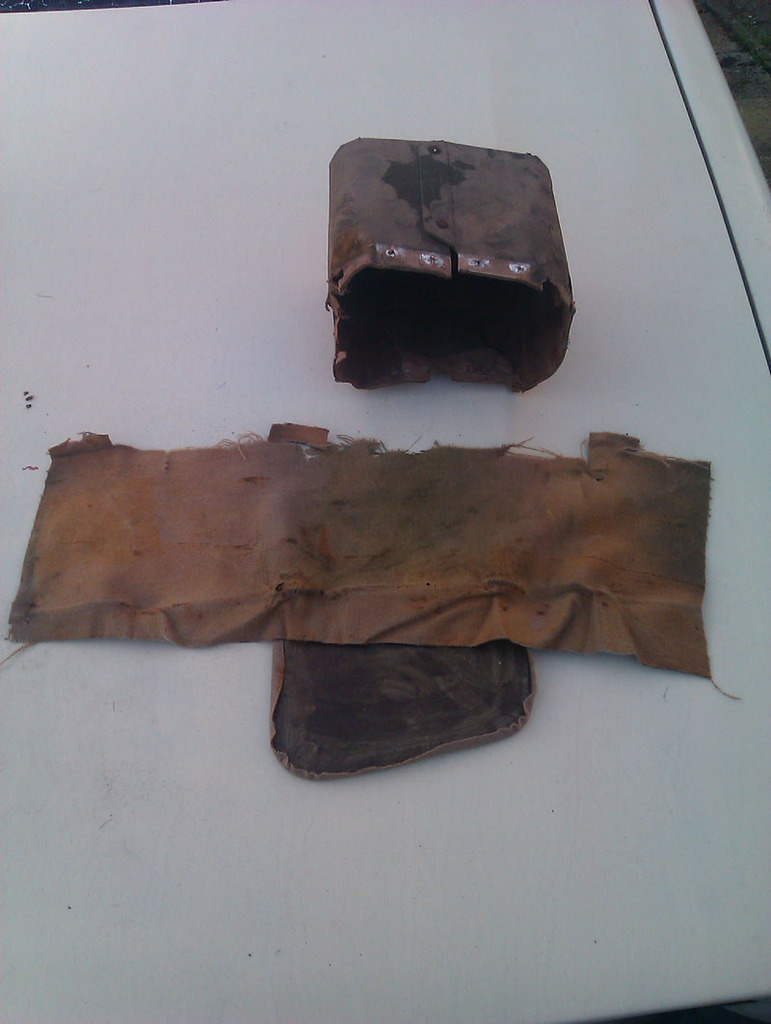
There was one casualty along the way which was the driver's side cubby, there was signs of water damage on it and as we tried to wiggle everything out past the steering column it started to collapse. It's intact enough that we can take a pattern and make a new one and since the glovebox is similarly tatty we'll redo both and reupholster them in something suitable, though perhaps not the original beige wool.
With everything all out we could now get a look at the new wiring that had been let in. The work has been done reasonably well except for the fact that none of it is tidied away, it's all just draped over the top of the heater. Just as well we've ordered a brand new loom, this looks like it was just waiting to be an accident.
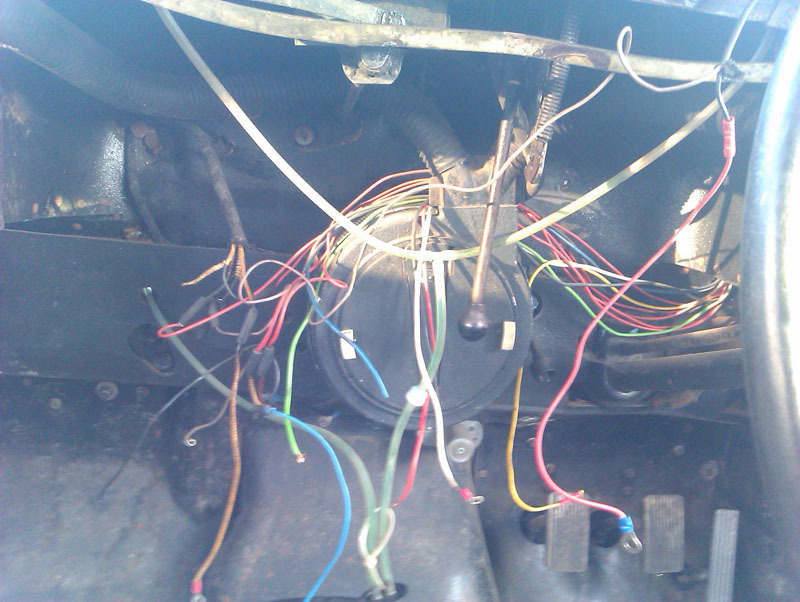
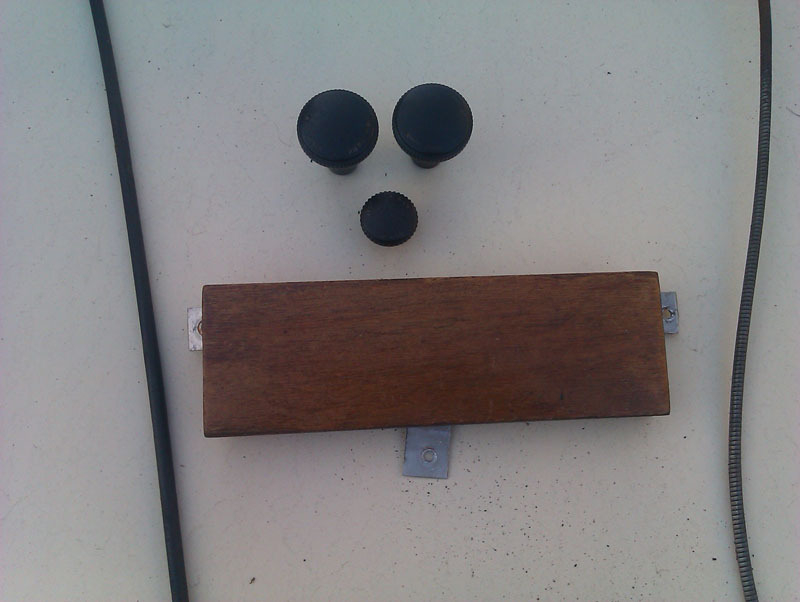
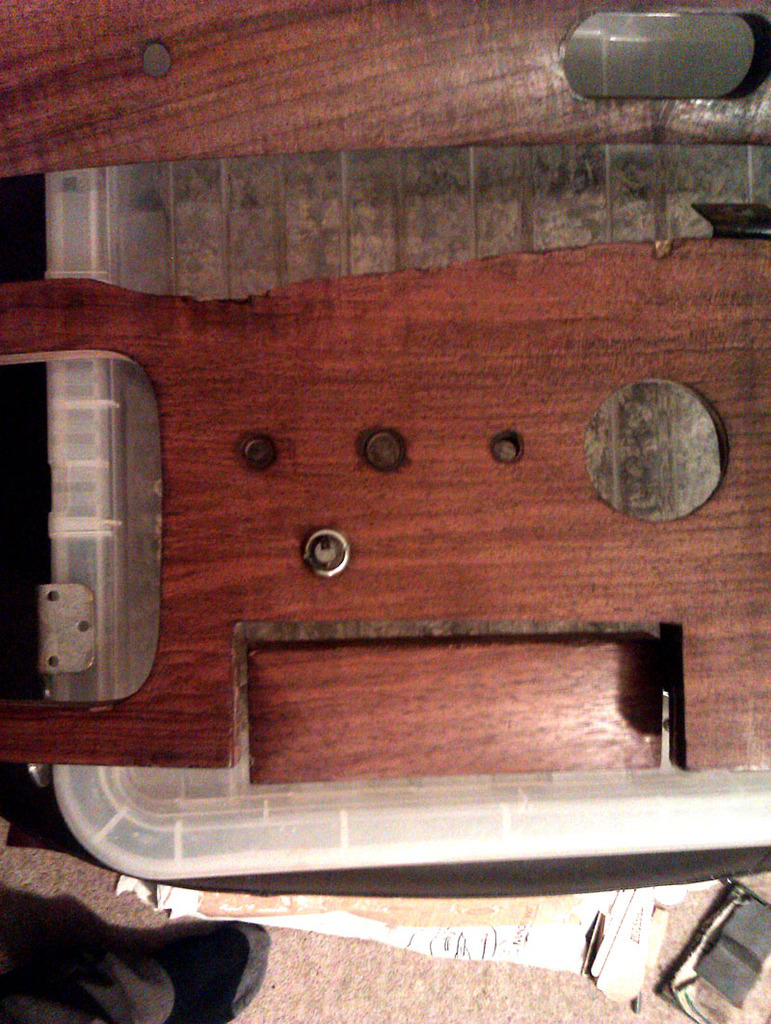
The dashboard needed to come out both for refinishing and so we could more easily do the wiring loom, so as horrible a job as it's been, it was absolutely necessary. Another thing it's allowed us to do is see that the wiper mechanism is very sloppy, the main linking arm wobbles around quite a lot and it's not exactly clear how we're going to tighten this up again at this point, we'll have to investigate more thoroughly when we have more time. It was also quite clear someone has been behind the dashboard before as several screws were missing, including on of the two that holds the instrument binnacle in place, and there were a few newer screws here and there, all items we'll need to rectify on reassembly. With it removed, we could now get our first proper look at the dashboard, the condition of which isn't too terrible aside from a little water damage on the corners and the wear from the loose wiper mechanism. The radio blanking plate (we assume, it's about the right size) and controls are all in pretty good shape.
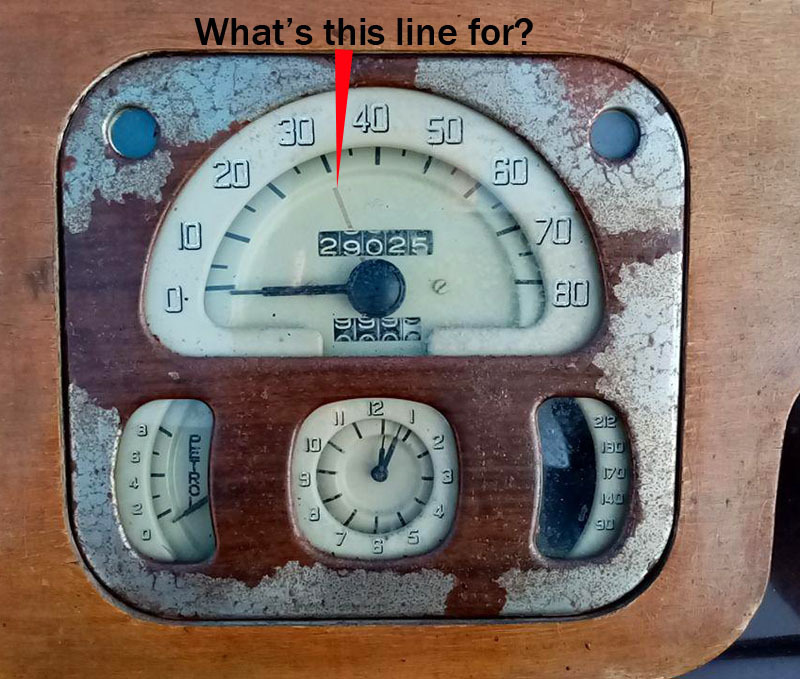
On the speedometer there is a red line, it doesn't show up as red in photographs for some reason. Is this some sort of visual reminder for which gear to be in? Maybe instructing you to be in top gear by the time the needle gets to this point? EDIT: apparently this is to serve as a reminder of the speed limit in built-up areas.
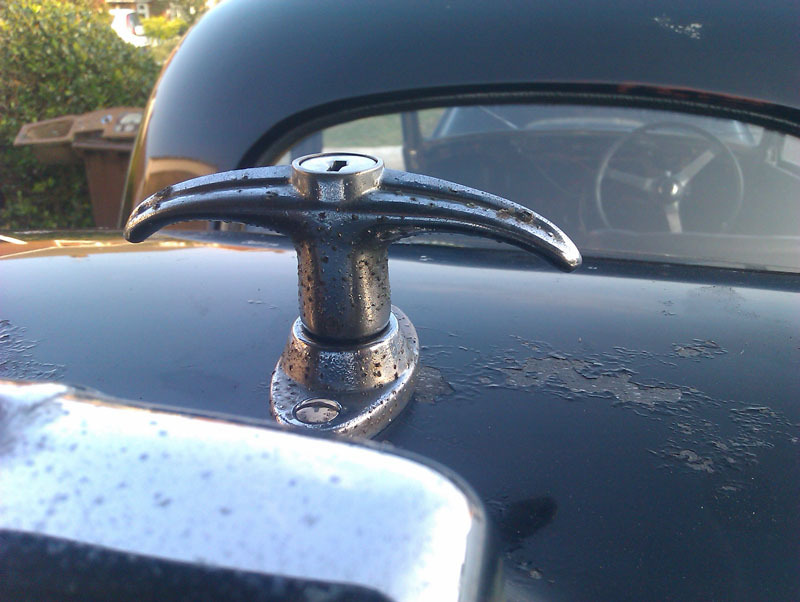
The boot handle was screwed back on now we have a working key for it and that makes life a lot easier on that front. I also put all the spanners into my old plywood toolbox which just happens to fit perfectly in the bottom portion of the Lanchester's boot.
After a break we then spent some time scraping old varnish off before putting the first fresh coat of Danish Oil on the dashboard. As with the other wood, it's come up beautifully. There's a few tiny pieces of veneer missing that we're not worrying about since they're hidden by other bits of trim that overlap. With another couple of coats of oil, this dashboard is going to look excellent and will be a real treat when it's back in the car.
 |
|
| Back to top |
|
|
Peter_L
Joined: 10 Apr 2008
Posts: 2680
Location: New Brunswick. Canada.
|
| Posted: Mon Sep 21, 2020 4:24 am Post subject: |
|
|
Vulgalor asks about the line opposite 30mph. I have seen this on many vehicles over the years. It is what may be called a "Driver Aid" by helping the driver to keep to the 30mph speed limit. Back in the day of this particular motor car I believe that 30mph was the only designated speed limit and was applied to "Built Up Areas", the rest of the road network was without restriction. A Very British Contradiction to this applied to light commercial vehicles, such as the 300E 5 & 7 Cwt Ford Vans. If they did not have side windows, they were subject to a 30mph Max Speed, everywhere.
Last edited by Peter_L on Mon Sep 21, 2020 2:02 pm; edited 1 time in total |
|
| Back to top |
|
|
peter scott
Joined: 18 Dec 2007
Posts: 7118
Location: Edinburgh
|
| Posted: Mon Sep 21, 2020 8:03 am Post subject: |
|
|
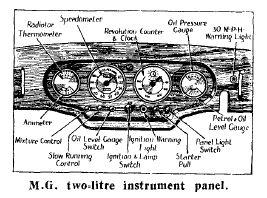
Yes, it's quite interesting having young eyes looking at things that us oldies took for granted. In the good old days there was only one speed limit. In some of the better quality MGs that used "Chronometric" speedometers a dashboard warning lamp came on when you reached 30 MPH.
Peter
_________________
http://www.nostalgiatech.co.uk
1939 SS Jaguar 2 1/2 litre saloon |
|
| Back to top |
|
|
Ray White
Joined: 02 Dec 2014
Posts: 6313
Location: Derby
|
| Posted: Mon Sep 21, 2020 8:28 am Post subject: |
|
|
This came up with my MG 1949 TC because being an export model it was omitted. Home market cars had what was called a "thirtylight" on the dashboard. It was like a chrome plated map reading lamp except that instead of having a window in the side, it had a green lens on the end. It can be seen between the instrument panel and the tacho to the right (not my car).
 |
|
| Back to top |
|
|
|
|
You cannot post new topics in this forum
You cannot reply to topics in this forum
You cannot edit your posts in this forum
You cannot delete your posts in this forum
You cannot vote in polls in this forum
|
php BB powered © php BB Grp.
|


