
Classic cars forum & vehicle restoration.
|
|
| Author |
Message |
badhuis

Joined: 20 Aug 2008
Posts: 1390
Location: Netherlands
|
 Posted: Mon Sep 21, 2020 9:25 am Post subject: Posted: Mon Sep 21, 2020 9:25 am Post subject: |
 |
|
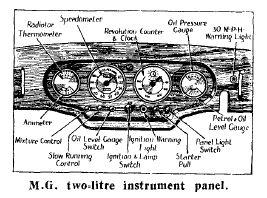
| peter scott wrote: | In some of the better quality MGs that used "Chronometric" speedometers a dashboard warning lamp came on when you reached 30 MPH.
Peter |
Would love to see how they managed a mechanical device triggering the warning light. Something inside the speedometer? I cannot imagine it being done by the speedo needle itself as that would not be strong enough to put on a switch.
_________________
a car stops being fun when it becomes an investment |
|
| Back to top |
|
 |
Ray White

Joined: 02 Dec 2014
Posts: 6314
Location: Derby
|
| Posted: Mon Sep 21, 2020 10:26 am Post subject: |
|
|
| Yes it was a somewhat fragile mechanism in the speedo. They tend to fail and relatively few are working. Some people have converted them to an oil pressure warning light. |
|
| Back to top |
|
|
Rootes75
Joined: 30 Apr 2013
Posts: 3815
Location: The Somerset Levels
|
| Posted: Mon Sep 21, 2020 12:59 pm Post subject: |
|
|
All our pre-war Hillmans have the 30mph indicator line. They don't do much more than that anyway these days!
_________________
Various Rootes Vehicles. |
|
| Back to top |
|
|
alastairq
Joined: 14 Oct 2016
Posts: 1954
Location: East Yorkshire
|
| Posted: Mon Sep 21, 2020 1:20 pm Post subject: |
|
|
That must make the red line a target, then?
_________________
Dellow Mk2, 1951 built, reg 1952.
Fiat 126 BIS
Cannon special [1996 registered. Built in 1950's]
----------------------------------------------
Ford Pop chassis, Ashley 1172 bodyshell, in pieces. |
|
| Back to top |
|
|
peter scott

Joined: 18 Dec 2007
Posts: 7118
Location: Edinburgh
|
| Posted: Mon Sep 21, 2020 2:26 pm Post subject: |
|
|
| badhuis wrote: | | I cannot imagine it being done by the speedo needle itself as that would not be strong enough to put on a switch. |
Chronometric Speedos: http://archives.jampot.dk/Technical/Speedo/Smiths_Speedo_restoration.pdf
I'm not sure where the "Thirtylight" switch sits in the mechanism but I assume the mechanism has more "power" to operate it than anything with magnetic drag.
Peter
_________________
http://www.nostalgiatech.co.uk
1939 SS Jaguar 2 1/2 litre saloon |
|
| Back to top |
|
|
Ray White
Joined: 02 Dec 2014
Posts: 6314
Location: Derby
|
|
| Back to top |
|
|
badhuis
Joined: 20 Aug 2008
Posts: 1390
Location: Netherlands
|
| Posted: Tue Sep 22, 2020 5:57 pm Post subject: |
|
|
Thank you Ray for finding this.
_________________
a car stops being fun when it becomes an investment |
|
| Back to top |
|
|
Bitumen Boy
Joined: 26 Jan 2012
Posts: 1735
Location: Above the snow line in old Monmouthshire
|
| Posted: Wed Sep 23, 2020 2:33 am Post subject: |
|
|
| Not sure about the latest models but there are plenty of modern-ish Vauxhalls on the road that have a red line on the speedo for 30mph. |
|
| Back to top |
|
|
Vulgalour
Joined: 08 May 2018
Posts: 474
Location: Kent
|
| Posted: Wed Sep 23, 2020 10:32 pm Post subject: |
|
|
I don't really know anything about cars built after 2000 so I'll have to take your word for it on the modern Vauxhalls.
Work has been progressing steadily on the dashboard. Drying times aside, this has been a very quick job. One of the issues was that when you turned the heater knob, the whole assembly turned and we were concerned the controller might have seized. Luckily, it was just that the nut holding the controller to the back of the dashboard was a bit loose. Even so, we did take the heater controller apart, a case of prying back three metal tabs on the casing, so that we could get a better look inside it. It's a very simple item and therefore very easy to sort out. It was a bit corroded from sitting around, so we gave it a thoroughly clean to give it the best fighting change. It all cleaned up very well and moves much more freely than before.
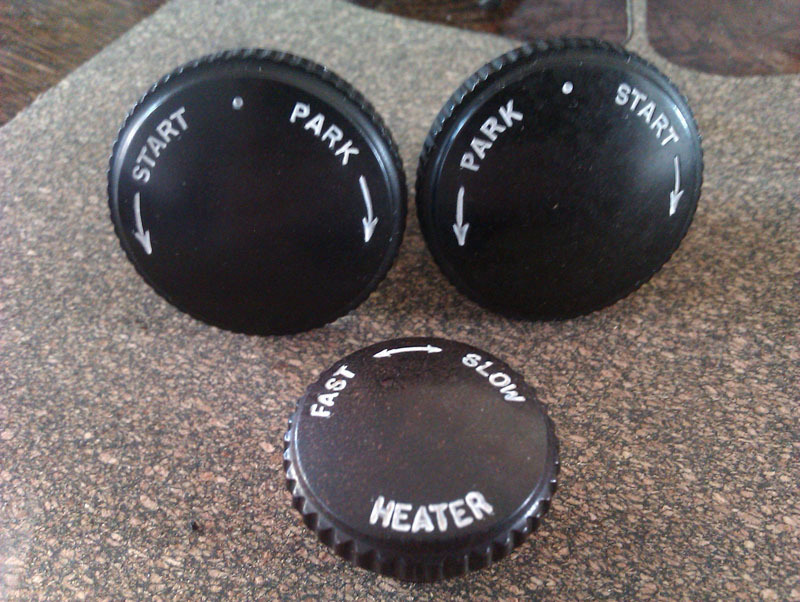
This was then reassembled and attention turned to sorting out the dash control knobs. Most of the original paint in the lettering on the knobs was missing, or discoloured to a degree that it was no longer legible. A good scrub in plain water followed by picking out any stubborn bits of old paint with a pin was followed by some good quality acrylic paint. You don't have to be at all tidy doing this, just load up the letters with as much paint as they'll take, wait for it to dry, and then polish the paint off on a piece of paper towel. This gives a nice crisp finish for minimal effort and can be redone just as easily in the future if needed. A good quality acrylic paint was chosen rather than enamel as it doesn't yellow with exposure to UV. Some people use Tippex or nail varnish for this job, the former has a habit of flaking off, the latter can be more difficult to clean since you have to use a solvent and that can lift paint out of the lettering as you clean.
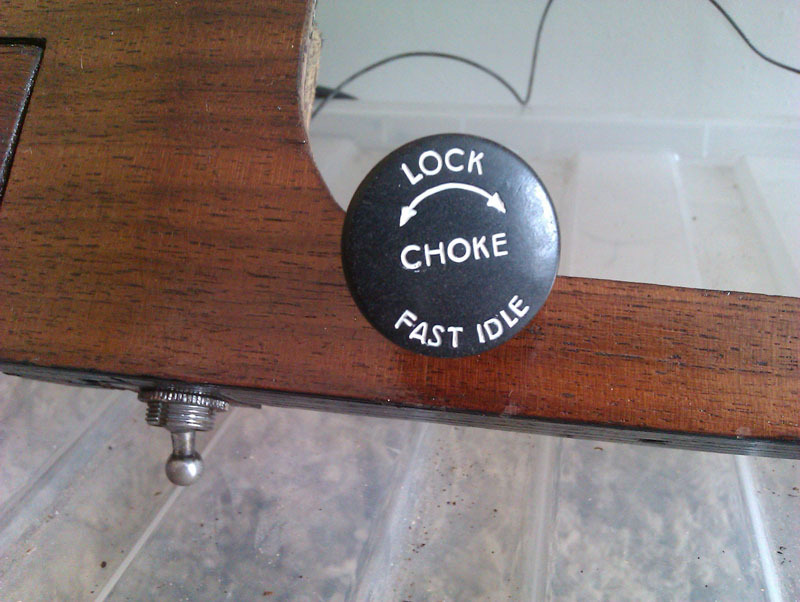
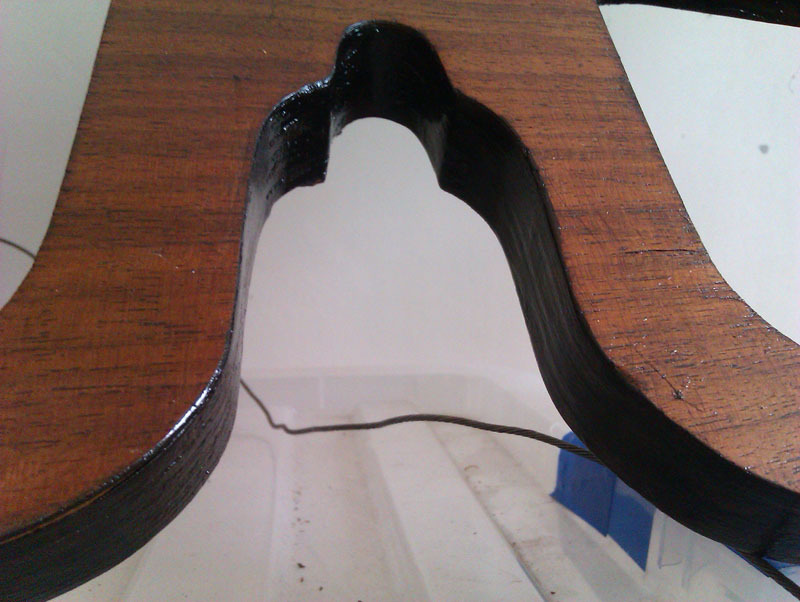
All of the exposed plywood edges were originally painted a dark brown, this seems to be common practice with mid-century modern furniture too. I used black, since I had some left over from the restoration of an antique sideboard that's made in the same way as this dashboard, and that works just fine. It's a slightly translucent paint so it does allow some of the brown of the plywood to show through, the finish ends up closer to dyed wood than painted.
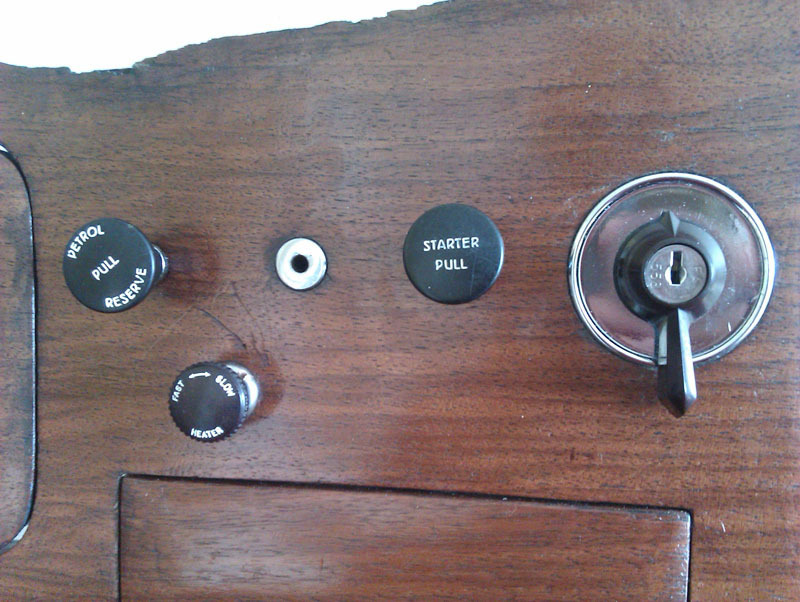
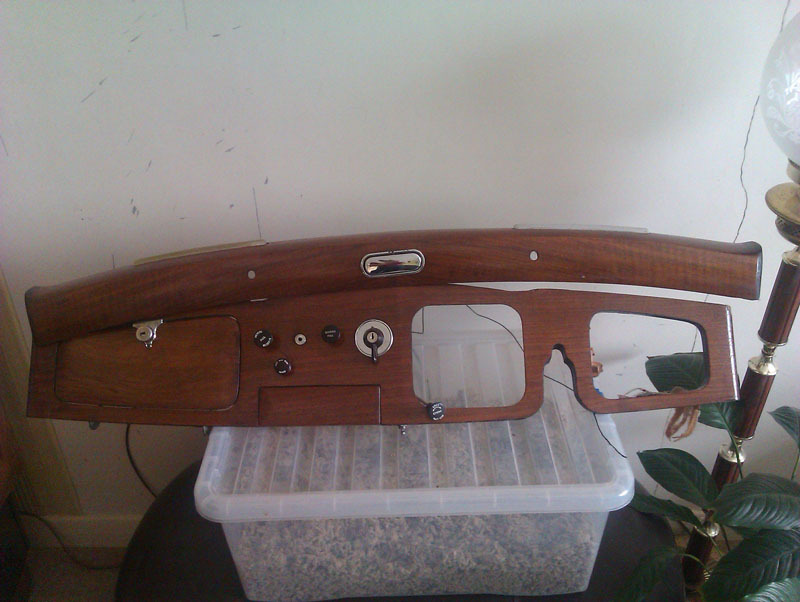
I then reassembled all the bits of the dashboard I could that were finished. The only item I'm having difficulty with is the choke cable which does not want to thread through from the front. Because of the way the sheath is made, you have to thread the cable in from the engine end, the step of the sheath as it goes into the holder that screws into the dashboard is such that it always catches whatever cable or wire you try to thread through. I'm considering getting some very skinny plastic pipe, threading that through from the engine end of the sheath, fitting the cable into it and then pulling the whole lot back through to get around the step. Failing that, unsoldering the cable, threading it through from the engine end, and the re-soldering it into the brass tube ferrule might be the only way to do it. It'll sort. the other item that was tidied up on the dashboard was the flaking paint on the ignition/headlight switch. You can get a black sticker with white lettering for this which is usually for Land Rovers. We're either going to get a reproduction sticker to match the original cream paint with brown lettering, or we'll get the three positions stamped into the polished bezel and then put paint in the recesses as with the control knobs. There was no saving the original paint, it had basically turned into confetti.
Finally, we got the opportunity to see the dashboard all together since all the finishes on it were done that could be. The collapsed cubby box might actually be salvagable, most of the damage is to the front edge so in theory we should be able to just cut the first inch or so off it, strengthen any weak spots with resin or similar, and recover it, both dashboard boxes need recovering anyway and this would be the most cost effective solution as things stand. Obligatory before and after shots.
 |
|
| Back to top |
|
|
Ray White
Joined: 02 Dec 2014
Posts: 6314
Location: Derby
|
| Posted: Wed Sep 23, 2020 10:54 pm Post subject: |
|
|
| Superb work. Your dashboard is looking very nice and is a credit to you. |
|
| Back to top |
|
|
Keith D
Joined: 16 Oct 2008
Posts: 1129
Location: Upper Swan, Western Australia
|
| Posted: Thu Sep 24, 2020 3:01 am Post subject: |
|
|
I agree with Ray
Keith
_________________
1926 Chrysler 60 tourer
1932 Austin Seven RN long wheelbase box sedan
1950 Austin A40 tourer
1999 BMW Z3
Its weird being the same age as old people.
You are either part of the problem or part of the solution |
|
| Back to top |
|
|
kevin2306
Joined: 01 Jul 2013
Posts: 1359
Location: nr Llangollen, north wales
|
| Posted: Thu Sep 24, 2020 8:19 am Post subject: |
|
|
You are doing a great job of the V, can you pack your job in and do more every day as I can’t wait for updates!
Keep it up
Kev |
|
| Back to top |
|
|
Vulgalour
Joined: 08 May 2018
Posts: 474
Location: Kent
|
| Posted: Fri Sep 25, 2020 1:03 am Post subject: |
|
|
Thank you  Other half said we should do regular YouTube videos about all this until I suggested he should be the one doing the editing, suddenly the idea wasn't so appealing. Other half said we should do regular YouTube videos about all this until I suggested he should be the one doing the editing, suddenly the idea wasn't so appealing. 
---
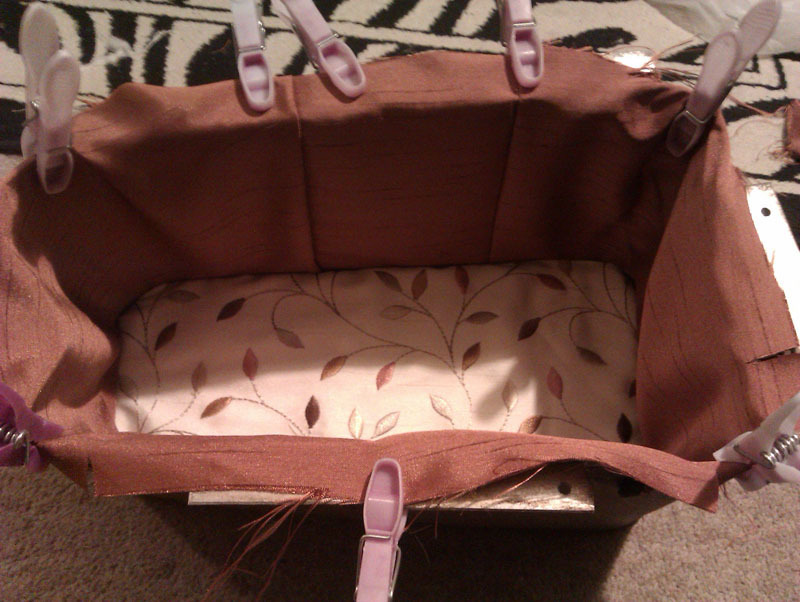
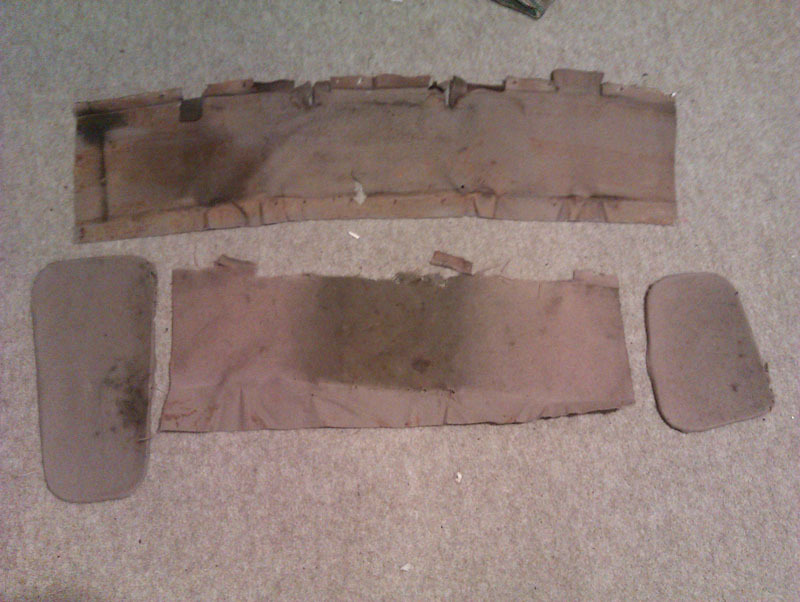
Time for another instalment of Lanchester fettling. Quite a few small jobs have been ticking over and I've been saving up the progress made until I had something to put together into a single post. We found, and were the only bidders, on a pair of working Lucas WT29 horns, or so they were described. Hopefully that will at least give us a look at how a working pair are supposed to go together and figure out why ours are being so recalcitrant. Here's hoping the new horns arrive safely. Progress on the dashboard has been continuing steadily in our free time, and the fabric stash raided to see if we had anything suitable that would suit the car without looking too out of place. I know there was no pale coloured wool, and the dark coloured wool I did have didn't look right against the restored dashboard. Eventually, we settled on two scraps of artificial silk leftover from sewing projects past and not enough to really do much of anything else with. This is the first item that goes against the originality brief but we think it's allowed because it looks nice and it at least fits in with the ethos of using what you've got to keep things nice. After stripping off the old fabric and discovering the back of the storage bins are a separately covered piece, some repairs were done and then the backing boards covered in the paler of the two fabrics in the same way they were done originally. That is to say, messily on the side that isn't seen. It was actually a bit surprising just how quick and lazy an approach was taken to upholstering these pieces, fabric is basically stuffed where needed, wrapped around and glued, then wedged together to fit.
The second bit, while the first bit dried, was to line the storage bins themselves, this time by using a strip of fabric glued around the inside of the bin. Because this artificial silk is quite thin, we also used a bit of the cotton wadding we ordered for the door cards (the smallest quantity is far more than we need) to line all the pieces which will lend a nicer finish by hiding the fixing rivets and making the fabric feel a little plush. The copper fabric is extremely shiny on the facing side, on the reverse it looks a lot more like shot silk so that's the side we had facing out. Because this isn't real silk we shouldn't have issues with sun damage or the fabric rotting away, and because it's been in the fabric stash for a long time, it no longer has that new fabric smell. Lining the boxes is easy, you roll the fabric up and start from the seam at the top centre of the box, then unroll it using pegs to hold it at the top. There's no need for any glue. The one mistake I made was the larger box I cut the edge fabric too short and the scrap I had left wasn't long enough to redo it in one piece. Instead of panicking, I just folded the raw edges and put another piece in to bridge the cap, If I hadn't told you, you'd think it was a design feature rather than a mistake... unless you know anything about sewing and upholstery I suppose. Anyway, it's fine, it looks fine.
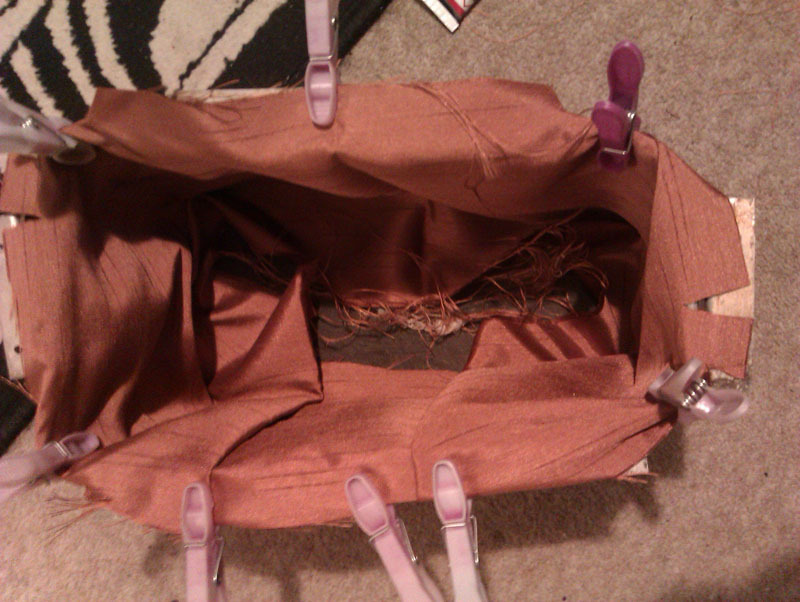
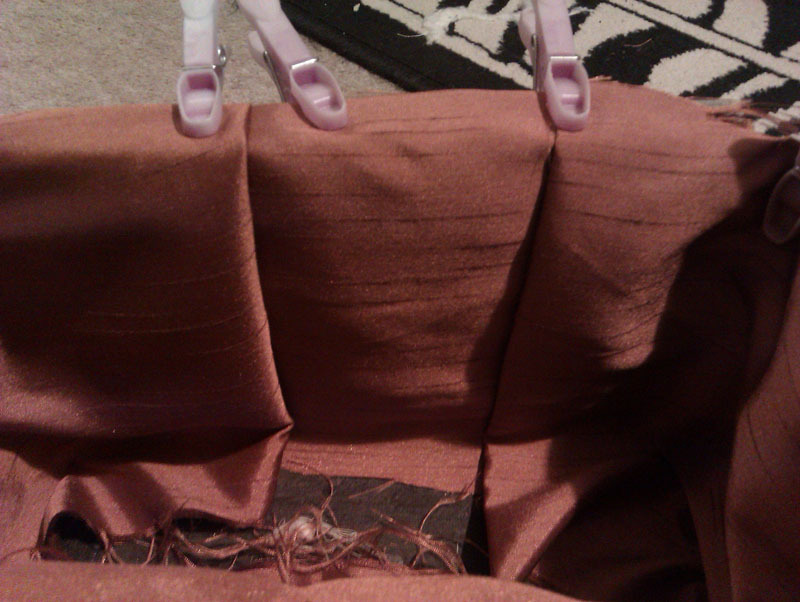
With that all pegged in place, I could put the contact adhesive on the back of the first panel we covered and in the base of this panel. There's no need to glue the copper coloured fabric because when you (carefully) push the paler backing piece in, it holds all of the raw edges out of sight and under as much tension as is required for this application. Originally, the fabric was glued to the sides of the box, one downside of this fabric is that the glue bleeds straight through to the front and looks unsightly (test samples are a good idea for this reason) so we'll be gluing this in differently. Since the pale piece holds one end of the copper fabric in, we'll do as Barker did and glue the other end of the fabric to the bracket faces and the edges of the box so that when the box is screwed back onto the dashboard there's no way for the fabric to escape.
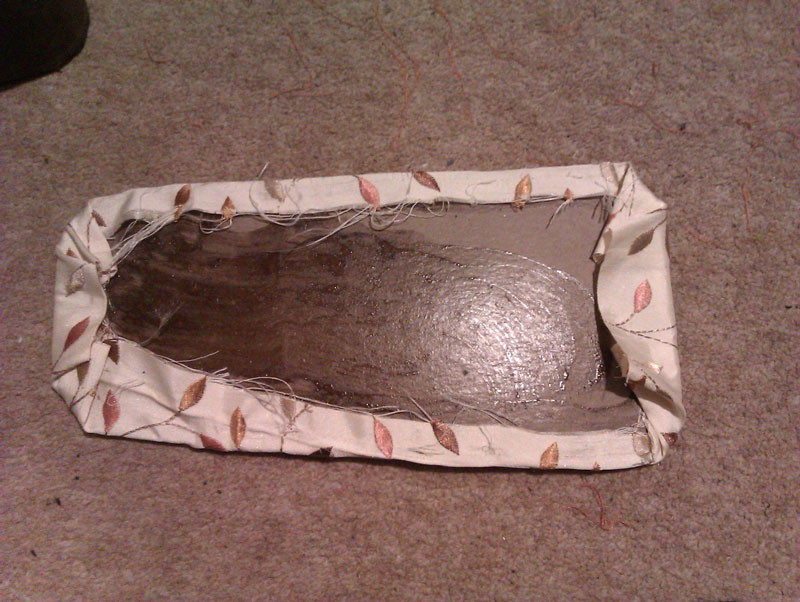
With the base piece glued in and the pegs holding the fabric, fill the boxes with whatever you can that's got some weight and fits, and leave to cure. The box that was water damaged was repaired with a combination of leather offcuts, hessian, and contact adhesive and is now almost as strong as it was originally without altering its original dimensions. We could have bought the materials to remake the box, but since it's not really visible and this repair is perfectly adequate, this is the option we went for.
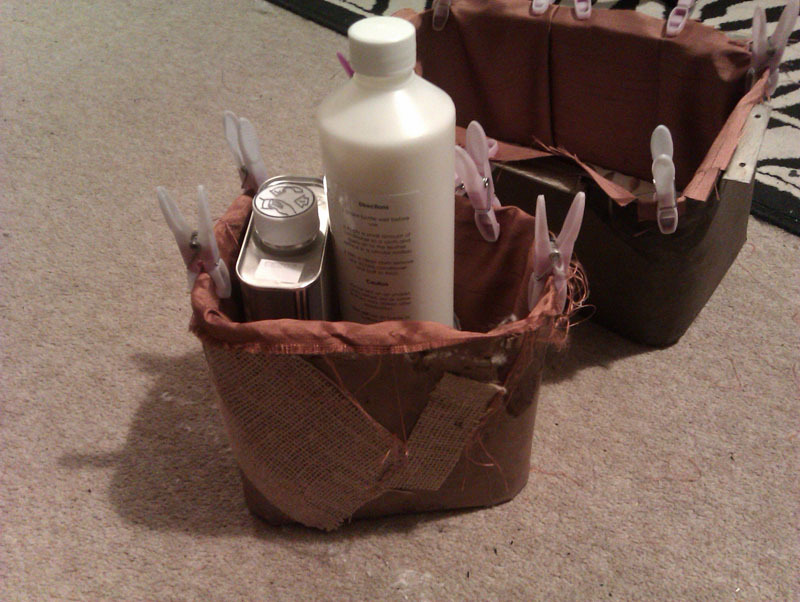

The original fabric was very dirty and in places moth-eaten (perhaps even literally) so replacement of some sort was likely to happen anyway.
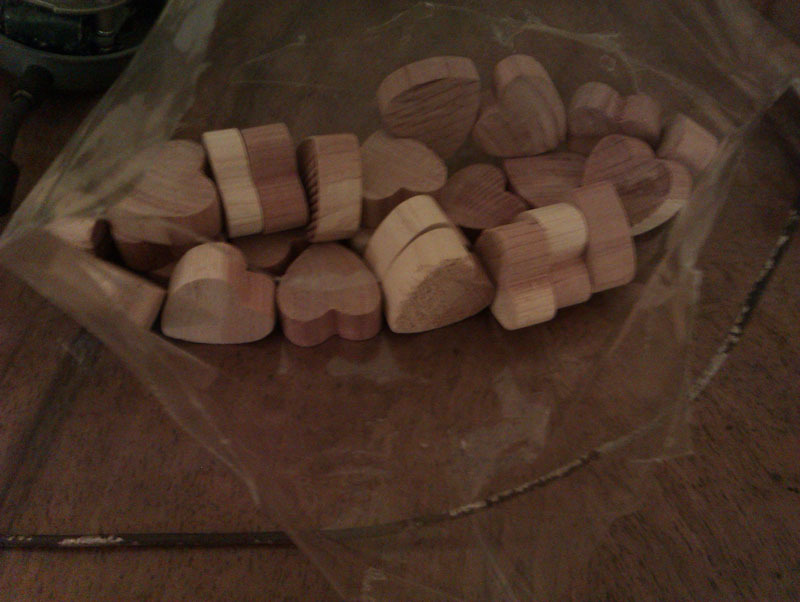
Speaking of moths, we got some little cedar wood blocks to dot around the car to keep the moths at bay and protect the headlining a bit. You can re-infuse these blocks with cedar, lavender, or camphor oil to refresh them so they're a very affordable moth deterrent solution.
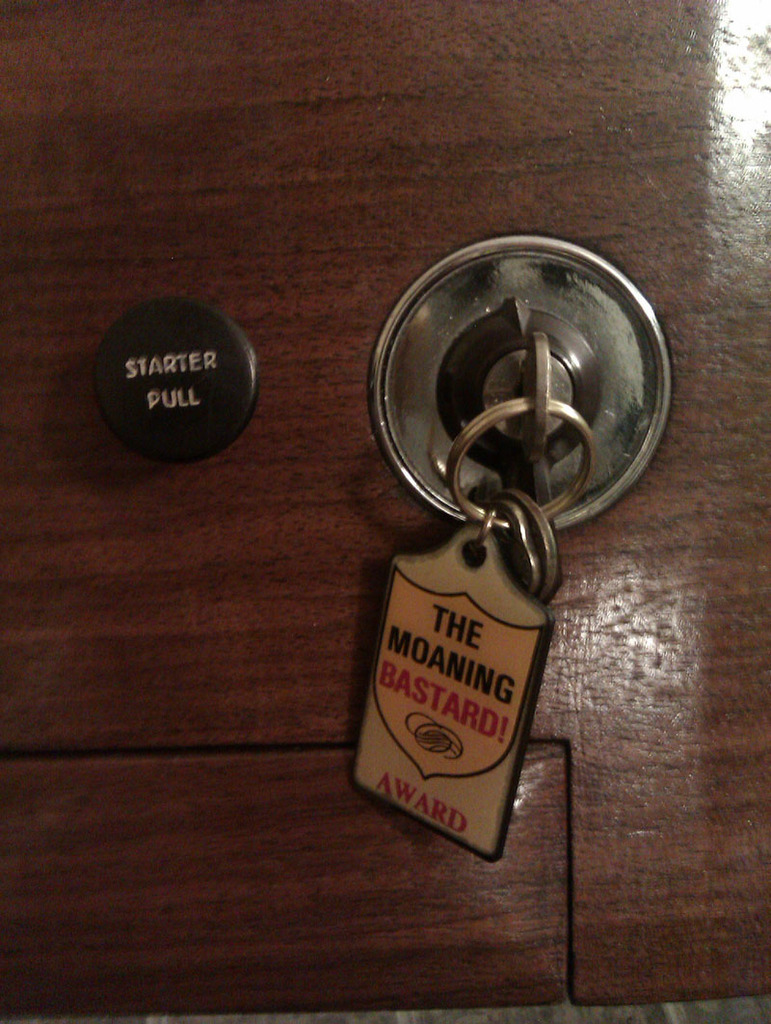
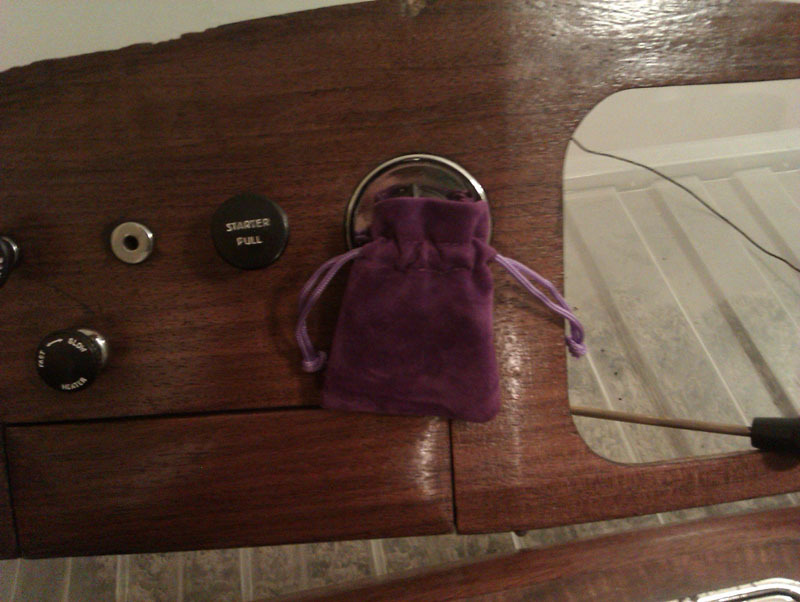
Another item that was solved by chance was making use of a little velvet bag some horrendous cufflinks I ordered came in, turns out it's just the right size to put on the keys so they can't scuff up the dashboard. Even covers up the keyring nicely.
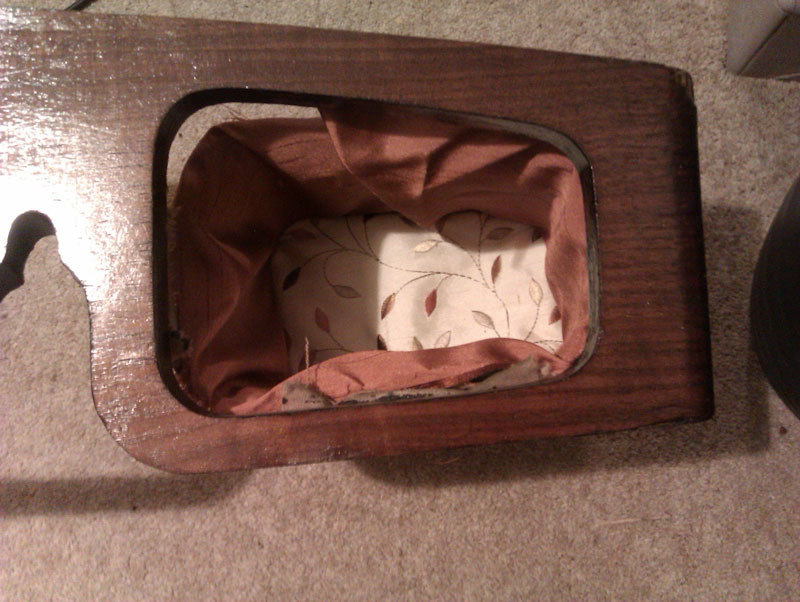
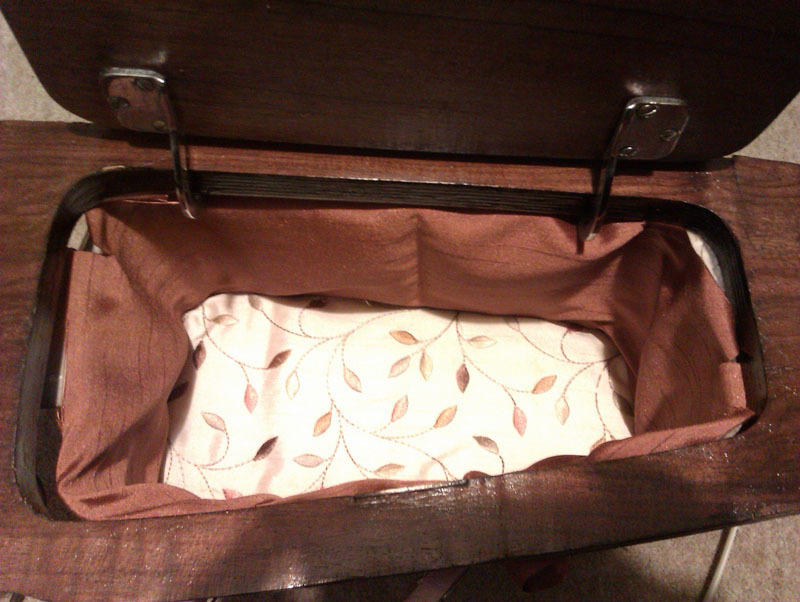
For some idea of how the newly recovered storage boxes look in the dashboard, here's a view of that. You'll have to imagine the copper fabric with some more tension and a smoother finish, than it has here. The colours compliment the wood nicely and the machine embroidery is a nice little flourish. They also feel quite nice because of the padding.
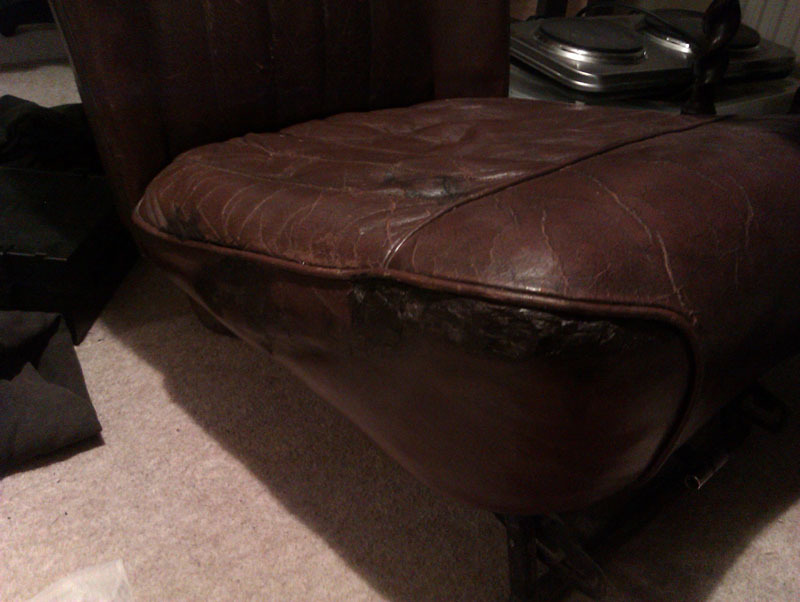
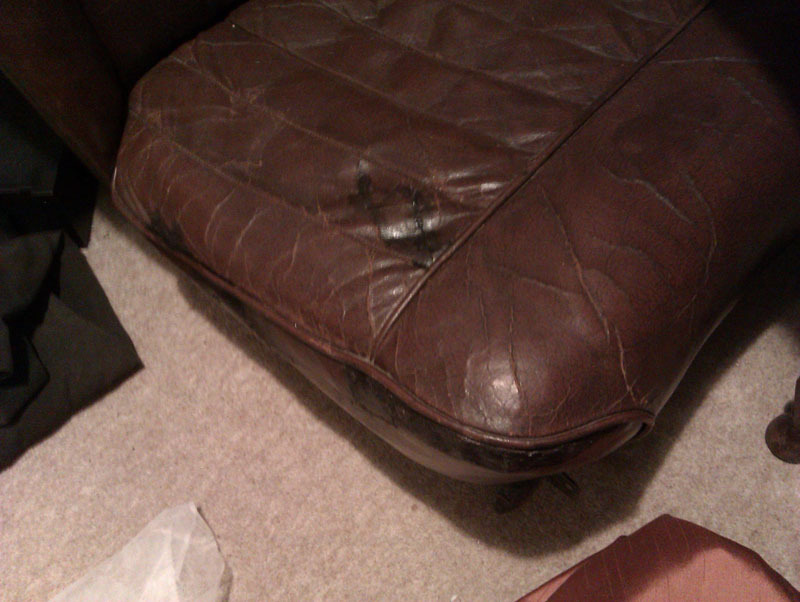
The driver's seat as was has now been fully repaired too. The leather on this seat is a good bit lighter than the passenger seat so the dye does stand out a bit, it's also not been conditioned after the repair and we know from experience that will help mellow and blend in the dye a bit better. We actually ended up swapping the drivers and passenger seats over and found that there's better knee support for the driver that way. Even though the seats did look the same, there must be some slight variation in them that's not so obvious to the naked eye.
The really scary job to do was the instrument cluster. One problem with it was that the original pad-printed lettering on the back of the glass was flaking off and we didn't really know what to do about it. That is, until Baumgartner posted a video about restoring a reverse painted oil-on-glass painting. This would give some insight into what to expect from paint on glass and how to potentially fix it.
https://youtu.be/eXZLMzWj31g
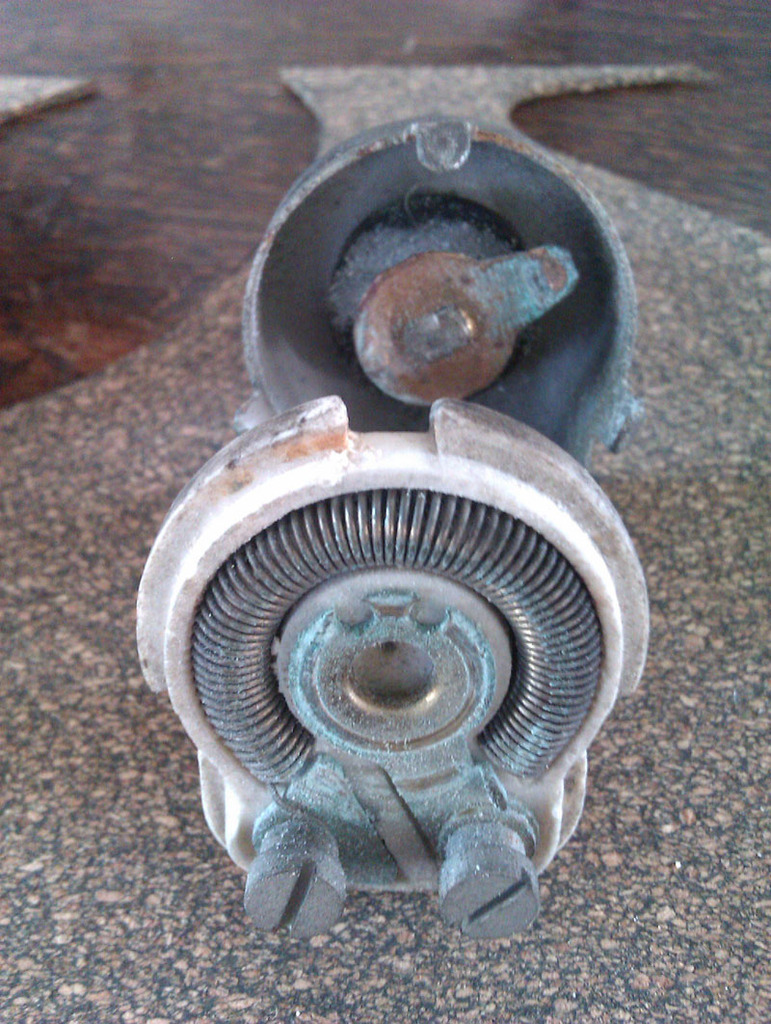
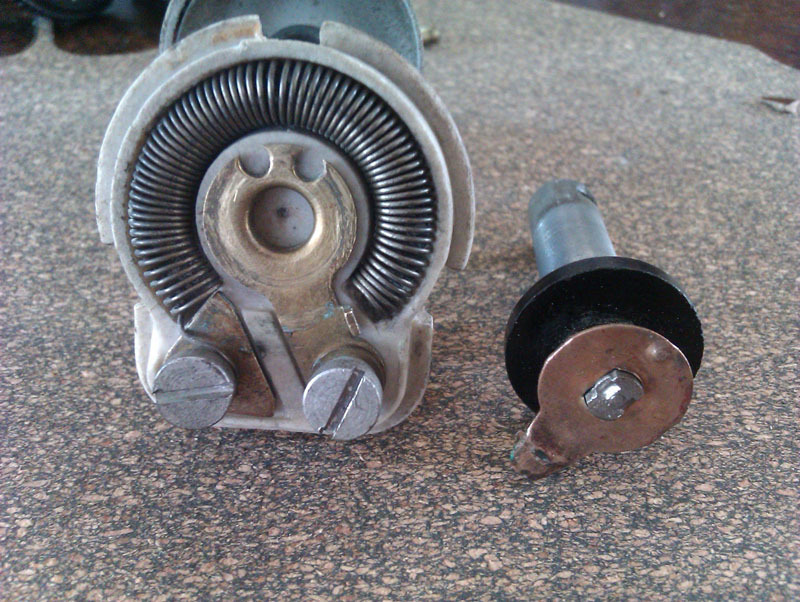
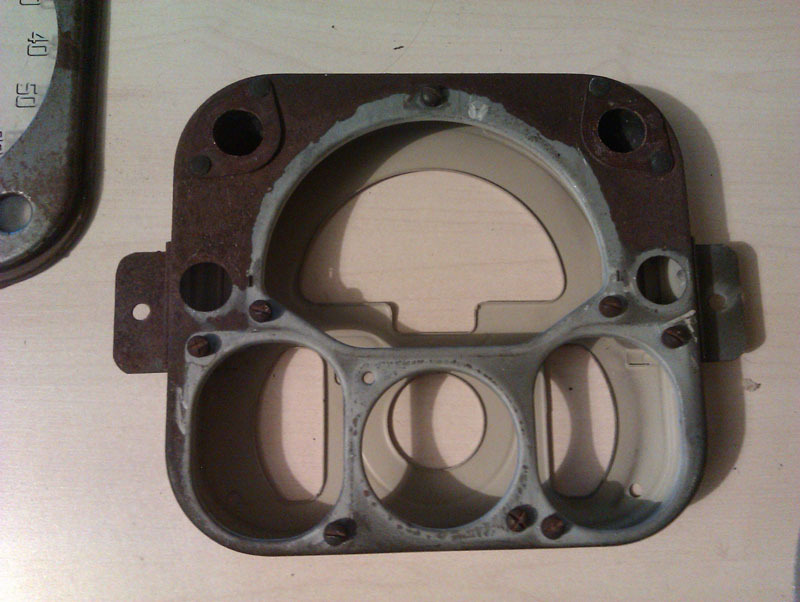
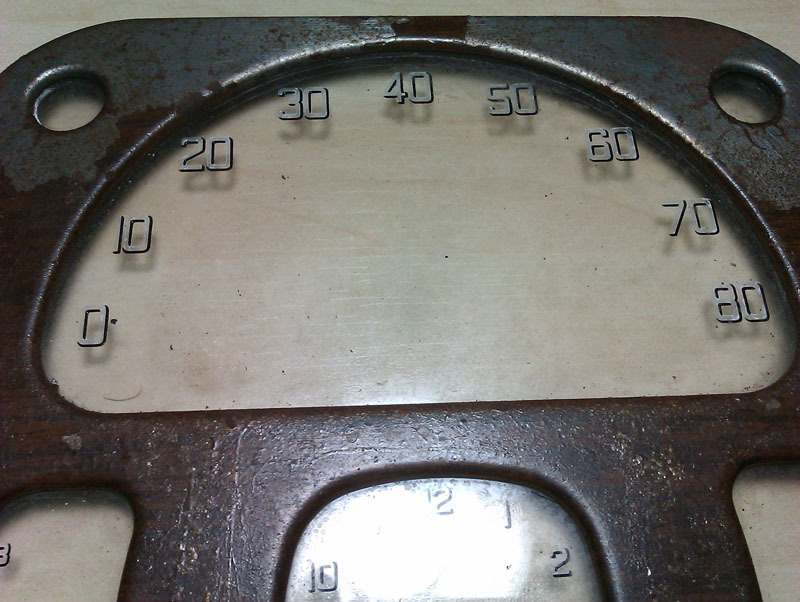
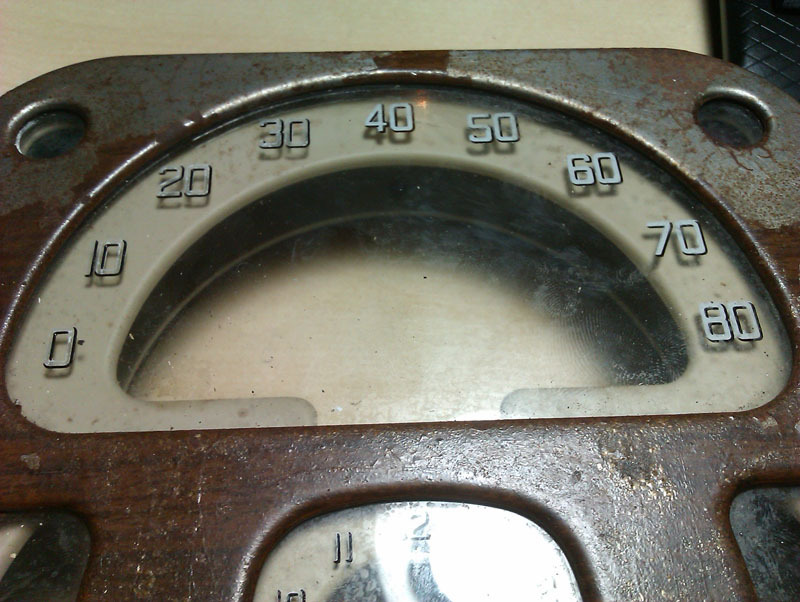
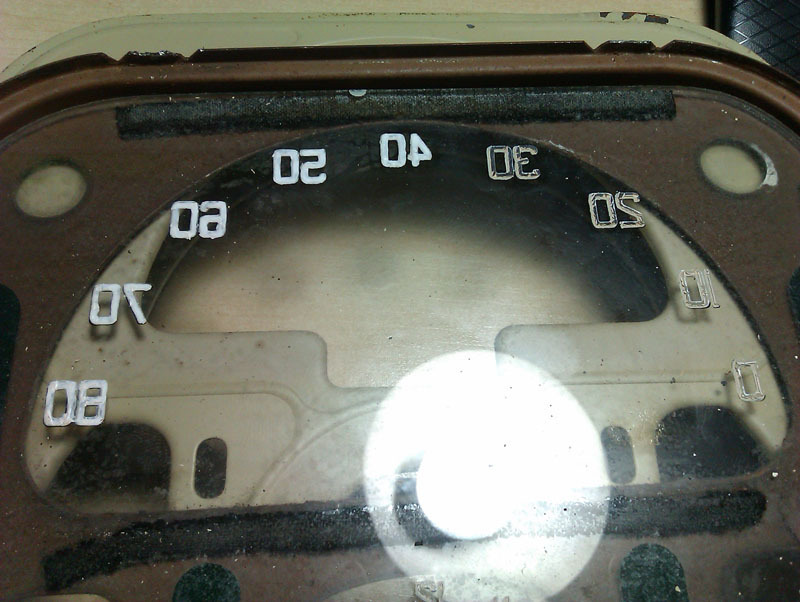
Obviously, we're neither of us professional conservators, but the age of information allows us to get a glimpse into techniques that would otherwise be unfamiliar, and adapt them to our current needs. The first task was to actually get to the back of the glass, and that meant dismantling the unit. We also hoped the glass would be separate to make the face of the binnacle easier to repaint, more on that shortly. The binnacle is made of three steel pressings, the rear being bare steel painted white inside, the intermediate piece being white on the back and cream/ivory on the front, and the front pressing being painted mid-brown front and rear, with a darker brown scumble on the face.
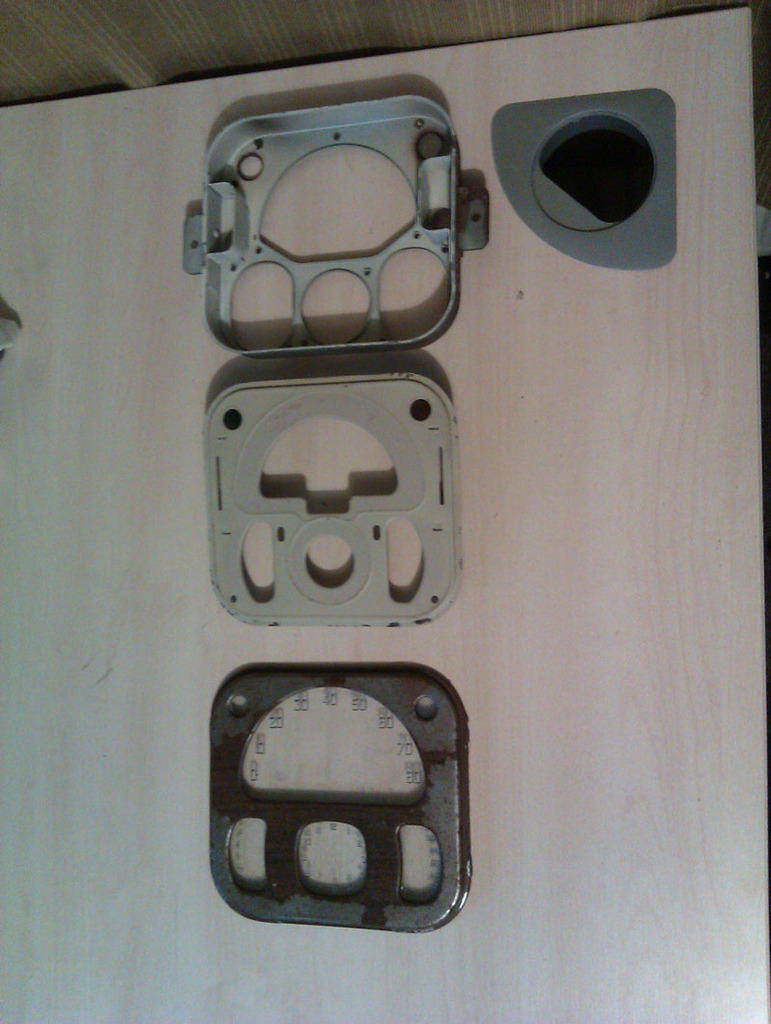
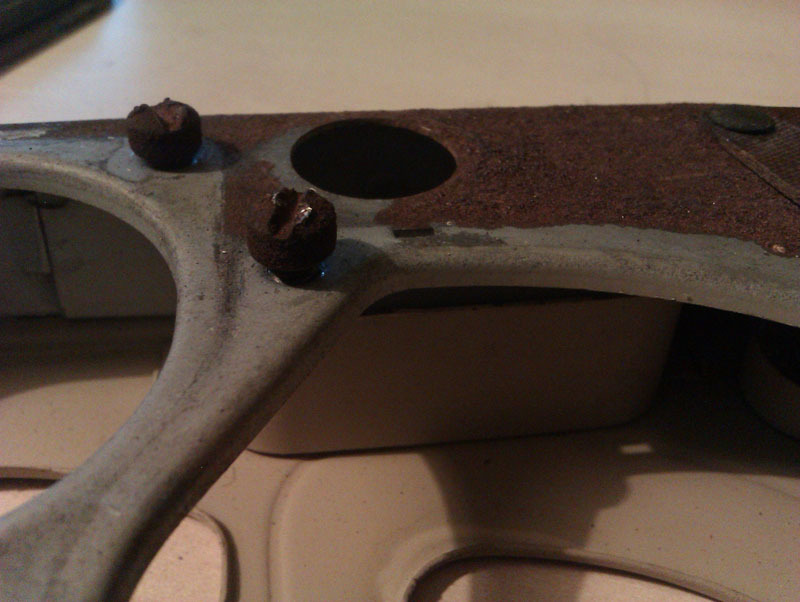
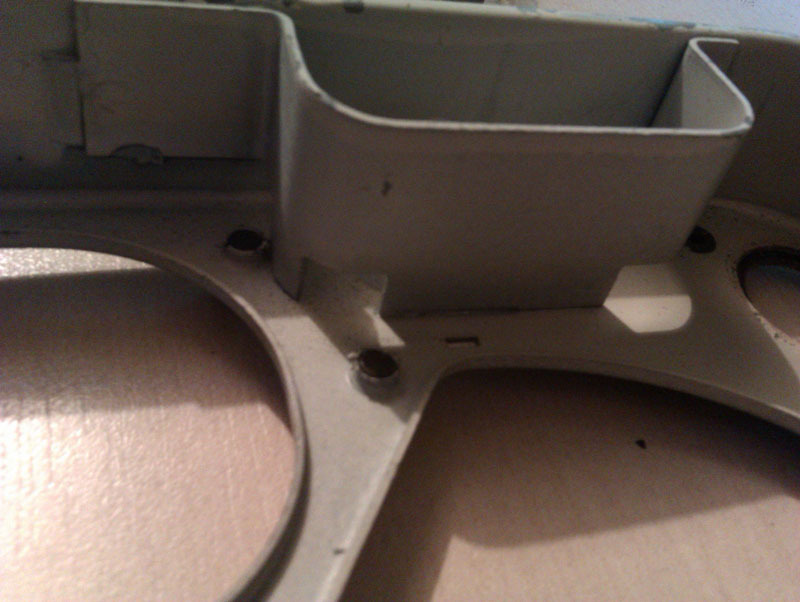
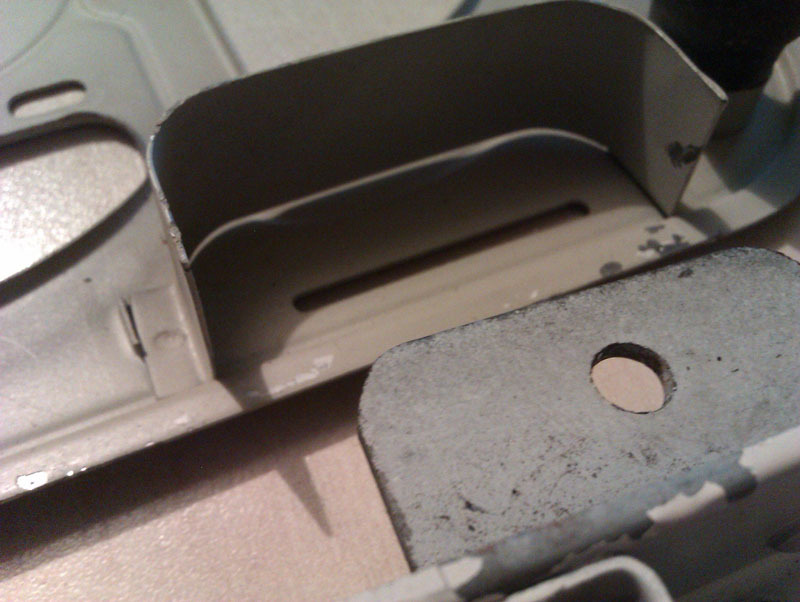
The unit is illuminated by just two bulbs, these go into the two round holes halfway down the unit on each side. All of the instruments are held in with very short flat head screws, except for the clock which is missing one screw and has had the other modified in the past with a saw to make it a cross head which none of my screwdrivers actually fit. The two riveted pieces to the top left and right are the bulb holders for the oil and ignition lights, these shine through coloured lenses that are held in with rubber tubes sandwiched between the layers of the binnacle. The two large tabs on the side are what holds the whole binnacle to the back of the dashboard, one of the screws was missing when we removed the dashboard, presumed repurposed as one of the three screws holding the washer jet pump that a previous owner added.
For the illumination, the bulb's light is supposed to be directed out of the little bay through several holes. However, in part because this isn't a superb design, and in part because the white paint isn't particularly bright any more, it doesn't work very well at all.
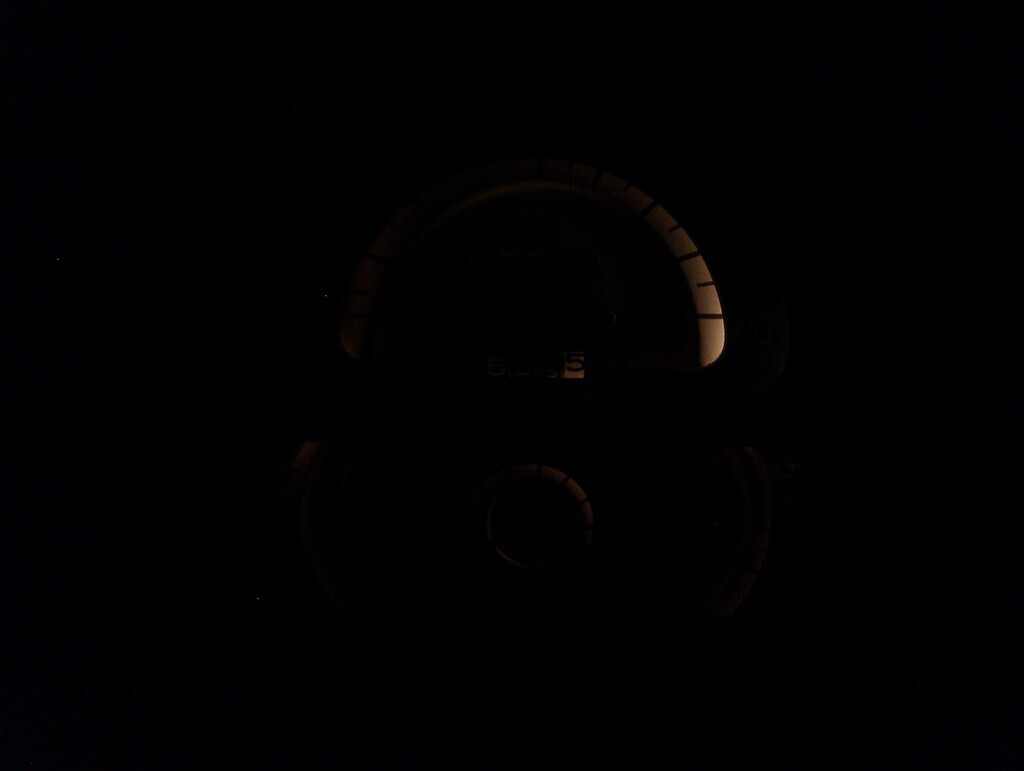
So, one of the things we'll be doing to improve this is to replace all of the white painted areas you don't see when the binnacle is together, with modern chrome paint. It shouldn't negatively affect the colour of the light, but should improve the amount of it. We may also upgrade the bulbs to warm white LED equivalents to improve matters. This image really is as good as it currently gets and there's nothing wrong with the lightbulbs.
o the task at hand then, which is the numbers. This design is supposed to give you 'floating' numbers, so far as I can work out, and when it's done well it's quite a pleasing thing to look at. Each of the numbers is printed with a black drop shadow to emphasise the effect. Unfortunately, while all the black remains, most of the white paint has peeled up and fallen off so the letters don't float that well.
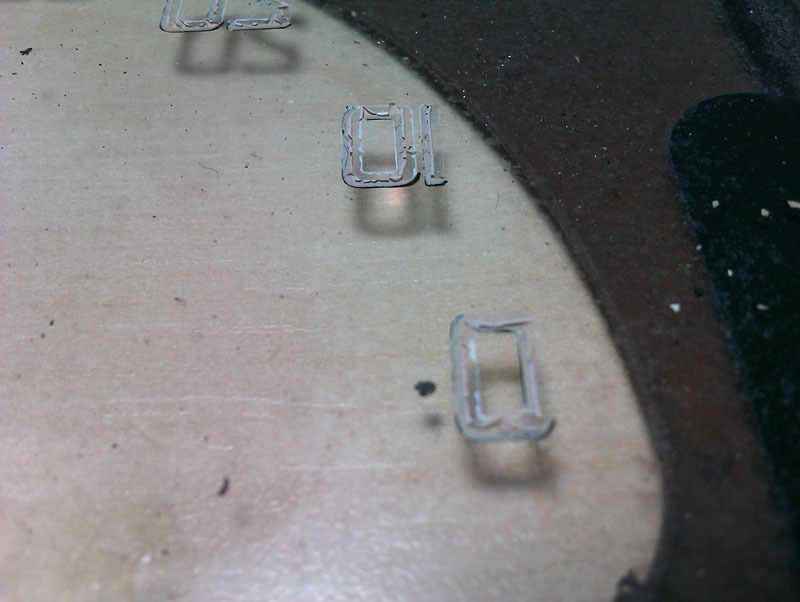
There are various solutions to this issue and had it not been for the Baumgartner video above, this could have proven tricky to resolve. We didn't want to have a custom vinyl made, or transfers, since that would mean getting everything exactly aligned. We also can't remove the glass from the face of the binnacle, it's bonded on very well and to try and separate the two risks breaking the glass so that's something we have to work around. Instead, we had to find some way to both stabilise what was left, and replace what was missing. Fortunately, we found a way, and the trial of it on the glass proved it to be quite effective.
What's more, it didn't require any specialist tools to be bought. The same paint brush and high quality acrylic paint as was used on the control knobs was used for this. Good old Citadel paints and tiny artist brushes.
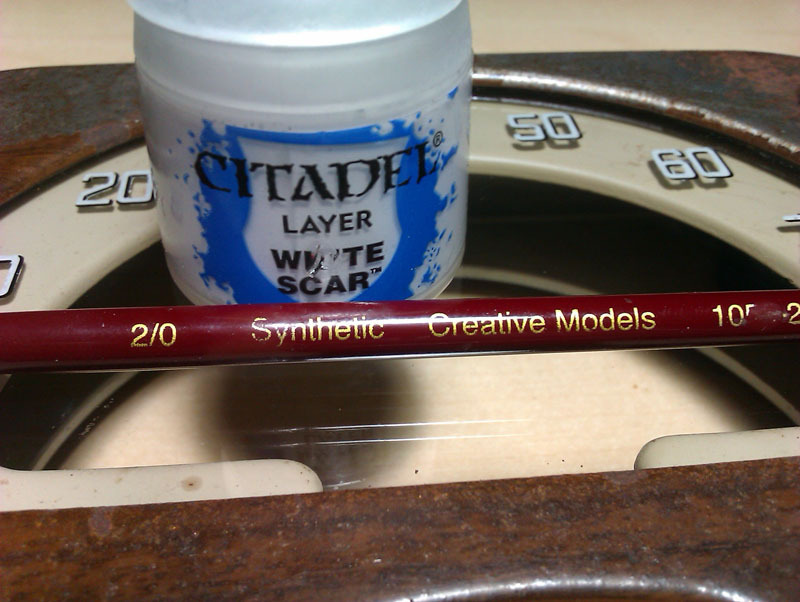
The reason for using this particular paint is that we know it's very UV stable, not prone to shrinking or fading, and sticks really very well to just about any surface you care to apply it to. It also behaves incredibly well, so you can predict where it's going to go and, since we both have years of experience of using it, we know just how to make it do what we want when you need to do a very controlled bit of detailed work. One very fortunate thing with the way the original numbers are applied is that it leaves just a bit of rough surface even when the old paint has flaked off, and that works a bit like a primer. If you dot the paint on it wants to flow only where the primer is and avoids going on the glass, so you can get it almost exactly where it used to be. Because of the aforementioned video, we knew not to clean the old paint off, or clean the glass, and instead used the new acrylic paint to serve as a bonding agent as well as a paint in its own right, stabilising what was left of the original paint and filling in the missing areas. It was jolly hard work to do, but the results really do speak for themselves. The letters actually do appear to float because now they actually cast a shadow and, when the binnacle is illuminated properly they should block out the light and become more visible by contrast.
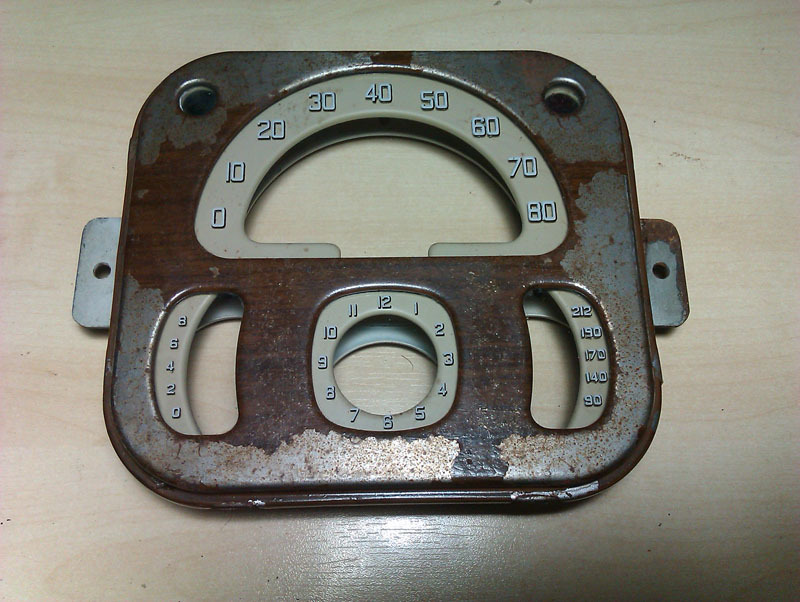
The scumbling is very straight forward and quite affordable so some samples will be run before we commit to doing that on the instrument binnacle. Careful masking of the glass should make for a very sharp end result. The intermediate panel may also get repainted on the visible side because where the 20/30 is on the speedometer you can see a bit of brown staining, this is rust just coming through the very thin original paint. It is a satin finish rather than gloss, to give it that look of a more expensive ceramic surface so it will be a case of finding a close match to the instruments themselves. The instrument faces aren't rusting because they're painted over aluminium and are all in very good shape so we'll leave those be. |
|
| Back to top |
|
|
peter scott
Joined: 18 Dec 2007
Posts: 7118
Location: Edinburgh
|
| Posted: Fri Sep 25, 2020 8:28 am Post subject: |
|
|
Very well done with the lettering. With my shaky hands I don't think I would have been brave enough to tackle that.
The skill and patience of the Titanic painting conservator are wasted on that painting even if it was created 3 years after the sinking.
Peter
_________________
http://www.nostalgiatech.co.uk
1939 SS Jaguar 2 1/2 litre saloon |
|
| Back to top |
|
|
Vulgalour
Joined: 08 May 2018
Posts: 474
Location: Kent
|
| Posted: Fri Sep 25, 2020 12:45 pm Post subject: |
|
|
The Titanic painting certainly had a flavour of seaside souvenir about it in its execution. If it were of any other ship it's likely the painting wouldn't have survived, the painting probably wasn't even expected to survive as long as it has. That doesn't really mean his skills were wasted on it, it just means we put different values on different things. Really, no artwork is worth anything (and I say this as a full time artist) unless someone says it is. An artwork is worth what the person that has it believes it is, what's worthless to one person is priceless to another.
There are some artists in my field who charge tens of times what I do for work that, from a technical standpoint, simply isn't as good. For whatever reason, people value their work more. There are other artists who are objectively far better than I am and they can't get as much as I do. Art is a strange and personal thing that way, rather like cars. One only need look at what sort of ordinary unremarkable cars make huge sums, and what rarities don't to get a glimpse of how art is valued and by whom. |
|
| Back to top |
|
|
|
|
You cannot post new topics in this forum
You cannot reply to topics in this forum
You cannot edit your posts in this forum
You cannot delete your posts in this forum
You cannot vote in polls in this forum
|
php BB powered © php BB Grp.
|


